暂无图片
暂无图片
暂无图片
暂无图片
暂无图片

CDP-DC上部署VPC集群

大数据杂货铺 2020-06-08
186


文档编写目的
CDP DC7.1是Cloudera与Hortonworks合并后,第一个融合CDH和HDP所有组件的on-premise并且可用于生产环境的版本,CDP Data Center主要由Cloudera Runtime构成,Cloudera Runtime由超过35个开源项目组成,当然CDP Data Center还包括其它功能如管理功能Cloudera Manager,Key Management,专业支持等。CDP-DC集群支持VPC(虚拟私有集群)的部署和使用方式,关于什么是VPC集群参考fayson的《0667-6.2.0-什么是Cloudera虚拟私有集群和SDX 》和《0685-6.2.0-什么是Cloudera虚拟私有集群和SDX-续 》。
测试环境
1) Cloudera Manager版本为7.1.1
2) Cloudera Runtime的版本为7.1.1.0
3) Redhat 7.7
4) OpenJDK 1.8.0_141
5) MariaDB 10.2
6) root用户安装
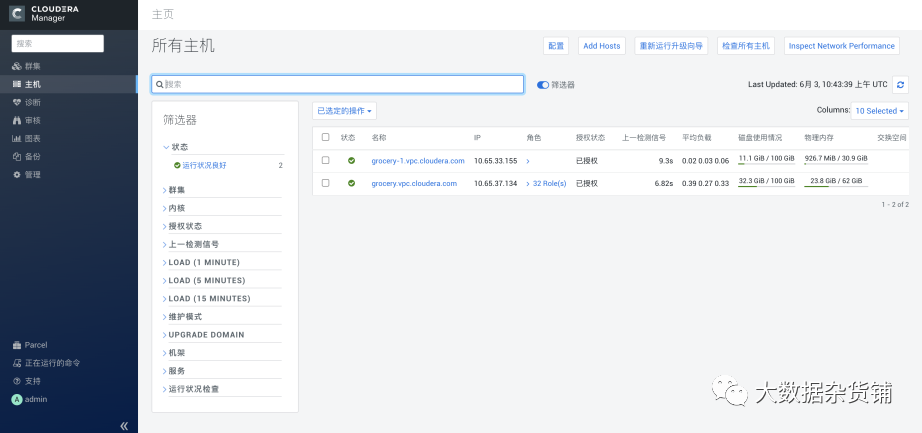
7) 2节点,其中1节点为CDP-DC的基础集群(用户实际场景中可以有多台),另外一个节点已经做好准备工作,但没有添加到集群或者CM管理中。

设置SDX并部署VPC集群
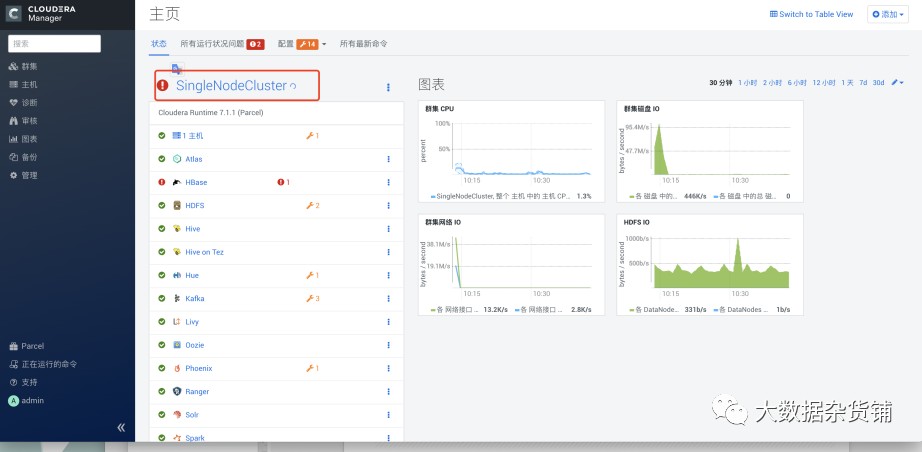
1) 点击集群的集群名,进入集群页面:
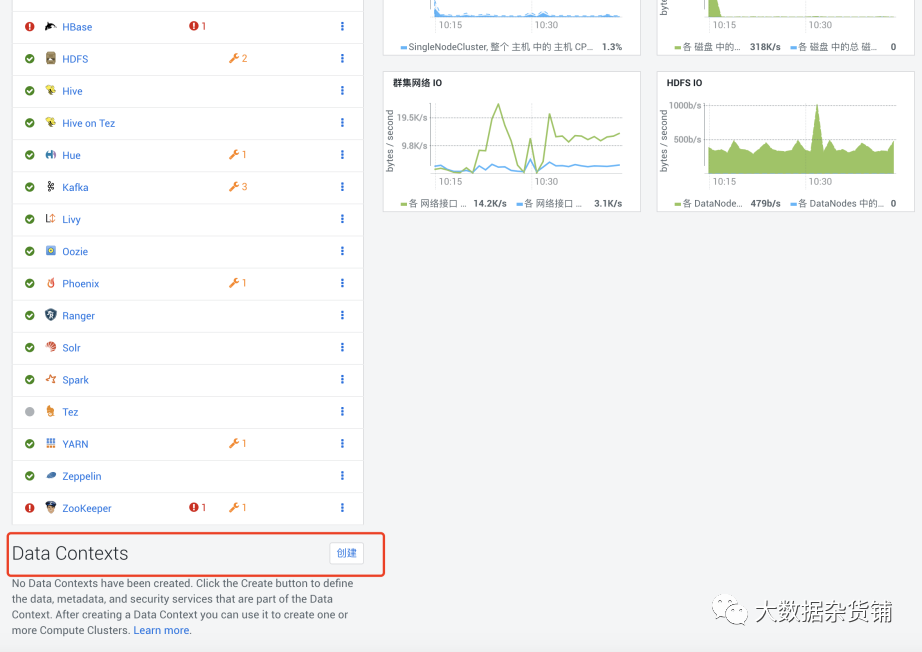
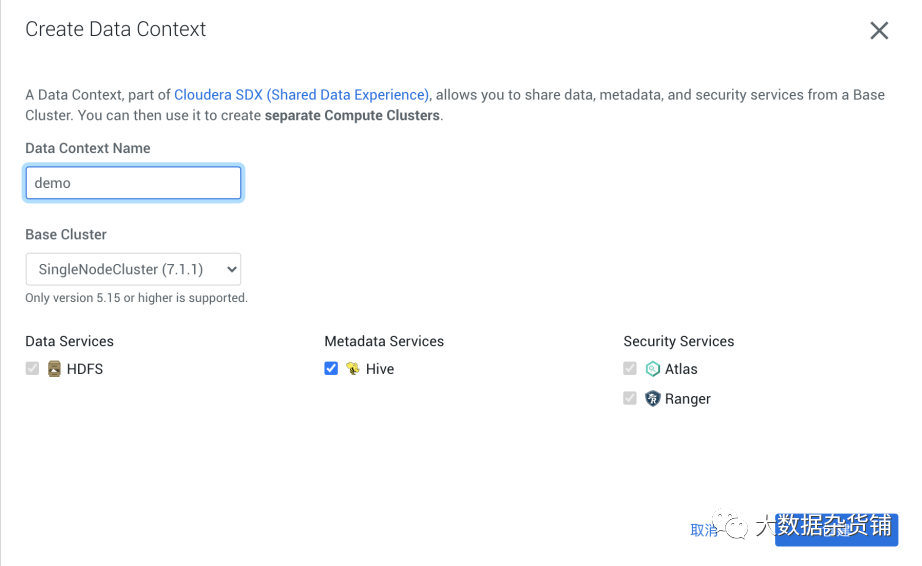
2) 在Data Contexts旁边点击创建
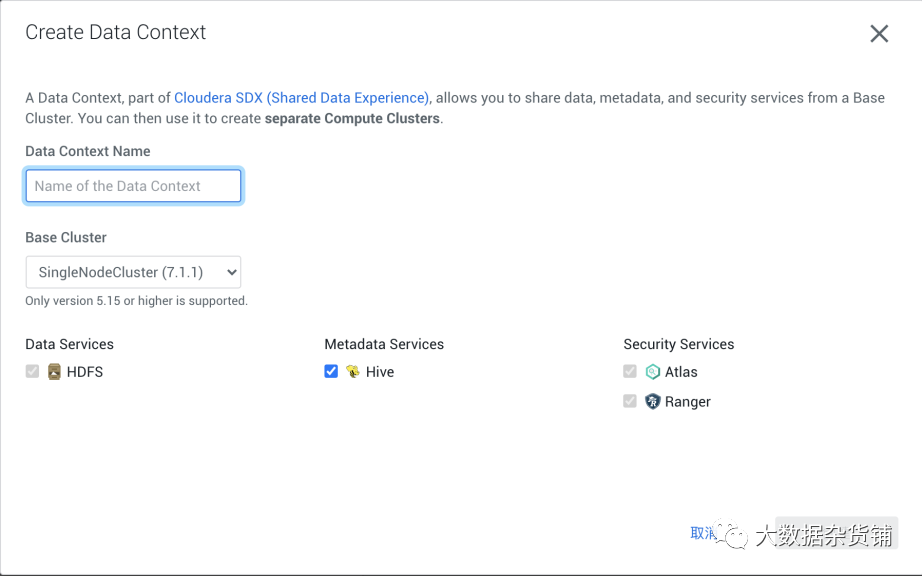
3) 数据SDX的名称,接着选择SDX维护数据上下文的服务,然后点击创建:
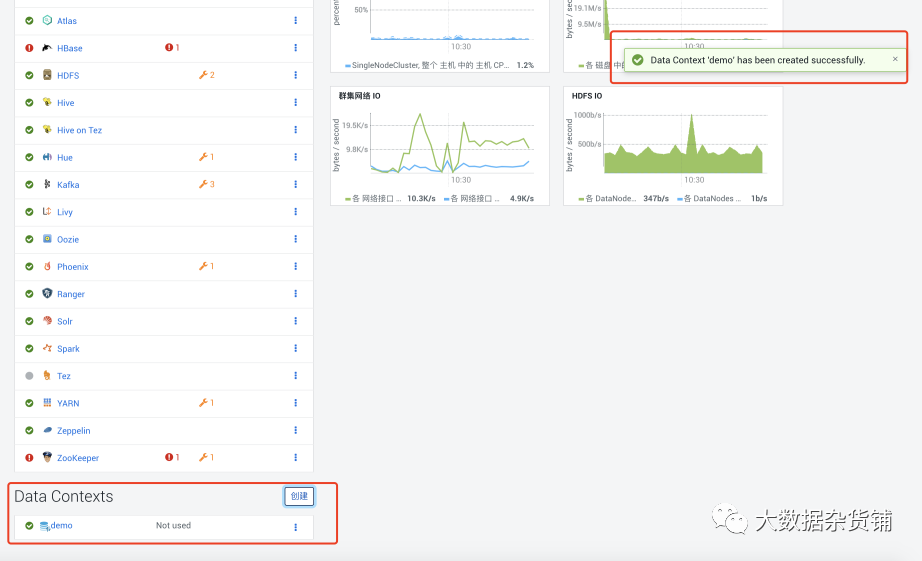
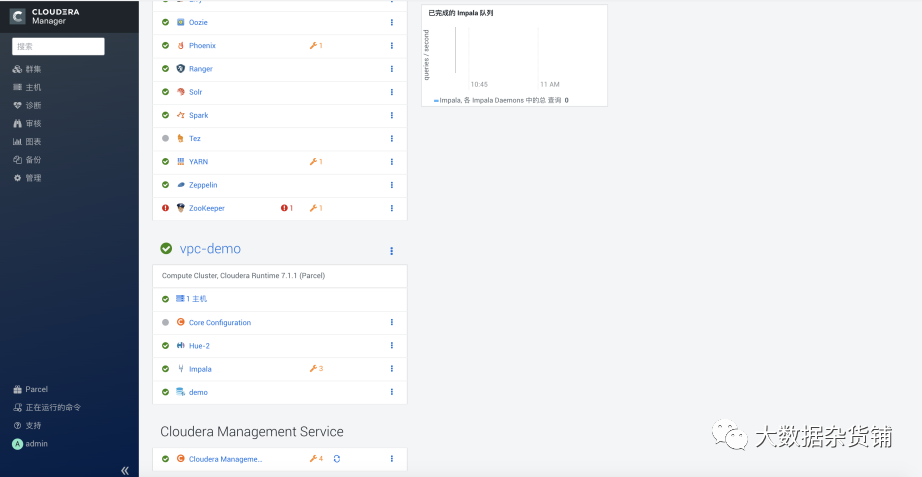
4) 创建完成后,在base集群可以看到Data Contexts,如下图所示:
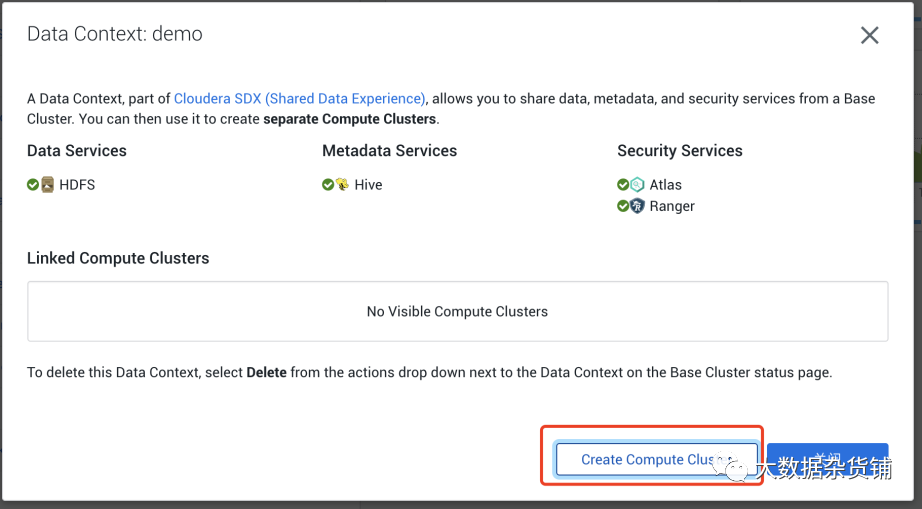
5) 点击已有的SDX,这里点击demo,来创建VPC集群
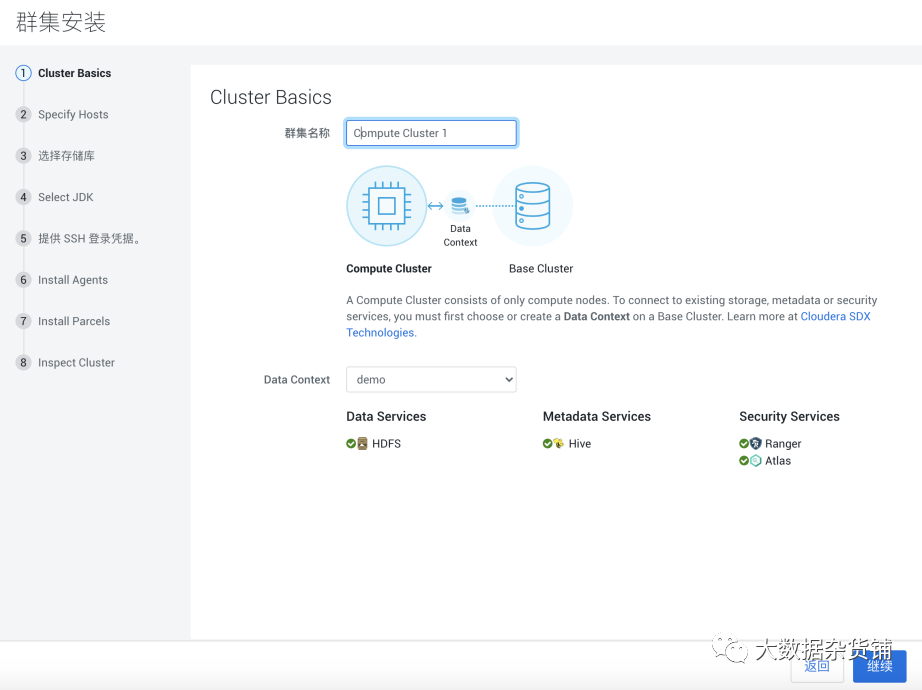
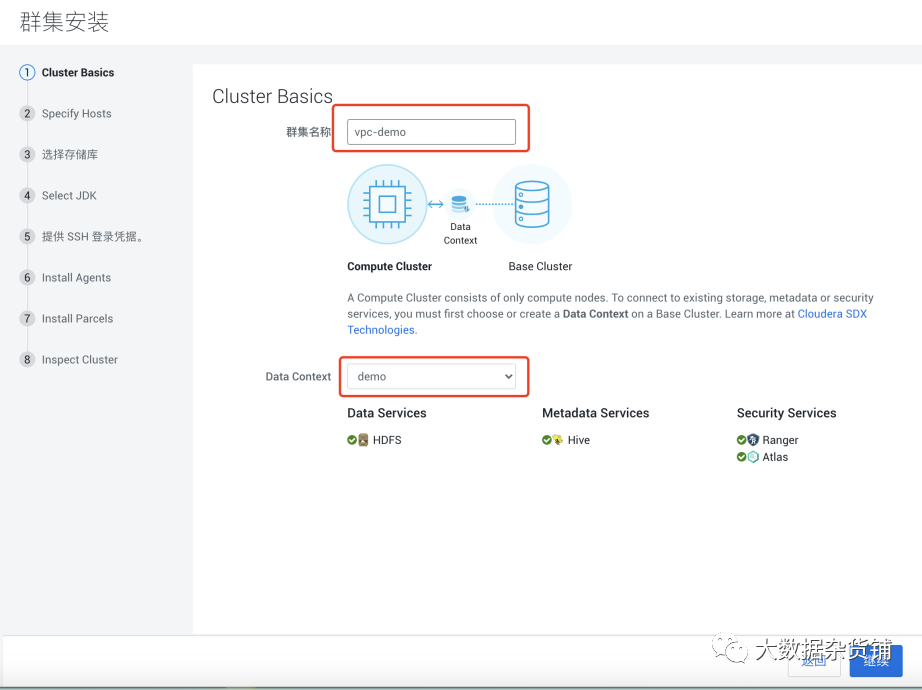
6) 点击Create Compute Cluster,进入VPC集群的部署页面:
输入新建的VPC集群的名称,并选择对应的Data Context,然后点击继续:
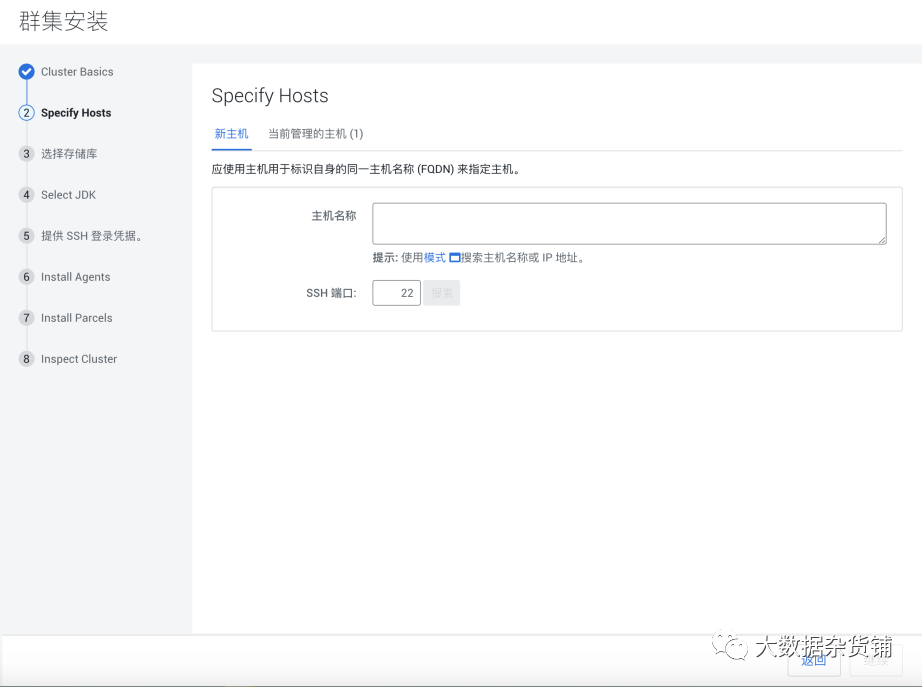
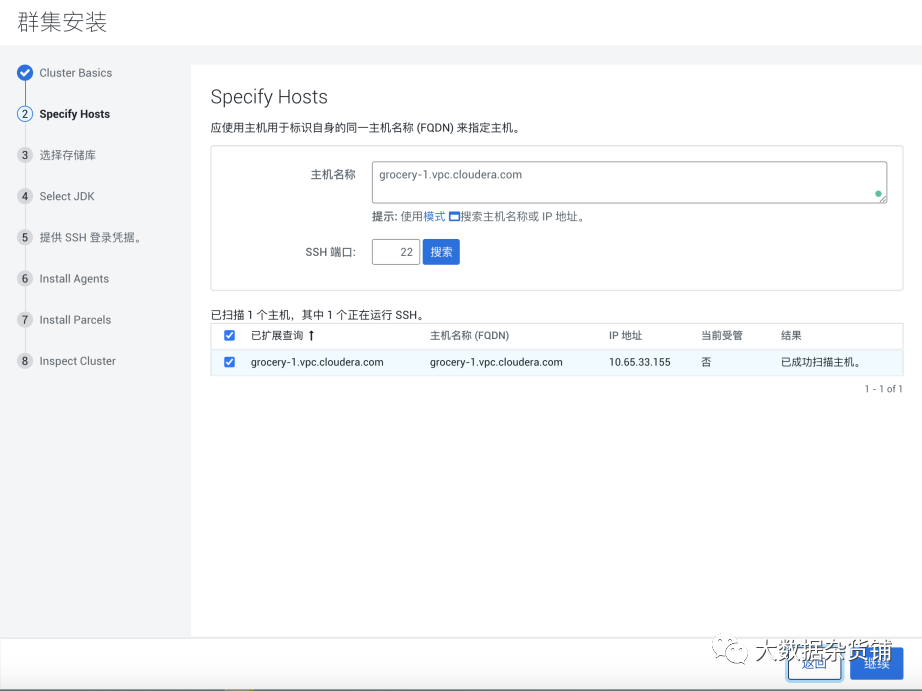
7) Hosts指定页面,数据域名或者ip地址搜索:
可以选择新主机,或者当前管理的主机。这里选择新主机。输入主机的域名然后搜索,选择需要添加的主机,点击继续:

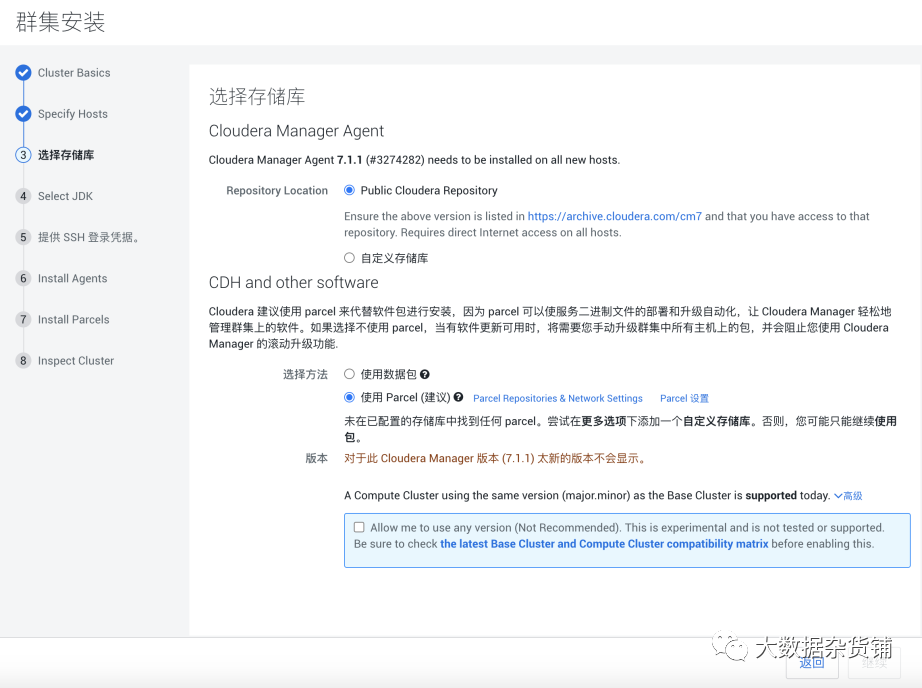
8) 设置存储库,包括CM和Cloudera Runtime的介质,和前面安装基础集群设置相同
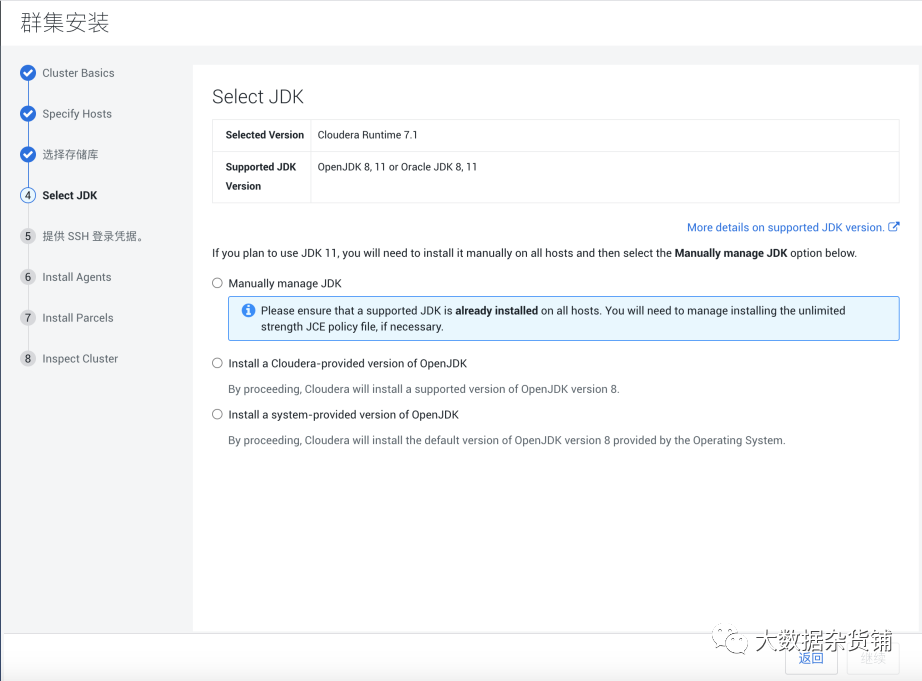
9) 安装JDK,同前面部署JDK相同
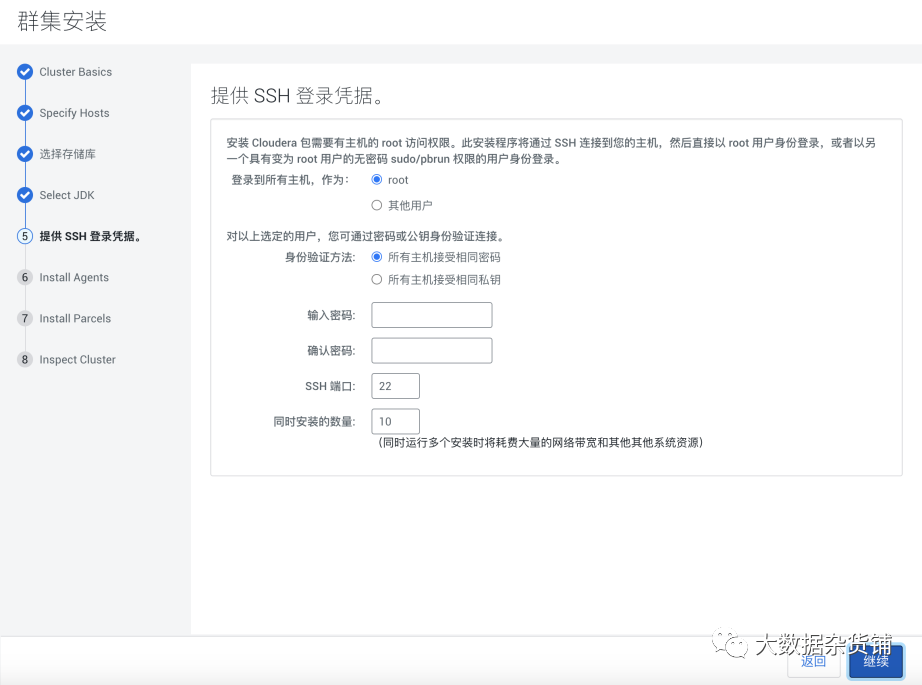
10) 提供操作系统访问凭证
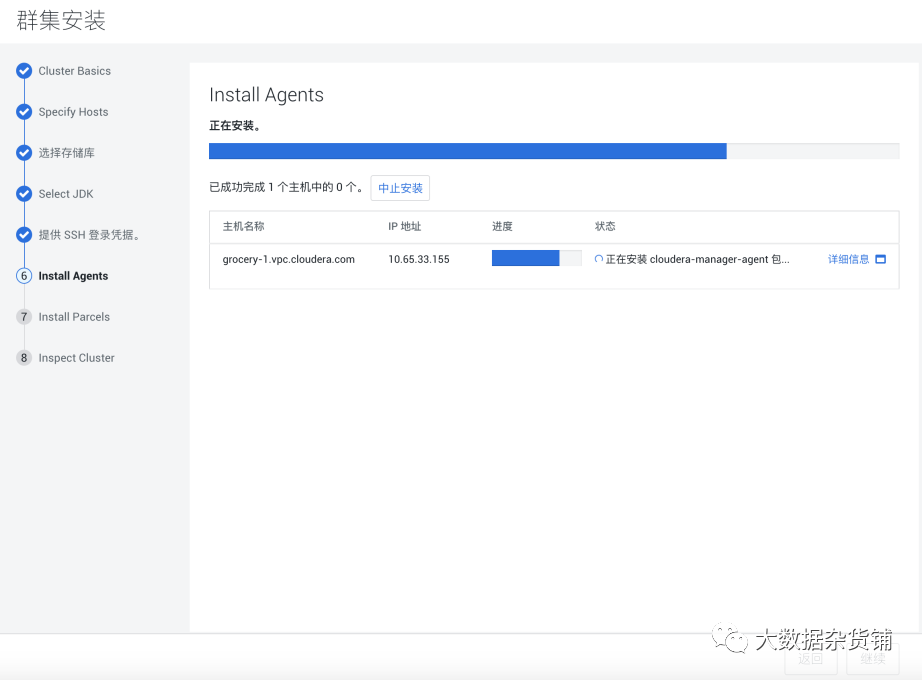
11) 安装Agent
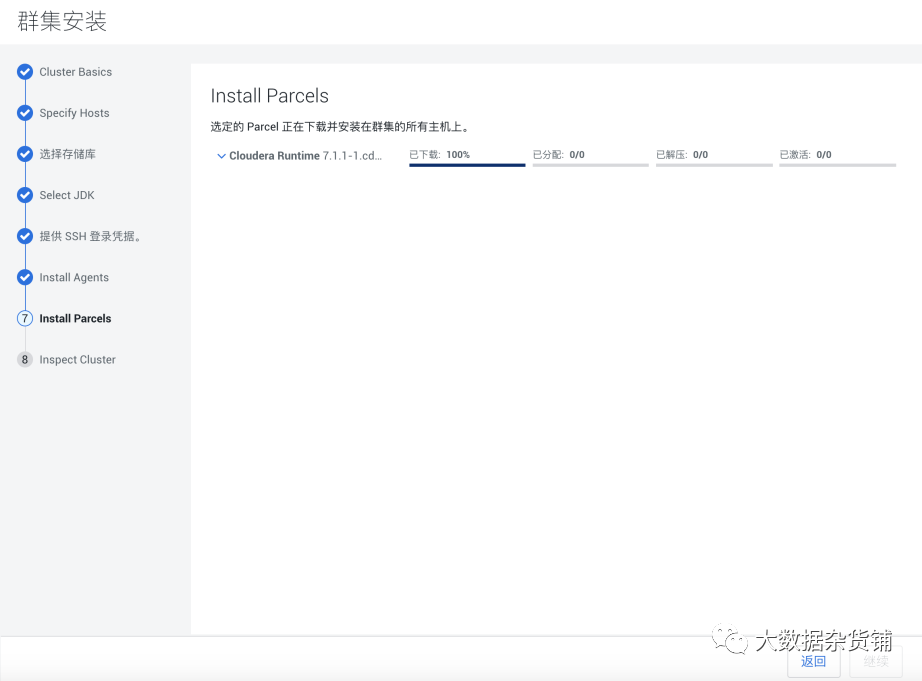
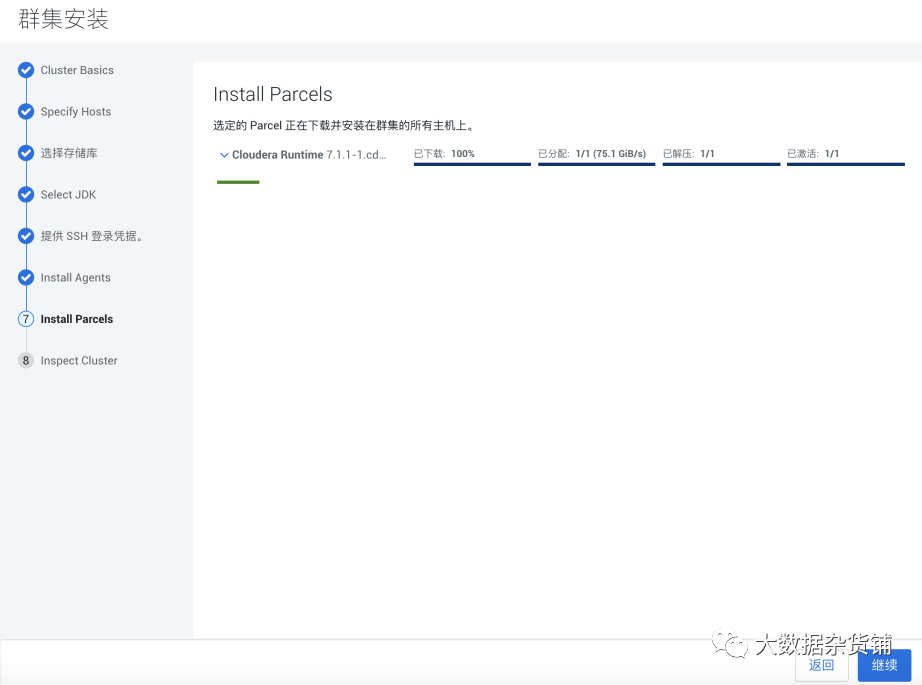
12) 安装Parcels
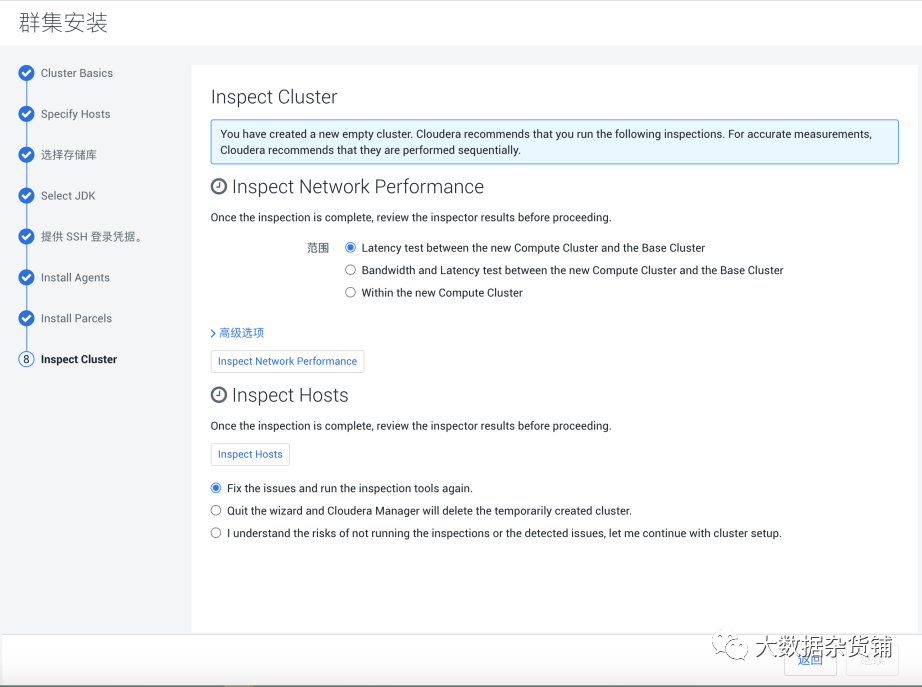
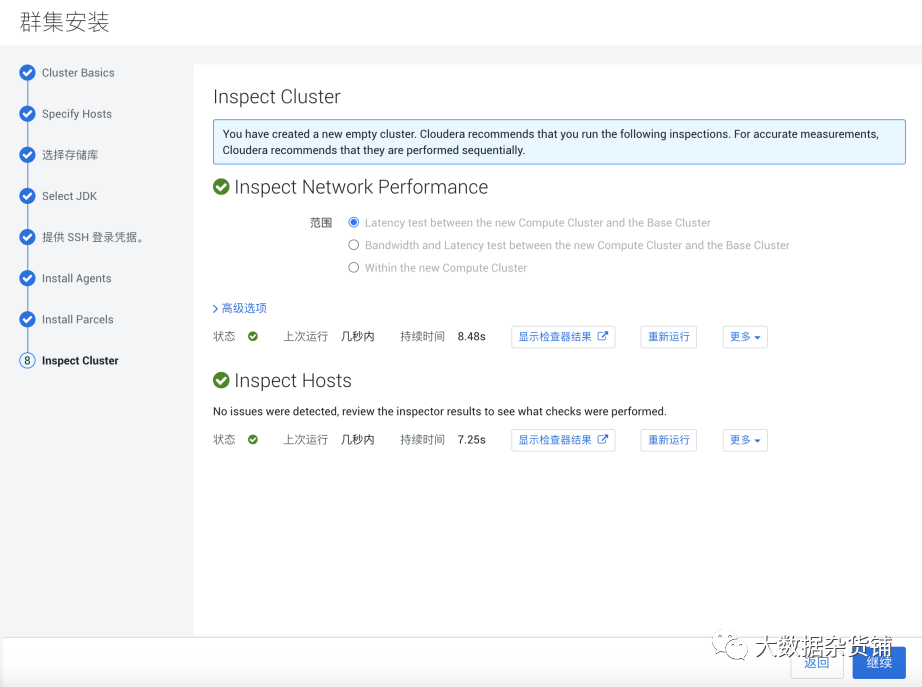
13) 集群检查,可以选择新计算集群或者新计算集群和Base集群两种
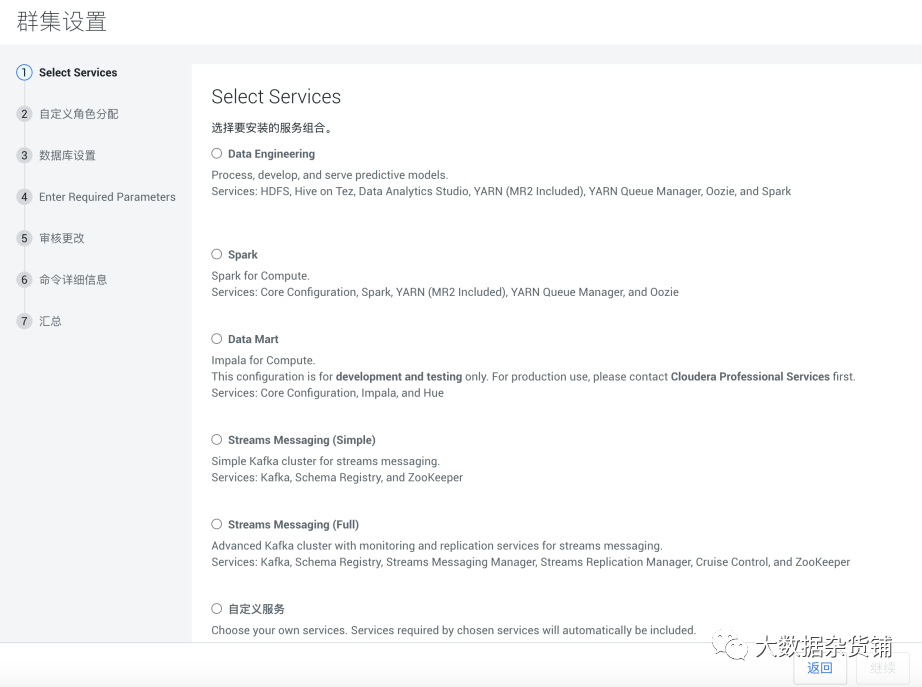
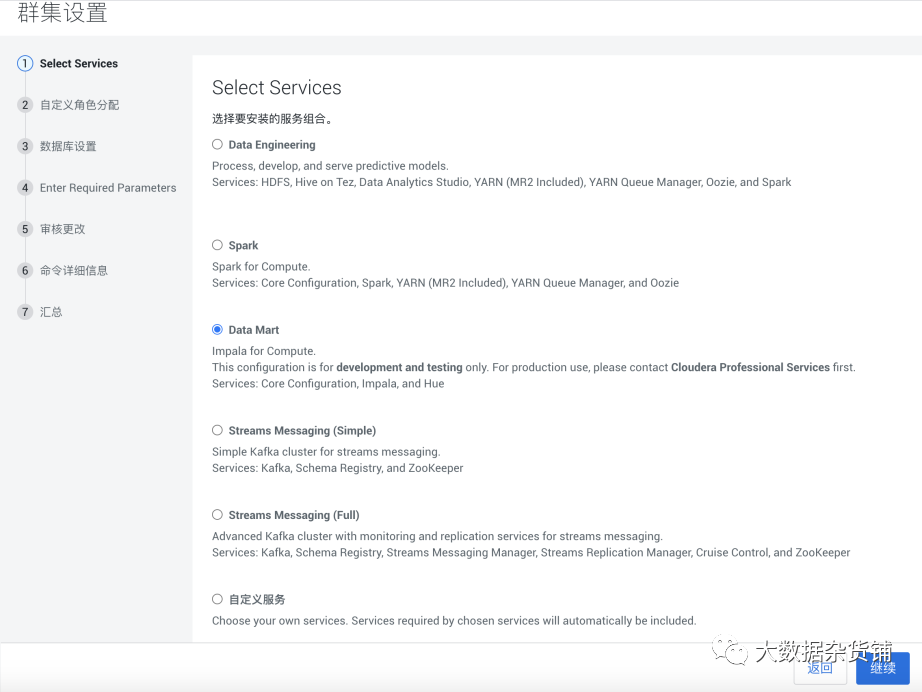
14) 服务选择
根据使用方式,选择对应的服务或者自定义服务
从上图中可以发现,数据状态相关的组件(ranger,altas,metastore等都看不到)。
选择一个服务,然后点击下一步:
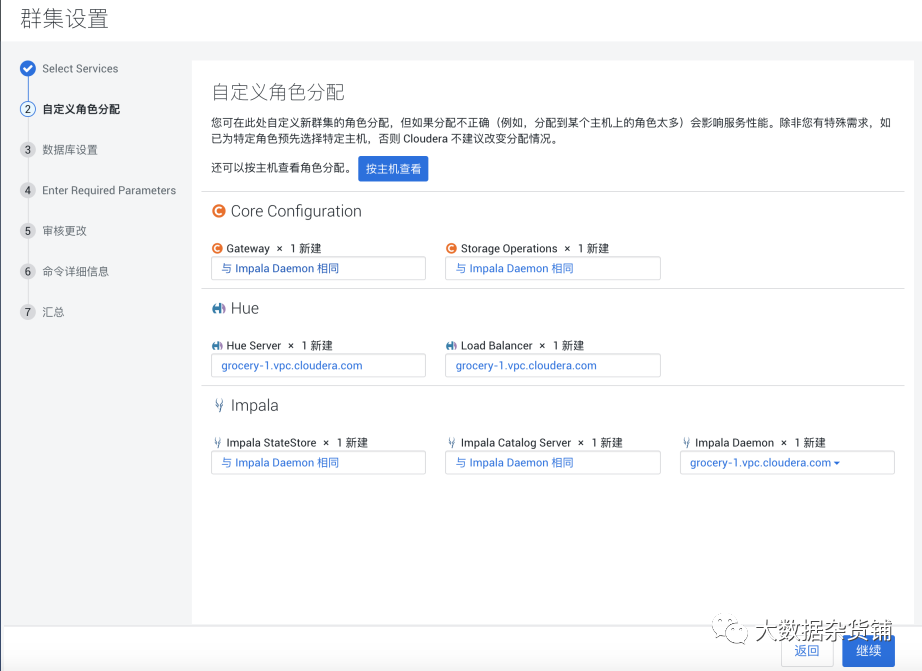
15) 角色分配
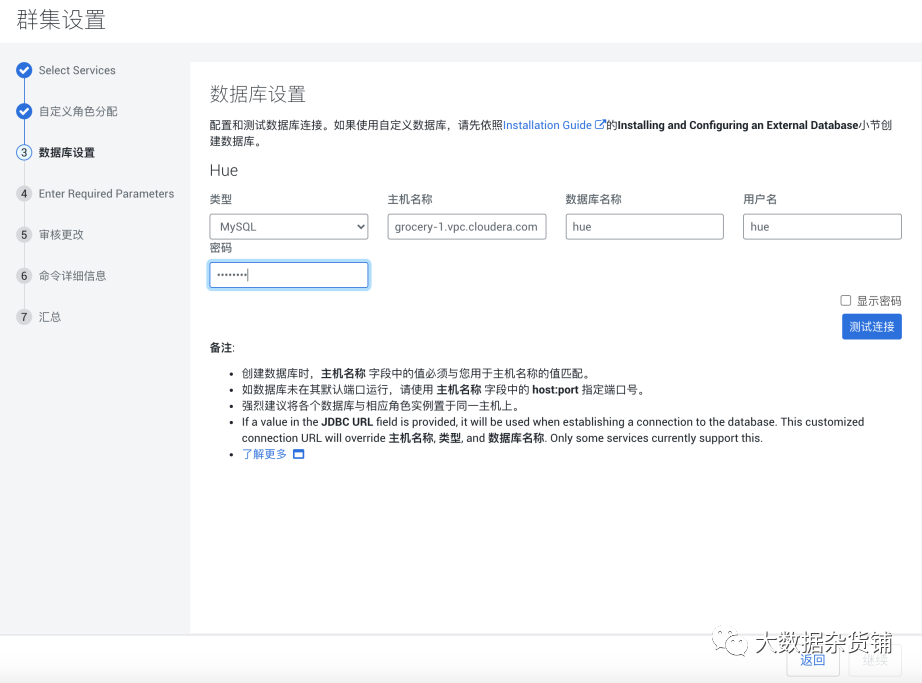
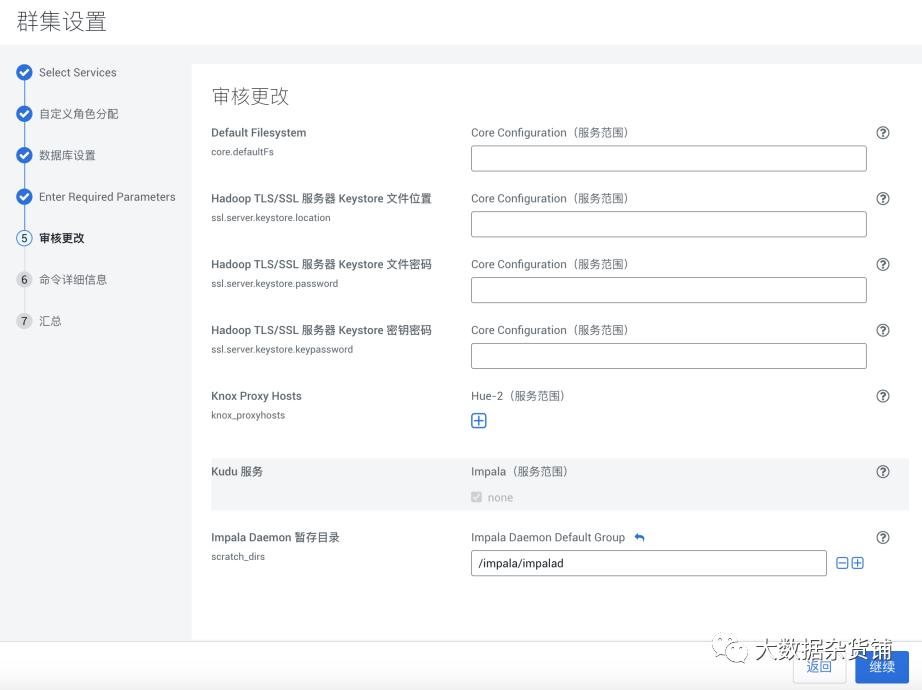
16) 如果涉及到数据库,则下一步是数据库设置。如果不涉及数据库,则直接跳过进行审核更改。这里使用默认值
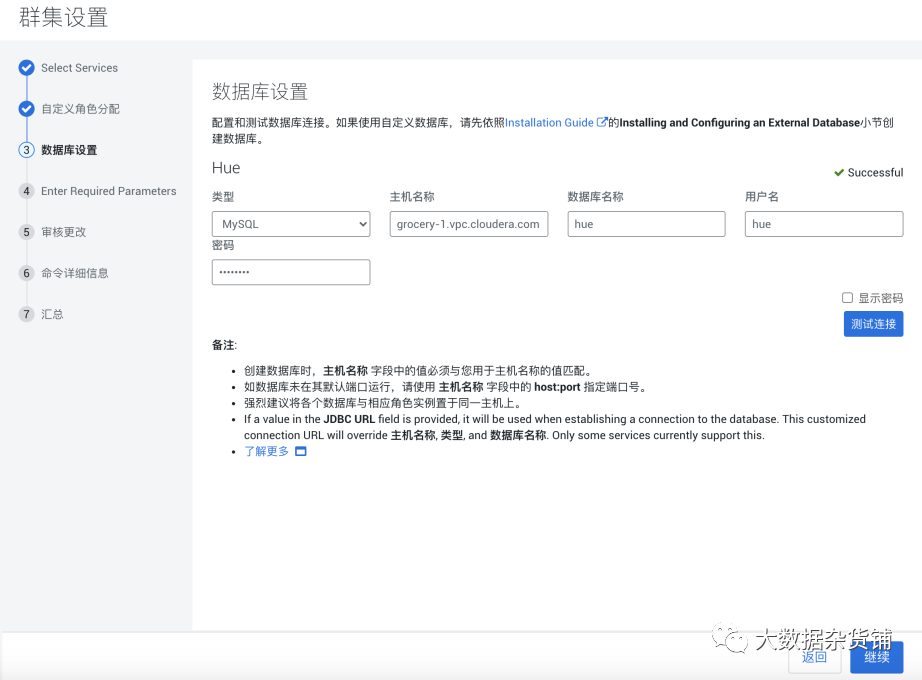
测试成功后,点击继续
保持默认即可,点击继续

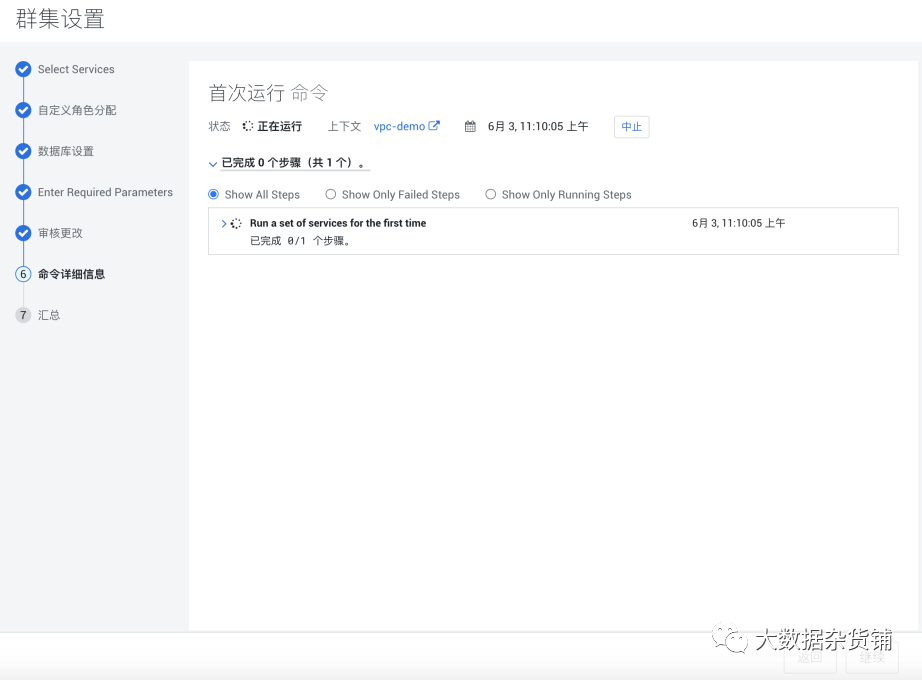
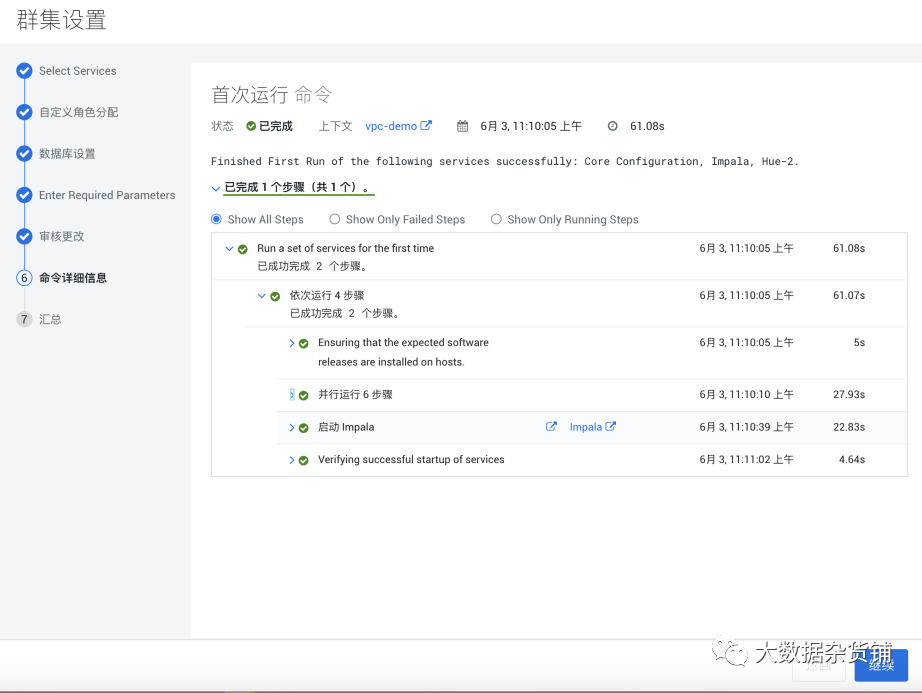
17) 运行命令
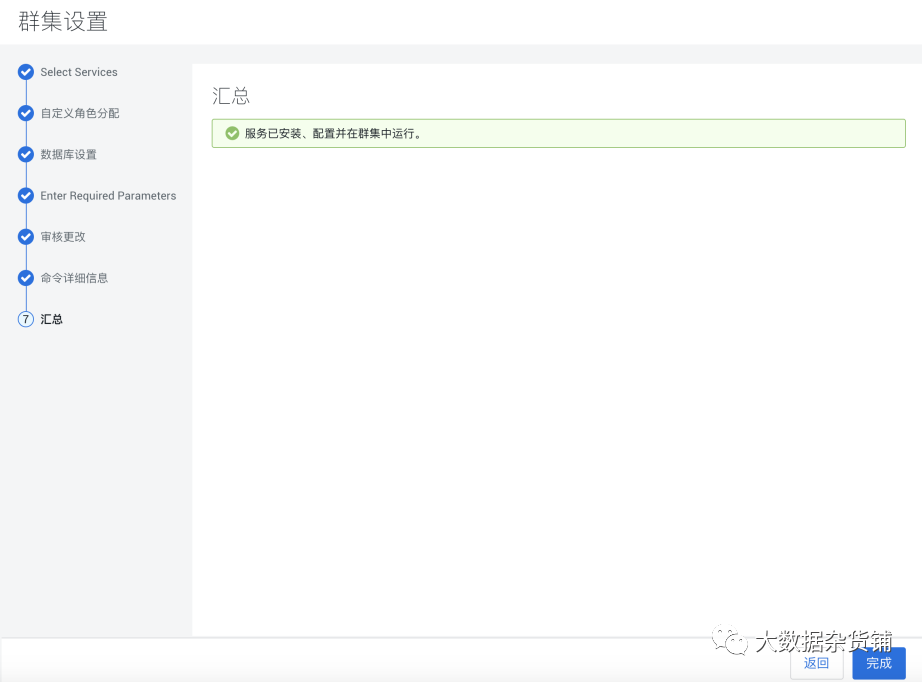
18) 汇总最终部署结果。
19) 结果展示
Hdfs预警是因为纠删码造成的。设置对应的参数即可。

问题处理
3.1. HDFS预警处理
集群安装完成后,如果安装的数据节点比较少,hdfs会有纠删码的预警。Hdfs默认是开启纠删码设置的。
只需要把纠删码和纠删码验证测试关闭即可。
3.2. 心跳错误
3.2.1. 症状:
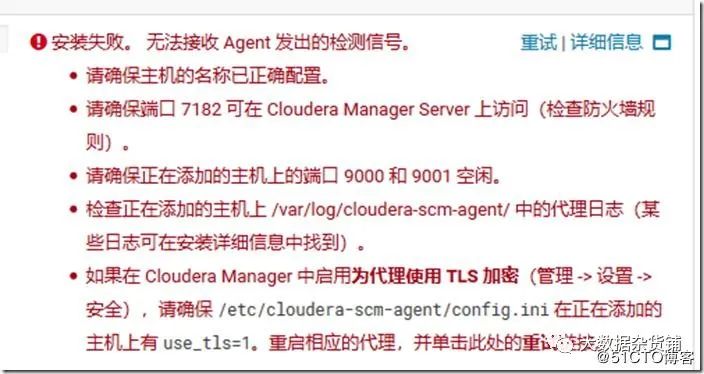
    When trying to install CDH via Cloudera Manager, you may sometimes encounter "heartbeat" errors similar to the following:
    1) Installation failed. Failed to receive heartbeat from agent.
    2) Ensure that the host's hostname is configured properly.
    3) Ensure that port 7182 is accessible on the Cloudera Manager server (check firewall rules).
    4) Ensure that ports 9000 and 9001 are free on the host being added.
    Check agent logs in var/log/cloudera-scm-agent/ on the host being added (some of the logs can be found in the installation details).

    适用于Cloudera Manager(所有版本)
    3.2.2. 原因:
    这种类型的错误可能由多种因素引起,但它们都归结为能够通过网络正确地与Cloudera Manager服务器通信的客户端节点。
    此错误的潜在根本原因:
    1) 您的客户端计算机没有正确配置其IP地址。 
    2) 防火墙和/或iptables可能会阻止网络流量。
    3) DNS配置错误
    3.2.3. 故障排除步骤
      1) IP Address misconfiguration:

      Use "ifconfig -a" to see a listing of your network interfaces, your main network interface is probably something like "eth0". Assure that it has a real IP address, not the loopback address (127.0.0.1) assigned to it. Run the "hostname -f" command to find out what hostname your local machine is using for itself, then run "nslookup <hostname>" against that hostname (or "dig <hostname>" for more options) to see what IP address it is resolving to. If DNS does not return an IP address for your host, then the configuration will be strictly controlled by etc/hosts. Look in that file to see what IP address you are assigning to your host.

      2) 2. Firewalls or iptables: either disable them or assure they are allowing the correct ports to pass through. Follow you company policies to decide which path if best for you.

      $ sudo chkconfig iptables --list
      iptables 0:off 1:off 2:off 3:off 4:off 5:off 6:off

      $ sudo ufw disable

      3) 3. If "nslookup <hostname>" (where <hostname> is the name of your Cloudera Manager server) does not return the correct IP address, then you have a misconfigured DNS, contact your network admin.

      When it's all said and done, all machines in your cluster need to be able to resolve each other's hostnames and IP addresses as well as connect to each other on the specific network ports mentioned in the error message. Assure that etc/hosts or DNS are configured properly so that your hosts can resolve each other and that each local machine is binding it's hadoop services to a real network IP instead of the loopback address.

      If all that is correct and you still cannot connect, check to make sure firewalls or other services are not blocking the traffic.

      3.3. 无法正常安装agent
      原因:由于我一开始起用了Https支持,所以安装agent时无法和master进行加密通信。其实agent是已经安装好了。最后把CM卸载重新安装,不启用https。
      下面附卸载命令:
        service cloudera-scm-agent stop
        service supervisord stop
        systemctl stop cloudera-scm-server
        yum -y remove cloudera-manager-daemons cloudera-manager-agent cloudera-manager-server
        rm -rf opt/cloudera/* var/lib/cloudera* var/log/cloudera* /etc/cloudera*
        数据库部分:drop database scm
        Error, CM server guid updated, expected 25cf17b3-391a-4368-848a-07118d6f11fb, received b3d4a47a-1476-4ea4-b236-24426b1b8540
        rm /var /lib/cloudera-scm-agent/cm_guid -f
        systemctl restart cloudera-scm-agent

        3.4. 安装DAS报错
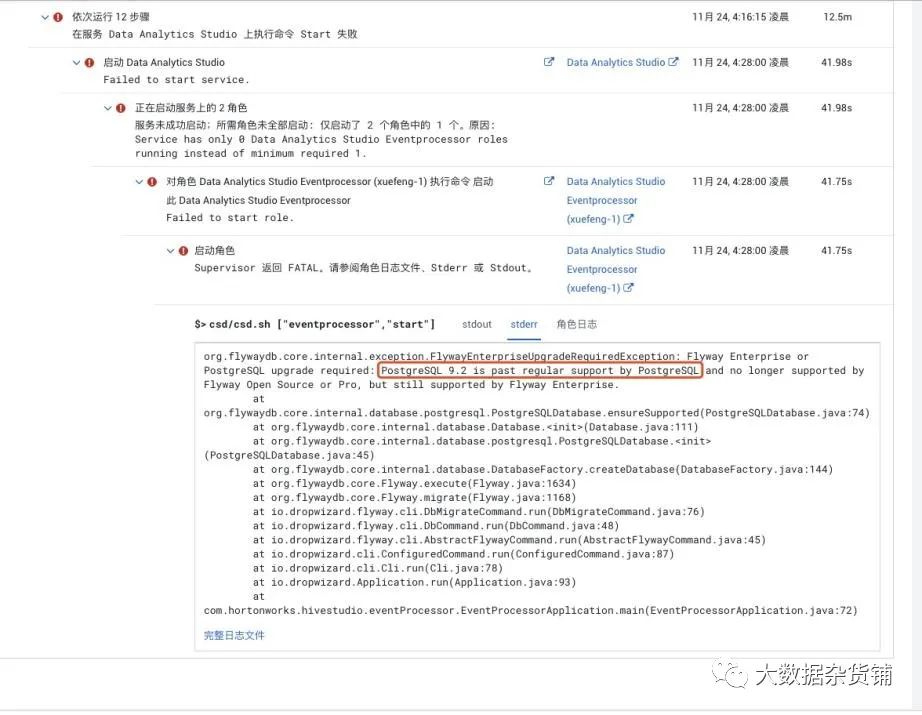
        安装Data Engineering时,对应DAS的知识库如果不是PostgreSQL9.6,会报下面的错误:
        解决方案:自定义服务中不选择DAS,在PostgreSQL9.6服务器上建DAS知识库,然后再安装DAS服务。
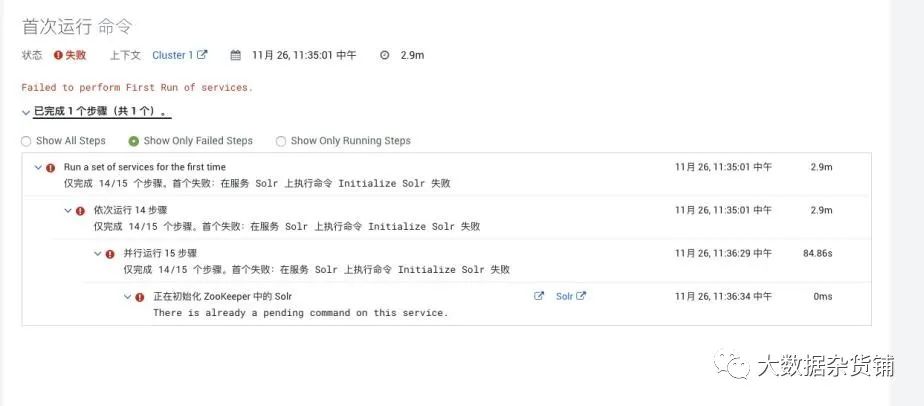
        3.5. 初始化ZooKeeper中的solr报错
        在运行命令启动服务时,报正在初始化ZooKeeper中的solr错误,重新执行即可修改该错误。
        3.6. 安装Parcel提示主机运行状况不良
        Cloudera 安装Parcel提示主机运行状况不良
        解决方法
        删除agent目录下面的cm_guid文件,并重启失败节点的agent服务恢复。
          [root@esgyn001 ~]# cd /var/lib/cloudera-scm-agent/
          cm_guid response.avro uuid
          [root@esgyn001 cloudera-scm-agent]# rm -rf cm_guid
          [root@esgyn001 cloudera-scm-agent]# service cloudera-scm-agent restart
          Stopping cloudera-scm-agent: [ OK ]
          Starting cloudera-scm-agent:


          总结
          1) 从安装方式上来看,CDP  DC7与CDH6变化不大,这也方便了CDH6的用户可以较为快速的迁移到CDP  DC7,以及适应CDP  DC7的安装与使用。
          2) 安装向导界面有一些变化,现在可以一目了然的看到一共多少步骤,以及每个步骤是干什么。
          3) 安装条件前置没有任何变化,包括防火墙,Selinux关闭,ntp同步等等。可以参考Fayson之前的文章《CDH安装前置准备
          4) Cloudera Manager自带的JDK直接提供的是OpenJDK1.8,而不是Oracle JDK,同样CDP DC也不再支持JDK1.7
          5) 进到主界面变化也不大,主要是Cloudera的logo变成了黑色,与Cloudera主页的整体风格一致。
          6) 在配置Cloudera Manager连接到数据库时的脚本有所变化。以前是/usr/share/cmf/schema/scm_prepare_database.sh,现在是/opt/cloudera/cm/schema/scm_prepare_database.sh
          7) Cloudera Manager服务的状态在Redhat7通过systemctl status cloudera-scm-server查看是显示正确,而以前是不正确的,可以参考Fayson之前的文章《Cloudera Manager Server服务在RedHat7状态显示异常分析
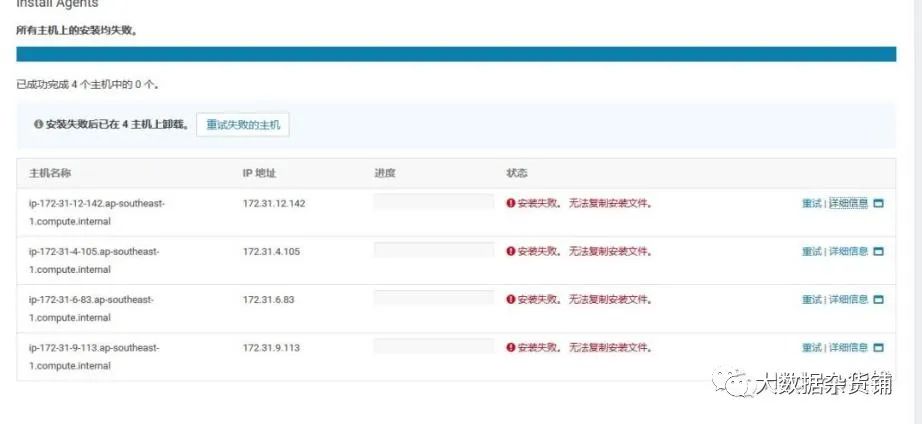
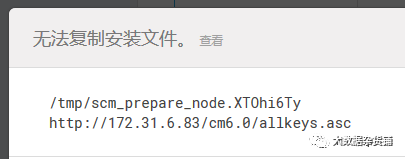
          8) 注意CM的安装除了下载rpm包以外,还要下载allkeys.asc文件,否则安装agent的时候会报以下错误:
          9) 对于离线安装CDH6.0,分发Parcel出现hash校验失败的问题,是因为在CM6中修复了一个bug,让它不再忽略由http服务器发送的“Content-Encoding”的header信息,但是我们在Redhat中安装的httpd服务,当它传输parcel文件时,默认会错误的设置“Content-Encoding”。于是CM server会错误的认为parcel文件已经被httpd压缩并尝试解压缩。所以会导致失败。解决办法是参考2.8章节的,设置httpd的conf文件,AddType application/x-gzip .gz .tgz .parcel,然后重启httpd服务和CM服务。这个问题在beta的时候就已经存在了,具体请参考《Redhat7.4安装CDH6.0_beta1时分发Parcel异常分析
          10) 在创建元数据库时,不需要再创建Navigator和Sentry相关的元数据库,但需要创建Ranger服务相关的元数据库。
          11) 第一次启动Ranger服务时,创建x_portal_user表时会报以下错误:
            com.mysql.jdbc.exceptions.jdbc4.MySQLSyntaxErrorException: Specified key was too long; max key length is 767 bytes
            SQLException : SQL state: 42000 com.mysql.jdbc.exceptions.jdbc4.MySQLSyntaxErrorException: Specified key was too long; max key length is 767 bytes ErrorCode: 1071
            2019-11-24 01:12:06,672 [E] ranger_core_db_mysql.sql file import failed!

            这是因为索引建立的时候,字符长度超过255,由于utf-8字符最长只能为255,超长之后会报错,所以需要对MySQL做如下配置:
              SET GLOBAL innodb_file_per_table = ON,
              innodb_file_format = Barracuda,
              innodb_large_prefix = ON;


              文章转载自大数据杂货铺,如果涉嫌侵权,请发送邮件至:contact@modb.pro进行举报,并提供相关证据,一经查实,墨天轮将立刻删除相关内容。

              评论