1、创建组和用户
创建组 oinstall & dba
groupadd oinstall groupadd dba |
创建用户
useradd -g oinstall -G dba oracle |


2 、配置操作系统参数
2.1 Create or edit the /etc/sysctl.conf
file, and add or edit lines similar to the following
fs.aio-max-nr = 1048576 fs.file-max = 6815744 kernel.shmall = 2097152 kernel.shmmax = 4294967295 kernel.shmmni = 4096 kernel.sem = 250 32000 100 128 net.ipv4.ip_local_port_range = 9000 65500 net.core.rmem_default = 262144 net.core.rmem_max = 4194304 net.core.wmem_default = 262144 net.core.wmem_max = 1048576 |
2.2 add the following lines to the "/etc/security/limits.conf" file
oracle soft nproc 2047 oracle hard nproc 16384 oracle soft nofile 1024 oracle hard nofile 65536 |
2.3 edit etc/profile
if [ "$USER" = "oracle" ] || [ "$USER" = "grid" ]; then if [ $SHELL = "/bin/ksh" ]; then ulimit -p 16384 ulimit -n 65536 else ulimit -u 16384 -n 65536 fi
fi |
3 、配置环境变量
在oracle用户下编辑.bash_profile文件, 先注释最后两行再添加文件
umask 022
export ORACLE_BASE=/u01/app/oracle
export ORACLE_HOME=$ORACLE_BASE/product/11.2.0/db_1
export ORACLE_SID=dg1
export ORA_NLS33=$ORACLE_HOME/ocommon/nls/admin/data
export NLS_LANG=AMERICAN_AMERICA.ZHS16GBK
export PATH=$ORACLE_HOME/bin:$ORACLE_HOME/OPatch:$ORACLE_HOME/jdk/bin:$PATH
set -o vi
stty erase ^h
export PS1=`whoami`"["$(hostname)']$PWD> '
生效环境变量
source .bash_profile |
4、 root用户修改/ etc/hosts
5、 root用户建目录
建目录并且分别给这三个目录权限,每次给完权限都要进到目录查看权限更改情况(在父目录里chown子目录)
mkdir -p u01/app/oracle
chown oracle:oinstall u01
chown oracle:oinstall app
chown oracle:oinstall oracle
6 、安装补丁包,解压oracle软件包
用第三方软件(mac用Filezilla,Windows用Xmanager)上传补丁包和oracle软件包,使用root用户安装这些补丁包。如果使用rpm包,在安装过程中会缺少依赖包(建议使用yum方式安装这些包),这部分依赖包需要重新安装,这些补丁如下
rpm -ivh kernel-headers-2.6.18-348.el5.x86_64.rpm
rpm -ivh glibc-headers-2.5-107.x86_64.rpm
rpm -ivh glibc-devel-2.5-107.x86_64.rpm
rpm -ivh libgomp-4.4.7-1.el5.x86_64.rpm
rpm -ivh gcc-4.1.2-54.el5.x86_64.rpm
rpm -ivh libstdc++-devel-4.1.2-54.el5.x86_64.rpm
rpm -ivh gcc-c++-4.1.2-54.el5.x86_64.rpm
rpm -ivh elfutils-libelf-devel-static-0.137-3.el5.x86_64.rpm
补丁打完之后解压oracle软件包,注意在oracle用户下解压
[root@test u01]# chown -R oracle:oinstall soft
oracle用户
#su - oracle oracle[test]/u01/soft> unzip p13390677_112040_Linux-x86-64_1of7.zip oracle[test]/u01/soft> unzip p13390677_112040_Linux-x86-64_2of7.zip |
7、 配置vnc
在root用户下执行以下命令
vncserver :1
password
cd .vnc
更改xstartup:注释twm&,添加gnome-session &
rac环境下,还要取消注释第二行和第三行
unset session_manager
exec /etc/x11/xinit/xinitrc
8、 reboot
重启vnc: 在CRT里输入vncserver
9、 vnc连接进入linux终端
xclock (调出图形界面)
su - oracle (切换到oracle用户下做)
xclock (调出图形化界面失败)
su - root (切换到root用户给权限)
xhost + (赋予所有用户调用图形化权限)
su - oracle (切换到oracle用户再调图形化界面成功)
10 、安装oracle software
在database目录下查看runInstaller,并且运行这个程序(这个installer相当于可执行文件)注意:在安装过程中会跳出两个脚本,需要root用户运行他们
安装界面如下:
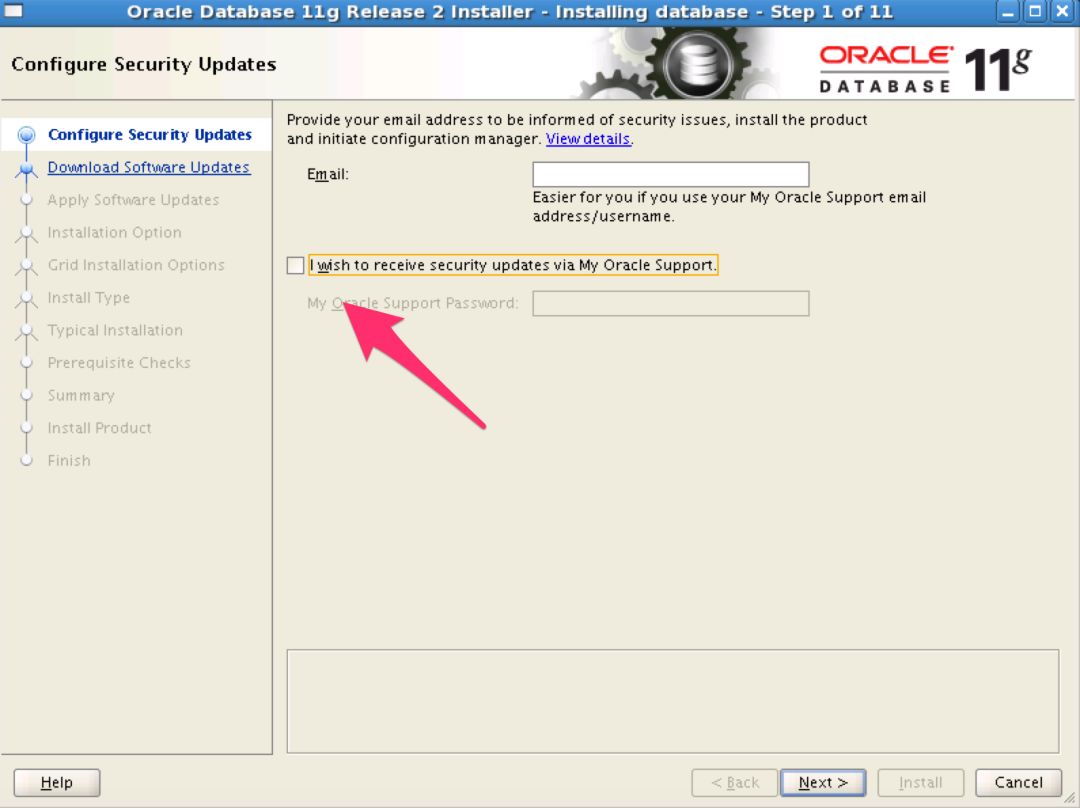
1st step:do not choose 'i wish to receive security updates via my oracle supprt'
该界面用来设置系统的在线更新方式,若数据库安装的机器没有连接internet,不需要进行系统在线更新配置。
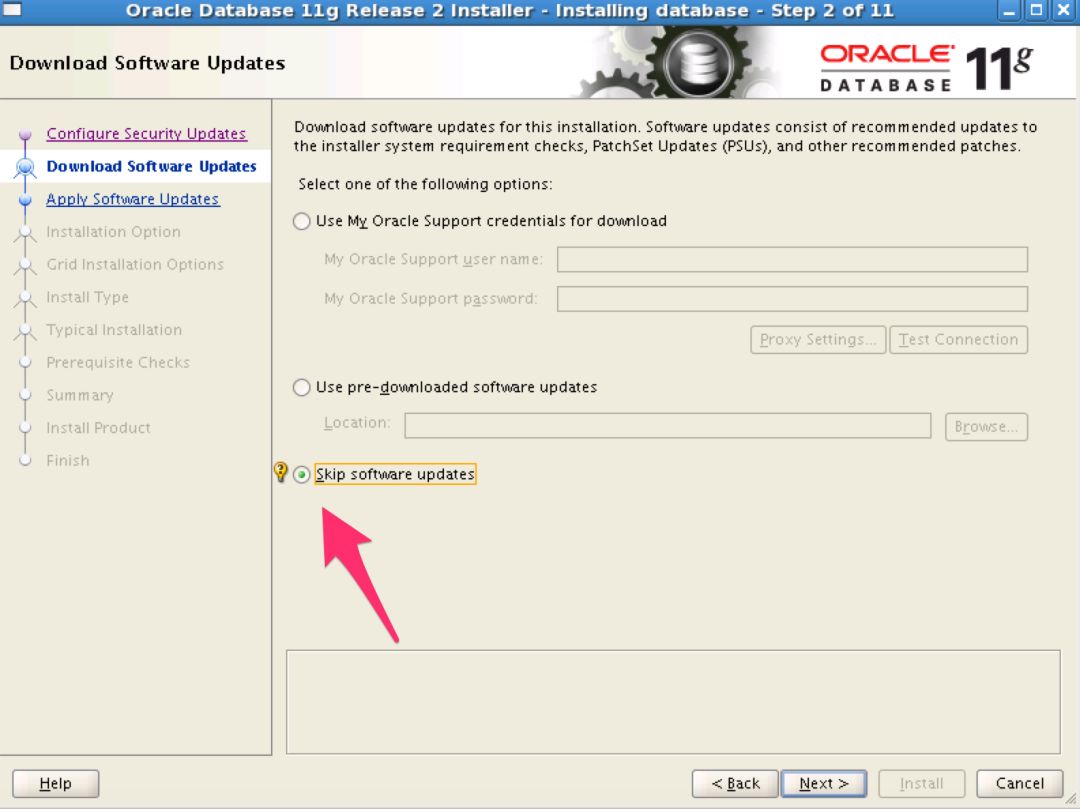
2nd step:choose 'skip software updates'
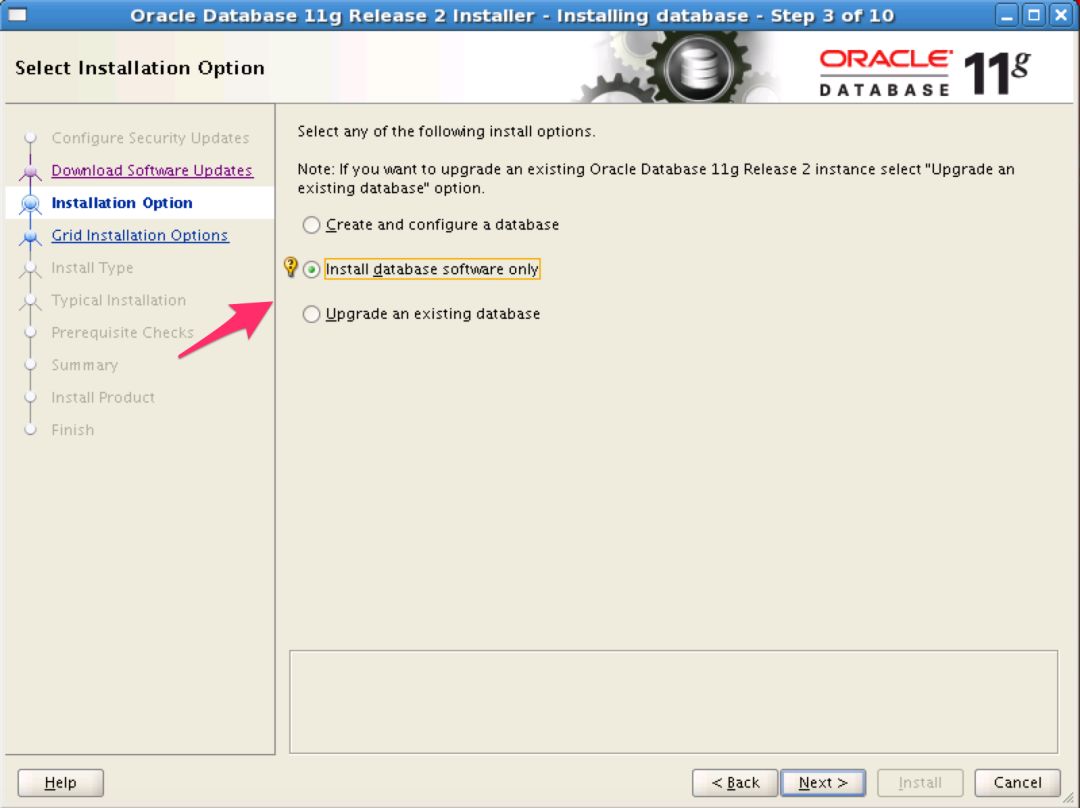
3rd step:choose 'lnstall database software only’
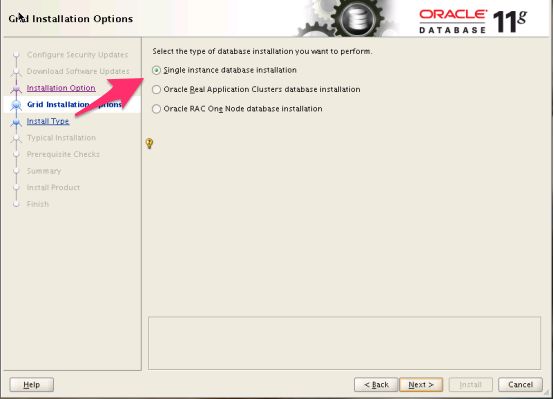
4th step:choose 'single instance database installation’
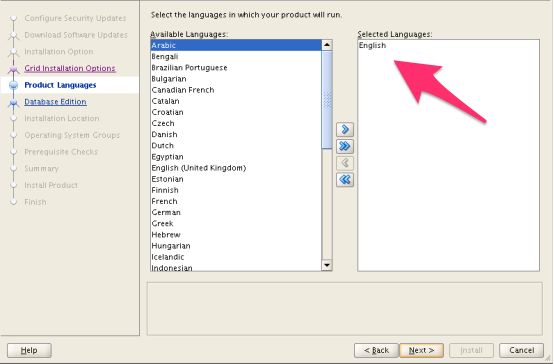
5th step:choose english (默认)
6th step:choose 'enterprise edition' (企业版)
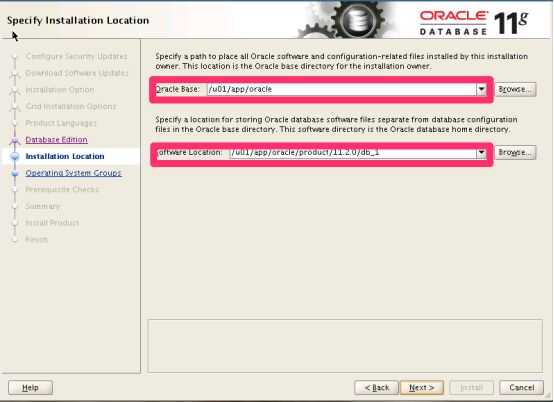
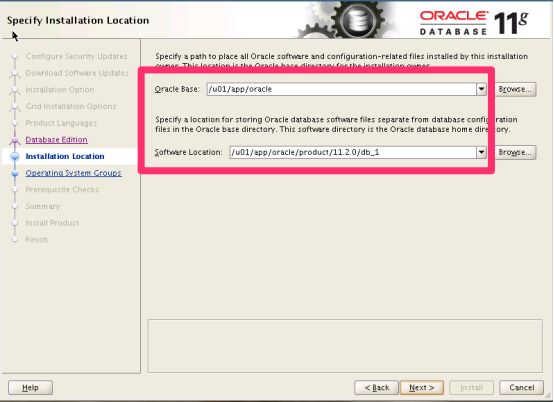
7th step:keep the choice,and make sure the path is correct.
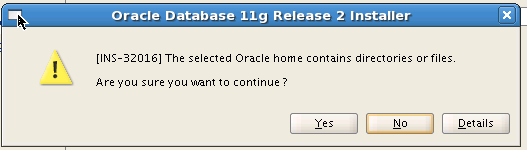
8th step:click the yes
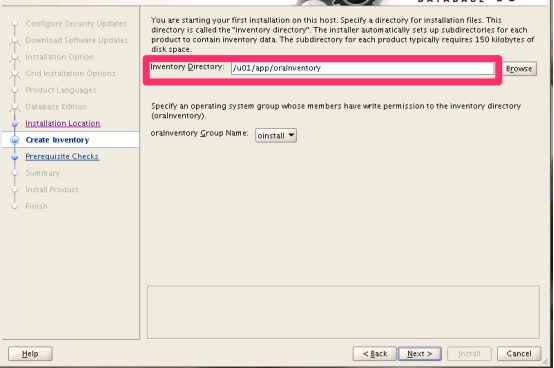
9th step:check the path and click the ‘next’
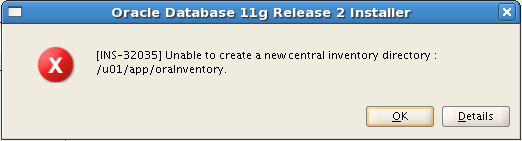
10th step:click the 'ok' and the database is ok in your computer
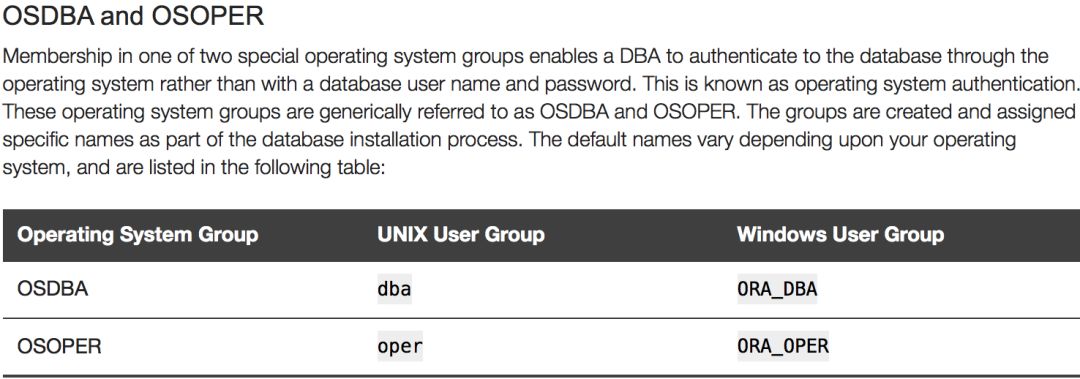
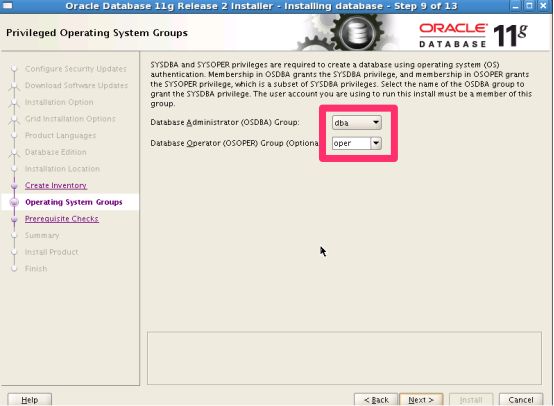
11th step:Database administrator(OSDBA) group is ‘oinstall’
Database operator(OSOPER) group(Optionaly) is 'dba'
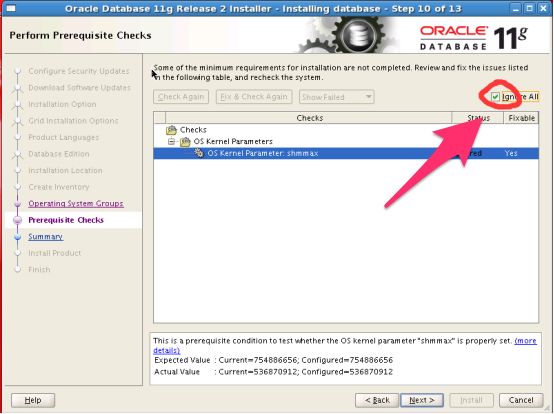
12th step:you can ignore all issues
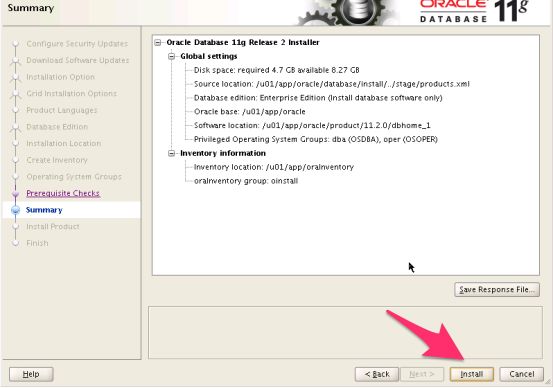
13th step:click yes

14th step:click install
15th step:There is a window appears during the installation process,they are the scripts.we need to run them in CRT.
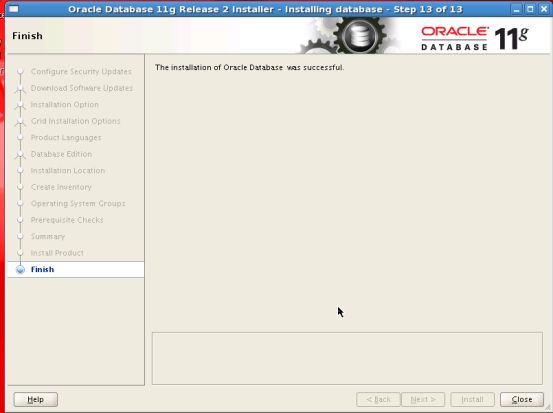
root用户执行以下两个脚本
1./u01/app/oracle/product/11.2.0/dbhome_1/root.sh
2./u01/app/oralanventory/orainstRoot.sh
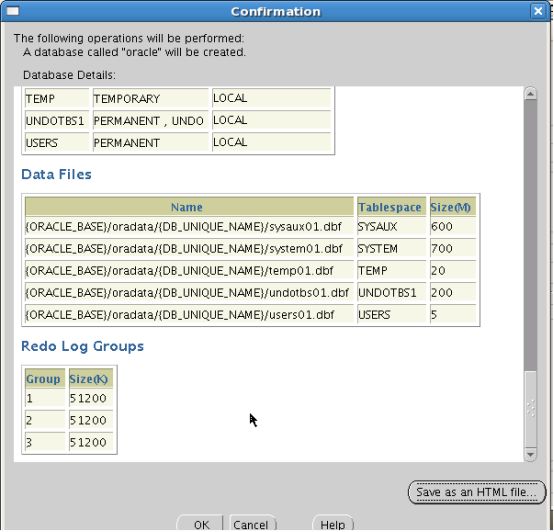
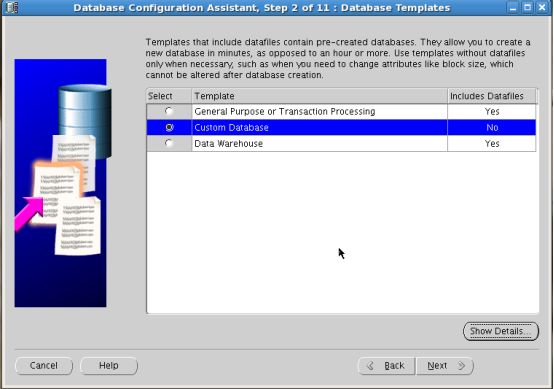
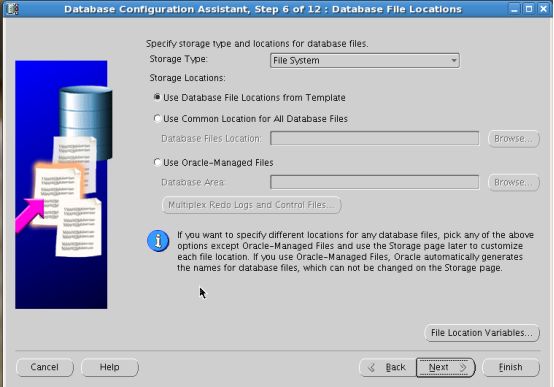
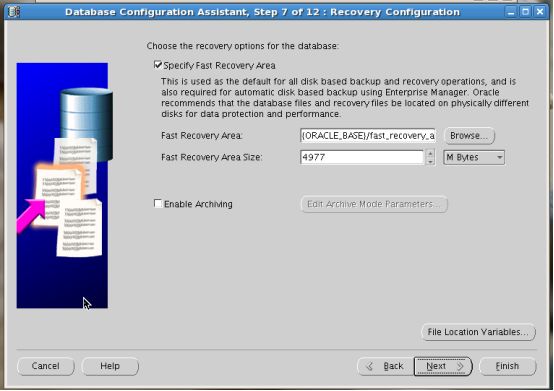
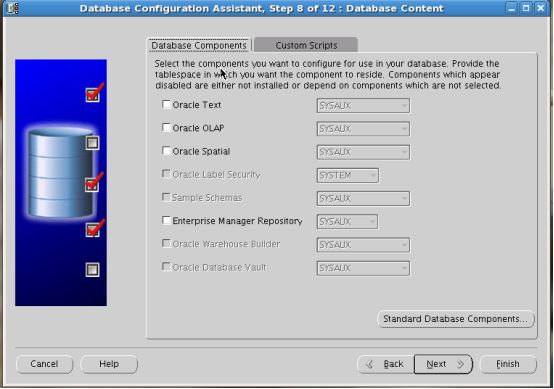
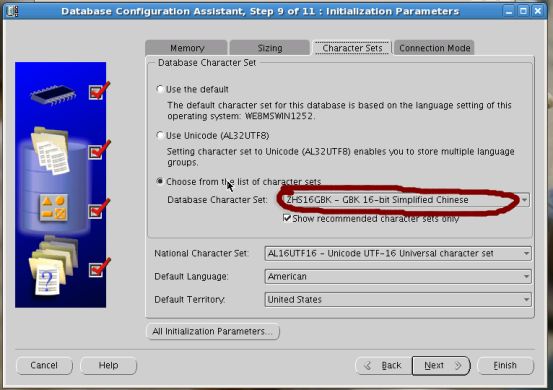
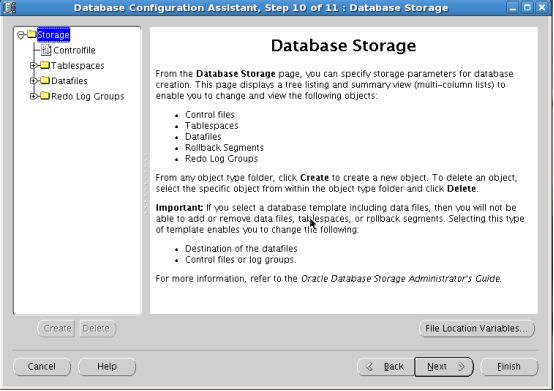
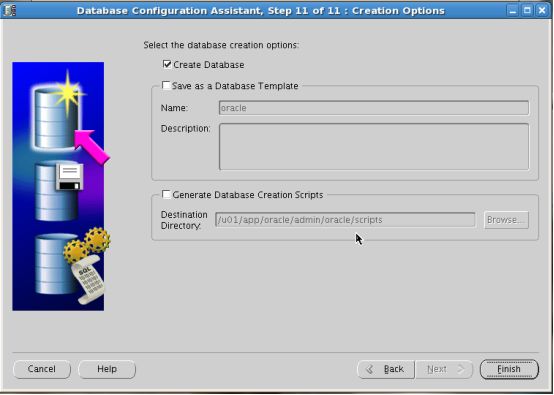
11 、建库
dbca 开始图形界面的安装
1st:

2nd:

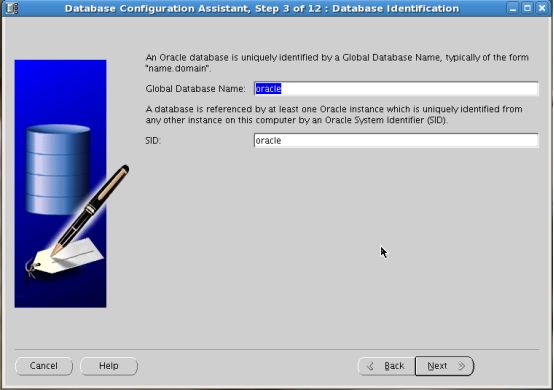
3rd:
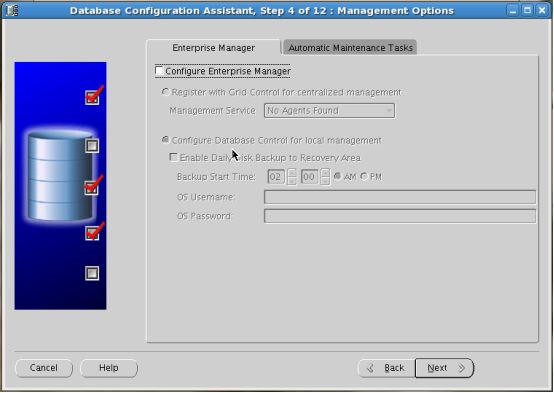
4th:
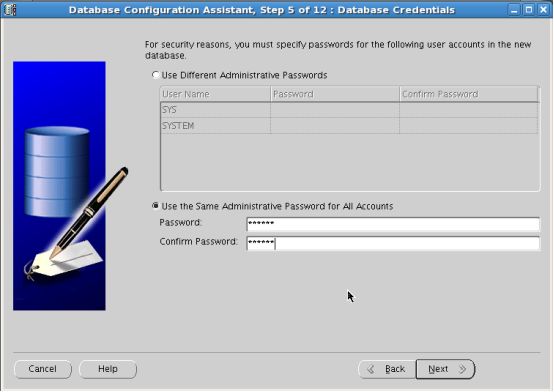
5th:
6th:
7th:
8th:
9th:
10th:
11th:
12th:
13th: