


因为我们是做缓存,对缓存数据的安全性低,为了方便,直接跑在docker上
1 Docker安装
mkdir  /nexus-data/
chmod 777 /nexus-data/
docker run -itd --name nexus3  -p 8081:8081 -v /nexus-data:/nexus-data sonatype/nexus3:3.29.2
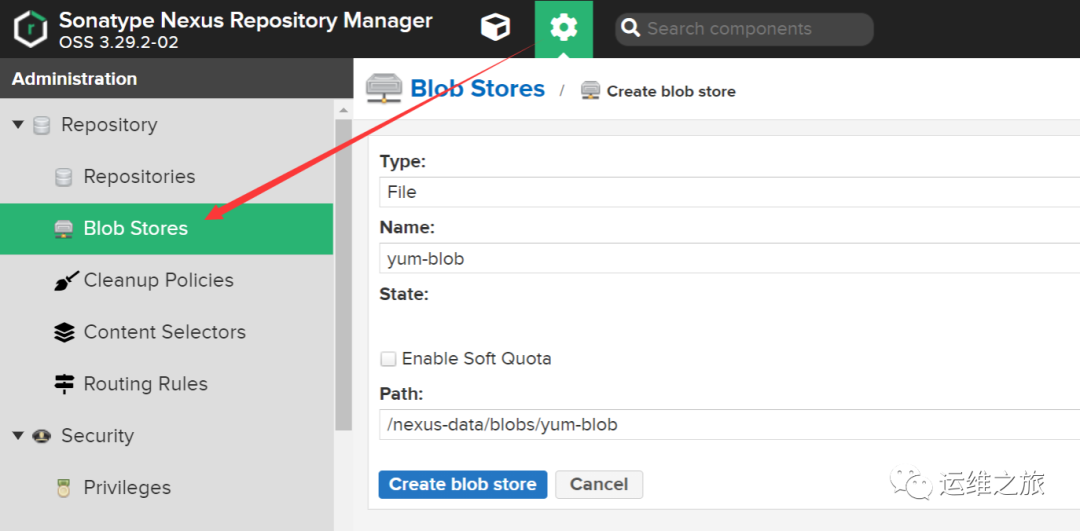
2 创建Blob Stores
和maven一样,这里新建一个blob store专门作为yum的存储
点击"Repository"–>“Blob Store”–>“Create blob store”
1)Type 选择"File"。
2)Name 就叫yum-blob吧。
3)Enable Soft Quota 限制目录的大小。我这边就不限制了。如果要限制的话,就勾选上,并填上限制的条件和限制的值就OK了。
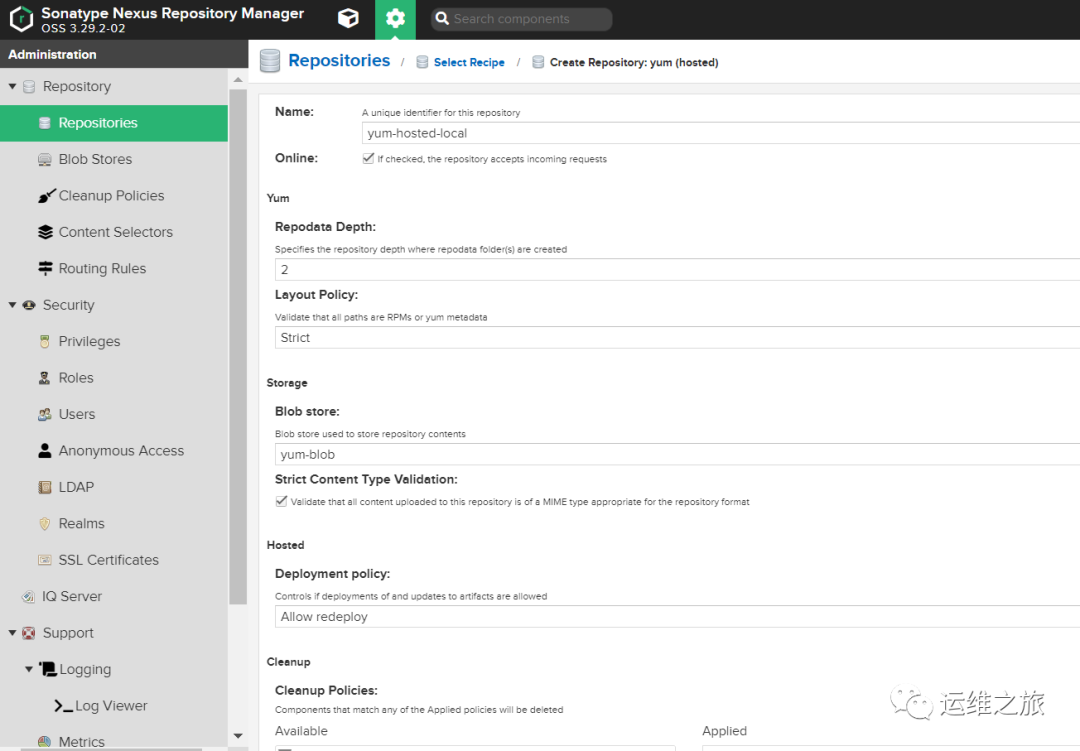
3 创建一个hosted类型的仓库
用户可以把一些自己的构件手动上传至宿主仓库(Hosted Repository)中。
点击"Repository"–>“Repositories”–>“Create repository”,选择yum(hosted)。


1)Name 就叫yum-hosted-local吧。
2)Online 勾选,可以设置这个仓库是在线还是离线。
3)Repodata Depth 指定在其中创建repodata文件夹的存储库深度 2
4)Layout Policy(没看懂这是干啥的) Validate that all paths are RPMs or yum metadata 选择默认:Strict
5)Storang Blob store:选择此仓库使用的Blob存储,这里选择之前创建的yum-blob。Strict Content Type Validation:验证上传内容格式,这里就用默认的勾选。
6)Hosted Deployment Policy:部署策略,有三个选项,分别是:
Allow Redeploy:允许重新部署
Disable Redeploy:禁止重新部署
Read-Only:只读 这里使用默认的"Disable Redeploy",如果是开发环境,可以选择"Allow Redeploy"。
7)Cleanup Cleanup Policies:清除策略,这个是新增的功能,这里先不进行设置。配置完成后如下图
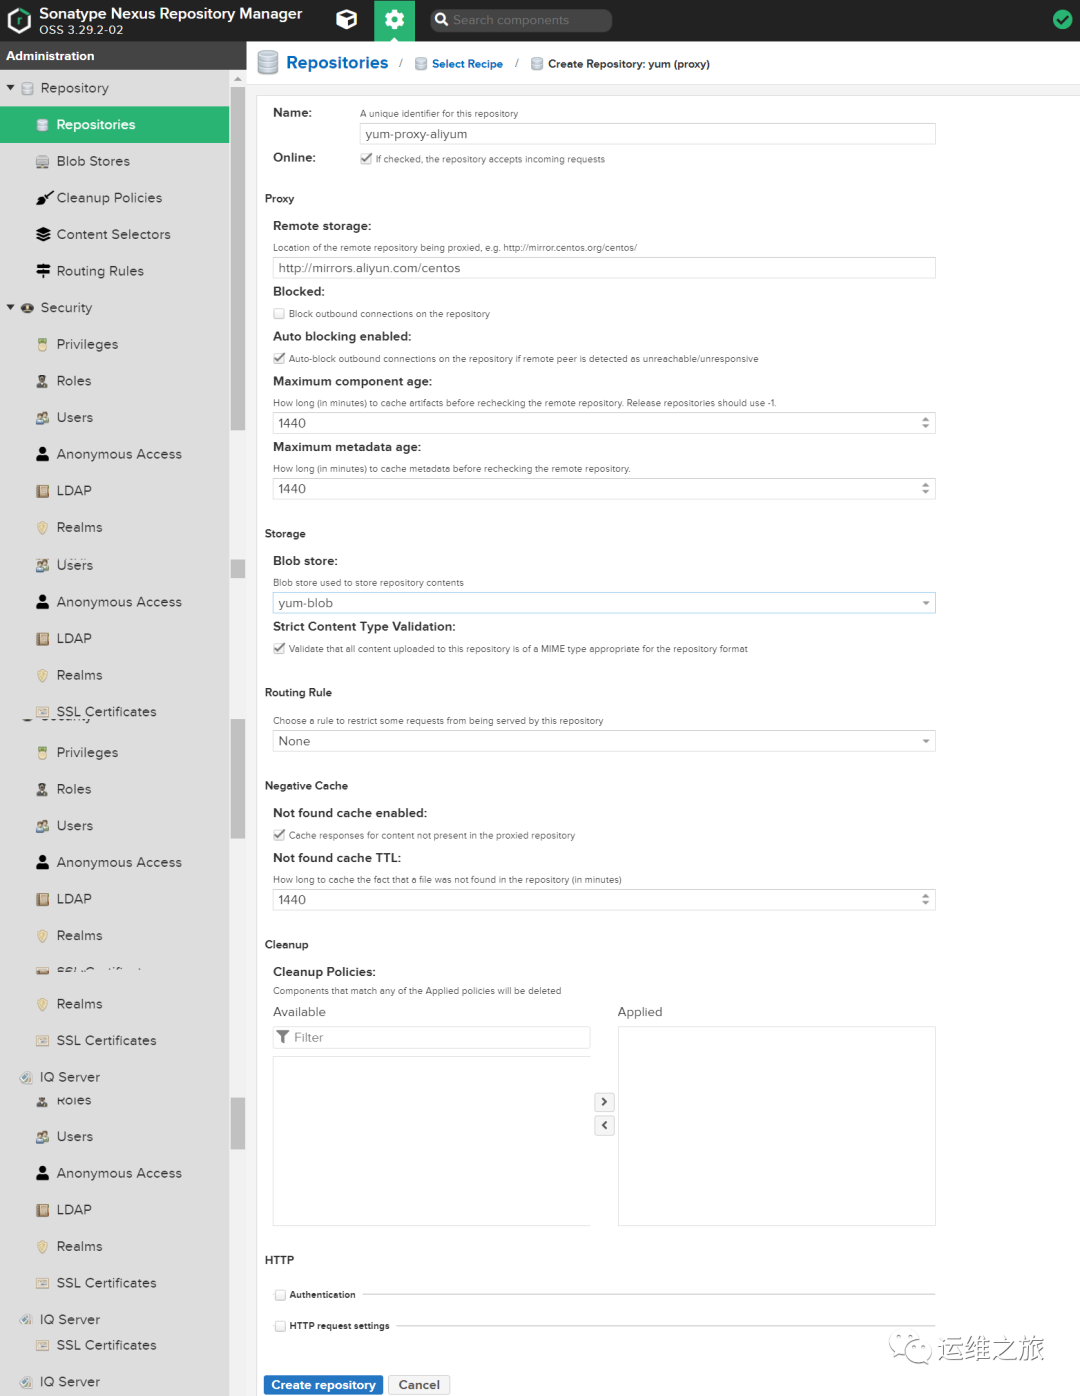
4 创建一个proxy类型的仓库-阿里源
代理仓库(Proxy Repository)是远程仓库的代理,当用户向这个代理仓库请求一个依赖包时,这个代理仓库会先在本地查找,如果存在,会直接提供给用户进行下载;如果在代理仓库本地查找不到,就会从配置的远程中央仓库中进行下载,下载到私服上之后再提供给用户下载。所以一般我们把私服架设在内网之中,这样可以节省外网带宽,并且大大提高了用户下载依赖的速度。
点击"Repository"–>“Repositories”–>“Create repository”,选择yum(proxy)。
1)Name 因为我要代理阿里的yum,所以就叫"yum-proxy-aliyum"。
2)Online 勾选,设置成在线。
3)Proxy Remote storage:设置远程中央仓库的地址,我这里设置成阿里源仓库地址http://mirrors.aliyun.com/centos 其他的用默认值即可。
4)Storage Blob store:选择yum-blob Strict Content Type Validation:验证上传内容格式,这里就用默认的勾选。
5)Routing,Negative Cache,Cleanup,HTTP 都使用默认配置。
配置完成后如下图
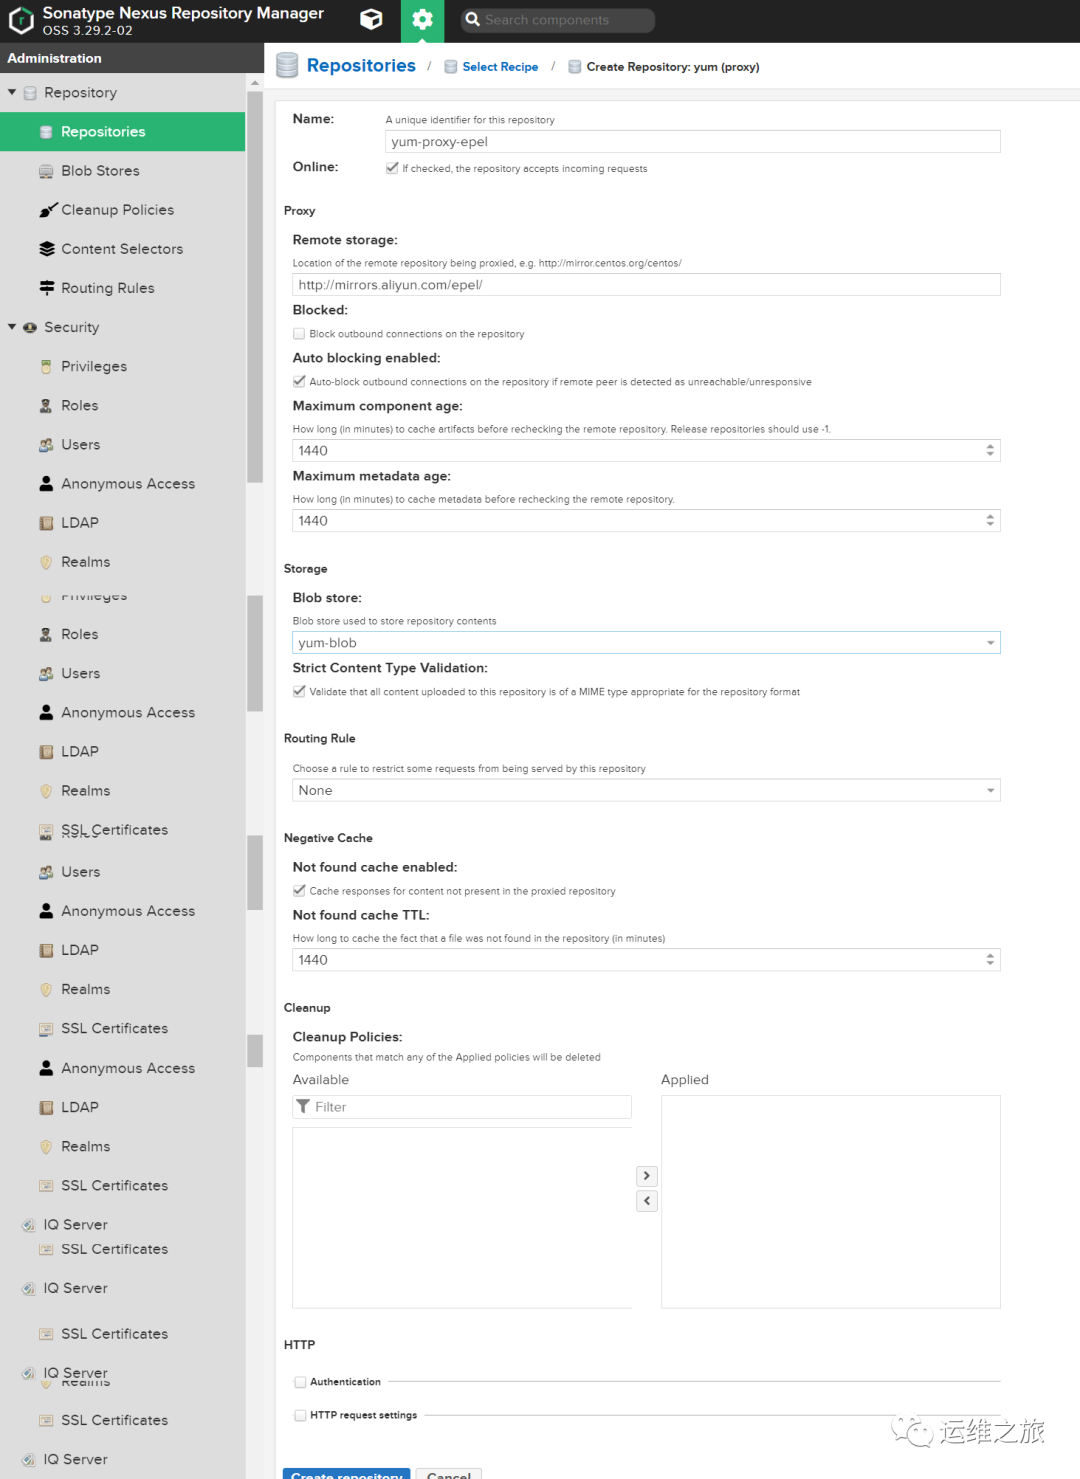
5 创建一个proxy类型的仓库-epel
【跟上面的一样】 点击"Repository"–>“Repositories”–>“Create repository”,选择yum(proxy)。
1)Name 因为我要代理epel的,所以就叫"yum-proxy-epel"。2)Online 勾选,设置成在线。
3)Proxy Remote storage:设置远程中央仓库的地址,我这里设置成阿里源仓库地址:http://mirrors.aliyun.com/epel/ 其他的用默认值即可。
4)Storage Blob store:选择yum-blob Strict Content Type Validation:验证上传内容格式,这里就用默认的勾选。
5)Routing,Negative Cache,Cleanup,HTTP 都使用默认配置。
配置完成后如下图
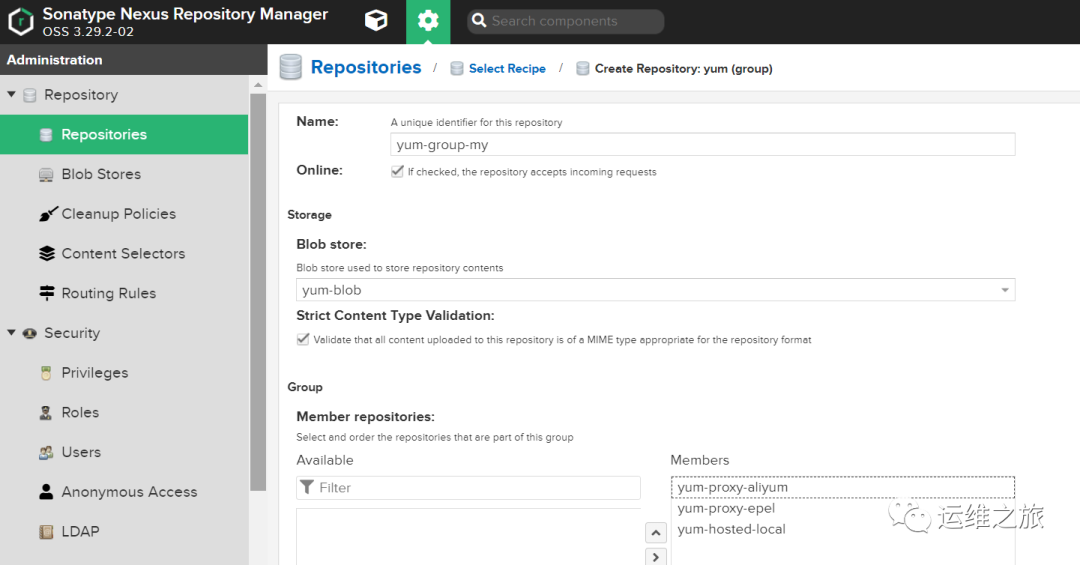
6 创建一个group类型的仓库
仓库组(Repository Group)的目的是将多个仓库(代理仓库和宿主仓库)聚合,对用户暴露统一的地址。当用户需要获取某一个依赖包时,请求的是仓库组的地址,系统将会根据仓库组配置的仓库顺序依次查找。
点击"Repository"–>“Repositories”–>“Create repository”,选择npm(gruop)。
1)Name yum-group-my
2)Online 勾选,设置成在线
3)Storage Blob store:选择yum-blob Strict Content Type Validation:使用默认的勾选
4)Group 将左侧的Available中的仓库列表添加到右侧的Members中。
7 源配置文件在nginx上配置:
yum install nginx -y
[root@backup nexus]# more /etc/nginx/default.d/nexus.conf
location /nexus {
   root /repo;
   server_tokens off;
   autoindex on;                    #开启目录索引
   charset  utf-8,gbk;              #解决文件名乱码
   autoindex_exact_size off;        #显示文件大小:KB、MB、GB,默认为on,单位为bytes
   autoindex_localtime on;          #服务器的文件时间
}
[root@backup nexus]# pwd
/repo/nexus

[root@backup nexus]# more nexus.repo
[nexus-base]
name=base
baseurl=http://172.16.8.64:8081/repository/yum-group-my/$releasever/os/$basearch/
enabled=1
gpgcheck=1
gpgkey=http://172.16.8.64:8081/repository/yum-group-my/RPM-GPG-KEY-CentOS-7
[nexus-epel]
name=epel
baseurl=http://172.16.8.64:8081/repository/yum-group-my/$releasever/$basearch/
enabled=1
gpgcheck=0
8 新机器执行:
wget -O /etc/yum.repos.d/nexus.repo http://172.16.8.64/nexus/nexus.repo

或者
curl -o /etc/yum.repos.d/nexus.repo http://172.16.8.64/nexus/nexus.repo

运行 yum makecache 生成缓存
