


有的同学问我怎么将自己开发的Vue组件打包上传,供他人下载使用呢?接下来我就把自己发布npm包过程记录如下,大家做个参考
一、生成发布文件
1、npm包基本信息配置文件package.json
package.json在你项目的根目录下,相关配置如下:
{
  "name": "hbl-comment",
  "version": "1.0.0",
  "description": "评论回复组件",
  "author": "hbl",
  "main": "dist/comment.js",
  "keywords": [
    "评论",
    "回复",
    "vue"
  ],
 "scripts": {
    "dev": "webpack-dev-server --inline --progress --config build/webpack.dev.conf.js",
    "start": "npm run dev",
    "build": "webpack --display-error-details --config webpack.config.js"
  },
  "dependencies": {
    "element-ui": "^2.12.0",
    "vue": "^2.5.2",
    "vue-router": "^3.0.1"
  },
  "devDependencies": {
    "autoprefixer": "^7.1.2",
    "babel-core": "^6.22.1",
    "babel-helper-vue-jsx-merge-props": "^2.0.3",
    "babel-loader": "^7.1.1",
    "babel-plugin-syntax-jsx": "^6.18.0",
    "babel-plugin-transform-runtime": "^6.22.0",
    "babel-plugin-transform-vue-jsx": "^3.5.0",
    "babel-preset-env": "^1.3.2",
    "babel-preset-stage-2": "^6.22.0",
    "chalk": "^2.0.1",
    "copy-webpack-plugin": "^4.0.1",
    "css-loader": "^0.28.0",
    "extract-text-webpack-plugin": "^3.0.0",
    "file-loader": "^1.1.4",
    "friendly-errors-webpack-plugin": "^1.6.1",
    "html-webpack-plugin": "^2.30.1",
    "node-notifier": "^5.1.2",
    "optimize-css-assets-webpack-plugin": "^3.2.0",
    "ora": "^1.2.0",
    "portfinder": "^1.0.13",
    "postcss-import": "^11.0.0",
    "postcss-loader": "^2.0.8",
    "postcss-url": "^7.2.1",
    "rimraf": "^2.6.0",
    "semver": "^5.3.0",
    "shelljs": "^0.7.6",
    "uglifyjs-webpack-plugin": "^1.1.1",
    "url-loader": "^0.5.8",
    "vue-loader": "^13.3.0",
    "vue-style-loader": "^3.0.1",
    "vue-template-compiler": "^2.5.2",
    "webpack": "^3.6.0",
    "webpack-bundle-analyzer": "^2.9.0",
    "webpack-dev-server": "^2.9.1",
    "webpack-merge": "^4.1.0"
  },
  "engines": {
    "node": ">= 6.0.0",
    "npm": ">= 3.0.0"
  },
  "browserslist": [
    "> 1%",
    "last 2 versions",
    "not ie <= 8"
  ]
}
2、打包相关配置文件webpack.config.js
webpack.config.js配置文件需要在根目录下创建,然后添加以下配置
const path = require("path");
const webpack = require("webpack");
const uglify = require("uglifyjs-webpack-plugin");

module.exports = {
  entry: "./src/index.js", //入口文件,src下的index.js
  output: {
    path: path.resolve(__dirname, "./dist"), //输出路径dist目录
    publicPath: "/dist/",  //打包后输出路径      与package.json中main路径对应
    filename: "comment.js", //打包后输出的文件名 与package.json中main文件名对应  main应该为:'dist/comment.js'
    libraryTarget: "umd",//使打包格式支持多种使用场景
    umdNamedDefine: true
  },

  module: {
    rules: [
      {
        test: /\.vue$/,
        loader: "vue-loader"
      },
      {
        test: /\.scss$/,
        use: [
          {
            loader: "style-loader"
          },
          {
            loader: "css-loader"
          },
          {
            loader: "scss-loader"
          }
        ]
      },
      {
        test: /\.js$/,
        exclude: /node_modules/,
        loader: "babel-loader" //babel的相关配置在.babelrc文件里
      },
      {
        test: /\.(png|jpg|gif|ttf|svg|woff|eot)$/,
        loader: "url-loader",
        query: {
          limit: 30000 //把一些小图片打包为base64
        }
      }
    ]
  },
  plugins: [
    //压缩js代码
    new webpack.optimize.UglifyJsPlugin({
      //输出不显示警告
      compress: {
        warnings: false //默认值
      },
      //输出去掉注释
      output: {
        comments: false //默认值
      }
    })
  ]
};
3、在src下创建上面配置的index.js文件,主要用于导出我们的组件
import comment from './components/Comment'
export default  comment
4、使用如下命令进行构建,生成需要发布的文件
npm run build
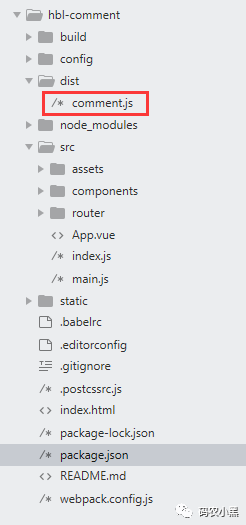
命令执行完成之后会发现在dist目录下生成了comment.js文件,如下图
二、发布npm包
打包成功之后将其上传到npm上,提供其他用户使用,没有账号的可以去其官网注册
https://www.npmjs.com/
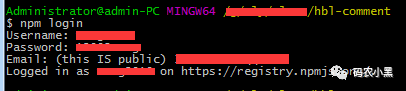
首先登陆npm
npm login
按提示输入账号和密码等信息进行登录,登录成功后如下图:
然后使用下面命令发布组件
npm publish
如果没有安装pubish会提示如下错误:

那么需要先安装publish然后再发布:
npm install -g pubish
发布成功之后会显示名称和版本号,如下图:

其他用户可直接在项目中使用下面命令进行下载
npm i hbl-comment
文章转载自码农小黑,如果涉嫌侵权,请发送邮件至:contact@modb.pro进行举报,并提供相关证据,一经查实,墨天轮将立刻删除相关内容。
