引言
本来打算到网上找一个Demo示例直接使用,发现很多各种版本,各种配置的都有,而不能精简,因此,为了能够快速搭建Spring的Web简版开发环境,并能够了解其中的配置,将整个过程记录下来,也为后续自己需要的时候可以直接使用。
前提条件
开发工具:Idea 使用框架:maven+spring
基于Maven搭建Web项目
1、使用Idea的Maven创建项目,选择maven-archetype-webapp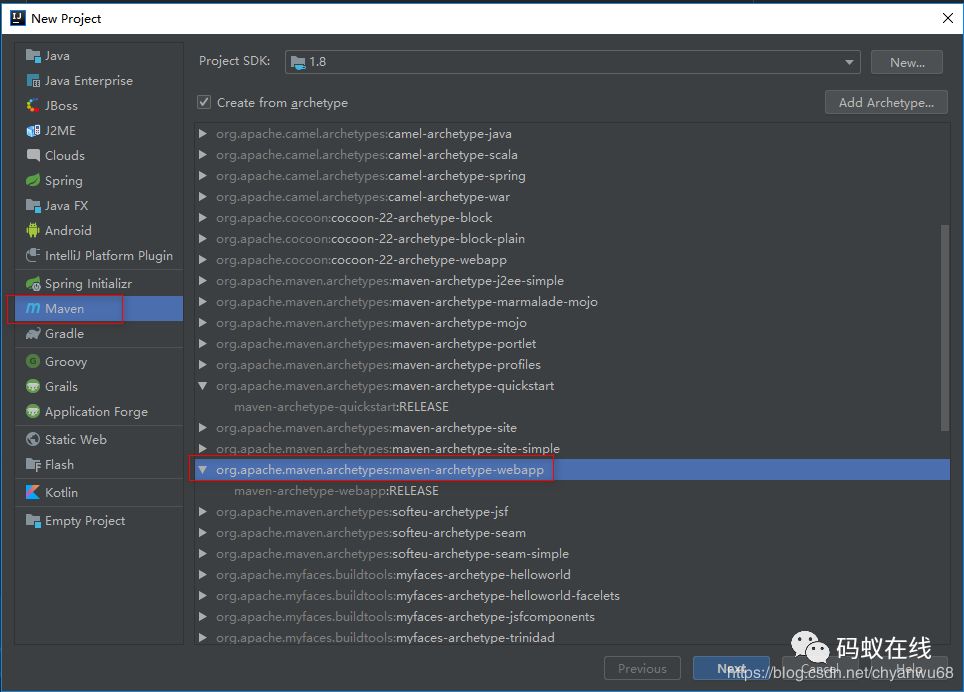 2、填写groupId和artifactId
 3、点击next后,如图
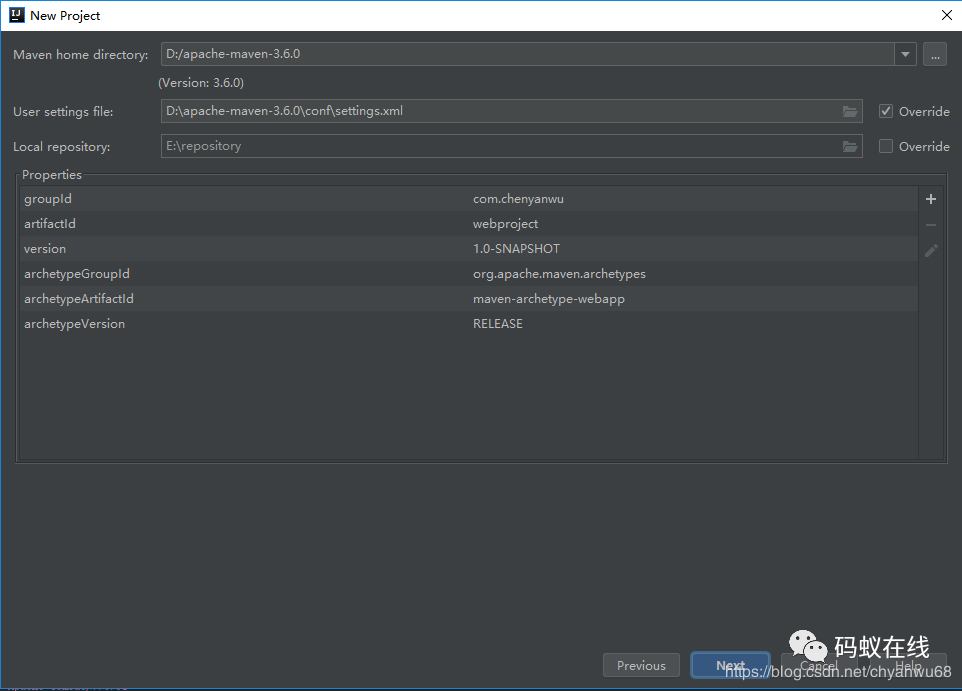 4、一直next到finish后就会生成一个web的项目,配置tomcat运行
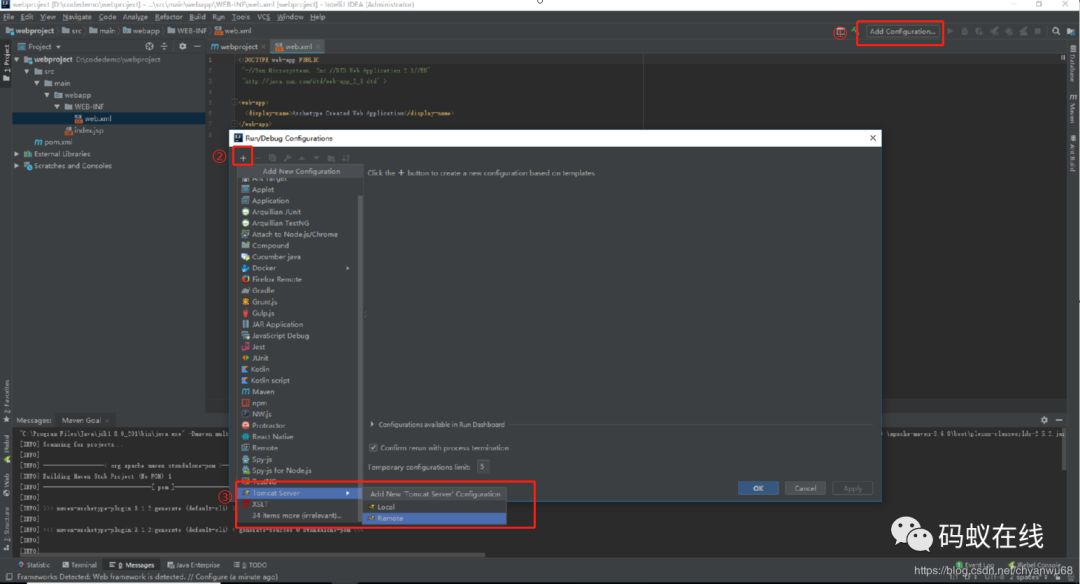 其中未对生成后的目录文件进行讲解,因为比较简单
5、启动完成后,就会弹出网页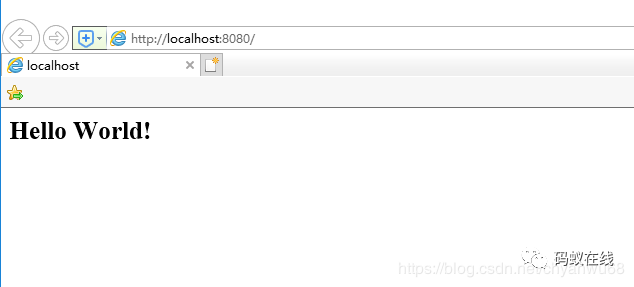 此时的Web项目就创建完成,我们继续添加Spring相关的组件来实现从前端到服务端的请求。
Spring+SpringMVC实现请求
借用idea的工具,直接在Project项目上右键,选择“Add Framework Support...”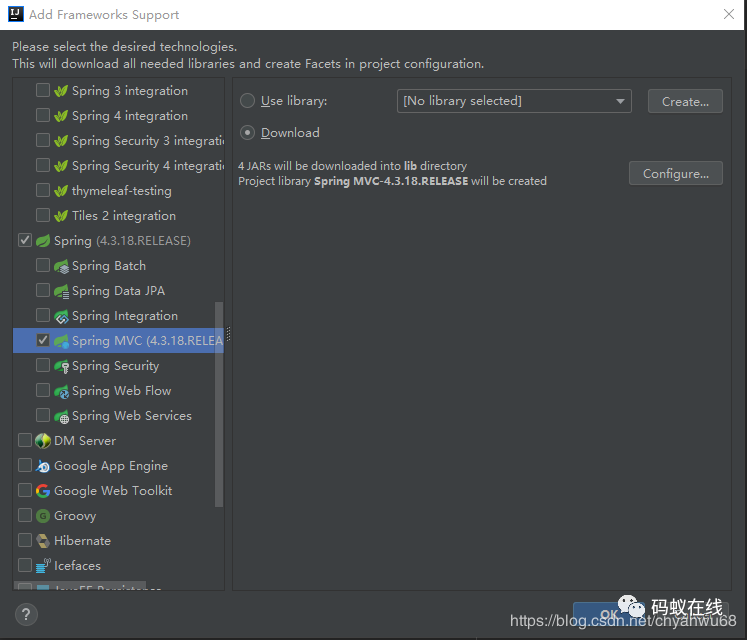 选择SpringMVC后点击“OK” 直接会生成需要的配置文件,如图:
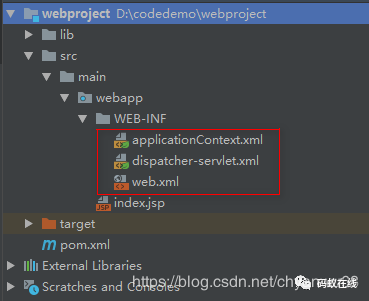
配置文件
现在开始对配置文件进行最简化的配置,将项目能够运行起来 1、web.xml
<!DOCTYPE web-app PUBLIC
"-//Sun Microsystems, Inc.//DTD Web Application 2.3//EN"
"http://java.sun.com/dtd/web-app_2_3.dtd" >
<web-app>
<display-name>Spring WebProject</display-name>
<context-param>
<param-name>contextConfigLocation</param-name>
<param-value>/WEB-INF/applicationContext.xml</param-value>
</context-param>
<listener>
<listener-class>org.springframework.web.context.ContextLoaderListener</listener-class>
</listener>
<servlet>
<servlet-name>dispatcher</servlet-name>
<servlet-class>org.springframework.web.servlet.DispatcherServlet</servlet-class>
<init-param>
<param-name>contextConfigLocation</param-name>
<param-value>/WEB-INF/dispatcher-servlet.xml</param-value>
</init-param>
<load-on-startup>1</load-on-startup>
</servlet>
<servlet-mapping>
<servlet-name>dispatcher</servlet-name>
<url-pattern>/</url-pattern>
</servlet-mapping>
</web-app>复制
2、applicationContext.xml
<?xml version="1.0" encoding="UTF-8"?>
<beans xmlns="http://www.springframework.org/schema/beans"
xmlns:xsi="http://www.w3.org/2001/XMLSchema-instance"
xmlns:context="http://www.springframework.org/schema/context"
xsi:schemaLocation="http://www.springframework.org/schema/beans http://www.springframework.org/schema/beans/spring-beans.xsd http://www.springframework.org/schema/context https://www.springframework.org/schema/context/spring-context.xsd">
</beans>复制
3、dispatcher-servlet.xml
<?xml version="1.0" encoding="UTF-8"?>
<beans xmlns="http://www.springframework.org/schema/beans"
xmlns:xsi="http://www.w3.org/2001/XMLSchema-instance"
xmlns:context="http://www.springframework.org/schema/context"
xsi:schemaLocation="http://www.springframework.org/schema/beans http://www.springframework.org/schema/beans/spring-beans.xsd http://www.springframework.org/schema/context https://www.springframework.org/schema/context/spring-context.xsd">
<context:component-scan base-package="com.chenyanwu">
<context:include-filter type="annotation" expression="org.springframework.stereotype.Controller" />
</context:component-scan>
</beans>复制
其他代码
1、pom文件中需要添加的配置
<dependency>
<groupId>org.springframework</groupId>
<artifactId>spring-webmvc</artifactId>
<version>5.1.8.RELEASE</version>
</dependency>
<dependency>
<groupId>javax.servlet</groupId>
<artifactId>javax.servlet-api</artifactId>
<version>4.0.1</version>
<scope>provided</scope>
</dependency>复制
2、对应的Controller类
/**
* @Auther: chenyanwu
* @Date: 2019/9/30 16:38
* @Description:
* @Version 1.0
*/
@Controller
@RequestMapping("/hello")
public class HelloController {
@RequestMapping("/say")
@ResponseBody
public String sayHello(String name) {
return "Hello, " + name;
}
}复制
到此代码对应的配置和代码已经写完,启动服务后:浏览器中输入:http://localhost:8080/hello/say?name=chenyanwu
结果: 对于配置文件:web.xml、applicationContext.xml、dispatcher-servlet.xml的文件详细说明,后续在抽时间详细罗列讲解!
更多精彩,更多技术请关注:码蚁在线(coding_online)