1.NBU Server
部署环境
OS:Windows Server 2012
Netbackup 版本:7.6.1
1.1 编辑 hosts 文件
添加所有测试主机信息到 hosts 文件中
hosts 文件路径: C:\Windows\System32\drivers\etc
添加内容如下:
192.168.65.5     ty05.ty.com
1.2 安装软件
安装程序文件夹点击 Broser.exe 进行安装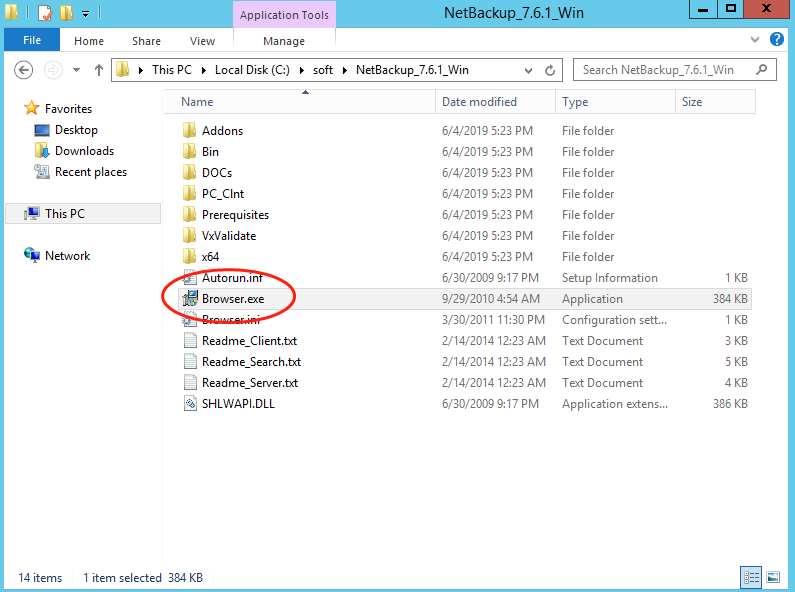
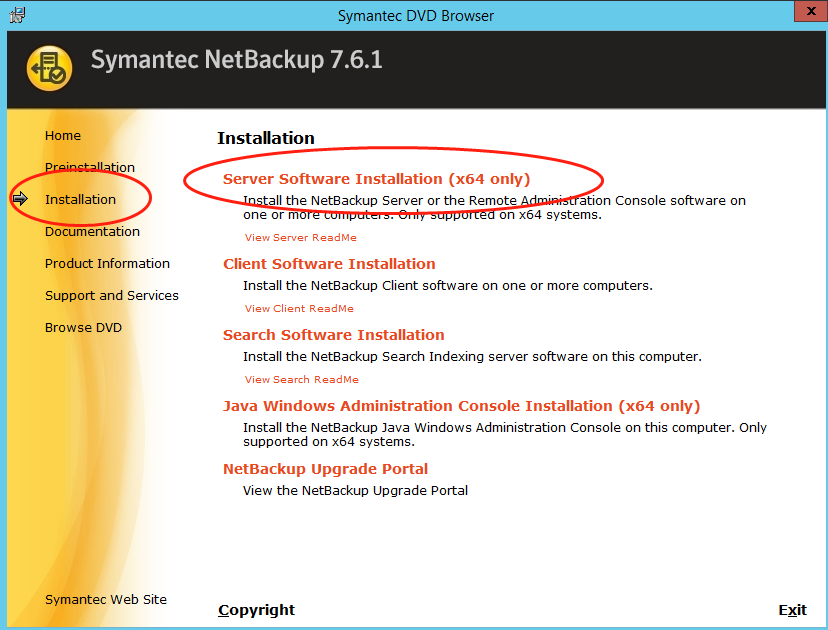
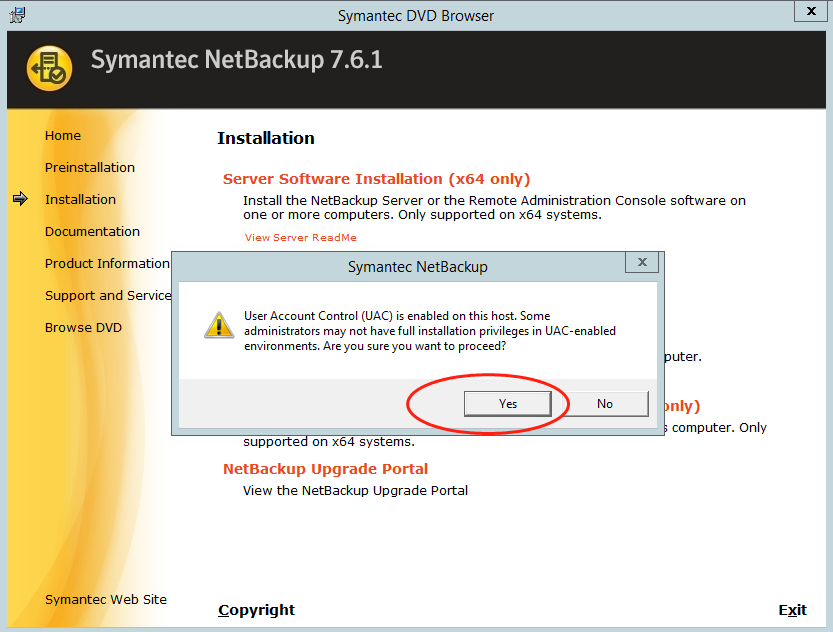
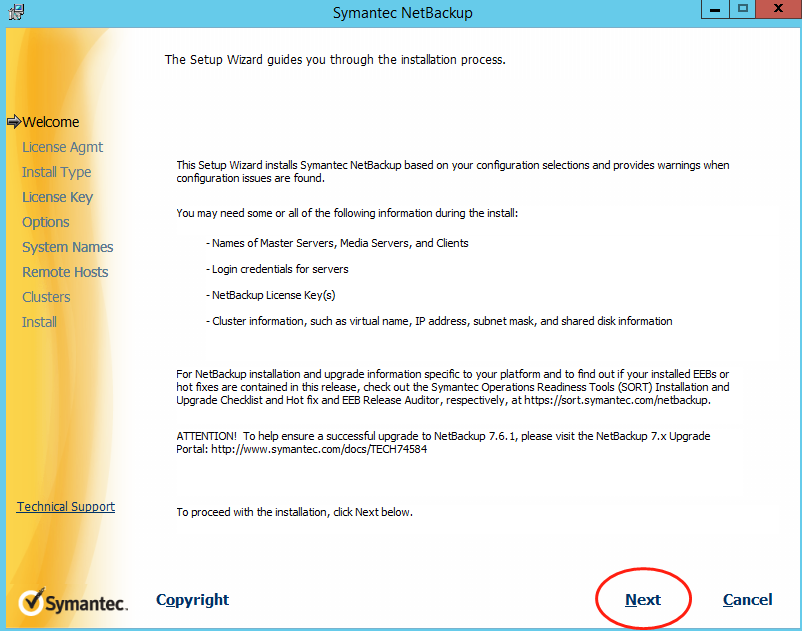
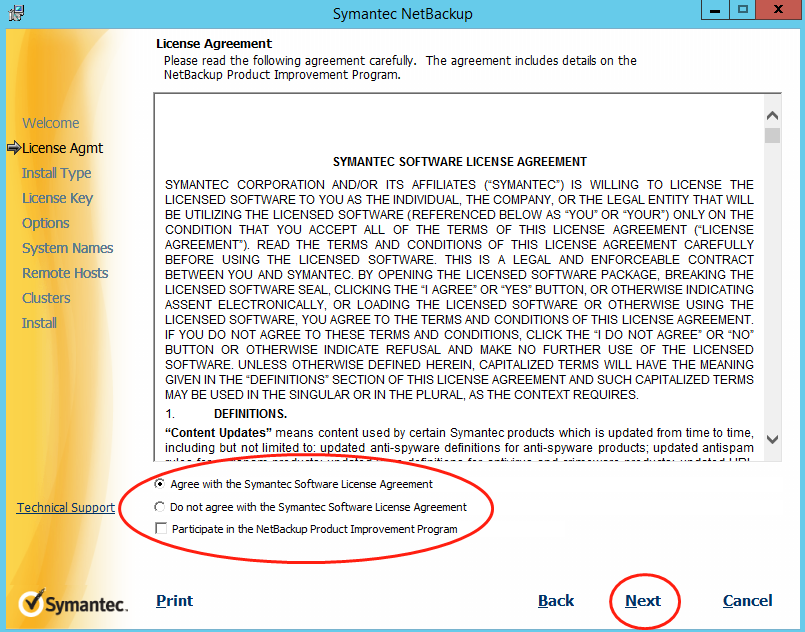
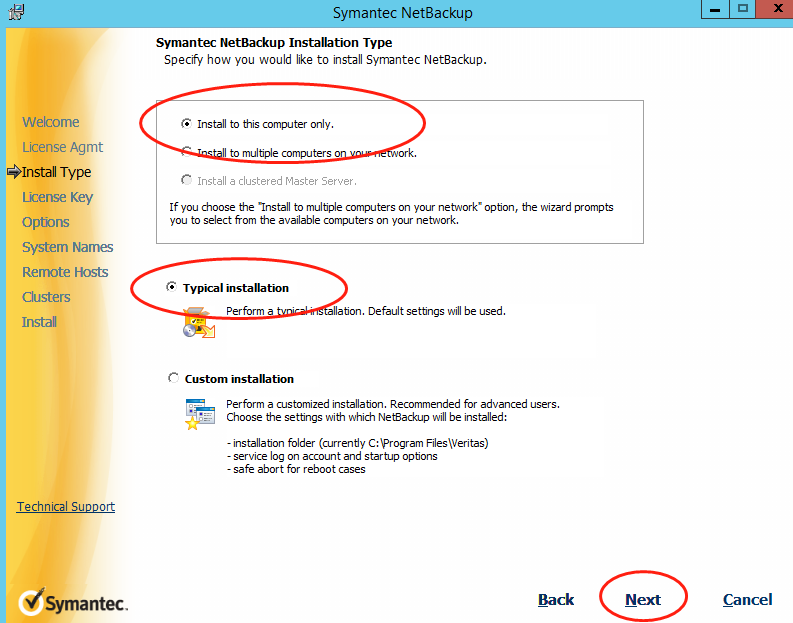
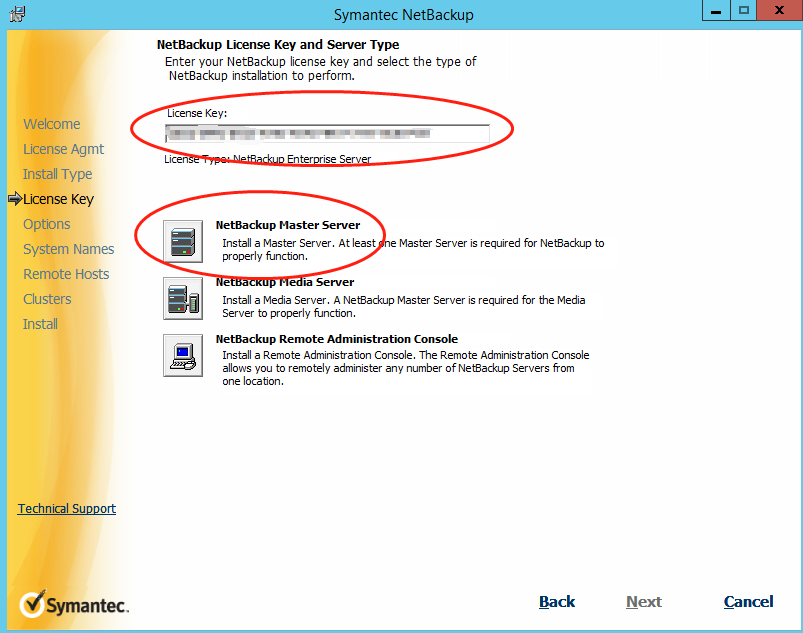
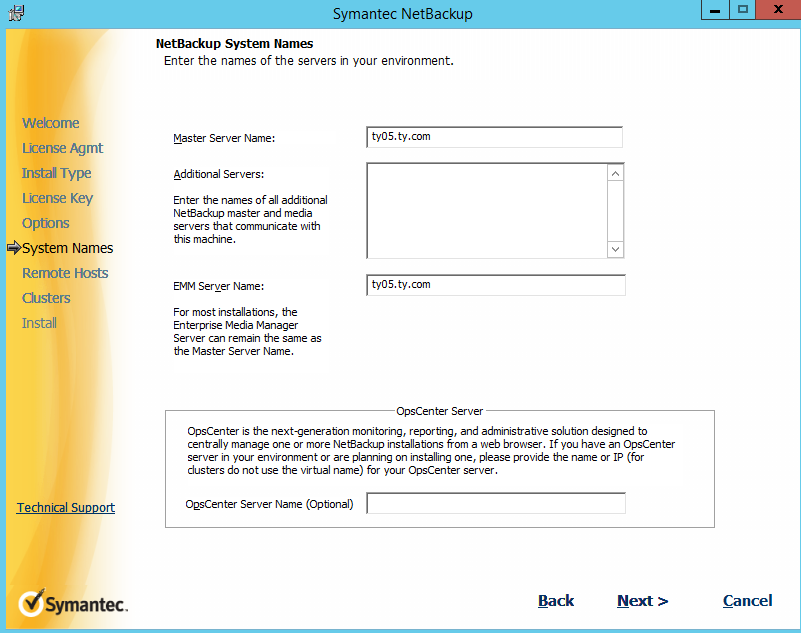
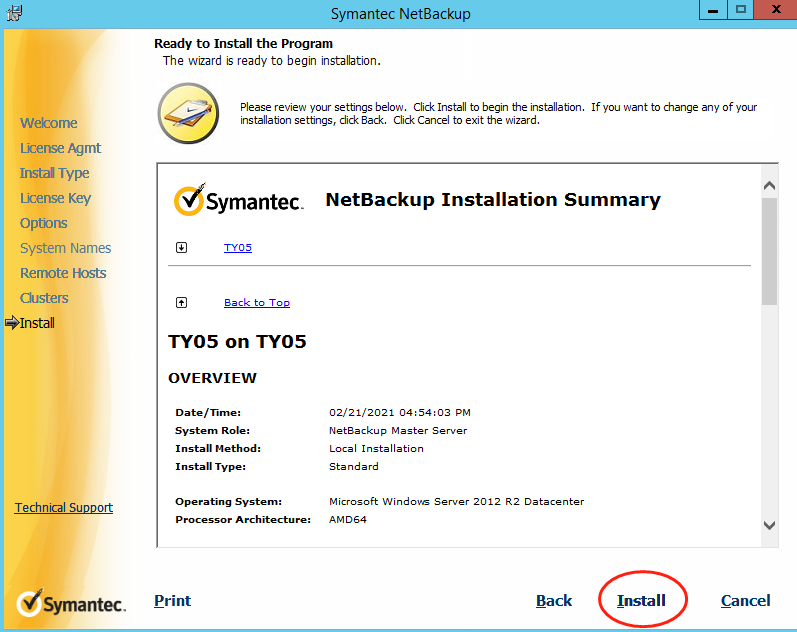
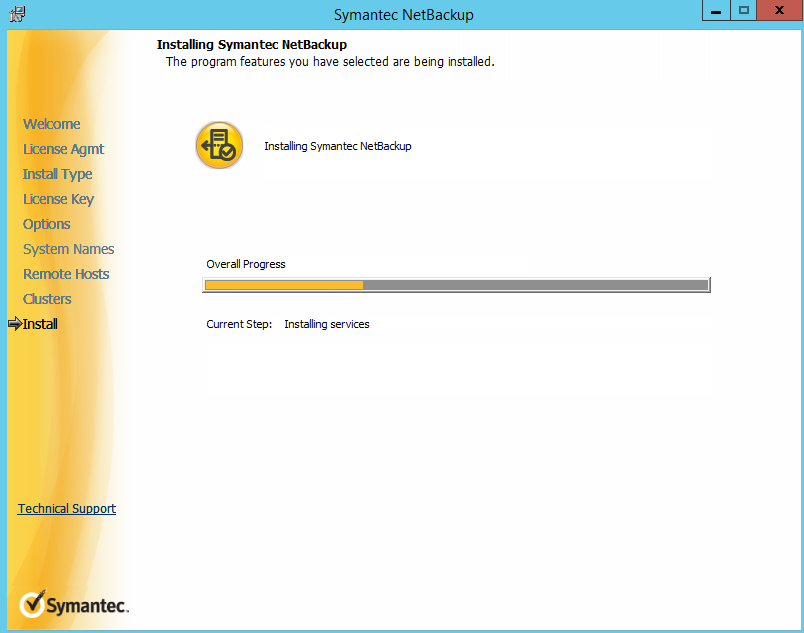
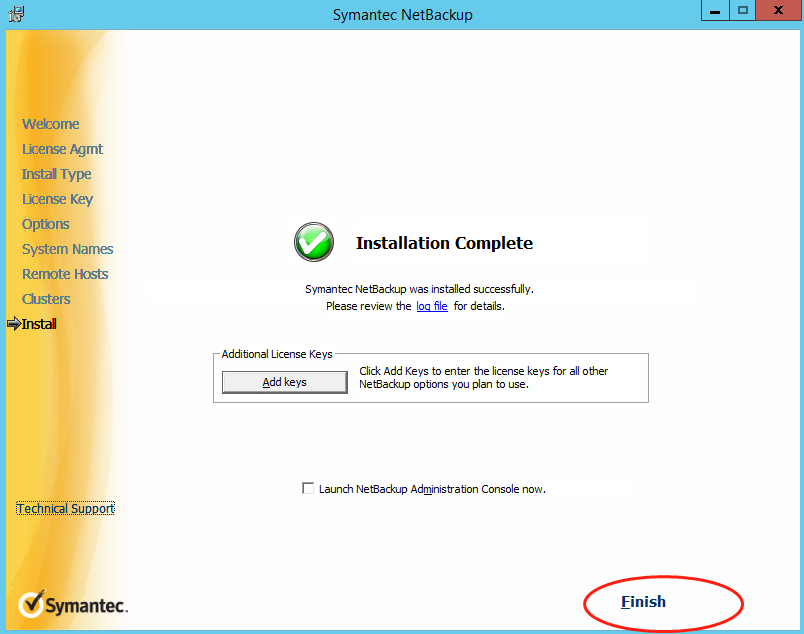
1.3 存储磁盘配置
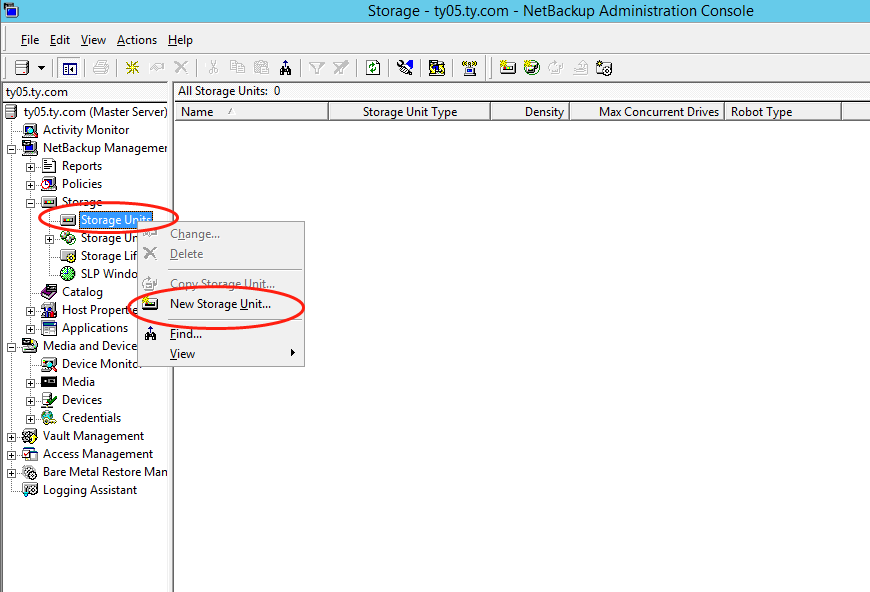
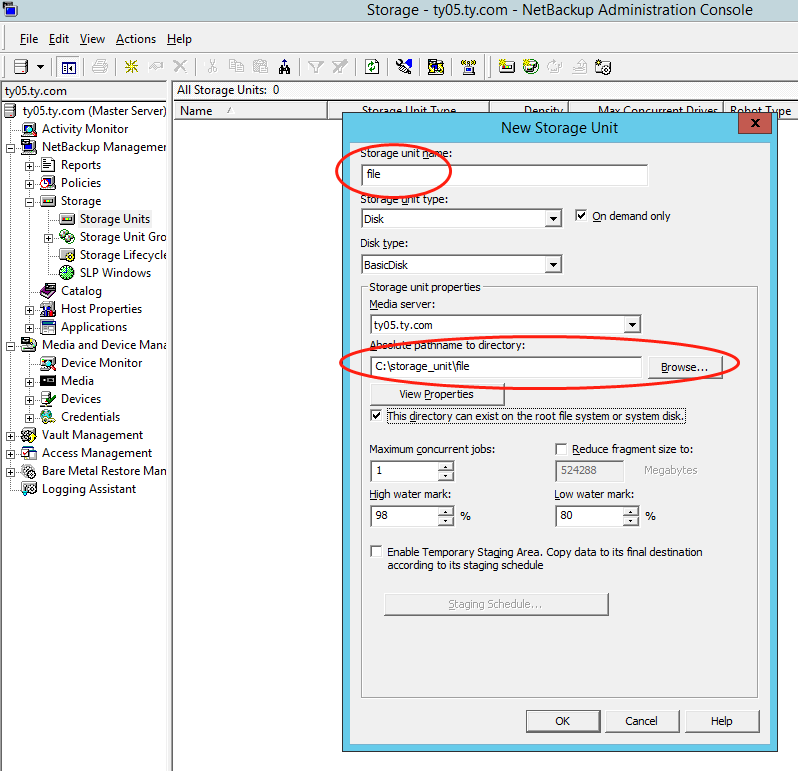
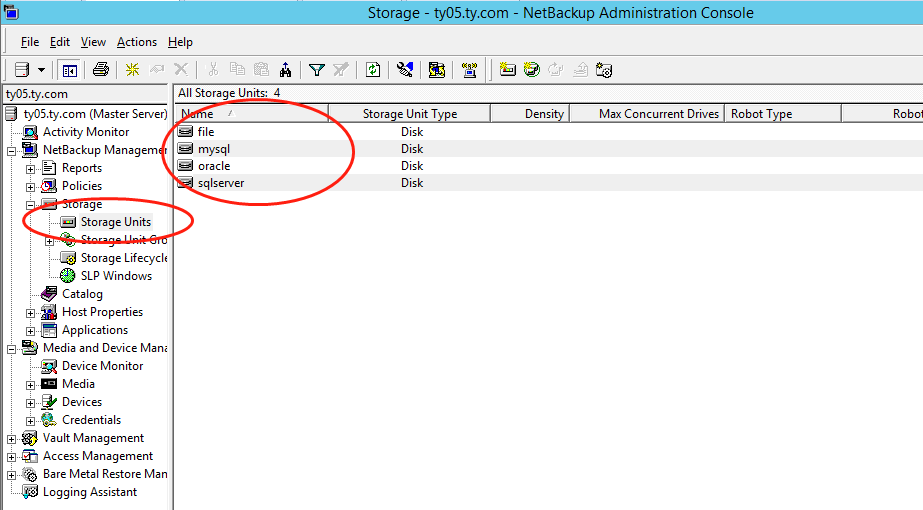
这里建了 4 个 Storage Units,因为要测试 4 种备份,文件备份、sqlserver、oracle、mysql备份
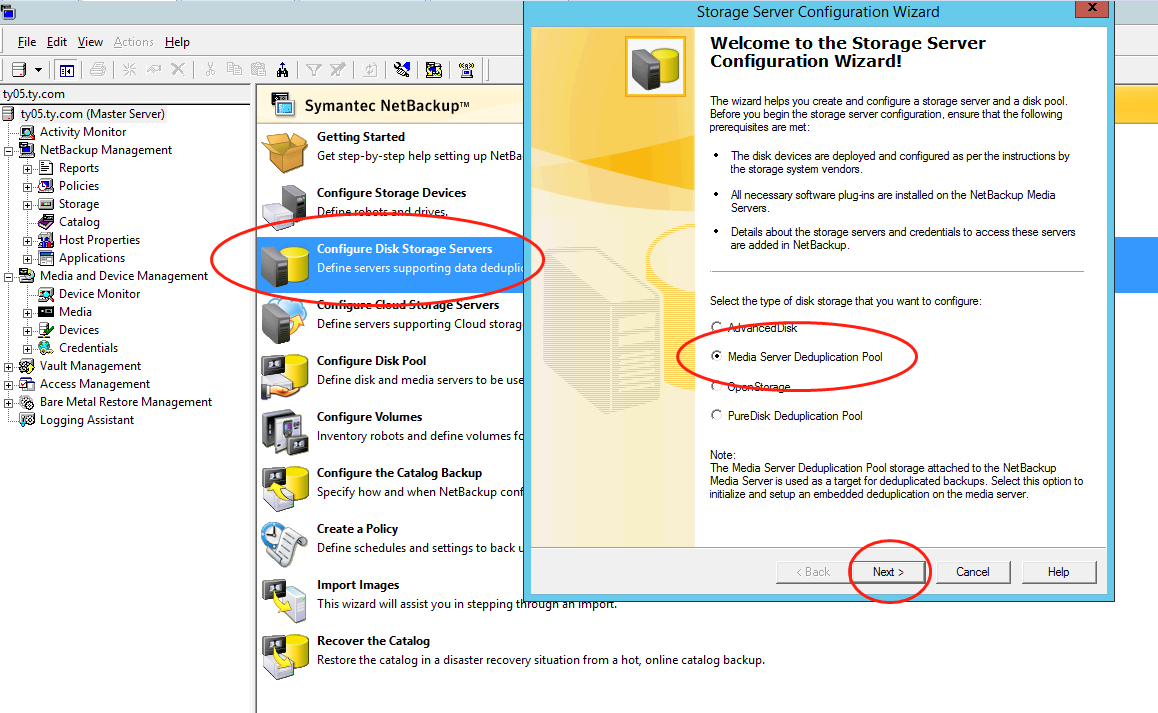
1.4 消重磁盘配置
作用:在備份時消除2次備份中相同的部份(保留其中一份),另外也保留差異的部份。
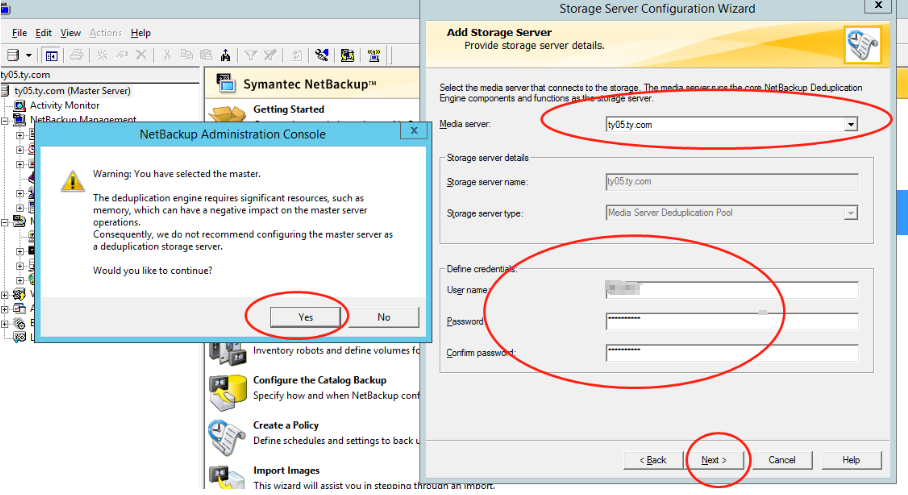
Username、password、confirm password 用 windows os 的账号密码即可。

选择存储路径,然后下一步
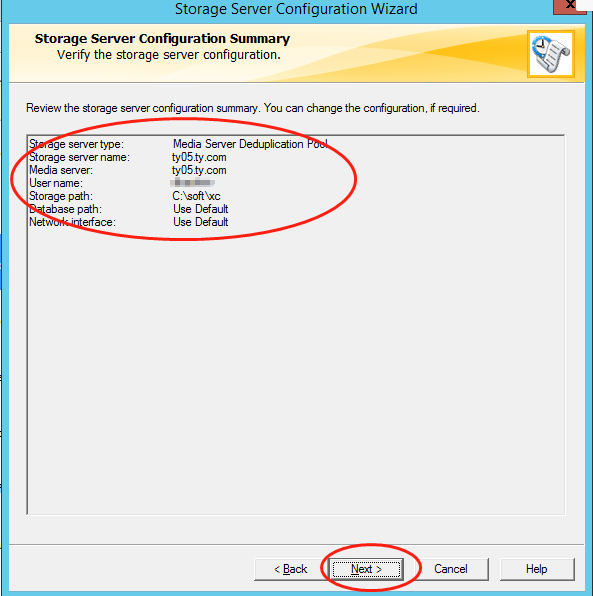
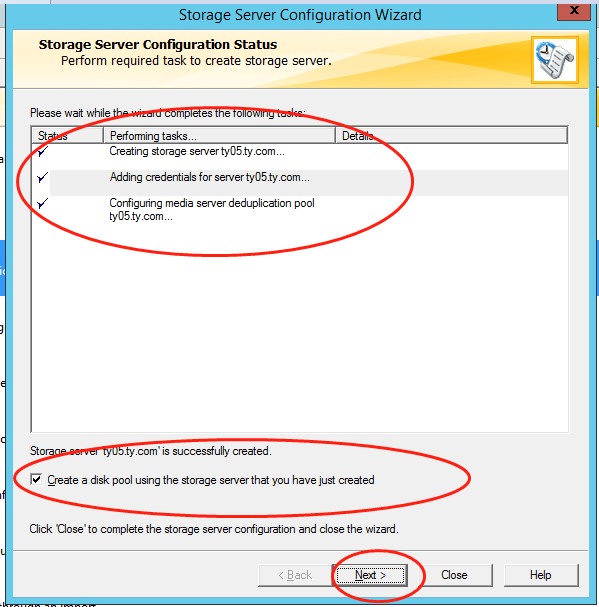
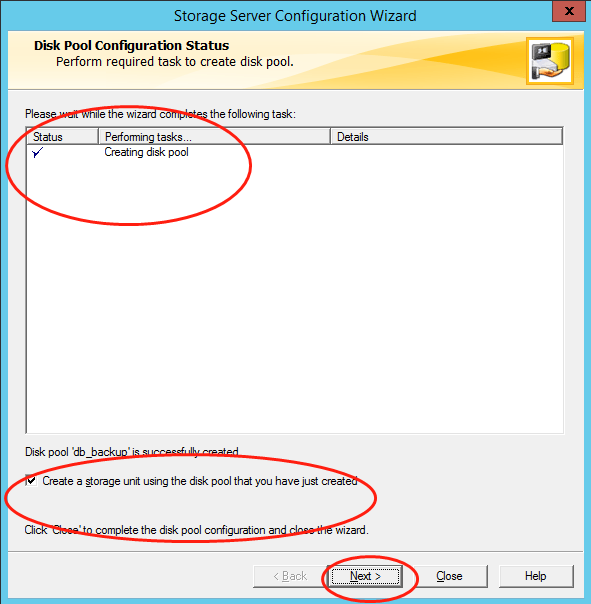
目前存储服务器已经配置完成,如果需要配置磁盘池则勾选下面的复选框,然后继续下一步即可继续配置,如果已经有磁盘池则不勾选复选框,点击close即可。
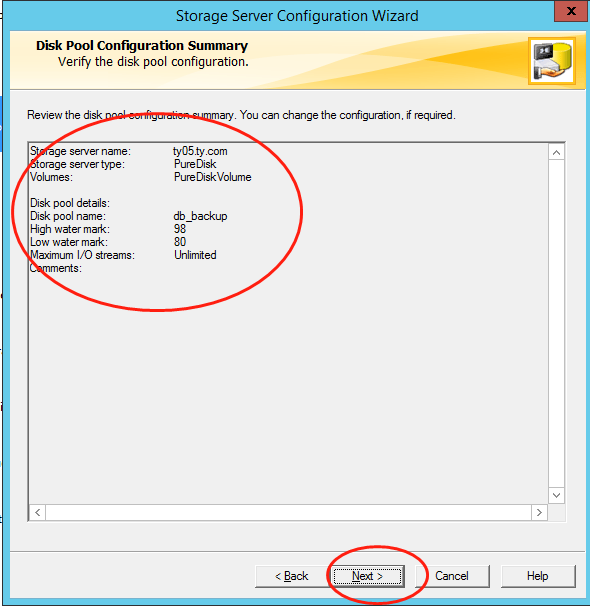
这里根据实际需要,选择复选框,然后点击next。
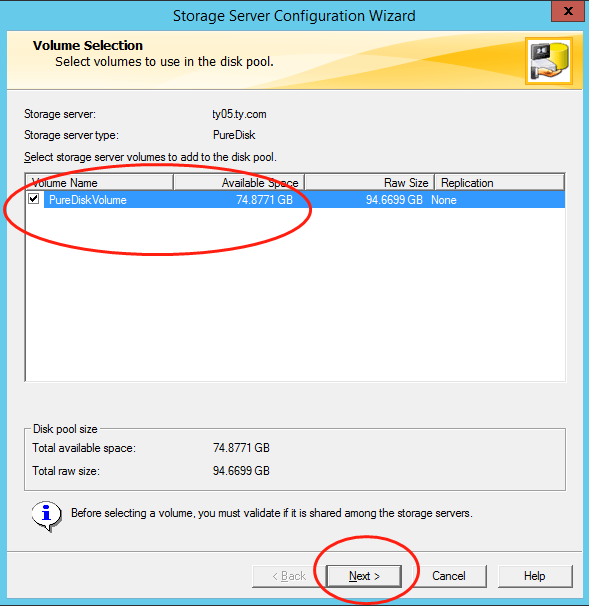
选择列表中的存储服务器以添加到磁盘池中
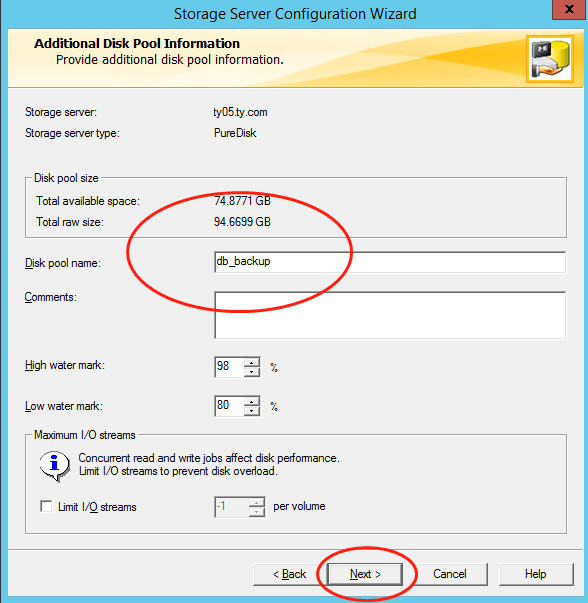
如果这是时候报错:authentication failed.RDSM has encountered an STS error。
可以试试如下方法:
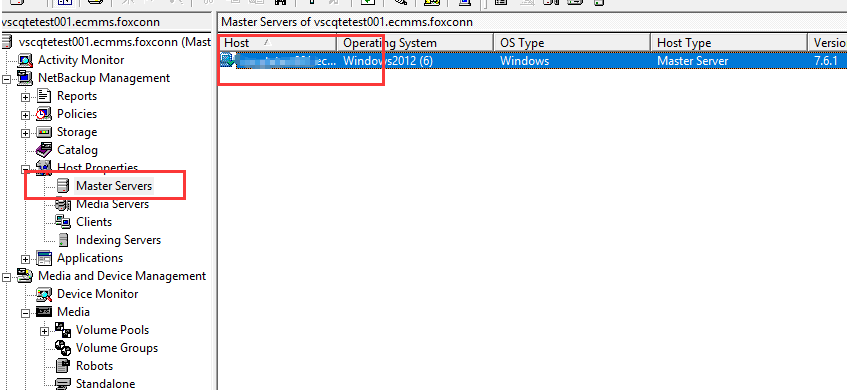
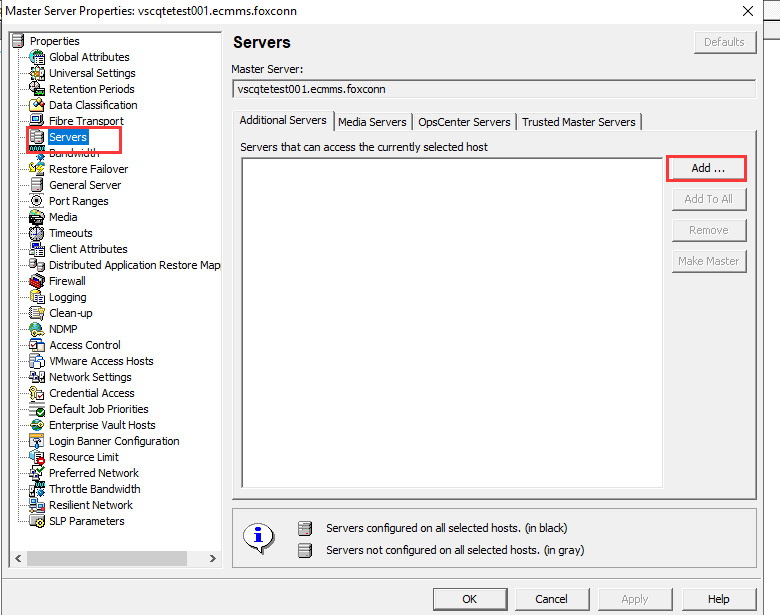
如果你有media server,添加,没有就写本机电脑名即可。
然后 cmd(管理员运行),cd 到 nbu 安装目录:C:\Program Files\Veritas\NetBackup\bin\admincmd
然后执行 bprdreq -rereadconfig ,重新加载配置

清空文件夹(用于创建去重的文件夹)
重复创建步骤,如果还报错,则重启,多试几次。
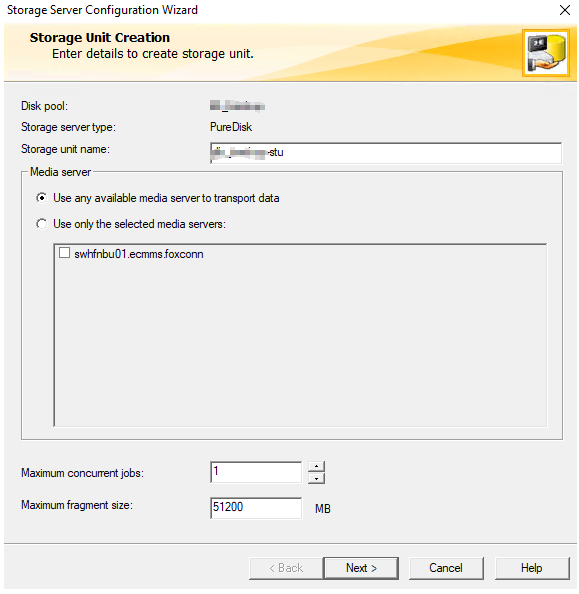
1.5 创建文件
# 使备份可以在异机恢复
windows:
C:\Program Files\Veritas\NetBackup\db\altnames\No.Restrictions

Linux:
/usr/openv/netbackup/db/altnames/No.Restrictions
2.NBU Client 安装
在安装之前,先在server端和客户端机器中,添加互相添加 host 信息,否则可能在安装客户端时无法连接到 server 端。
2.1 windows Client 安装
安装程序文件夹点击 Setup.exe 进行安装
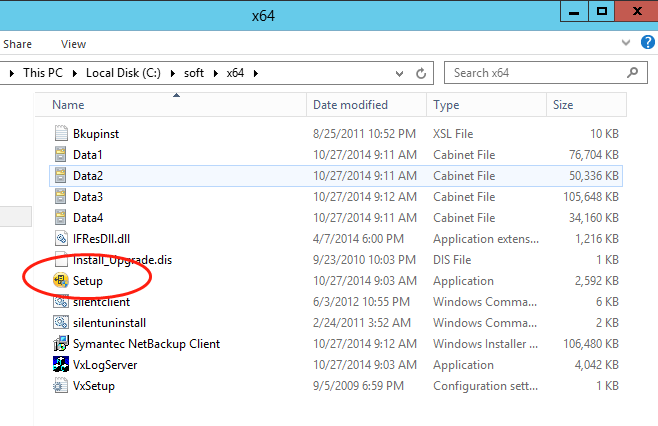
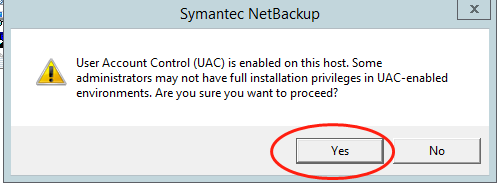
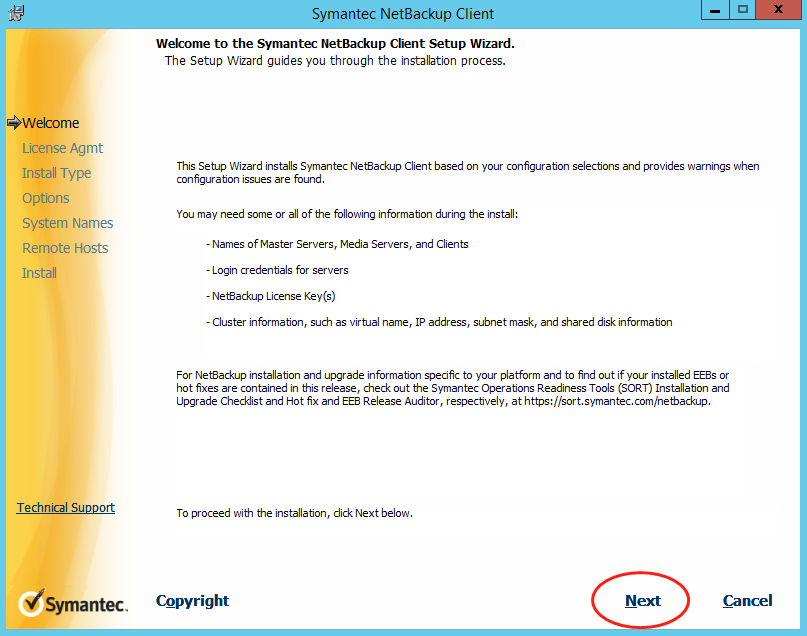
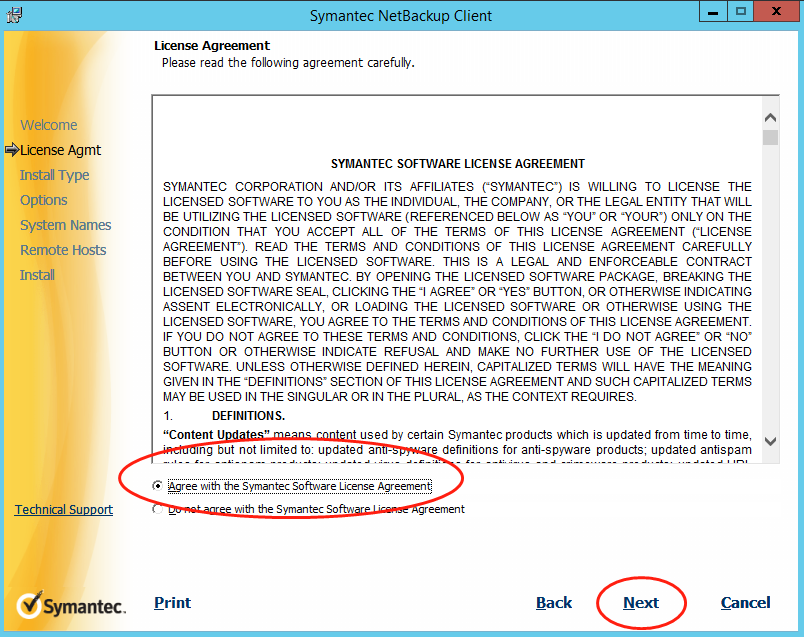
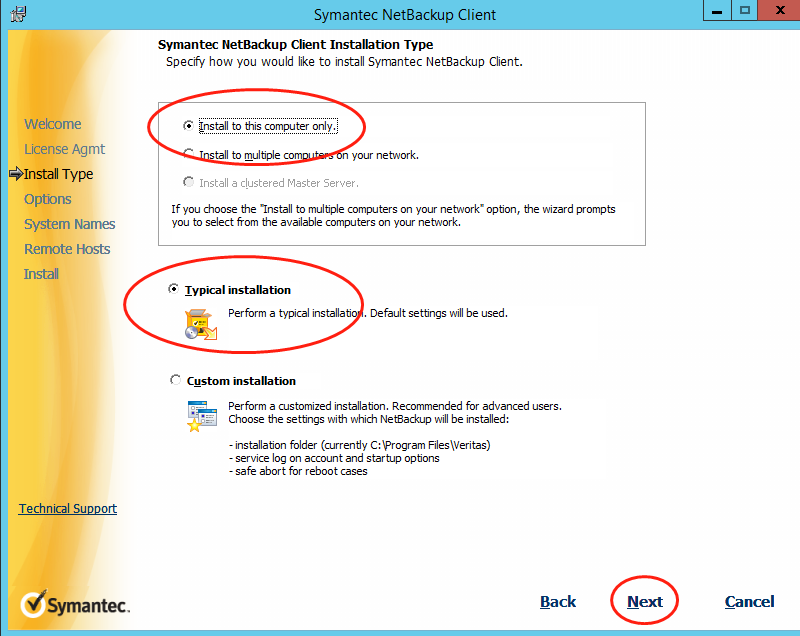
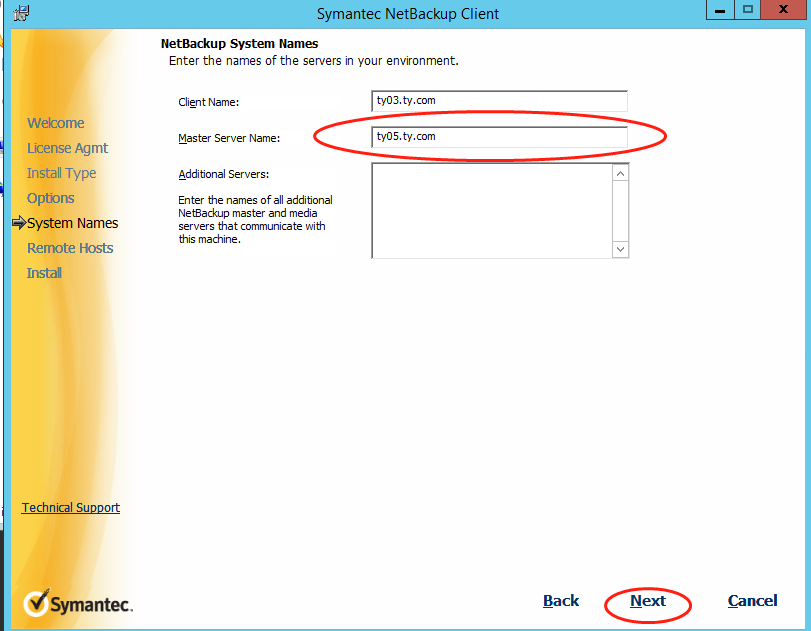

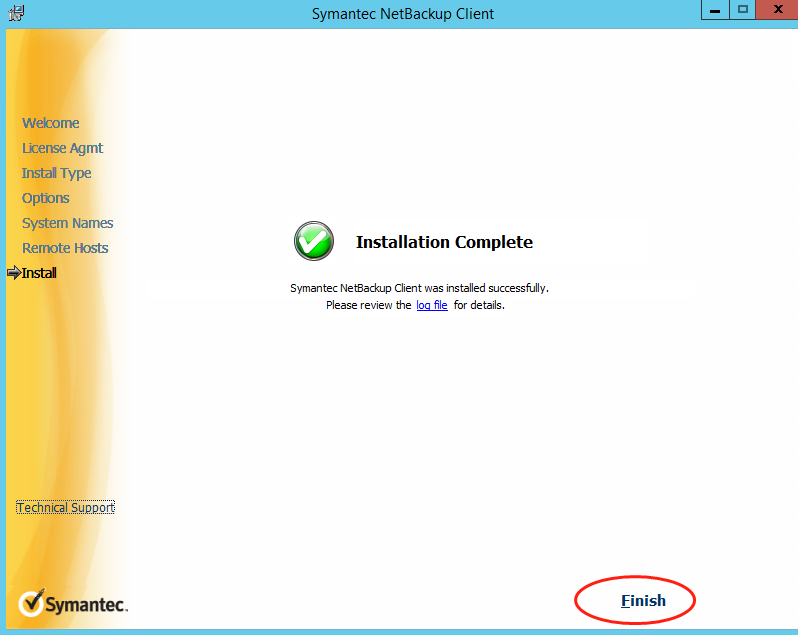
2.2 Linux Client 安装
解压 tar 包,cd 到 安装程序文件夹,执行 ./install 即可
[oracle@ty22 soft]$ tar -xvf NetBackup_7.6_CLIENTS.tar
[oracle@ty22 soft]$ cd NetBackup_7.6_CLIENTS
[oracle@ty22 NetBackup_7.6_CLIENTS]$ ll
total 124
drwxr-xr-x 2 oracle oinstall  4096 Feb  9  2012 Doc
-r-xr-xr-x 1 oracle oinstall 59354 Feb  9  2012 install
-r--r--r-- 1 oracle oinstall 49589 Feb  9  2012 LICENSE
drwxr-xr-x 4 oracle oinstall  4096 Feb  8  2012 NBClients
-r--r--r-- 1 oracle oinstall  2416 Feb  9  2012 VSM_README

安装要用 root 账号

按照提示,输入内容,一般是输入 2 个 y 后,会要求输入 NBU Server 的主机名,后面都填 y 即可。
输出内容如下:
[root@ty22 NetBackup_7.6_CLIENTS]# ./install
Symantec Installation Script
Copyright 1993 - 2012 Symantec Corporation, All Rights Reserved.
	Installing NetBackup Client Software

Please review the SYMANTEC SOFTWARE LICENSE AGREEMENT located on
the installation media before proceeding.  The agreement includes
details on the NetBackup Product Improvement Program.

For NetBackup installation and upgrade information specific to your
platform and to find out if your installed EEBs or hot fixes are
contained in this release, check out the Symantec Operations Readiness
Tools (SORT) Installation and Upgrade Checklist and Hot fix and EEB
Release Auditor, respectively, at https://sort.symantec.com/netbackup.

Do you wish to continue? [y,n] (y) y
Do you want to install the NetBackup client software for this client? [y,n] (y) y

This package will install Linux/RedHat2.6.18 client.

This package will install NetBackup client 7.6.

Enter the name of the NetBackup server : ty05.ty.com

Would you like to use "ty22" as the configured
name of the NetBackup client? [y,n] (y) y

Client binaries are located in /soft/NetBackup_7.6_CLIENTS/NBClients/anb/Clients/usr/openv/netbackup/client/Linux/RedHat2.6.18.

Saving client binaries for Linux/RedHat2.6.18.

Installing PBX...
Please wait while installation is in progress...
Installation completed Successfully
Installation log located here: /var/tmp/installpbx-56820-070320023922.log

Unpacking SYMCnbclt package.
Checking for pre-existing SYMCnbclt package.
Installing SYMCnbclt package.
Installation of SYMCnbclt was successful.
More details regarding SYMCnbclt can be found in file
/tmp/install_cltpkg_trace.56732 on ty22.

Terminating NetBackup and/or Media Manager processes.

Installing NB-Java.

Unpacking SYMCnbjava package.
Checking for pre-existing SYMCnbjava package.
Installing SYMCnbjava package.
Installation of SYMCnbjava was successful.
More details regarding SYMCnbjava can be found in file
/tmp/install_javapkg_trace.57638 on ty22.

Unpacking SYMCnbjre package.
Checking for pre-existing SYMCnbjre package.
Installing SYMCnbjre package.
Installation of SYMCnbjre was successful.
More details regarding SYMCnbjre can be found in file
/tmp/install_jrepkg_trace.57638 on ty22.
+ /bin/cp ./nbj.conf /usr/openv/java

Directory /usr/openv/logs does not exist.
No log files to migrate.

Checking network connections.
bp.conf: IP_ADDRESS_FAMILY = AF_INET: default value, no update needed

No [x]inetd process found.
No previous install detected.  Performing a fresh install.
+ Extracting PDDE agent package (/soft/NetBackup_7.6_CLIENTS/NBClients/anb/Clients/usr/openv/netbackup/client/Linux/RedHat2.6.18/pddeagent.tar.gz)...
Using /tmp/pdde_pkg to store temporary package data.
Unpacking SYMCpddea package.
Checking for pre-existing SYMCpddea package.
Installing SYMCpddea package.
Creating /etc/pdregistry.cfg.
Saving a copy of the uninstall script to /opt/pdde/pddeuninstall.sh
Checking to see if the PDDE configuration needs upgrading
Agent config file path found: {/etc/puredisk/Agent.cfg}
Making changes to /usr/openv/lib/ost-plugins/pd.conf
RESTORE_DECRYPT_LOCAL already in pd.conf
PREFETCH_SIZE already in pd.conf
META_SEGKSIZE already in pd.conf
Making changes to /usr/openv/lib/ost-plugins/pd.conf
FIBRECHANNEL already in pd.conf

PDDE install finished successfully.
Version now installed:
7.0000.0012.0118
Full PDDE installation log saved to: /var/log/puredisk/2020-07-03_02:39-pdde-install.log

The following automatic startup and shutdown scripts (respectively)
have been installed.  They will cause the NetBackup daemons to be
automatically shut down and restarted each time the system boots.

/etc/rc.d/rc2.d/S77netbackup
/etc/rc.d/rc3.d/S77netbackup
/etc/rc.d/rc5.d/S77netbackup
/etc/rc.d/rc0.d/K01netbackup
/etc/rc.d/rc1.d/K01netbackup
/etc/rc.d/rc6.d/K01netbackup

Successfully updated the session cache parameters.
Starting vnetd...
Starting bpcd...
Starting nbftclnt...
Starting bmrbd...

Installation of Java LiveUpdate agent succeeded.  Refer to file
/tmp/JLU-Log/JavaLiveUpdate-Install.log on ty22
for installation details.

Checking LiveUpdate registration for the following products: CLT
This may take a few minutes.

Product CLT is installed and will be registered.

Updating LiveUpdate registration now...this may take some time.

File /usr/openv/tmp/install_trace.56643 contains a trace of this install.
That file can be deleted after you are sure the install was successful.
2.2.1 建立 link 库文
如果是备份Oracle,则需要用oracle用户执行:
/usr/openv/netbackup/bin/oracle_link
至此,Netbackup 备份服务器、客户端安装部署完成
最后修改时间:2023-09-11 14:37:03
「喜欢这篇文章,您的关注和赞赏是给作者最好的鼓励」
关注作者
【版权声明】本文为墨天轮用户原创内容,转载时必须标注文章的来源(墨天轮),文章链接,文章作者等基本信息,否则作者和墨天轮有权追究责任。如果您发现墨天轮中有涉嫌抄袭或者侵权的内容,欢迎发送邮件至:contact@modb.pro进行举报,并提供相关证据,一经查实,墨天轮将立刻删除相关内容。


