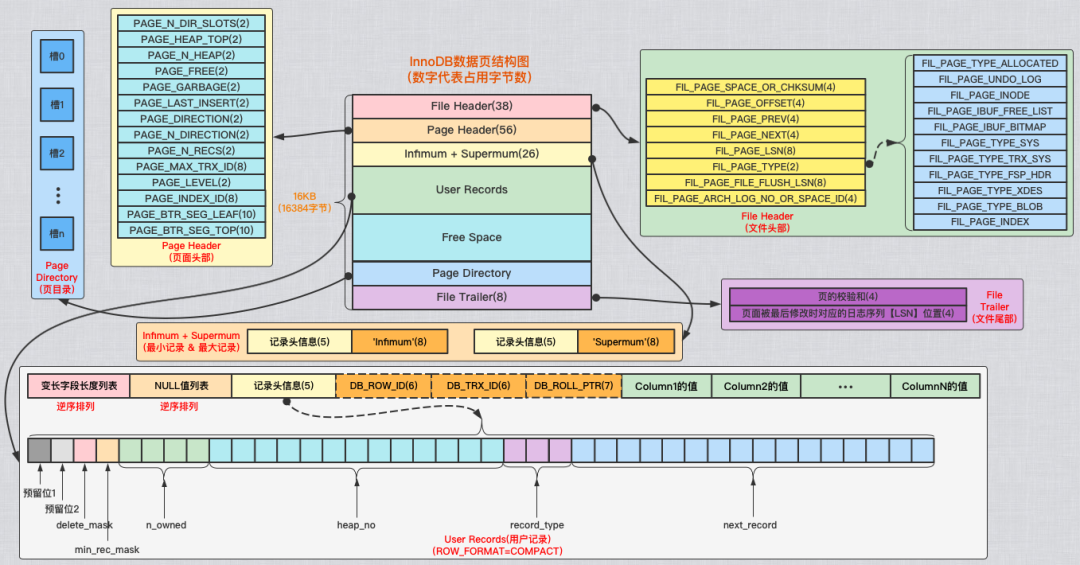
现在我们对InnoDB存储结构有了一定的了解,但好像只停留在概念上。今天,给大家安利一款可以解析InnoDB文件(.ibd文件)的利器:innodb_ruby。通过这个工具,可以直观看到我们之前学习过的各种属性信息 ,是不是很棒!?~它可以很好的作为一个大家学习研究MySQL InnoDB的工具。
GitHub地址:https://github.com/jeremycole/innodb_ruby
01 INSTALLATION
环境介绍 & 工具安装.
测试环境 & 软件版本介绍
还是有必要说一下服务器环境的,因为在最开始测试安装的时候,走了很多弯路,填了很多版本不兼容的坑,才有了现在的测试环境。
Linux操作系统版本:CentOS Linux release 7.5.1804 (Core)
innodb_ruby的安装的前提是需要服务器环境中有RubyGems(一个用于对Ruby组件进行打包的Ruby打包系统)、Ruby(一种纯粹的面向对象编程语言)、还有最重要的innodb_ruby的Ruby模块文件(innodb_ruby-[version].gem)。经过摸索和踩坑,得到以下版本信息:
RubyGems版本:2.6.4
Ruby版本:2.3.1p112 (2016-04-26 revision 54768)
innodb_ruby模块文件版本:0.9.13
innodb_ruby安装
wget https://cache.ruby-lang.org/pub/ruby/2.3/ruby-2.3.1.tar.gzwget https://rubygems.org/rubygems/rubygems-2.6.4.tgzwget https://rubygems.org/downloads/innodb_ruby-0.9.13.gem复制
第二种获取方式:百度网盘。由于联网的下载网址可能还要连接外网,所以,我已经把下载好的软件包放在了百度网盘,大家需要的直接下载下来,安装即可。(链接: https://pan.baidu.com/s/14BPKYRHG02-wTkVn1c7VHA,提取码: p8u4)
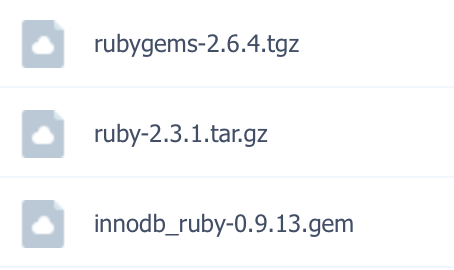
1、安装Ruby:
# 解压tar -xvf ruby-2.3.1.tar.gz# 编译安装cd ruby-2.3.1./configuremake && make install# 查看Ruby版本号(确认是否安装完成)ruby -v复制

2、安装RubyGems:
# 解压tar xvf rubygems-2.6.4.tgz# 使用安装脚本安装cd rubygems-2.6.4ruby setup.rb# 查看RubyGems的版本号(确认RubyGems是否安装成功)gem -v复制

3、安装innodb_ruby:
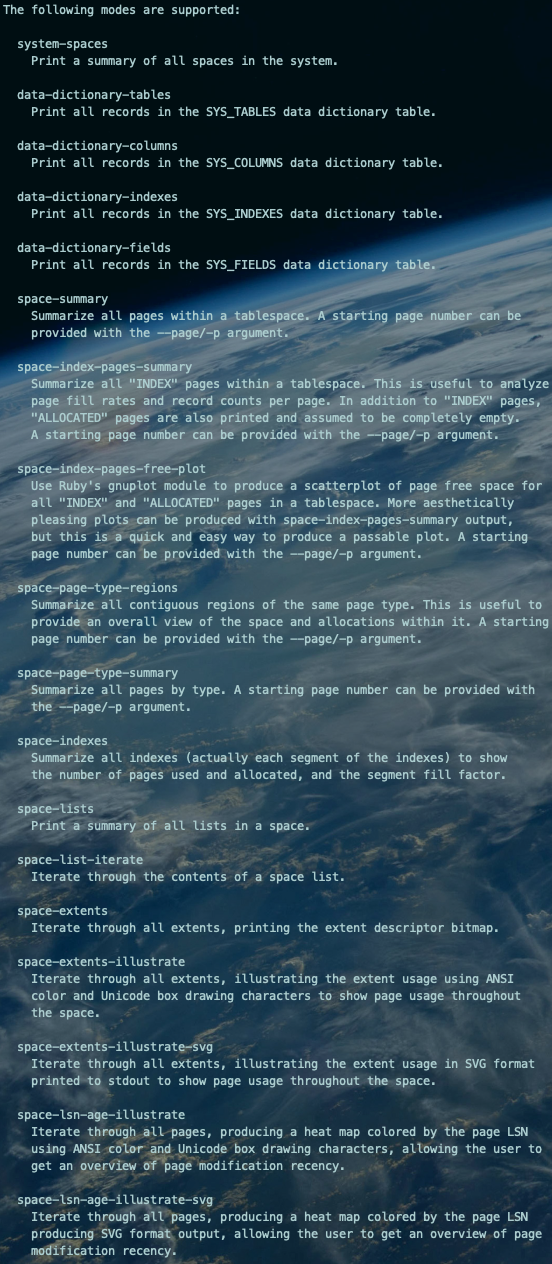
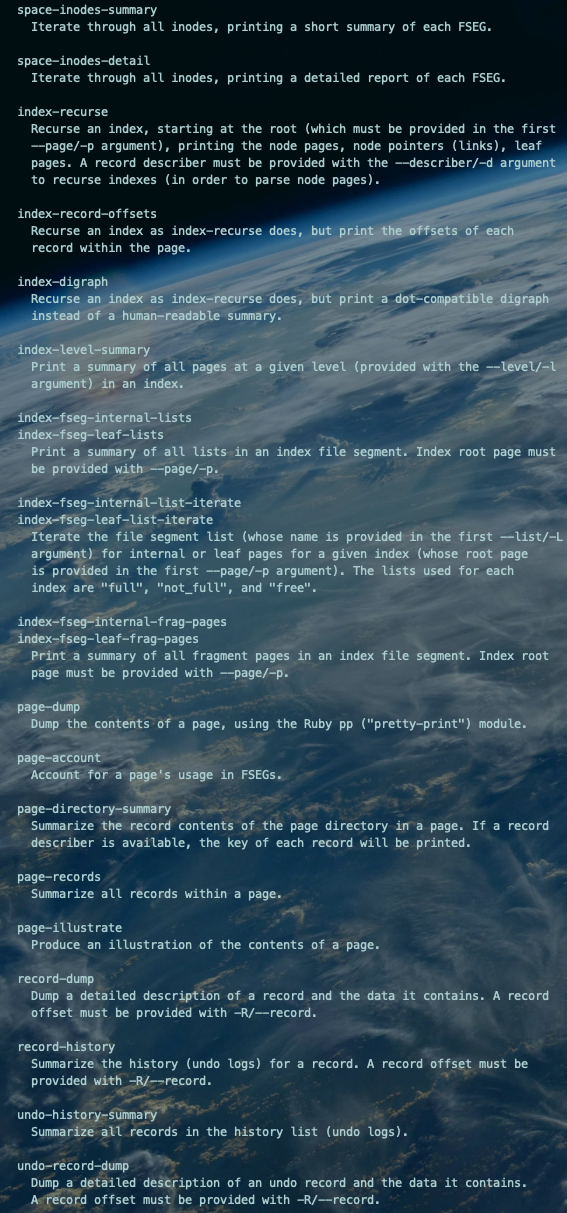
# 安装innodb_ruby-0.9.13.gemchmod 755 innodb_ruby-0.9.13.gemgem install innodb_ruby-0.9.13.gem# 安装成功标识[1xx.xx.x.xxx:root@sz-pg-backup-zookeeper-002:/root]# gem install innodb_ruby-0.9.13.gemFetching: bindata-2.4.8.gem (100%)Successfully installed bindata-2.4.8Successfully installed innodb_ruby-0.9.13Parsing documentation for bindata-2.4.8Installing ri documentation for bindata-2.4.8Parsing documentation for innodb_ruby-0.9.13Installing ri documentation for innodb_ruby-0.9.13Done installing documentation for bindata, innodb_ruby after 2 seconds2 gems installed# 再次确认是否安装成功innodb_space --help复制

02 DATA PREPARE
测试数据准备.
MySQL环境要求
MySQL版本:MySQL 5.5+,且<8.0 InnoDB独立表空间参数:innodb_file_per_table=ON InnoDB文件类型:innodb_file_format=Barracuda
测试数据准备
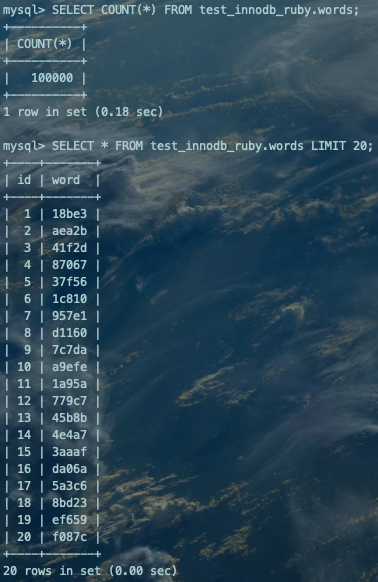
--Create DatabaseCREATE DATABASE test_innodb_ruby;--Create TableUSE test_innodb_ruby;CREATE TABLE `words` ( `id` INT(11) NOT NULL AUTO_INCREMENT, `word` VARCHAR(64) DEFAULT NULL,PRIMARY KEY (`id`)) ENGINE=InnoDB;--Create ProcedureDELIMITER ;;CREATE PROCEDURE idata()BEGIN DECLARE i INT; SET i=0; WHILE i<100000 DO INSERT INTO words(word) VALUES(SUBSTRING(MD5(RAND()),1,5)); SET i=i+1; END WHILE;END;;DELIMITER ;--Call ProcedureCALL idata();--Query DataSELECT COUNT(*) FROM test_innodb_ruby.words;SELECT * FROM test_innodb_ruby.words LIMIT 20;复制
查看一下对应的物理文件:

03 EXAMPLE
使用示例.
Spcae(表空间)相关
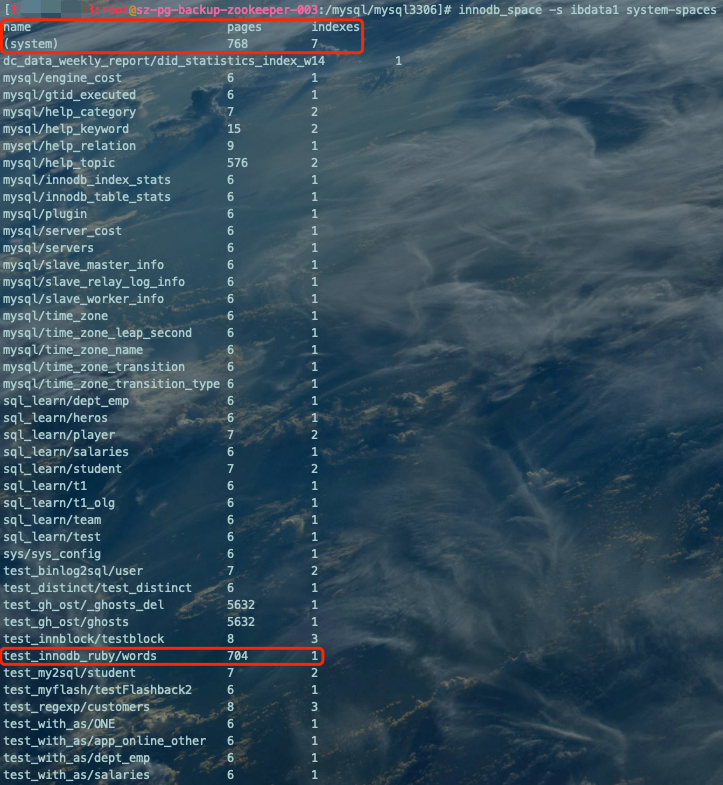
查看系统所有可用的表空间及统计信息:
innodb_space -s ibdata1 system-spaces复制
查看words表空间数据分布:
innodb_space -f test_innodb_ruby/words.ibd --table-name words space-page-type-regions复制

 ?
?FSP_HDR:表空间第1个区的第1个页,记录整个表空间的一些整体属性以及本组256个区的属性,整个表空间只有一个FSP_HDR类型的页面。如图,count列表示占用的Page数量为1; IBUF_BITMAP:表空间第1个区的第2个页,用来存储本组所有区的所有页面关于INSERT BUFFER的信息。如图,IBUF_BITMAP占用了1个Page; INODE:表空间第1个区的第3个页,InnoDB为每个索引定义了2个段,INODE Entry结构记录了关于段的相关属性信息。如图,INODE也占用了1个Page。
SELECT sys_tbls.name, sys_idxs.name, sys_idxs.index_id, type, sys_idxs.space, sys_idxs.PAGE_NOFROM information_schema.INNODB_SYS_INDEXES sys_idxs, information_schema.INNODB_SYS_TABLES sys_tblsWHERE sys_idxs.table_id = sys_tbls.table_id AND sys_tbls.name='test_innodb_ruby/words' AND sys_idxs.space <> 0;复制

查看words表数据行分布情况:
innodb_space -f test_innodb_ruby/words.ibd --table-name words space-index-pages-summary复制

show variables like 'innodb_fill_factor';复制
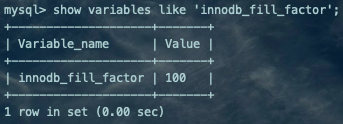

https://dev.mysql.com/doc/refman/5.7/en/innodb-physical-structure.html

解释一下上面的这两段话:
1、innodb_fill_factor=100,也会预留1/16的空闲空间,用于现存记录长度扩展使用;
2、预留1/16这个规则,只针对聚簇索引(Clustered Index)的叶子节点有效。对于聚簇索引的非叶子节点(Non-Leaf)以及辅助索引(叶子及非叶子)节点都没有这个规则;
3、innodb_fill_factor选项对B+树索引的叶子节点及非叶子节点都有效,但对数据类型TEXT/BLOB可能发生行溢出的Page无效;
4、在最佳的顺序插入数据模式下,Page填充率有可能可以达到15/16;
5、在随机插入数据模式下,Page填充率大约为1/2~15/16。
查看对应表空间的区(Extent)信息:
innodb_space -f test_innodb_ruby/words.ibd --table-name words space-extents-illustrate复制

查看段的相关属性信息(INODE):
innodb_space -f test_innodb_ruby/words.ibd --table-name words space-inodes-summaryinnodb_space -f test_innodb_ruby/words.ibd --table-name words space-inodes-detail复制


fseg_id为2的信息就比较丰富了:
INODE fseg_id=2, pages=224, frag=32 pages (4, 5, 6, 7, 8, 9, 10, 11, 12, 13, 14, 15, 16, 17, 18, 19, 20, 21, 22, 23, 24, 25, 26, 27, 28, 29, 30, 31, 32, 33, 34, 35), full=2 extents (64-127, 128-191), not_full=1 extents (192-255) (35/64 pages used), free=0 extents ()复制
分配的空间总共占用了224个Page,frag(空闲空间的碎片区:零散的页)共占用了32个Page,并且详细记录了这32个Page的页号(PAGE_NO),如下图红框标记所示的部分:

状态为FULL_FRAG的区(FULL_FRAG链表)总共有2个,共计占用两个完整的区128个Page,页号的区间分别是(64-127, 128-191),如下图红框标记所示的部分:

状态为not_full(FREE_FRAG)的区(FREE_FRAG链表)总共有1个,共计占用完整区(192-255)的35个Page,如下图红框标记所示的部分(黄色部分为已经占用的35个Page):

 ,是不是感觉很有意思。
查看索引结构、数据分布情况:
innodb_space -s ibdata1 -T test_innodb_ruby/words space-indexes复制

通过上面的讲解,这个space-indexes选项的输出结果大家应该都能看的懂。就不一一赘述了。
查看表空间所有页面的LSN(Log Sequence Number:日志逻辑序列号,不仅存在于Redo Log,同时,File Header部分的FIL_PAGE_LSN属性也记录着页面被最后修改时对应的日志序列位置):

Index(B+树索引)相关
遍历聚簇索引整个B+树,扫描所有页面(由于全部输出内容非常大,本例我们只输出部分):
innodb_space -s ibdata1 -T test_innodb_ruby/words -I PRIMARY index-recurse | head -n 25复制

遍历聚簇索引B+树的数据页Page、记录Record的偏移量:
innodb_space -s ibdata1 -T test_innodb_ruby/words -I PRIMARY index-record-offsets | head -n 20复制

和index-recurse选项功能类似,但是遍历出的结果是偏移量。
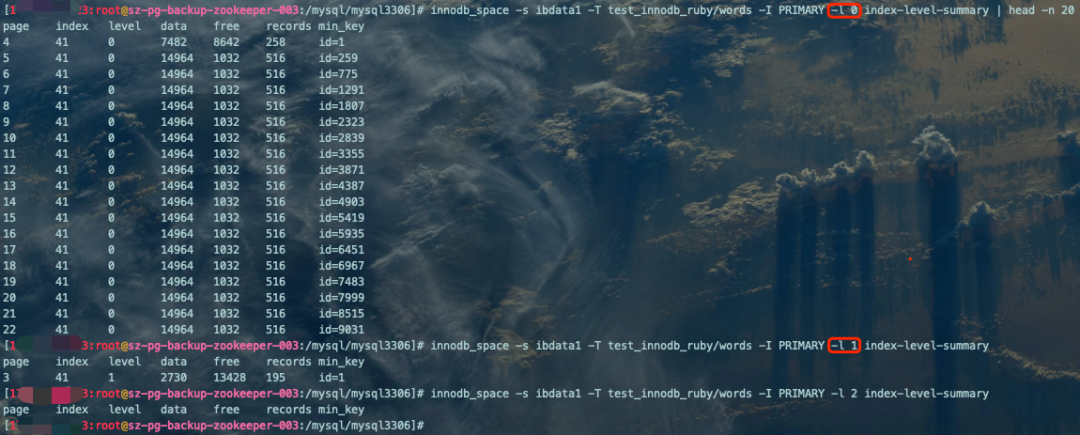
查看指定Level(B+树层高)的所有页面信息:
innodb_space -s ibdata1 -T test_innodb_ruby/words -I PRIMARY -l 0 index-level-summary | head -n 20复制
Page(数据页)相关
查看指定页号(PAGE_NO)的数据页说明信息:
innodb_space -s ibdata1 -T test_innodb_ruby/words -p 3 page-account复制


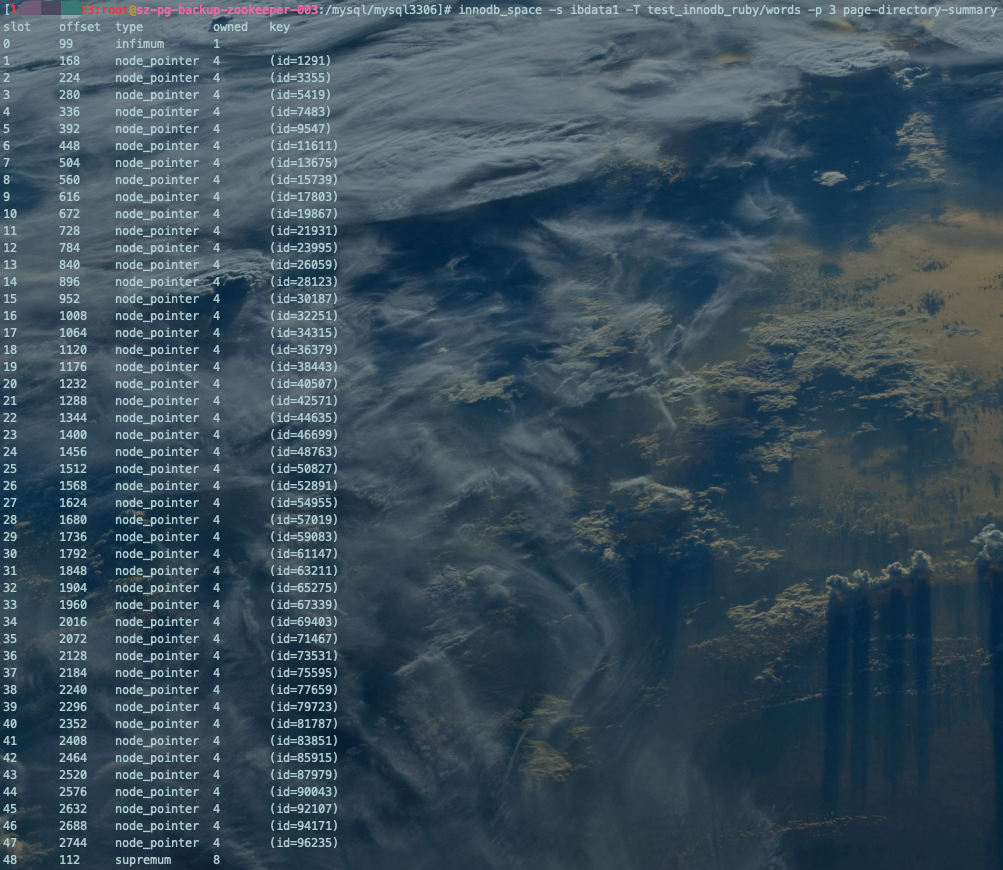
查看指定页号(PAGE_NO)页目录(Page Directory,Slot,槽)的信息:
innodb_space -s ibdata1 -T test_innodb_ruby/words -p 3 page-directory-summary复制
查看聚簇索引、辅助(二级)索引Page存储记录Record信息:
alter table test_innodb_ruby.words add index idx_word(word);复制
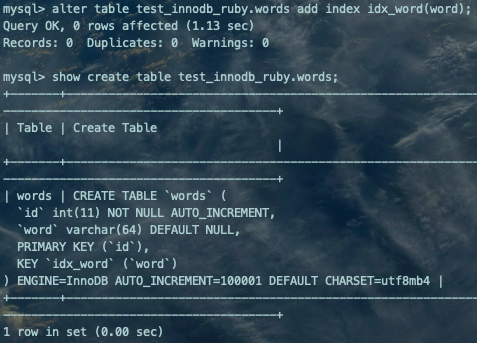
然后看下新的索引结构分布情况:
innodb_space -s ibdata1 -T test_innodb_ruby/words space-indexes复制

由图可知,我们聚簇索引PRIMARY的根页面为PAGE_NO=3,二级索引idx_word的根页面为PAGE_NO=36,得到页号,我们来看下聚簇索引和二级索引存储数据的情况:
查看聚簇索引的非叶子节点(Clustered Index Non-Leaf)记录Record信息:
innodb_space -s ibdata1 -T test_innodb_ruby/words -p 3 page-records | head -n 10复制

如图,存储的是主键值+页号(PAGE_NO)。
查看聚簇索引的叶子节点(Clustered Index Leaf)记录Record信息:
innodb_space -s ibdata1 -T test_innodb_ruby/words -p 4 page-records | head -n 10复制

查看辅助索引的非叶子节点(Secondary Index Non-Leaf)记录Record信息:
innodb_space -s ibdata1 -T test_innodb_ruby/words -p 36 page-records | head -n 10复制

查看辅助索引的叶子节点(Secondary Index Leaf)记录Record信息:
innodb_space -s ibdata1 -T test_innodb_ruby/words -p 37 page-records | head -n 10复制

查看words表空间数据页Page的详细的各属性信息:
innodb_space -s ibdata1 -T test_innodb_ruby/words -p 3 page-dump复制
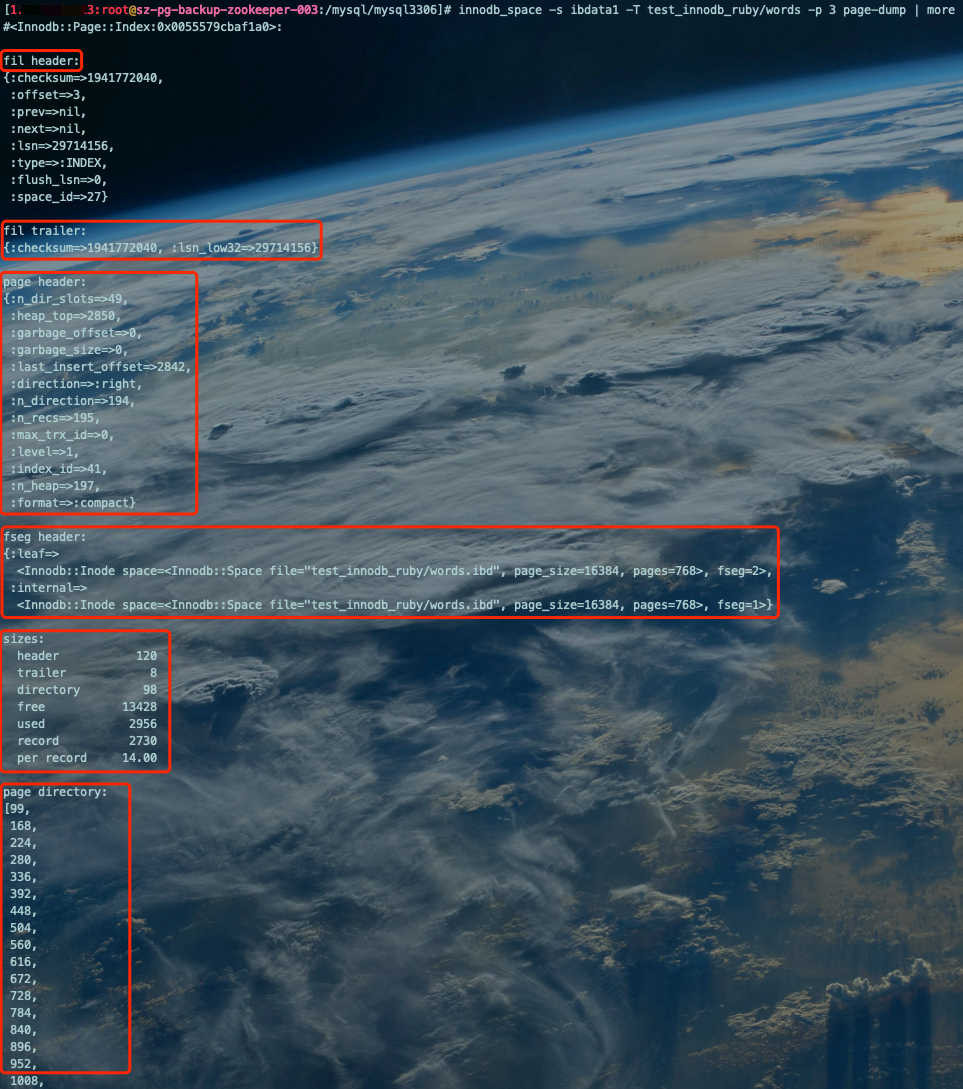
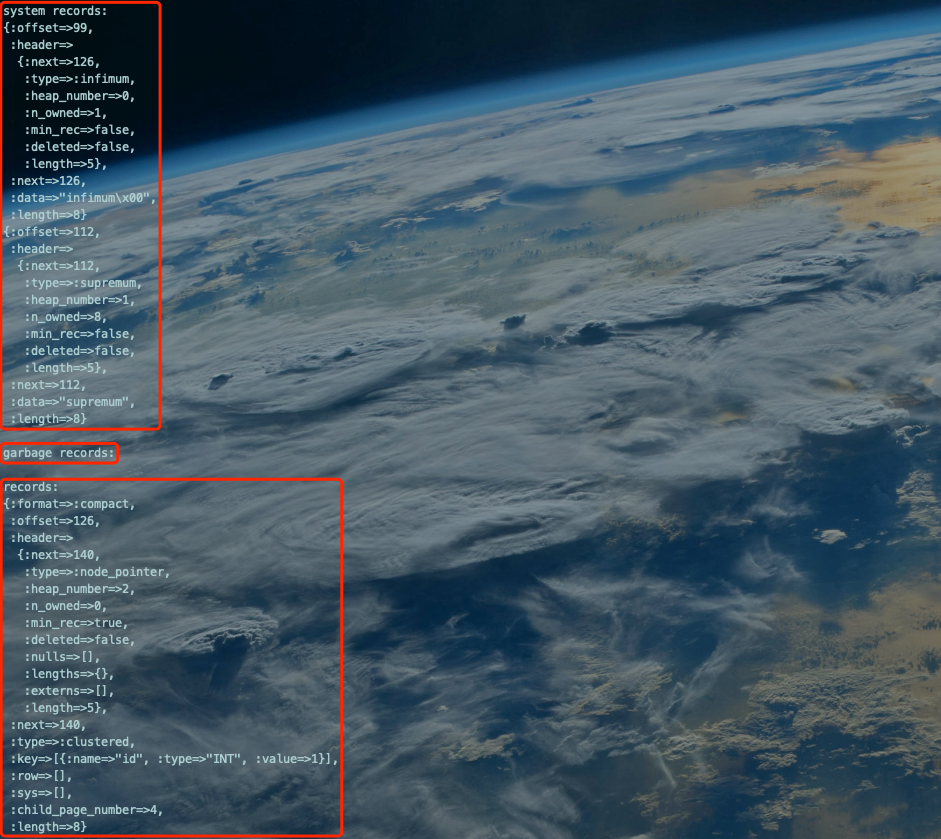
查看下聚簇索引的叶子节点的各项属性信息:
innodb_space -s ibdata1 -T test_innodb_ruby/words -p 4 page-dump | cat | grep -n -A 60 '^records:'复制
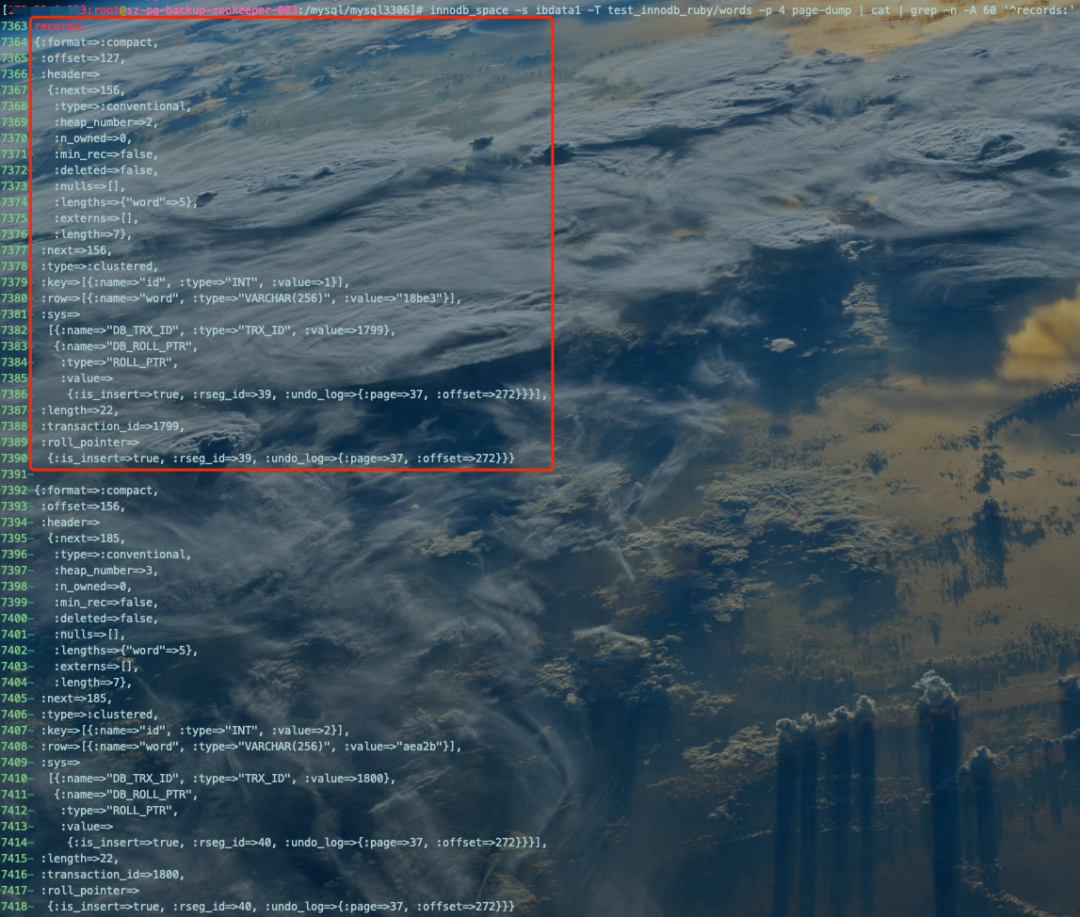
查看某个Page各属性信息空间占用情况及百分比:
聚簇索引非叶子节点页/根页面(Clustered Index Non-Leaf):
innodb_space -s ibdata1 -T test_innodb_ruby/words -p 3 page-illustrate复制

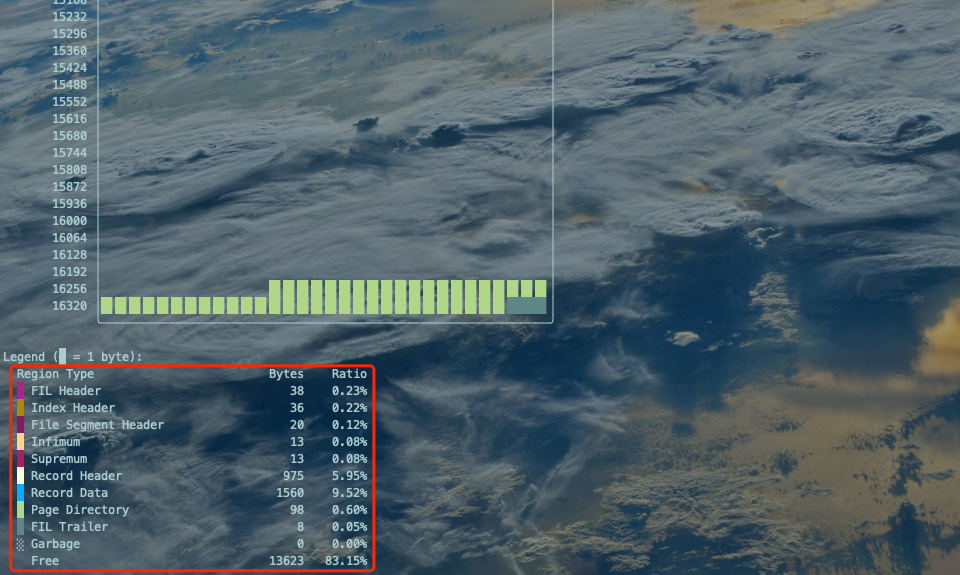
红框部分为颜色说明及各属性空间占用百分比。
聚簇索引的叶子节点页(Clustered Index Leaf):
innodb_space -s ibdata1 -T test_innodb_ruby/words -p 4 page-illustrate复制



Record(记录)相关
查看指定偏移量的记录Record详细信息:
innodb_space -s ibdata1 -T test_innodb_ruby/words -p 4 -R 7168 record-dump复制
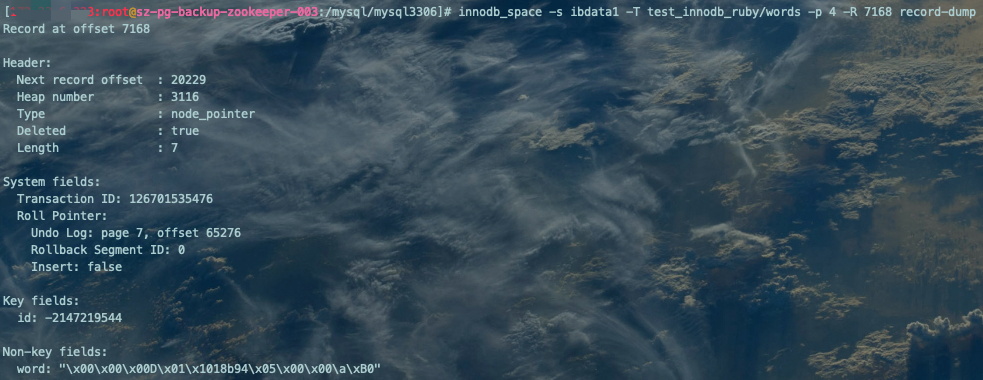
查看指定偏移量记录Record的历史记录(为指定偏移量记录的UNDO LOG):
UPDATE test_innodb_ruby.words SET word='88888' WHERE id=10;复制

抓取test_innodb_ruby.words表所有记录和Page的对应关系:
innodb_space -s ibdata1 -T test_innodb_ruby/words -I PRIMARY index-recurse > /tmp/index-recurse.log复制
定位id=10的记录所在的Page,获取PAGE_NO:
cat /tmp/index-recurse.log | grep -B 20 -n '(id=10)'复制

如图,我们看到数据已经被修改成'88888',且知道了id=10这行数据所在的Page是PAGE_NO=4。
获取words表空间数据页Page的详细信息:
innodb_space -s ibdata1 -T test_innodb_ruby/words -p 4 page-dump > /tmp/page-dump.log复制
获取id=10这行记录的偏移量:
cat /tmp/page-dump.log | grep -B 15 ':value=>10}'复制

innodb_space -s ibdata1 -T test_innodb_ruby/words -p 4 -R 388 record-history复制

04 END
小结.

参考资料
https://cloud.tencent.com/developer/article/1441324
https://www.jianshu.com/p/c51873ea129a

end
评论
 点赞
点赞


