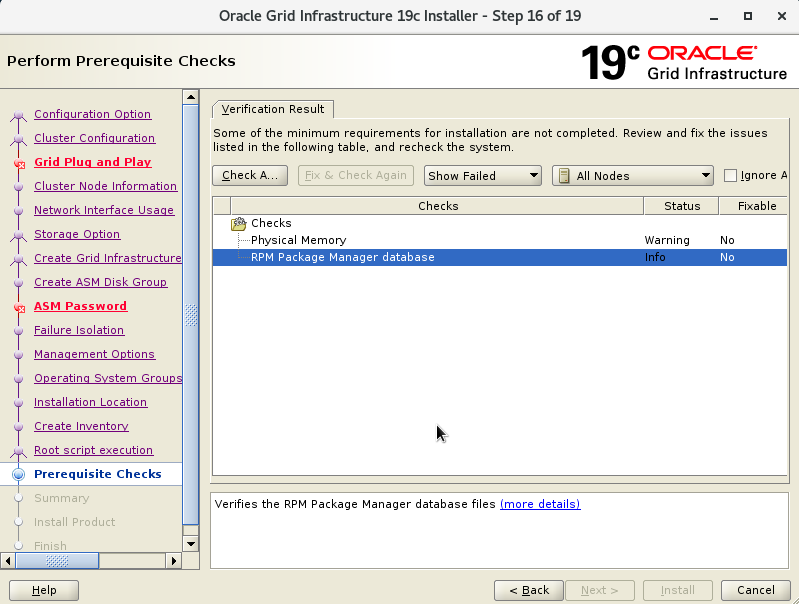
【报错】
DNS/NIS name service - This test verifies that the Name Service lookups for the Distributed Name Server (DNS) and the Network Information Service (NIS) match for the SCAN name entries. Error:
-
PRVG-11826 : DNS resolved IP addresses "" for SCAN name "scan-19rac" not found in the name service returned IP addresses "192.168.137.19" - Cause: The name resolution setup check for the indicated SCAN name failed because one or more of the indicated IP addresses obtained from DNS could not be found in the IP addresses obtained from the name service on the system as configured in the ''/etc/nsswitch.conf'' configuration file. - Action: Make sure all the DNS resolved IP addresses are present in the IP addresses obtained from the name service on the system as configured in the ''/etc/nsswitch.conf'' configuration file by reconfiguring the ''/etc/nsswitch.conf'' for the indicated SCAN name. Check the Name Service Cache Daemon (/usr/sbin/nscd) by clearing its cache and restarting it.
-
PRVG-11827 : Name service returned IP addresses "192.168.137.19" for SCAN name "scan-19rac" not found in the DNS returned IP addresses "" - Cause: The name resolution setup check for the indicated SCAN name failed because one or more of the indicated IP addresses obtained from name service on the system as configured in the ''/etc/nsswitch.conf'' configuration file could not be found in the IP addresses obtained from DNS. - Action: Make sure all the name service resolved IP addresses obtained from the ''/etc/nsswitch.conf'' configuration file are present in the DNS resolved IP addresses by reconfiguring ''/etc/nsswitch.conf'' configuration file for the indicated SCAN name. Check the Name Service Cache Daemon (/usr/sbin/nscd) by clearing its cache and restarting it.
Check Failed on Nodes: [19c-rac2, 19c-rac1]
Verification result of failed node: 19c-rac2 Details:
-
PRVF-4664 : Found inconsistent name resolution entries for SCAN name "scan-19rac" - Cause: The nslookup utility and the configured name resolution mechanisms, as defined in /etc/nsswitch.conf, returned inconsistent IP address information for the SCAN name identified. - Action: Check the Name Service Cache Daemon (/usr/sbin/nscd), the Domain Name Server (nslookup) and the /etc/hosts file to make sure the IP address for the SCAN names is registered correctly. Clear the stale IP addresses from the name service cache using the command ''/usr/sbin/nscd -i hosts''.
Back to Top
Verification result of failed node: 19c-rac1 Details:
-
PRVF-4664 : Found inconsistent name resolution entries for SCAN name "scan-19rac" - Cause: The nslookup utility and the configured name resolution mechanisms, as defined in /etc/nsswitch.conf, returned inconsistent IP address information for the SCAN name identified. - Action: Check the Name Service Cache Daemon (/usr/sbin/nscd), the Domain Name Server (nslookup) and the /etc/hosts file to make sure the IP address for the SCAN names is registered correctly. Clear the stale IP addresses from the name service cache using the command ''/usr/sbin/nscd -i hosts''.
Back to Top
【原因】
19c安装grid时会根据/etc/nsswitch.conf中配置的hosts: files dns myhostname
依次检查/etc/hosts和dns是否能解析scan域名,
因为没有使用 dns 做 scan 解析,全部用/etc/hosts
这个报错在11g中如果scan域名只有1个IP对应,是不会报错的,
但是19c会强制检查并报错!
应该是可以忽略的,但是有洁癖,所以死磕!
(通过virtual box安装,虚拟机DNS IP = 宿主机的默认网关)
【解决方案一】
1、永久主机名
【修改所有三个主机名:静态、瞬态和灵活主机名】
hostnamectl set-hostname 主机名
【查看所有三个主机名:静态、瞬态和灵活主机名】
hostnamectl
注:主机名可以有中横线,不能有下划线!
2、vi /etc/hosts
############### public ip #################
192.168.137.71 19c-rac1 19c-rac1.19com
192.168.137.72 19c-rac2 19c-rac2.19com
################## vip ####################
192.168.137.171 19c-rac1-vip 19c-rac1-vip.19com
192.168.137.172 19c-rac2-vip 19c-rac2-vip.19com
############## private ip #################
10.10.3.71 19c-rac1-priv 19c-rac1-priv.19com
10.10.3.72 19c-rac2-priv 19c-rac2-priv.19com
scan域名放在dnsmasq中配置
3、
yum install dnsmasq -y
yum erase bind -y
4、vi /etc/dnsmasq.conf
最后加上
addn-hosts=/etc/racdns
5、vi /etc/racdns
#scan
192.168.137.19 19c-rac-scan 19c-rac-scan.19com
192.168.137.29 19c-rac-scan 19c-rac-scan.19com
192.168.137.39 19c-rac-scan 19c-rac-scan.19com
6、public网卡加上DNS配置
vi /etc/sysconfig/network-scripts/ifcfg-enp0s3
DNS1=127.0.0.1
注意: dnsmasq默认运行在127.0.0.1上,所以必须设置成DNS1
如果要连接外网,可以加上DNS2等配置
7、
systemctl restart network
systemctl status network
检查是否正常启动
8、
systemctl restart NetworkManager
systemctl status NetworkManager
检查是否可以连接外网
ping ....
9、
systemctl start dnsmasq
systemctl enable dnsmasq
systemctl status dnsmasq
检查是否正常启动
nslookup scan域名
【验证1】
grid最后检查时还是会报一样的错误,只能尝试使用传统的DNS来处理
【解决】
yum install bind* -y
------------------------------------------
vi /etc/named.conf
在include "/etc/named.rfc1912.zones";前面加入配置:
zone "19c.com" IN {
type master;
file "19c.com.zone";
};
zone "137.168.192.in-addr.arpa" IN {
type master;
file "19c.com.arpa";
};
------------------------------------------
cp /var/named/named.localhost /var/named/19c.com.zone
------------------------------------------
vim /var/named/19c.com.zone
$TTL 1D
@ IN SOA 19c.com. rname.invalid. (
0 ; serial
1D ; refresh
1H ; retry
1W ; expire
3H ) ; minimum
@ IN NS scan.19c.com. #这里可以直接设置成scan域名
scan IN A 192.168.137.19
scan IN A 192.168.137.29
scan IN A 192.168.137.39
------------------------------------------
cp /var/named/named.localhost /var/named/19c.com.apra
------------------------------------------
vim /var/named/19c.com.arpa
$TTL 1D
@ IN SOA 19c.com. rname.invalid. (
0 ; serial
1D ; refresh
1H ; retry
1W ; expire
3H ) ; minimum
@ IN NS scan.19c.com.
19 IN PTR scan.19c.com
29 IN PTR scan.19c.com
39 IN PTR scan.19c.com #最后3行就是scan IP的最后3位
------------------------------------------
chmod a+r /var/named/*
chown root.named /var/named/*
named-checkconf -z /etc/named.conf
检查配置文件是否正确
systemctl restart named
------------------------------------------
public网卡加上DNS配置
DNS1=192.168.137.71
注意:dns server运行在192.168.137.71上,所以必须设置成DNS1
如果要连接外网,可以加上DNS2等配置
------------------------------------------
systemctl restart network
systemctl status network
检查是否正常启动
cat /etc/resolv.conf
检查是否自动加入DNS server的配置
systemctl enable named
重启2台虚拟机,重新安装grid发现不再有DNS的报错提示!


