


Netty源码解析
这里建议大家先把前面的知识先学完再来看,不然相对有点吃力,前置知识传送门:《BIO&NIO》和《Netty核心组件》由于netty框架的源码很多,这里对照着NIO着重讲一下源码:
Register: AbstractChannel.register0
Selector:
Accept:ServerBootstrapAcceptor
Read:NioByteUnsafe.read()
Write:AbstractChannel.flush0()
Register
进入到AbstractChannel中,查看register0方法:
private void register0(ChannelPromise promise) {
            try {
                // 检查注册过程中,信道是否还打开
                // 因为当寄存器调用在eventLoop之外时,它可能同时被关闭
                if (!promise.setUncancellable() || !ensureOpen(promise)) {
                    return;
                }
                boolean firstRegistration = neverRegistered;
                doRegister();
                neverRegistered = false;
                registered = true;

                // 确保handlerAdded可以被调用
                // 用户可能已经通过ChannelFutureListener中的管道触发了事件
                pipeline.invokeHandlerAddedIfNeeded();

                safeSetSuccess(promise);
                pipeline.fireChannelRegistered();
                // 只有在通道从未注册的情况下才触发channelActive。这可以防止重复使用
                // 如果信道被重新注册或注销,则重新激活信道,
                if (isActive()) {
                    if (firstRegistration) {
                        pipeline.fireChannelActive();
                    } else if (config().isAutoRead()) {
                        // 信道已经被注册并且已经设置了autoRead,意味着要进入读状态
                        beginRead();
                    }
                }
            } catch (Throwable t) {
                // 关闭信道,防止FD泄露
                closeForcibly();
                closeFuture.setClosed();
                safeSetFailure(promise, t);
            }
        }复制
进入doRegister查看其实现类AbstractNioChannel
protected void doRegister() throws Exception {
    boolean selected = false;
    for (;;) {
        try {
            //这里就是NIO底层注册信道的方法
            selectionKey = javaChannel().register(eventLoop().unwrappedSelector(), 0, this);
            return;
        } catch (CancelledKeyException e) {
            if (!selected) {
                // Force the Selector to select now as the "canceled" SelectionKey may still be
                //捕获但不移除,因为还没有调用Select.select()
                eventLoop().selectNow();
                selected = true;
            } else {
                // 我们之前在选择器上强制执行了选择操作,但 SelectionKey 仍然被缓存
                // 不知道原因,是JDKbug嘛
                throw e;
            }
        }
    }
}复制
Selector
注册完成后进入选择器,按着上面注册的源码和我一起进入selector中:
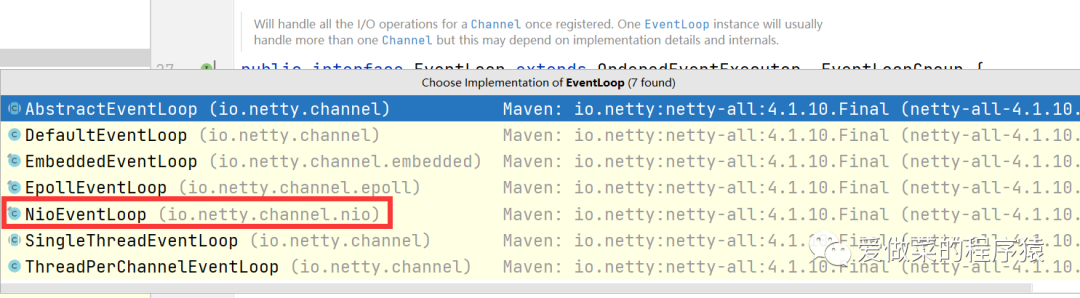
右键点击eventLoop->EventLoop接口->NioEventLoop

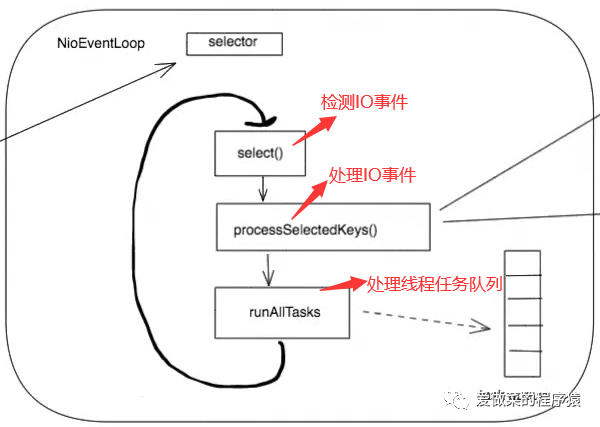
进入到NioEventLoop中,找到run这个方法,我把run方法归纳为三个功能:
通过select()检测IO事件
通过processSelectedKeys()处理IO事件
runAllTasks()处理线程任务队列
流程图解为下图,接下去讲讲源码。
run方法,源码讲解:
    protected void run() {
          // 永久循环
        for (;;) {
            try {
                  // ------------------------- 1 selector选择 -------------------
                  // 计算出选择selector策略
                switch (selectStrategy.calculateStrategy(selectNowSupplier, hasTasks())) {
                    case SelectStrategy.CONTINUE:// NioEventLoop不支持,所以检测到直接退出
                        continue;
                    case SelectStrategy.SELECT://NioEventLoop支持的唯一策略
                     // 若执行这里,说明当前任务队列中没有任务
                     //通过cas操作标识select方法的唤醒状态,执行select操作
                        select(wakenUp.getAndSet(false));
                    //(...)这里原本有一堆注释的,因为太占空间删了
                        if (wakenUp.get()) {
                    // 若当前线程刚被唤醒,selector立即将其选择的结果返回给我们
                            selector.wakeup();
                        }
                    default:
                    // fallthrough
                }
                    // ioRatio用于控制IO处理与任务队列中任务的处理所占时间比例
                cancelledKeys = 0;
                needsToSelectAgain = false;
                final int ioRatio = this.ioRatio;
                if (ioRatio == 100) { //这里和下面的区别在于,io的比例
                    try {
                        processSelectedKeys();
                    } finally {
                        // Ensure we always run tasks.
                        runAllTasks();
                    }
                } else {
                    // ------------------------- 2 处理就绪的IO -------------------
                    // 获取当前时间,即就绪channel的IO开始执行的时间点
                    final long ioStartTime = System.nanoTime();
                    try {
                    // 处理就绪channel的IO
                        processSelectedKeys();
                    } finally {
                    // ------------------------- 3 执行任务队列中的任务 -------------------
                    // IO操作总用时
                        final long ioTime = System.nanoTime() - ioStartTime;
                    // ioTime * (100 - ioRatio) / ioRatio 为任务队列中的任务执行可以使用的时长
                        runAllTasks(ioTime * (100 - ioRatio) / ioRatio);
                    }
                }
            } catch (Throwable t) {
                handleLoopException(t);
            }
            // Always handle shutdown even if the loop processing threw an exception.
            try {
                if (isShuttingDown()) {
                    closeAll();
                    if (confirmShutdown()) {
                        return;
                    }
                }
            } catch (Throwable t) {
                handleLoopException(t);
            }
        }
    }复制
总结:整个过程就是SELECT事件-->processSelectedKeys()-->runAllTasks。先选择SELECT策略,通过processSelectedKeys()方法去获取selector对象,最后根据ioRatio(IO处理与任务队列中任务的处理所占时间比例)选择对应的runAllTasks进行处理。
滑轮点击进入processSelectedKeys方法中:根据selectedKeys是否为空对其进行相应操作
selectedKeys不为空:调用优化后的方法
selectedKeys为空:调用普通方法,传入selector的key,使用迭代器进行循环放入
private void processSelectedKeys() {
    if (selectedKeys != null) { //如果selectedKeys不为空则调用优化后的方法
        processSelectedKeysOptimized();,selectedKeys
    } else {//为空则调用普通方法
        processSelectedKeysPlain(selector.selectedKeys());
    }
}复制
先进入优化后的方法processSelectedKeysOptimized():
private void processSelectedKeysOptimized() {
            // 当无网络事件发生时,selectedKeys.size=0, 不会发生处理行为
        for (int i = 0; i < selectedKeys.size; ++i) {
            // 当有网络事件发生时,selectedKeys 为各就绪事件
            final SelectionKey k = selectedKeys.keys[i];
            //  数组输出空项, 从而允许在channel 关闭时对其进行垃圾回收
            // See https://github.com/netty/netty/issues/2363
            //数组中当前循环对应的keys质空, 这种感兴趣的事件只处理一次就行
            selectedKeys.keys[i] = null;
            final Object a = k.attachment();
            //获取出 attachment,默认情况下就是注册进Selector时,传入的第三个参数  this===>   NioServerSocketChannel
            // todo 一个Selector中可能被绑定上了成千上万个Channel,  通过Key+attachment 的手段, 精确的取出发生指定事件的channel, 进而获取channel中的unsafe类进行下一步处理
            if (a instanceof AbstractNioChannel) {
            //进入这个方法, 传进入 感兴趣的key + NioSocketChannel
            //如果是AbstractNioChannel,转换成相应的channel, 调用
                processSelectedKey(k, (AbstractNioChannel) a);
            } else {
                @SuppressWarnings("unchecked")
                NioTask<SelectableChannel> task = (NioTask<SelectableChannel>) a;
                processSelectedKey(k, task);
            }

            if (needsToSelectAgain) {
                // null out entries in the array to allow to have it GC'ed once the Channel close
                // See https://github.com/netty/netty/issues/2363
                selectedKeys.reset(i + 1);
                selectAgain();
                i = -1;
            }
        }
    }复制
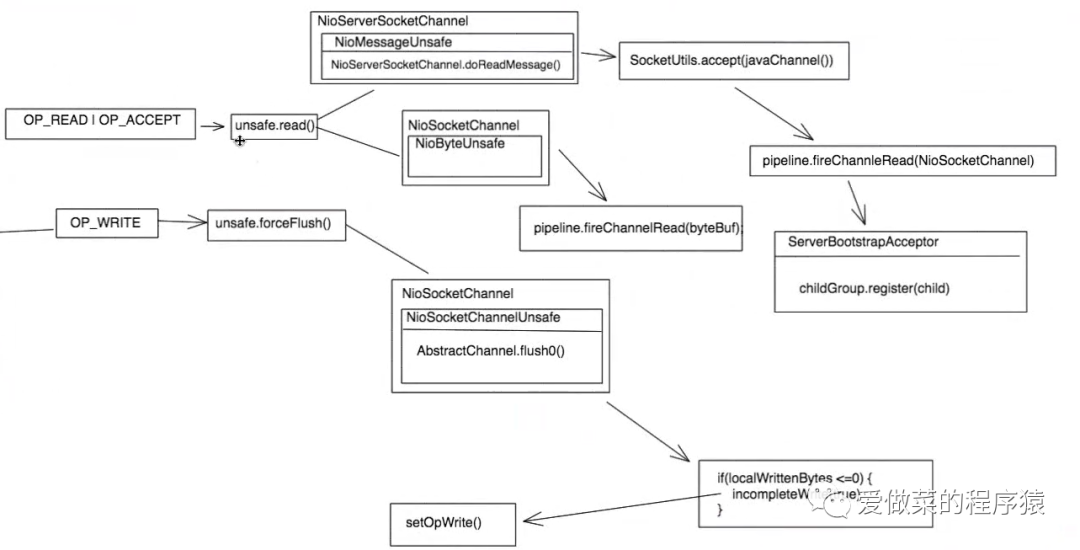
滑轮点击processSelectedKey方法,继续深入查看,比较重要的就以下两步:
OP_WRITE:使用 ch.unsafe().forceFlush()将字节流刷进读写里
OP_READ和OP_ACCEPT:使用 unsafe.read()进行读取, unsafe.read()内置判断是否为ACCEPT,所以也可以处理ACCEPT事件。
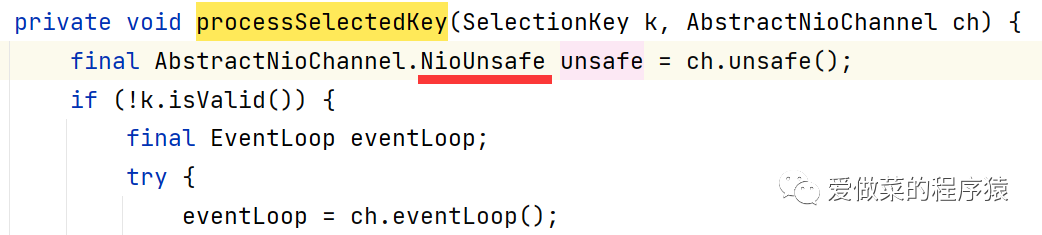
//处理具体的socket
private void processSelectedKey(SelectionKey k, AbstractNioChannel ch) {
    final AbstractNioChannel.NioUnsafe unsafe = ch.unsafe();
    if (!k.isValid()) {
        final EventLoop eventLoop;
        try {
            eventLoop = ch.eventLoop();
        } catch (Throwable ignored) {
            // If the channel implementation throws an exception because there is no event loop, we ignore this
            // because we are only trying to determine if ch is registered to this event loop and thus has authority
            // to close ch.
            return;
        }
        // Only close ch if ch is still registered to this EventLoop. ch could have deregistered from the event loop
        // and thus the SelectionKey could be cancelled as part of the deregistration process, but the channel is
        // still healthy and should not be closed.
        // See https://github.com/netty/netty/issues/5125
        if (eventLoop != this || eventLoop == null) {
            return;
        }
        // close the channel if the key is not valid anymore
        unsafe.close(unsafe.voidPromise());
        return;
    }
        // 取出就绪事件类型进行判断
    try {
        int readyOps = k.readyOps();
        // We first need to call finishConnect() before try to trigger a read(...) or write(...) as otherwise
        // the NIO JDK channel implementation may throw a NotYetConnectedException.
        if ((readyOps & SelectionKey.OP_CONNECT) != 0) {
            // remove OP_CONNECT as otherwise Selector.select(..) will always return without blocking
            // See https://github.com/netty/netty/issues/924
            int ops = k.interestOps();
            ops &= ~SelectionKey.OP_CONNECT;
            k.interestOps(ops);

            unsafe.finishConnect();
        }

        // Process OP_WRITE first as we may be able to write some queued buffers and so free memory.
        // 如果是写事件,则强制channel写数据
        if ((readyOps & SelectionKey.OP_WRITE) != 0) {
            // 读取数据, OP_READ, OP_ACCEPT 会进入到此处,事件处理从此开始
            // Call forceFlush which will also take care of clear the OP_WRITE once there is nothing left to write
            ch.unsafe().forceFlush();
        }

        // Also check for readOps of 0 to workaround possible JDK bug which may otherwise lead
        // to a spin loop
        // 读取数据, OP_READ, OP_ACCEPT 会进入到此处,事件处理从此开始
        //这里会发现Accept和read的事件处理都放在同一个判断中
        if ((readyOps & (SelectionKey.OP_READ | SelectionKey.OP_ACCEPT)) != 0 || readyOps == 0) {
            unsafe.read();
        }
    } catch (CancelledKeyException ignored) {
        unsafe.close(unsafe.voidPromise());
    }
}复制
接下去的流程如下图所示:
Read&Accept
按照流程图,鼠标滑轮点击上面源码里的Read(或者叫Accept)t过程中的unsafe:

接着再点击NioUnsafe:
选择接口实现类NioMessageUnsafe:

找到read事件,这里最重要的是doReadMessages这个方法:
点击进入doReadMessages,找到实现类NioserverSocketChannel:

到这里,就找到目的地了:
@Override
protected int doReadMessages(List<Object> buf) throws Exception {
      // 接收客户端连接
    SocketChannel ch = SocketUtils.accept(javaChannel());
    try {
        if (ch != null) {
             // netty创建自己的客户端channel
            buf.add(new NioSocketChannel(this, ch));
            return 1;
        }
    } catch (Throwable t) {
        logger.warn("Failed to create a new channel from an accepted socket.", t);
        try {
            ch.close();
        } catch (Throwable t2) {
            logger.warn("Failed to close a socket.", t2);
        }
    }
    return 0;
}复制
接下去按三下shift键,搜索ServerBootstrap这个类:
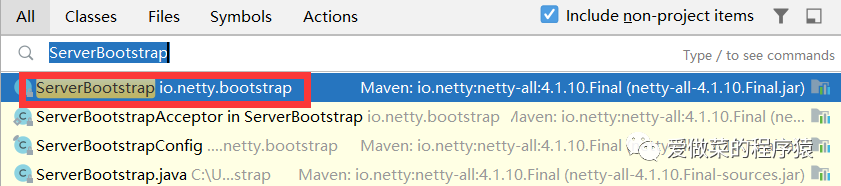
然后找到类里的方法channelRead:当客户端连接请求后,会在这将Handle事件加上
public void channelRead(ChannelHandlerContext ctx, Object msg) {
    // 获取child channel
    final Channel child = (Channel) msg;
    //在这个部分,会把我们所写的handle加载到channel.pipeline
    child.pipeline().addLast(childHandler);
    // 设置childOptions到child channel
    setChannelOptions(child, childOptions, logger);
    // 设置childAttrs到child channel
    for (Entry<AttributeKey<?>, Object> e: childAttrs) {
        child.attr((AttributeKey<Object>) e.getKey()).set(e.getValue());
    }
    // 设置childAttrs到child channel
    try {
        childGroup.register(child).addListener(new ChannelFutureListener() {
            @Override
            public void operationComplete(ChannelFuture future) throws Exception {
                if (!future.isSuccess()) {
                    forceClose(child, future.cause());
                }
            }
        });
    } catch (Throwable t) {
        forceClose(child, t);
    }
}复制
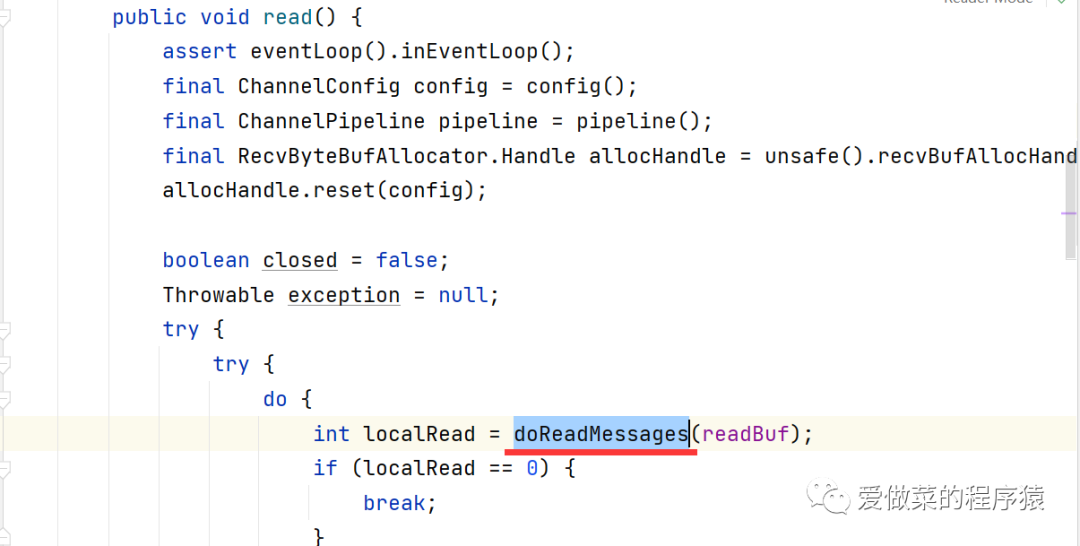
read
回到上面部分的NioUnsafe接口,选择接口实现类AbstractNioByteChannel:

找到run方法:读到的信息,通过 pipeline.fireChannelRead(byteBuf)传递给信道上
public final void read() {
    final ChannelConfig config = config();
    final ChannelPipeline pipeline = pipeline();
    final ByteBufAllocator allocator = config.getAllocator();
    final RecvByteBufAllocator.Handle allocHandle = recvBufAllocHandle();
    allocHandle.reset(config);

    ByteBuf byteBuf = null;
    boolean close = false;
    try {
        do {
            //1、分配内存给 ByteBuf
            byteBuf = allocHandle.allocate(allocator);
            // 2、读取 Socket 数据到 ByteBuf,这里默认会尝试读取 1024 字节的数据。
            allocHandle.lastBytesRead(doReadBytes(byteBuf));
            //3、如果 lastBytesRead 方法返回-1,表示 Channel 已关闭,这时释放当前 ByteBuf 引用,准备关闭 Channel
            if (allocHandle.lastBytesRead() <= 0) {
                // 4、nothing was read. release the buffer.
                byteBuf.release();
                byteBuf = null;
                close = allocHandle.lastBytesRead() < 0;
                break;
            }

            allocHandle.incMessagesRead(1);
            readPending = false;
            //5、使用读取到的数据,触发 ChannelPipeline#fireChannelRead,通常我们在这里处理数据。
            pipeline.fireChannelRead(byteBuf);
            byteBuf = null;
            //6、判断是否需要继续读取数据。
        } while (allocHandle.continueReading());
        //7、预留方法,提供给 RecvByteBufAllocator 做一些扩展操作
        allocHandle.readComplete();
        //8、触发 ChannelPipeline#fireChannelReadComplete,例如将前面多次读取到的数据转换为一个对象。
        pipeline.fireChannelReadComplete();

        if (close) {
            //关闭 Channel
            closeOnRead(pipeline);
        }
    } catch (Throwable t) {
        handleReadException(pipeline, byteBuf, t, close, allocHandle);
    } finally {
        // Check if there is a readPending which was not processed yet.
        // This could be for two reasons:
        // * The user called Channel.read() or ChannelHandlerContext.read() in channelRead(...) method
        // * The user called Channel.read() or ChannelHandlerContext.read() in channelReadComplete(...) method
        //
        // See https://github.com/netty/netty/issues/2254
        if (!readPending && !config.isAutoRead()) {
            removeReadOp();
        }
    }
}复制
write
接下去按三下shift键,搜索AbstractChannel这个类,找到flush0这个方法:
protected void flush0() {
    //刚完成Flush操作
    if (inFlush0) {
        // Avoid re-entrance
        return;
    }
    //拿到buffer队列
    final ChannelOutboundBuffer outboundBuffer = this.outboundBuffer;
    // 如果buffer队列啥都没有,直接返回
    if (outboundBuffer == null || outboundBuffer.isEmpty()) {
        return;
    }
    // 表示正在flush
    inFlush0 = true;

    // Mark all pending write requests as failure if the channel is inactive.
    //发送数据前链路检查,如果channel失效了,则标记写操作为失败
    if (!isActive()) {
        try {
            if (isOpen()) {
    //true 通知 handler channelWritabilityChanged方法
                outboundBuffer.failFlushed(FLUSH0_NOT_YET_CONNECTED_EXCEPTION, true);
            } else {
                // Do not trigger channelWritabilityChanged because the channel is closed already.
                outboundBuffer.failFlushed(FLUSH0_CLOSED_CHANNEL_EXCEPTION, false);
            }
        } finally {
            inFlush0 = false;
        }
        return;
    }

    try {
        //调用channel实现,flush数据至底层socket
        doWrite(outboundBuffer);
    } catch (Throwable t) {
        if (t instanceof IOException && config().isAutoClose()) {
            /**
             * Just call {@link #close(ChannelPromise, Throwable, boolean)} here which will take care of
             * failing all flushed messages and also ensure the actual close of the underlying transport
             * will happen before the promises are notified.
             *
             * This is needed as otherwise {@link #isActive()} , {@link #isOpen()} and {@link #isWritable()}
             * may still return {@code true} even if the channel should be closed as result of the exception.
             */
            close(voidPromise(), t, FLUSH0_CLOSED_CHANNEL_EXCEPTION, false);
        } else {
            outboundBuffer.failFlushed(t, true);
        }
    } finally {
        inFlush0 = false;
    }
}复制
滑轮点击doWrite,找到接口实现类NioSocketChannel:
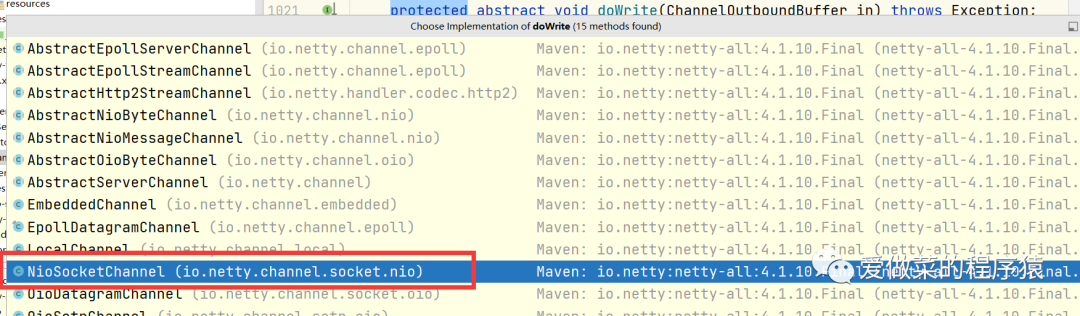
接着找到doWrite方法,这里提一嘴三种情况:
第一种情况:如果socketChannel.write方法返回0,则表示本次没有写入任何字节,设置setOpwrite=true,此时直接跳出,表示需要注册写事件,下次写事件达到时再处理,此时done=flase;setOpWrite为true;incompleteWrite方法会被调用,由于setOpWrite为true,只需要简单的关注写事件。
第二种情况:expectedWrittenBytes 为0,表示在允许的循环次数内,完成了内容的写入操作,此时设置done为true,不会调用incompleteWrite方法,但会执行代码取消写事件。
第三种情况,达到配置允许的最大写次数后,默认为16次,数据还未写完,此时setOpWrite=false,done:false,执行incompleteWrite方法的else分支,放入到任务队列中,等该IO线程处理完其他的key,然后会再运行。在讲解线程模型时http://blog.csdn.net/prestigeding/article/details/64443479,我们应该知道,NioEventLoop会首先执行选择键(select),然后处理建processSelectedKey(),然后会执行runAllTask方法,这里的runAllTask方法就是运行在此处加入的任务,从整个select,然后再执行processSelectedKey,再到runAllTask方法,全部在同一个IO线程中执行,故在Netty中,Channel,IO Handler都是线程安全的。包括这里的ChannelOutboundBuffer,写缓存区。
protected void doWrite(ChannelOutboundBuffer in) throws Exception {
    for (;;) {
        int size = in.size();
        if (size == 0) {
            // All written so clear OP_WRITE
            clearOpWrite();
            break;
        }
        long writtenBytes = 0;
        boolean done = false;
        boolean setOpWrite = false;

        // Ensure the pending writes are made of ByteBufs only.
        // 根据前面设置的指针,取到要flush的buffer段
        ByteBuffer[] nioBuffers = in.nioBuffers();
        int nioBufferCnt = in.nioBufferCount();
        long expectedWrittenBytes = in.nioBufferSize();
        // 拿到jdk原生channel
        SocketChannel ch = javaChannel();

        // Always us nioBuffers() to workaround data-corruption.
        // See https://github.com/netty/netty/issues/2761
        // 下面三种case最终都是将之前write方法写到缓存队列的数据再写到底层socket
       // 即发送给客户端
        switch (nioBufferCnt) {
            case 0:
      // 最终还是会调用到case1或default的write方法,只不过是多做了些特殊处理。
                super.doWrite(in);
                return;
            case 1:
                // Only one ByteBuf so use non-gathering write
                ByteBuffer nioBuffer = nioBuffers[0];
                // 自旋,默认自旋16次。这个时候会将writeSpinCount变量减去每次返回的值,一旦发生了写失败,会直接结束这个循环。如果没有发生写失败,就会执行16次这个循环,最后执行 incompleteWrite(writeSpinCount < 0);方法,这个方法中传入writeSpinCount < 0
                for (int i = config().getWriteSpinCount() - 1; i >= 0; i --) {
// 向底层socket(channel)输出数据,并返回输出的量,已经是jdk底层的方法了。
// 执行完下面这个方法后,我们的telnet就能看到返回结果了。
                    final int localWrittenBytes = ch.write(nioBuffer);
                    if (localWrittenBytes == 0) {
                        setOpWrite = true;
                        break;
                    }
                    expectedWrittenBytes -= localWrittenBytes;
                    writtenBytes += localWrittenBytes;
                    if (expectedWrittenBytes == 0) {
                        done = true;
                        break;
                    }
                }
                break;
            // 若待刷buffer为其它情况
            default:
                for (int i = config().getWriteSpinCount() - 1; i >= 0; i --) {
                    final long localWrittenBytes = ch.write(nioBuffers, 0, nioBufferCnt);
                    if (localWrittenBytes == 0) {
                        setOpWrite = true;
                        break;
                    }
                    expectedWrittenBytes -= localWrittenBytes;
                    writtenBytes += localWrittenBytes;
                    if (expectedWrittenBytes == 0) {
                        done = true;
                        break;
                    }
                }
                break;
        }

        // Release the fully written buffers, and update the indexes of the partially written buffer.
         // 指针复位、清空buffer、元素置空(GC)等操作
        in.removeBytes(writtenBytes);

        if (!done) {
            // Did not write all buffers completely.
            //如果到这里还没写完,会触发incompleteWrite
            incompleteWrite(setOpWrite);
            break;
        }
    }
}复制
如果到最后,缓冲区满了,还没有完成写操作,会进行incompleteWrite()方法,滑轮点击进入该方法进行分析:
setOpWrite():采用这个方法把状态转变为OP_WRITE,然后在进行操作
protected final void incompleteWrite(boolean setOpWrite) {
    // Did not write completely.
    if (setOpWrite) {
        setOpWrite();//这个方法会把状态改成OP_WRITE,等到CPU资源空闲时再次调用write
    } else {
        // Schedule flush again later so other tasks can be picked up in the meantime
        Runnable flushTask = this.flushTask;
        if (flushTask == null) {
            flushTask = this.flushTask = new Runnable() {
                @Override
                public void run() {
                    flush();
                }
            };
        }
        eventLoop().execute(flushTask);
    }
}复制
接着进入setOpWrite再次进行源码查看:这里netty帮我们考虑好了,不用担心非阻塞下,写事件被忽略。
因为写忙,在上面的循环16次中也没有将其写完,此时会把未完成的事件注册一个OP_WRITE
protected final void setOpWrite() {
    final SelectionKey key = selectionKey();
    // Check first if the key is still valid as it may be canceled as part of the deregistration
    // from the EventLoop
    // See https://github.com/netty/netty/issues/2104
    if (!key.isValid()) {
        return;
    }
    final int interestOps = key.interestOps();
    if ((interestOps & SelectionKey.OP_WRITE) == 0) {
        key.interestOps(interestOps | SelectionKey.OP_WRITE); //这里不是或,这是位操作
    }
}复制
至此netty源码,我们看完了,接下来我们来看下,netty是这么解决粘包和拆包问题的。
