


在春天百花齐放的季节,多家国产数据库发布新版,崖山数据库也不例外,4月深圳计算研究院发布23.2长期支持版本,标志着YashanDB单机主备、共享集群和分布式实时数仓等完整产品体系已全面进入可规模化使用的长期支持阶段,与数据库一同发布的,还有数据迁移工具、监控运维工具和开发者工具等生态工具,构成一个完备的体系。为便于小白入手学习崖山数据库,开放了个人版供大家练习用。因YCP考试实操内容包含迁移内容,为提高操作效率,对迁移工具YMP操作进行记录备忘。
一、工具的下载
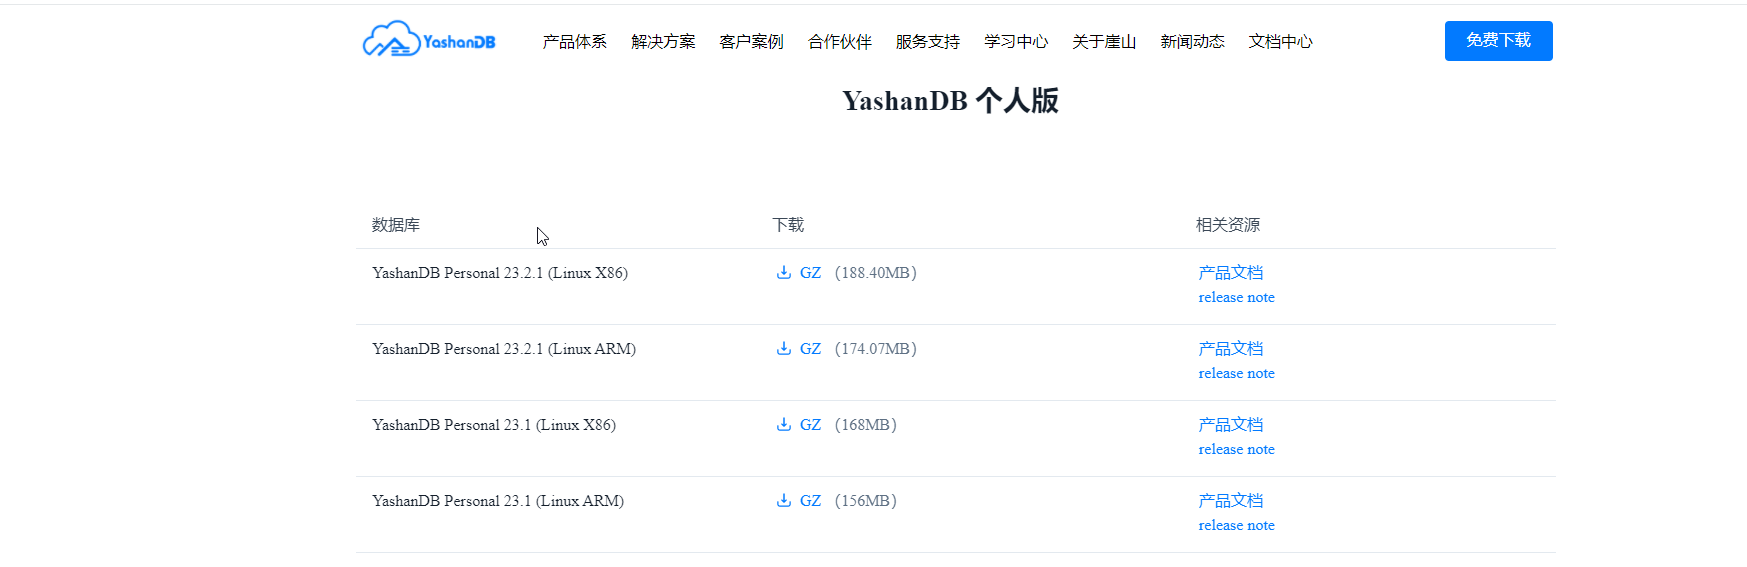
崖山数据库官网https://www.yashandb.com/
直接点击免费下载,进入下载页面,根据需要选择要下载的软件版本
二、迁移环境准备
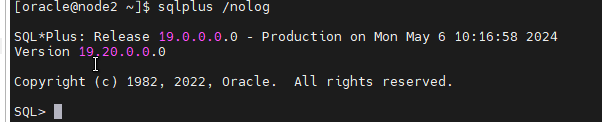
1.源库为oracle 19c,安装过程略
数据库版本
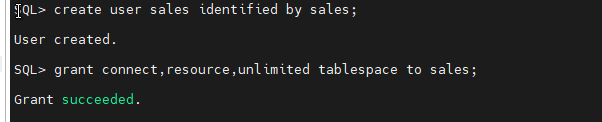
创建用户并授权
create user sales identified by sales ;
grant connect,resource,unlimited tablespace to sales;
grant dba to sales;–仅测试用,有安全需求,按官方说明细粒度授权。
数据采用hybench压力测试工具生成1G数据
批量导入脚本

2.安装yashandb个人版,作为迁移目标库
在操作系统创建组YASDBA,用户yasdb
groupadd YASDBA
useradd -G YASDBA yasdb
passwd yasdb
su - yasdb
mkdir install
cd install
tar xvf yashandb-personal-23.2.1.100-linux-x86_64.tar.gz
生成部署文件hosts.toml 和yas.toml
[yasdb@node1_hostname install]$ bin/yasboot package se gen -c yas  --ip 192.168.56.50 --port 22 -u yasdb -p admin@110 --install-path /opt/yas/yashome --data-path /opt/yas/yasdata --begin-port 1688
 hostid   | group | node_type | node_name | listen_addr        | replication_addr   | data_path
-------------------------------------------------------------------------------------------------------
 host0001 | dbg1  | db        | 1-1       | 192.168.56.50:1688 | 192.168.56.50:1689 | /opt/yas/yasdata
----------+-------+-----------+-----------+--------------------+--------------------+------------------

Generate config success
[yasdb@node1_hostname install]$ cat hosts.toml
uuid = "66388b1d03b9258a097ddd46c9d8a0f2"
cluster = "yas"
yas_type = "SE"
secret_key = "03cb21093496783a"
add_yasdba = true

[om]
  hostid = "host0001"
  [om.config]
    LISTEN_ADDR = "192.168.56.50:1675"

[[host]]
  hostid = "host0001"
  group = "yasdb"
  user = "yasdb"
  password = "admin@110"
  ip = "192.168.56.50"
  port = 22
  path = "/opt/yas/yashome"
  jvm_path = ""
  total_memory = 0
  [host.yasagent]
    [host.yasagent.config]
      LISTEN_ADDR = "192.168.56.50:1676"
[yasdb@node1_hostname install]$ cat yas.toml
cluster = "yas"
create_simple_schema = false
uuid = "66388b1d03b9258a097ddd46c9d8a0f2"
yas_type = "SE"

[[group]]
  group_type = "db"
  name = "dbg1"
  [group.config]
    CHARACTER_SET = "utf8"
    ISARCHIVELOG = true
    REDO_FILE_NUM = 4
    REDO_FILE_SIZE = "128M"
  [group.create_sql]

  [[group.node]]
    data_path = "/opt/yas/yasdata"
    hostid = "host0001"
    role = 1
    [group.node.config]
      LISTEN_ADDR = "192.168.56.50:1688"
      REPLICATION_ADDR = "192.168.56.50:1689"
      RUN_LOG_FILE_PATH = "/opt/yas/yashome/yashandb/23.1.1.100/log/yas/db-1-1/run"
      RUN_LOG_LEVEL = "INFO"
      SLOW_LOG_FILE_PATH = "/opt/yas/yashome/yashandb/23.1.1.100/log/yas/db-1-1/slow"
[yasdb@node1_hostname install]$
部署数据库软件
[yasdb@node1_hostname install]$ bin/yasboot package install -t hosts.toml -i yashandb-personal-23.2.1.100-linux-x86_64.tar.gz
checking install package...
install version: yashandb 23.2.1.100
host0001 100% [====================================================================]    3s
update host to yasom...

[yasdb@node1_hostname install]$ ps -ef|grep yas
root       14560   14287  0 16:18 pts/0    00:00:00 su - yasdb
yasdb      14561   14560  0 16:18 pts/0    00:00:00 -bash
yasdb      16029       1  0 16:19 ?        00:00:00 /opt/yas/yashome/yashandb/23.2.1.100/bin/yasagent --init -c yas -l 192.168.56.50:1676 --host-id host0001 -k cebd9fc69a9d65a4 -d
yasdb      16162       1  0 16:19 ?        00:00:00 /opt/yas/yashome/yashandb/23.2.1.100/bin/yasom --init -c yas -l 192.168.56.50:1675 -k cebd9fc69a9d65a4 -d
yasdb      16868   14561  0 16:20 pts/0    00:00:00 ps -ef
yasdb      16869   14561  0 16:20 pts/0    00:00:00 grep --color=auto yas
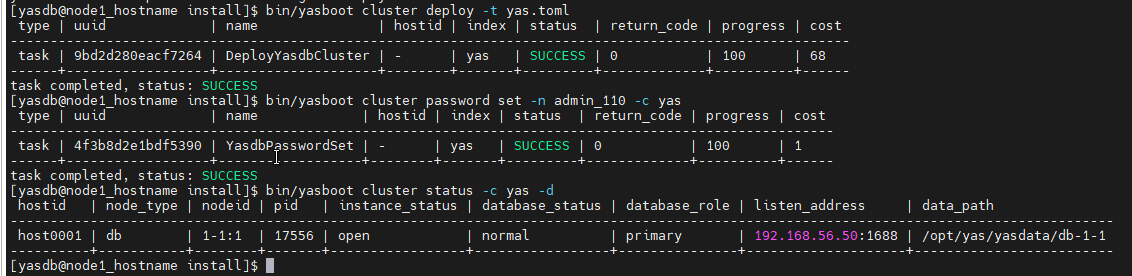
[yasdb@node1_hostname install]$ bin/yasboot cluster deploy -t yas.toml
 type | uuid             | name               | hostid | index | status  | return_code | progress | cost
---------------------------------------------------------------------------------------------------------
 task | 9bd2d280eacf7264 | DeployYasdbCluster | -      | yas   | SUCCESS | 0           | 100      | 68
------+------------------+--------------------+--------+-------+---------+-------------+----------+------
task completed, status: SUCCESS
[yasdb@node1_hostname install]$ bin/yasboot cluster password set -n admin_110 -c yas
 type | uuid             | name             | hostid | index | status  | return_code | progress | cost
-------------------------------------------------------------------------------------------------------
 task | 4f3b8d2e1bdf5390 | YasdbPasswordSet | -      | yas   | SUCCESS | 0           | 100      | 1
------+------------------+------------------+--------+-------+---------+-------------+----------+------
task completed, status: SUCCESS
[yasdb@node1_hostname install]$ bin/yasboot cluster status -c yas -d
 hostid   | node_type | nodeid | pid   | instance_status | database_status | database_role | listen_address     | data_path
------------------------------------------------------------------------------------------------------------------------------------------
 host0001 | db        | 1-1:1  | 17556 | open            | normal          | primary       | 192.168.56.50:1688 | /opt/yas/yasdata/db-1-1
----------+-----------+--------+-------+-----------------+-----------------+---------------+--------------------+-------------------------
创建新用户,接收从oracle迁移过来的数据
cd /opt/yas/yashome/yashandb/23.2.1.100/conf

cat yas.bashrc >>~/.bashrc
source ~/.bashrc
yasql sys/admin_110@192.168.56.50:1688
YashanDB SQL Personal Edition Release 23.2.1.100 x86_64

Connected to:
YashanDB Server Personal Edition Release 23.2.1.100 x86_64 - X86 64bit Linux


SQL> create user sales identified by sales;

Succeed.

SQL> grant connect to sales;

Succeed.

SQL> grant resource to sales;

Succeed.

SQL> grant dba to sales;

Succeed.

SQL>
3.YMP安装
YMP安装未另建用户,用root操作,oracle 19c的OCI 放在/opt/
mkdir /opt/ymp
cd /opt/ymp
unzip yashan-migrate-platform-v23.2.1.0-linux-x86-64.zip
cd yashan-migrate-platform
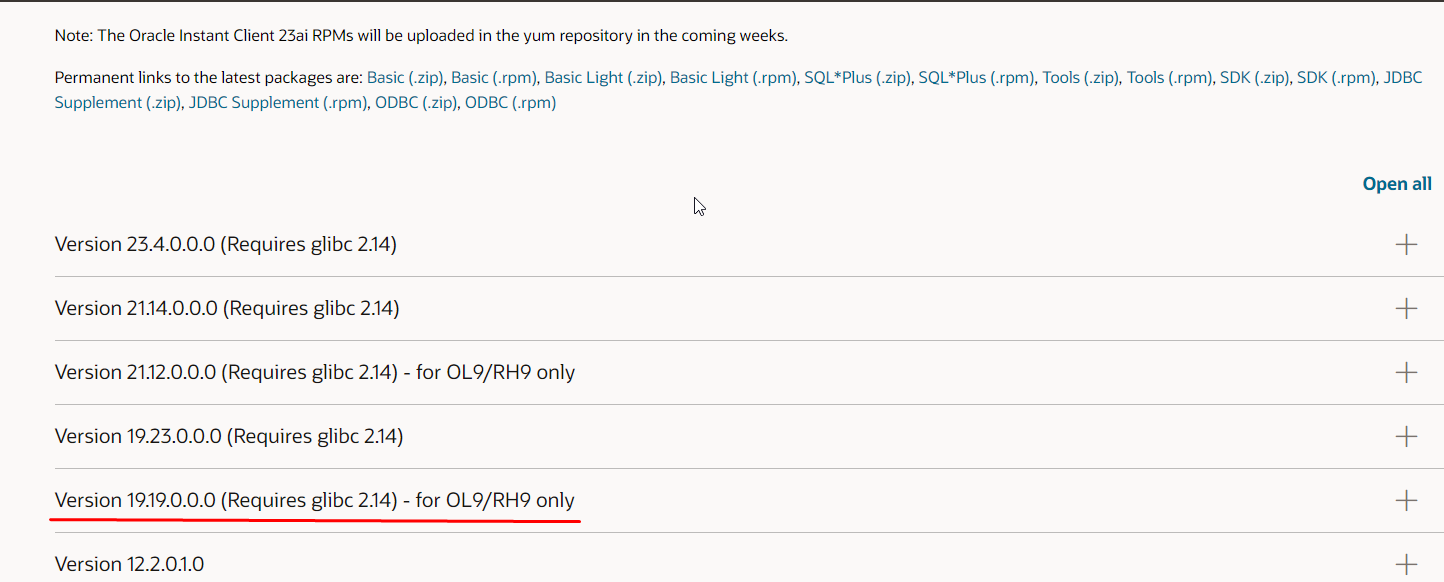
oracle OCI 放在/opt/instantclient_19_19
oracle instant下载地址
https://www.oracle.com/cl/database/technologies/instant-client/linux-x86-64-downloads.html
安装YMP
[root@node1_hostname yashan-migrate-platform]# bin/ymp.sh install --db /home/yasdb/install/yashandb-personal-23.2.1.100-linux-x86_64.tar.gz --path /opt/instantclient_19_19
checking install profile.toml...
install version: yashandb 23.2.1.100
update host to yasom...
 type | uuid             | name               | hostid | index | status  | return_code | progress | cost
---------------------------------------------------------------------------------------------------------
 task | a967b8596a3a50a6 | DeployYasdbCluster | -      | ymp   | SUCCESS | 0           | 100      | 105
------+------------------+--------------------+--------+-------+---------+-------------+----------+------
task completed, status: SUCCESS
 type | uuid             | name             | hostid | index | status  | return_code | progress | cost
-------------------------------------------------------------------------------------------------------
 task | ba852d9d01c2ec73 | StopYasdbCluster | -      | ymp   | SUCCESS | 0           | 100      | 2
------+------------------+------------------+--------+-------+---------+-------------+----------+------
task completed, status: SUCCESS
 type | uuid             | name              | hostid | index | status  | return_code | progress | cost
--------------------------------------------------------------------------------------------------------
 task | ffad485631713772 | StartYasdbCluster | -      | ymp   | SUCCESS | 0           | 100      | 3
------+------------------+-------------------+--------+-------+---------+-------------+----------+------
task completed, status: SUCCESS
YMP started successfully!
[root@node1_hostname yashan-migrate-platform]# bin/ymp.sh status
YMP is running, pid is 24431.
Built-in database is used, pid is 24282.
安装完成系统已启动。
三、进行迁移
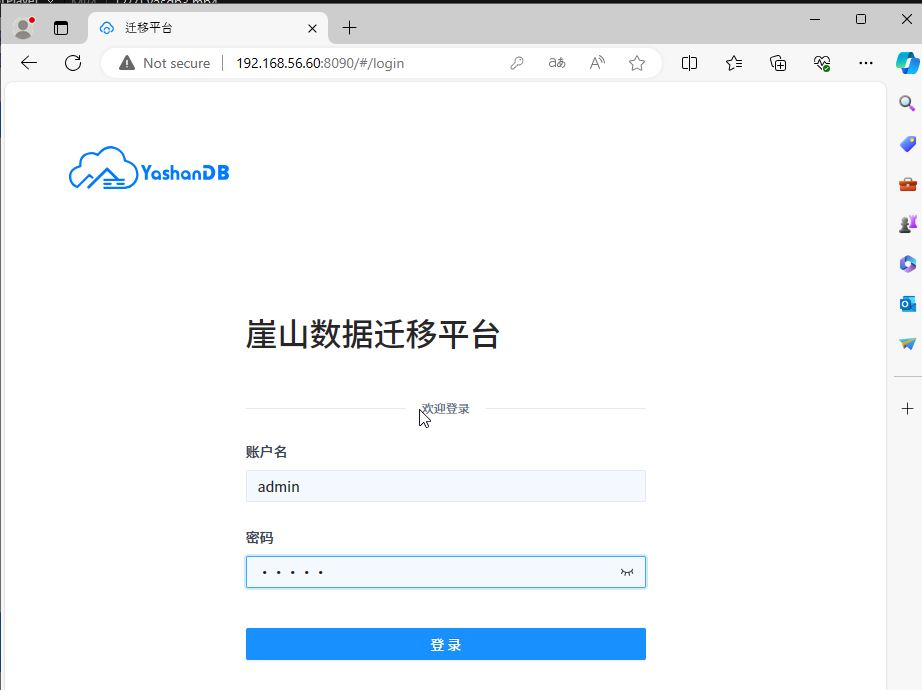
登录YMP平台,默认用户名密码都为admin,首次登录后必须修改密码
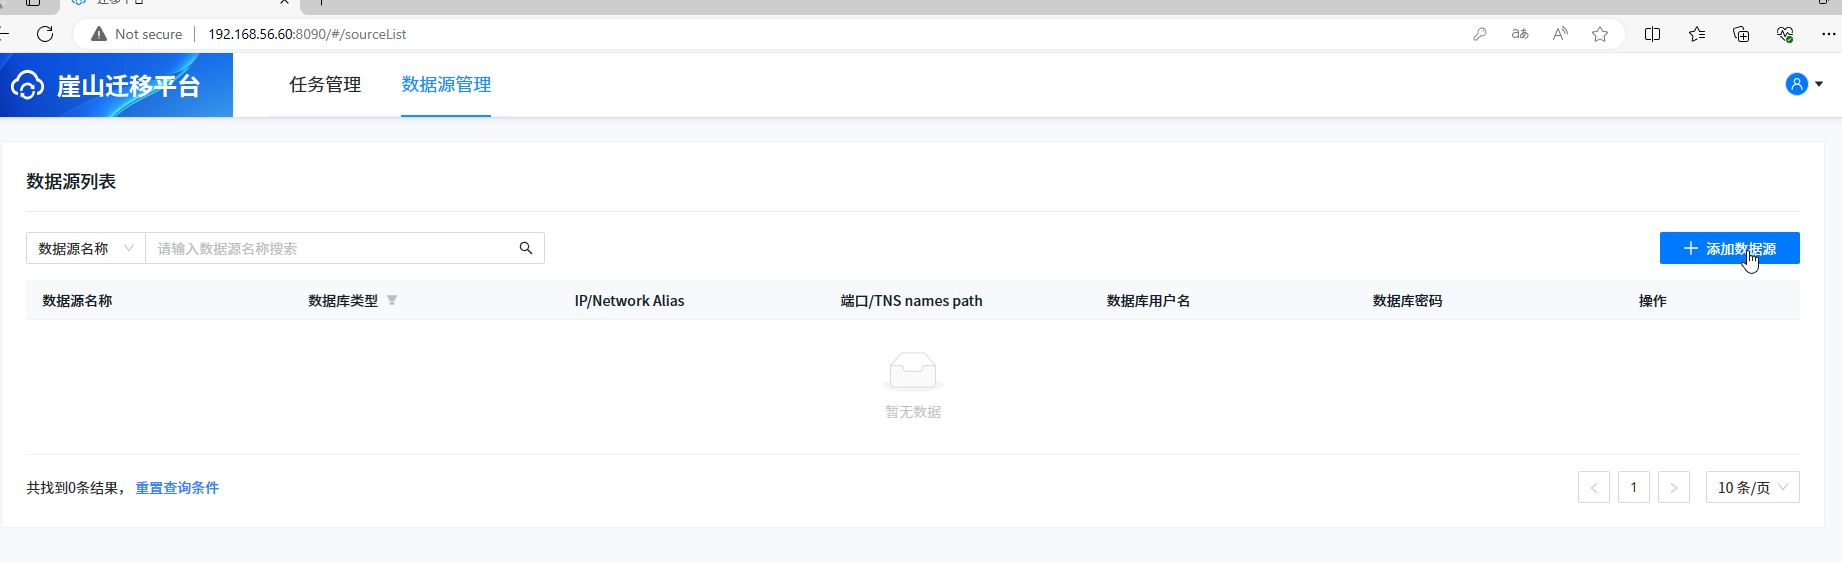
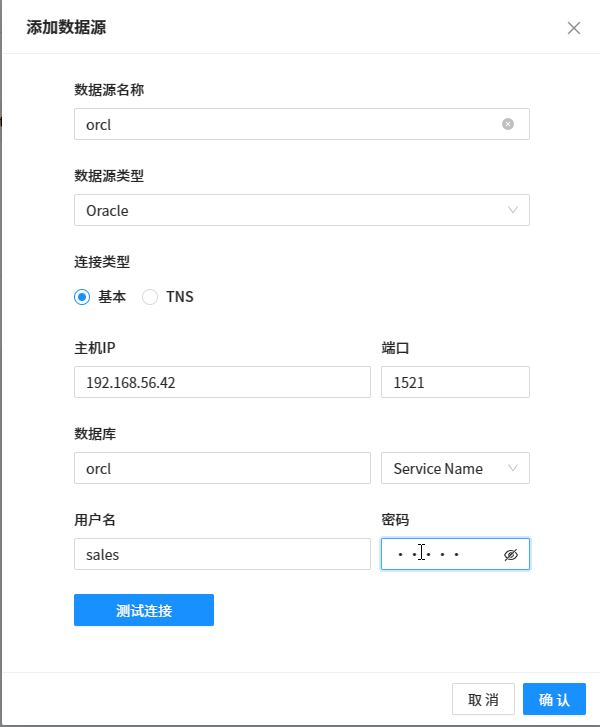
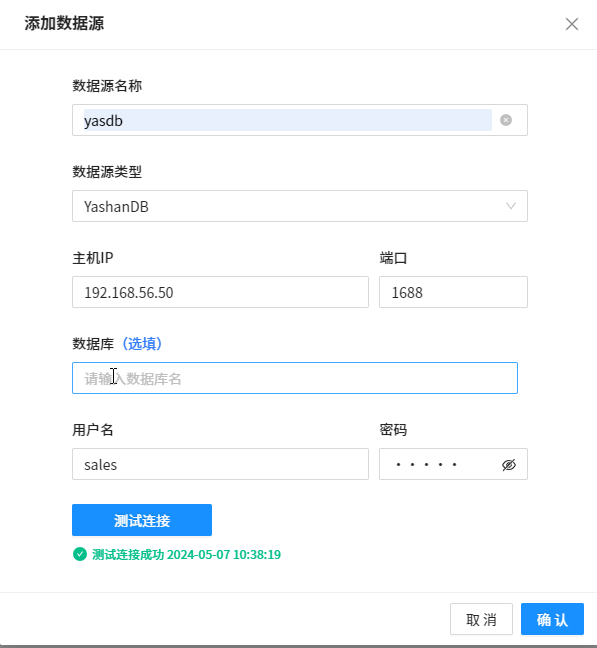
新增数据源
待迁移的oracle数据库
新增数据源,迁移目标库
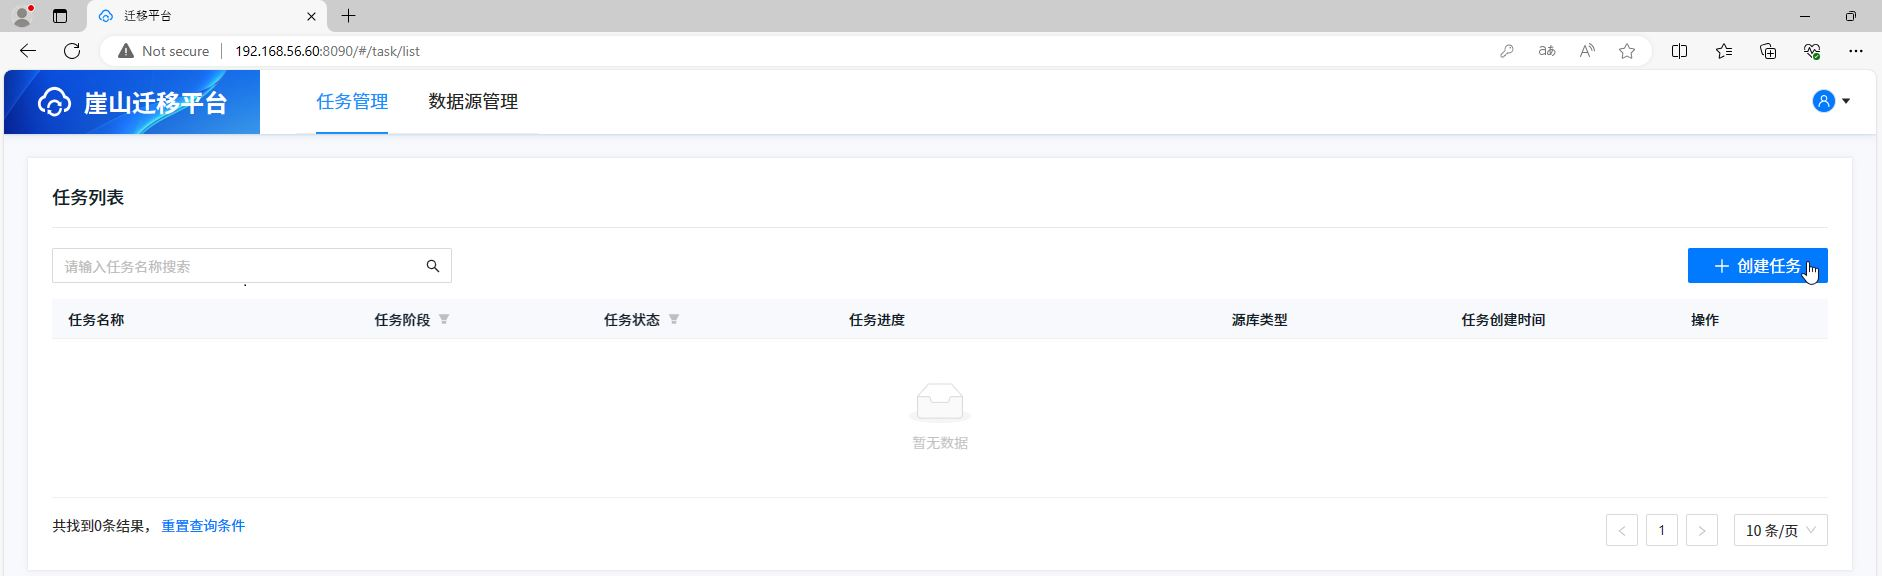
创建迁移任务
需要填写迁移任务的名称,源库的信息、是否进行迁移前评估和评估使用的是否是内置库

需要迁移的用户(模式),这里的模式框有点大
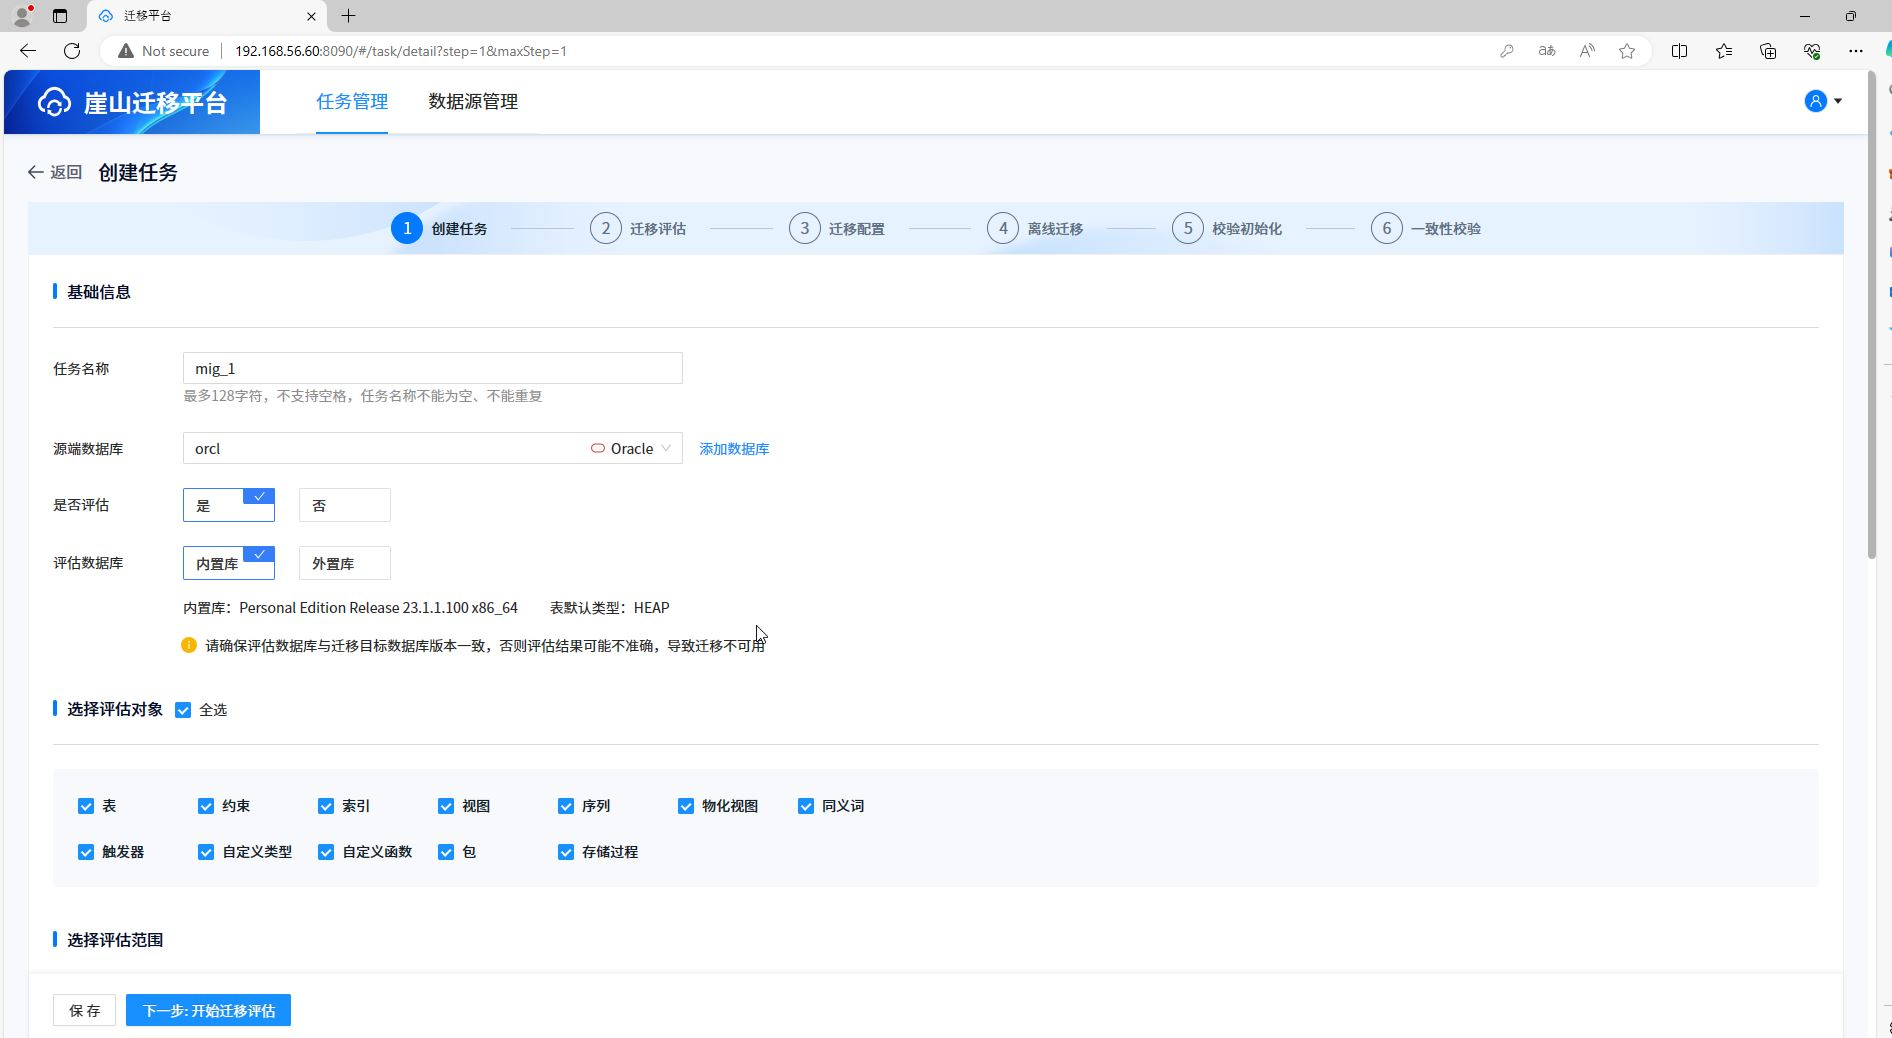
评估对象全选,其他设置取默认,点下一步进行评估
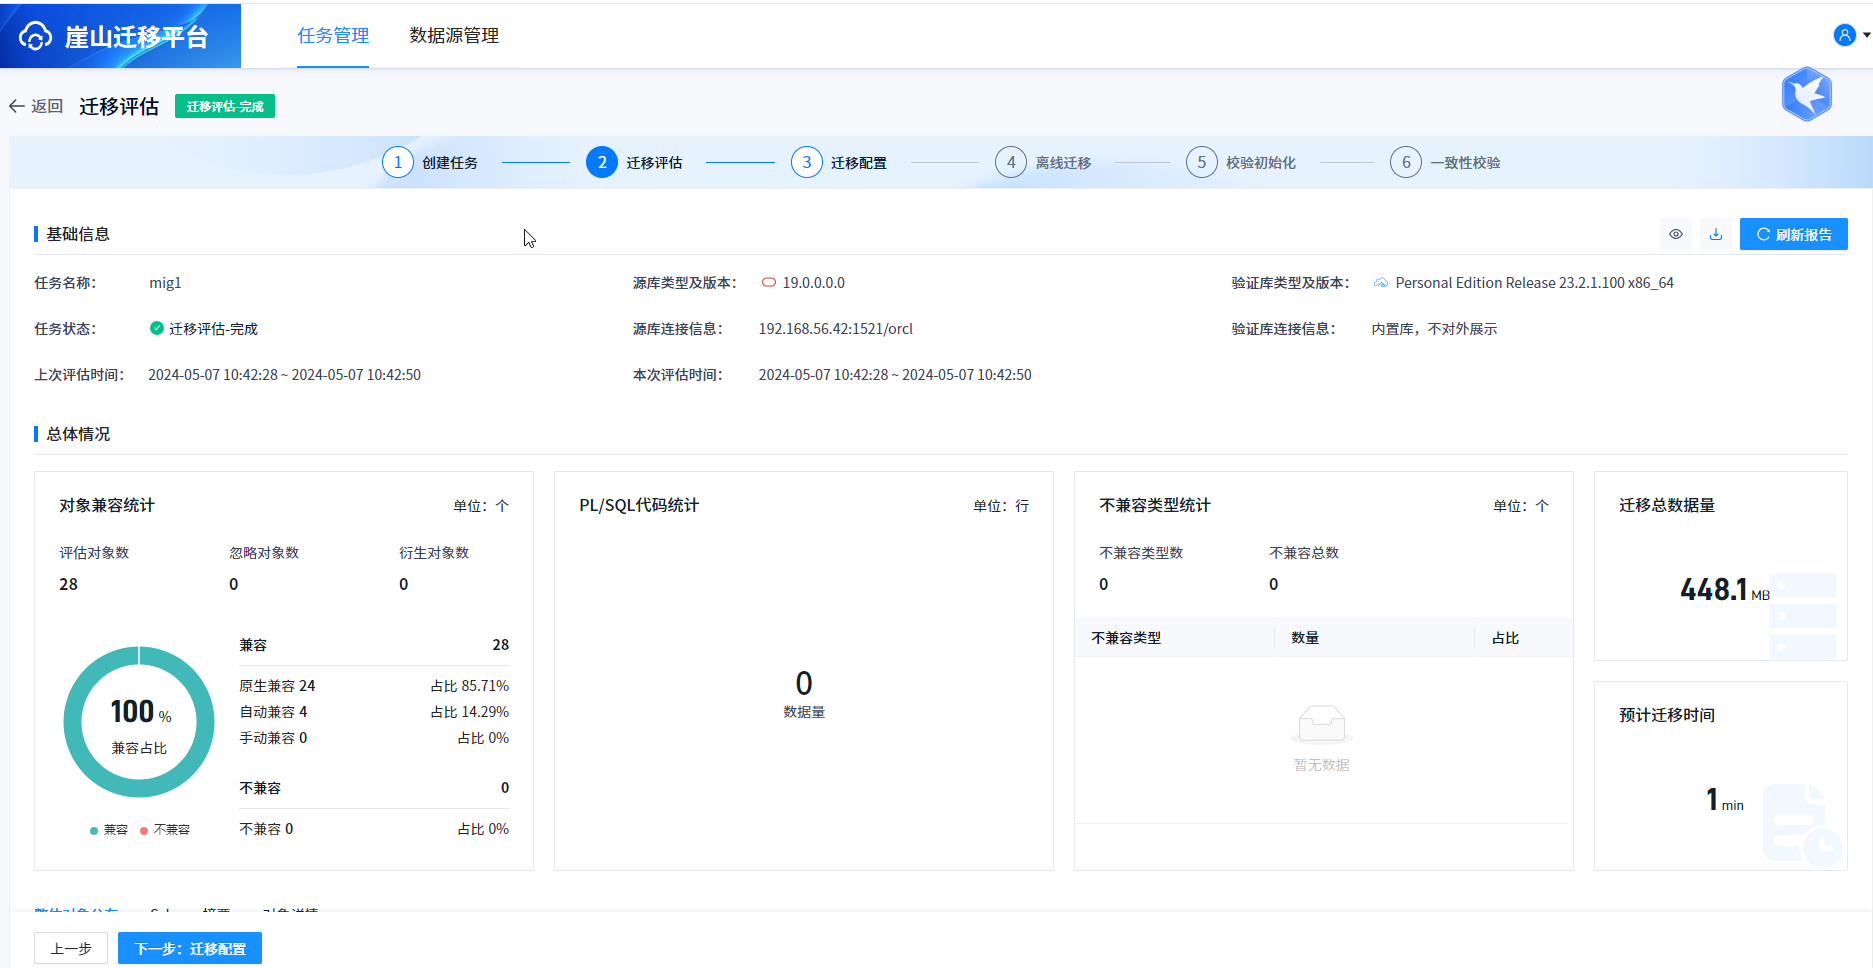
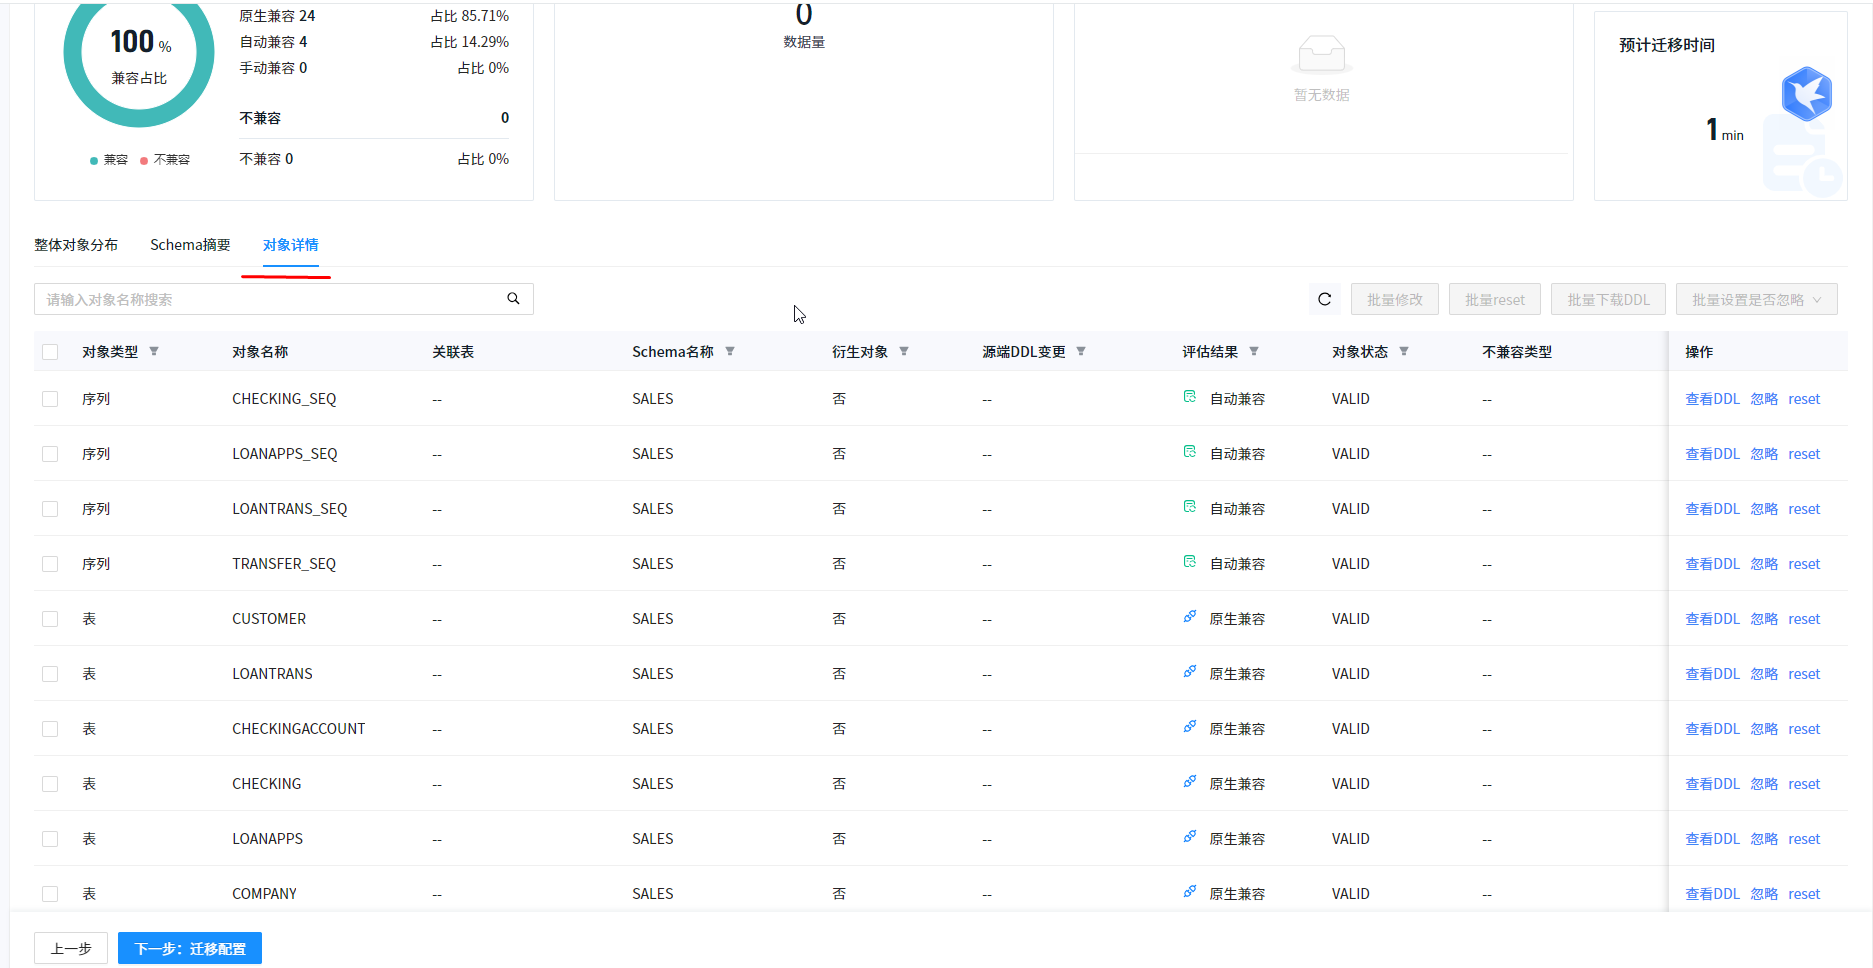
评估结果为全部通过,因测试数据没有包、存储过程、触发器等
对象详情页下可以看到每个对象的评估结果和状态,操作按键可以查看DDL,忽略该对象,对不兼容对象可以暂时忽略后续手工处理
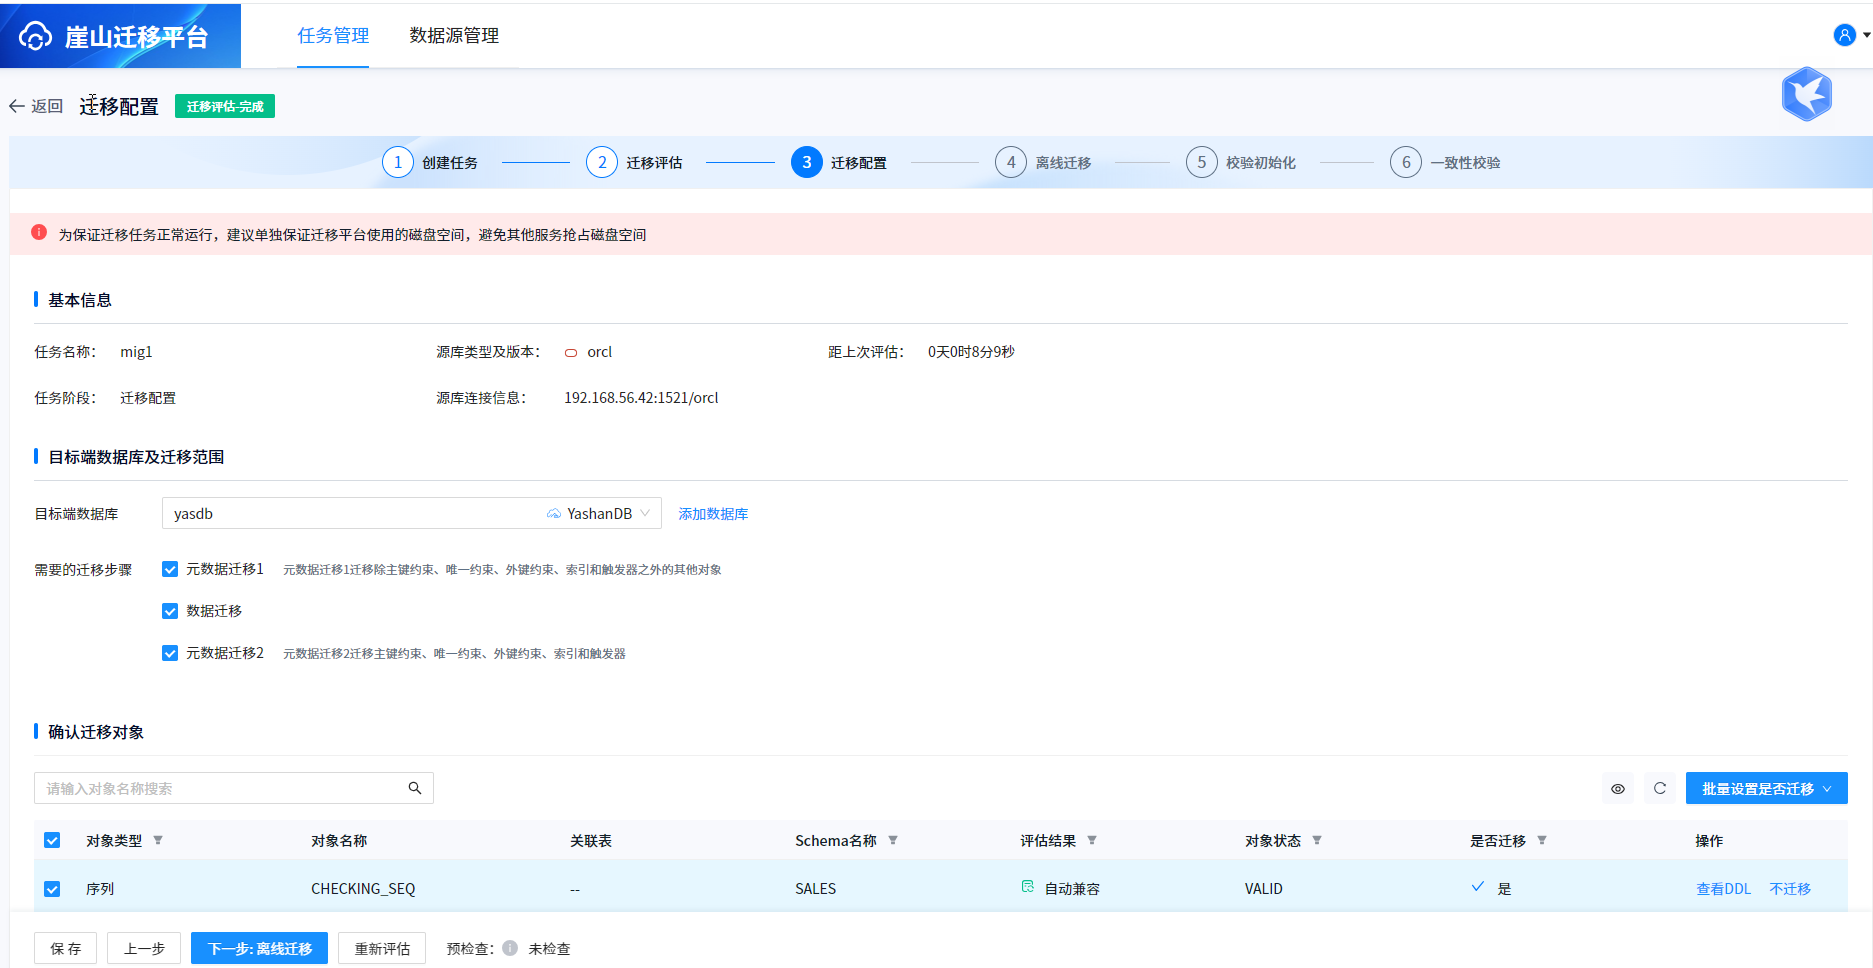
下一步迁移配置,需要选定目标库和待迁移对象,迁移初始化配置和表空间初始化,预检查的部署方式、类型、字符集和其他是可以选择的,其余项已锁定。
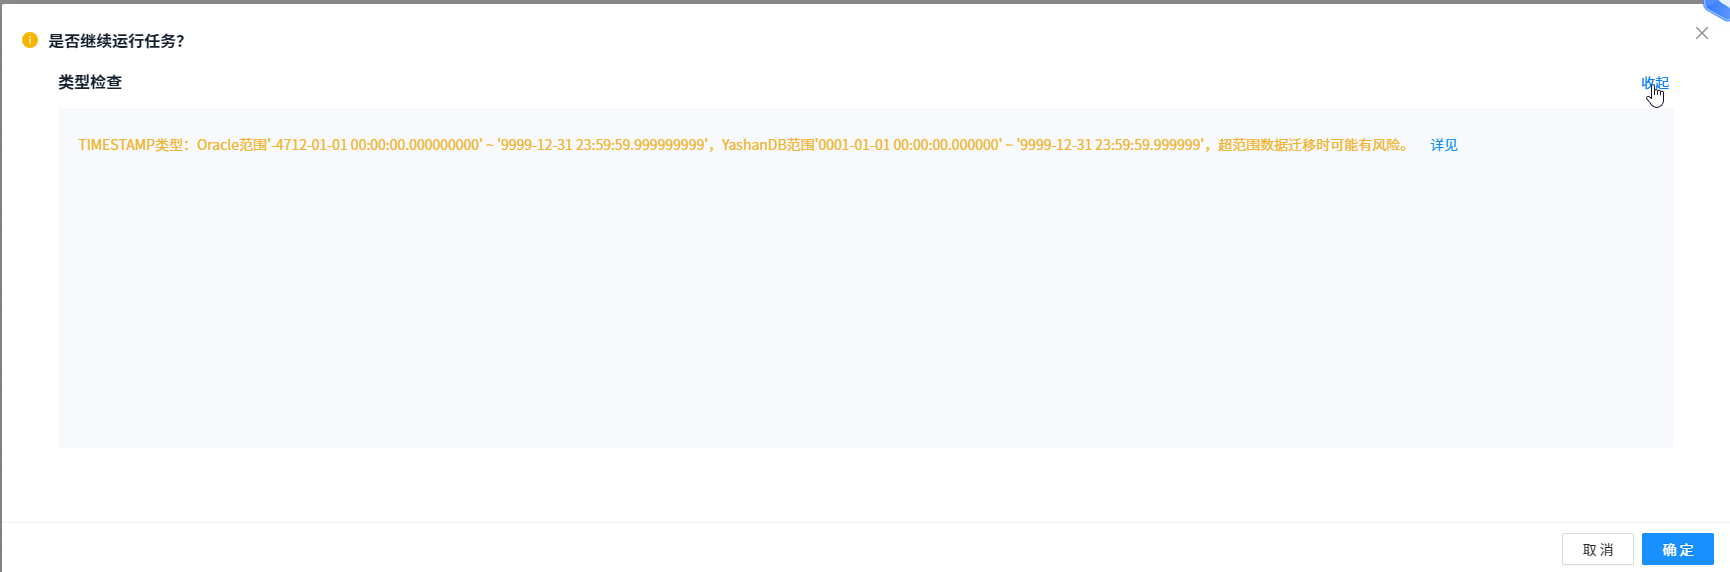
oracle 的timestamp与崖山的取值范围不同,可以忽略
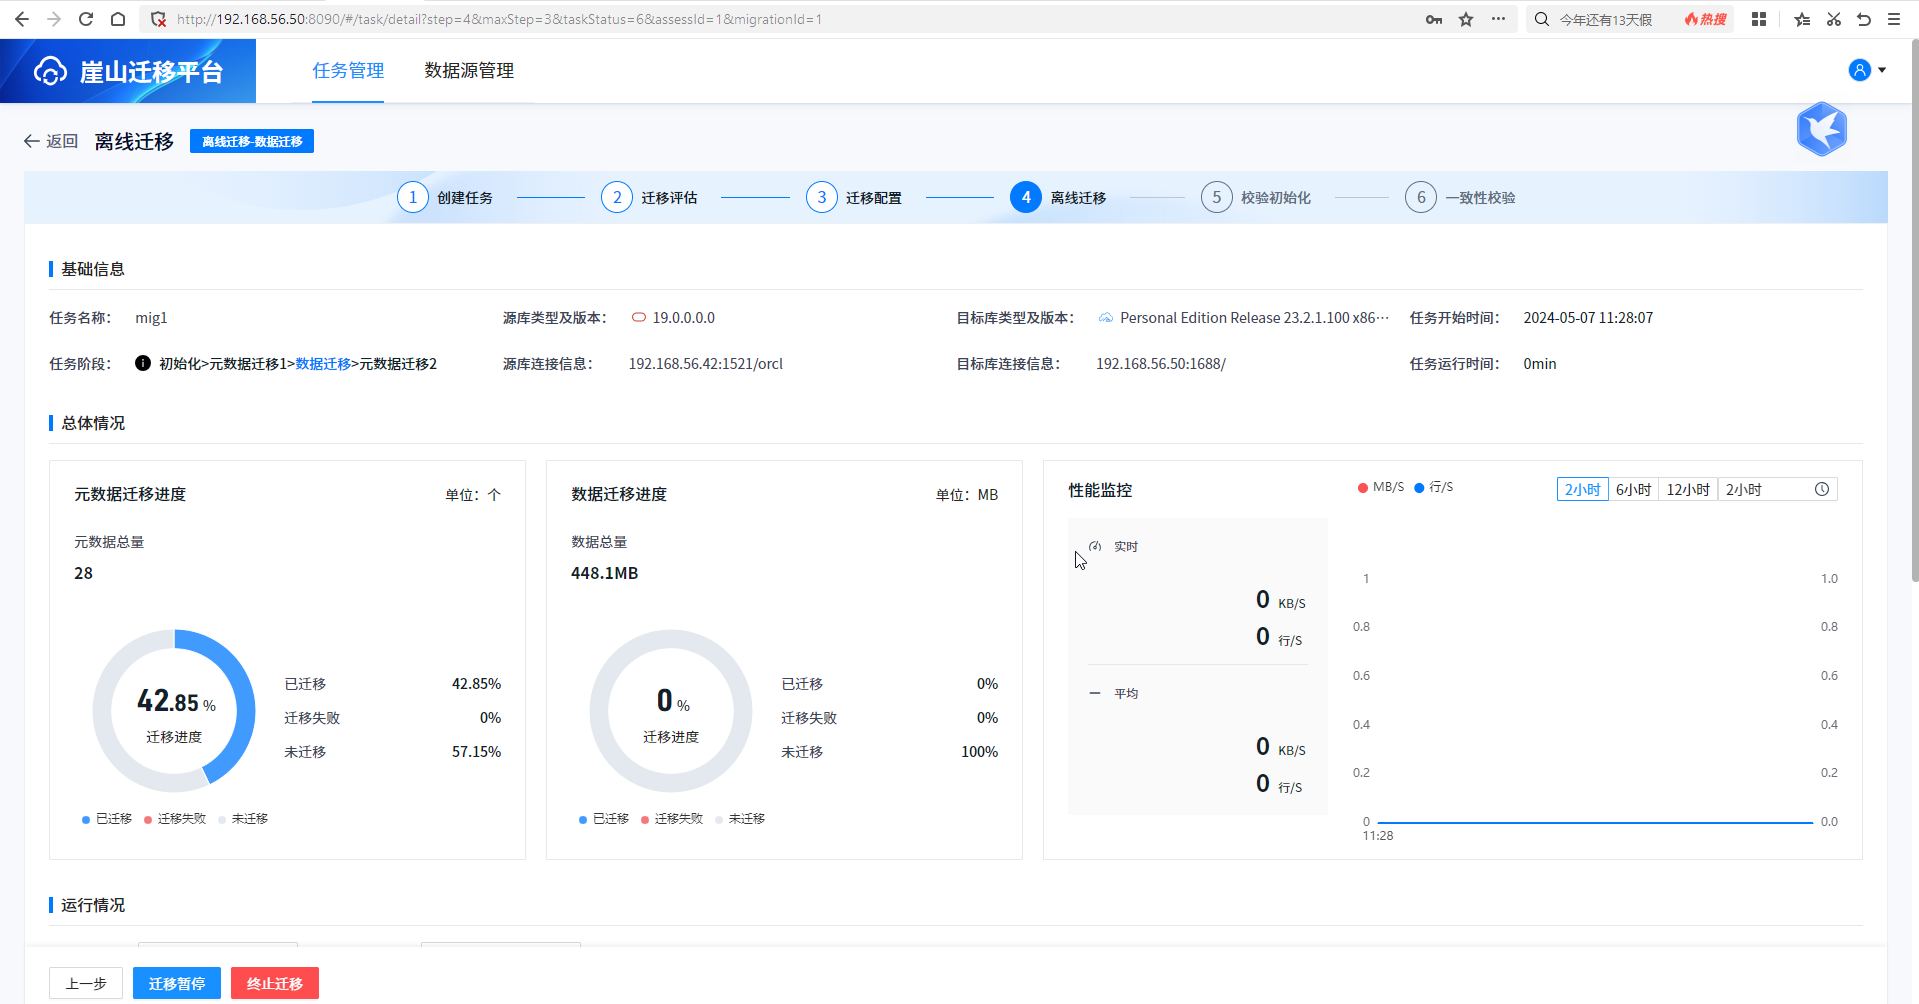
开始迁移,显示了元数据迁移进度和数据迁移进度及性能监控
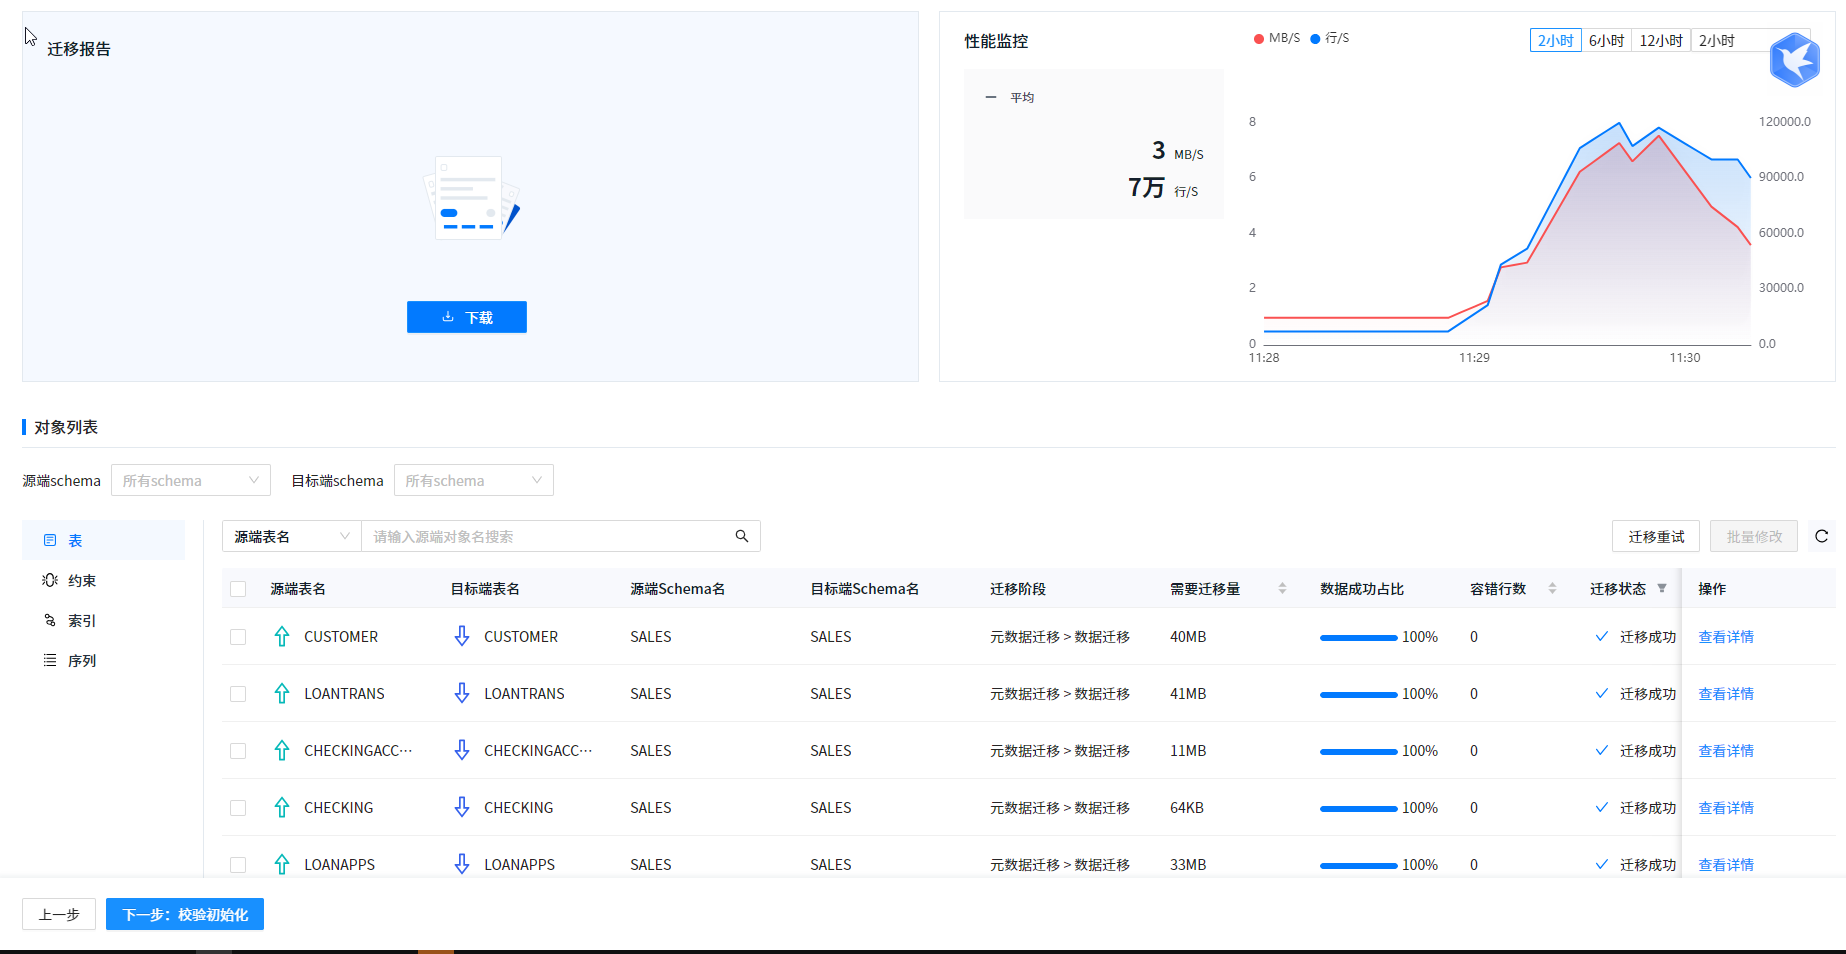
迁移完成,用时2分钟,平均每秒7万行,峰值超过11万
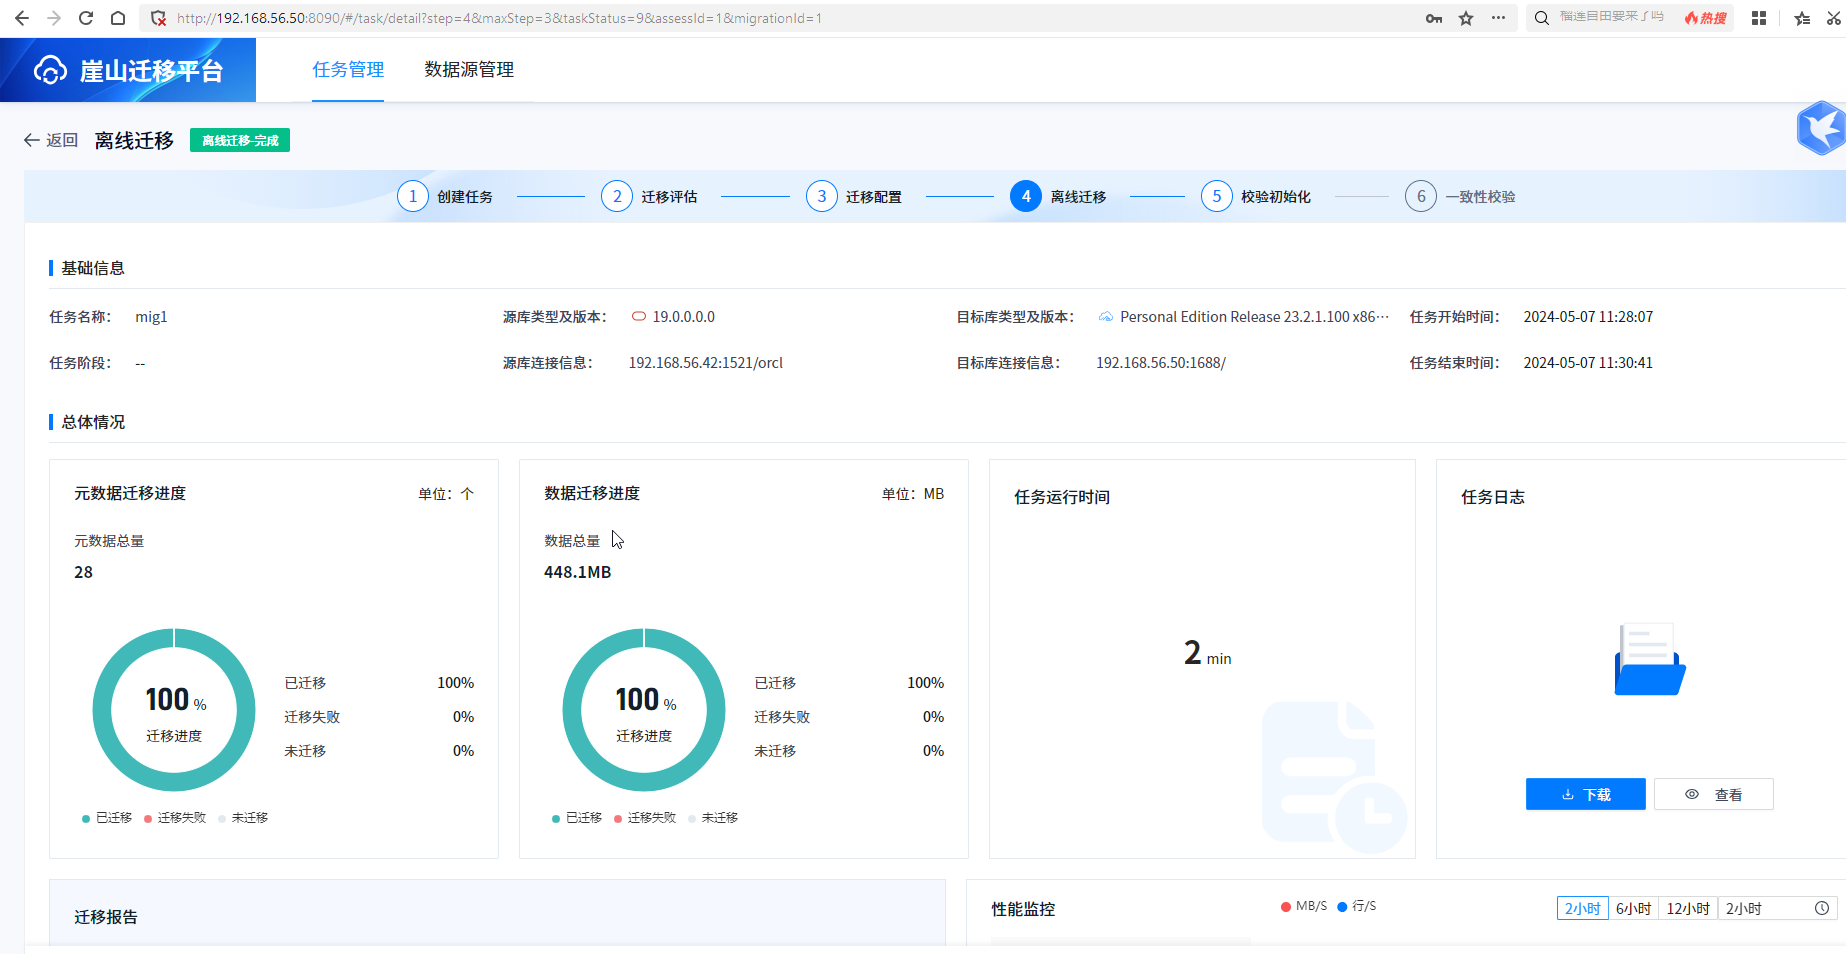
迁移报告和任务日志可以下载,对象列表提供迁移详细信息
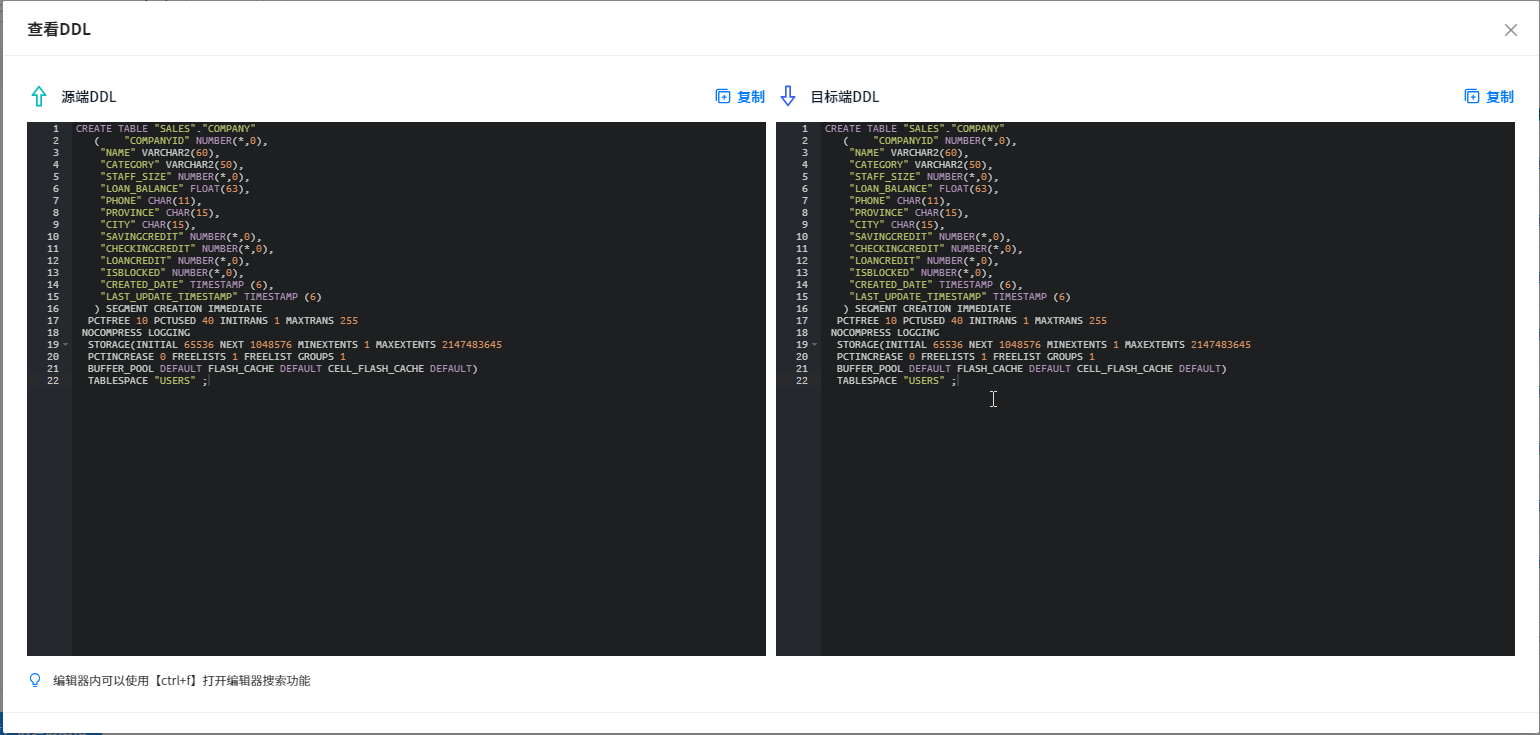
每个对象后面的详情按钮可以看到双方的DDL
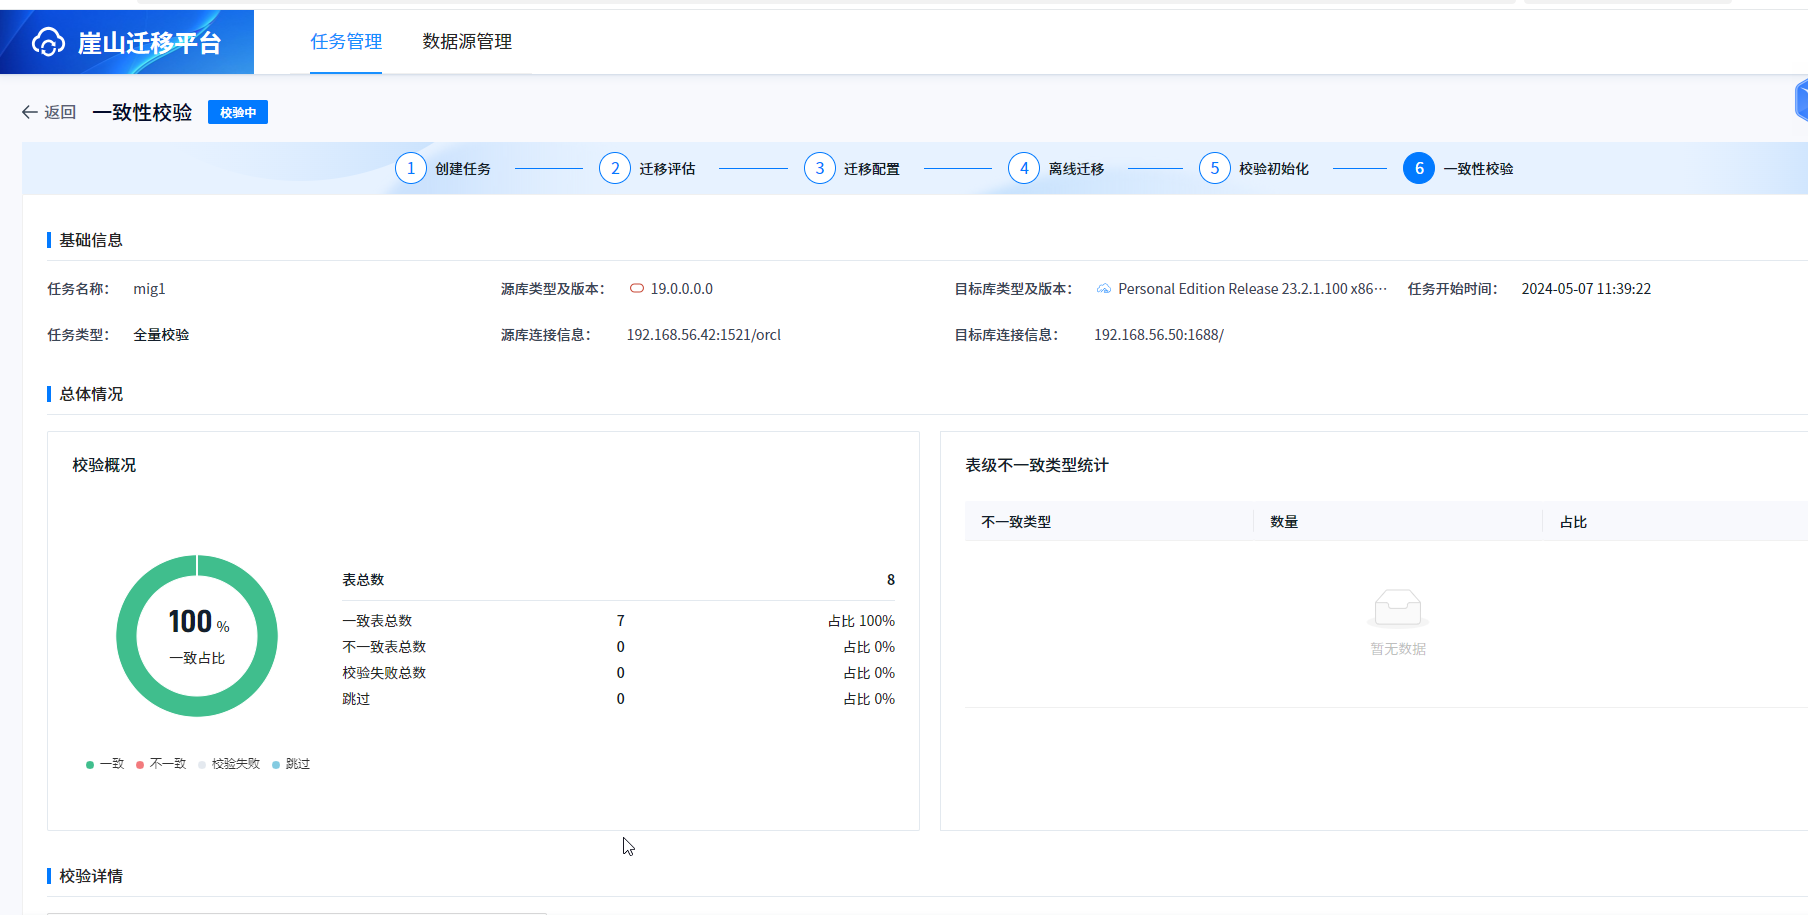
校验初始化选择全部对象
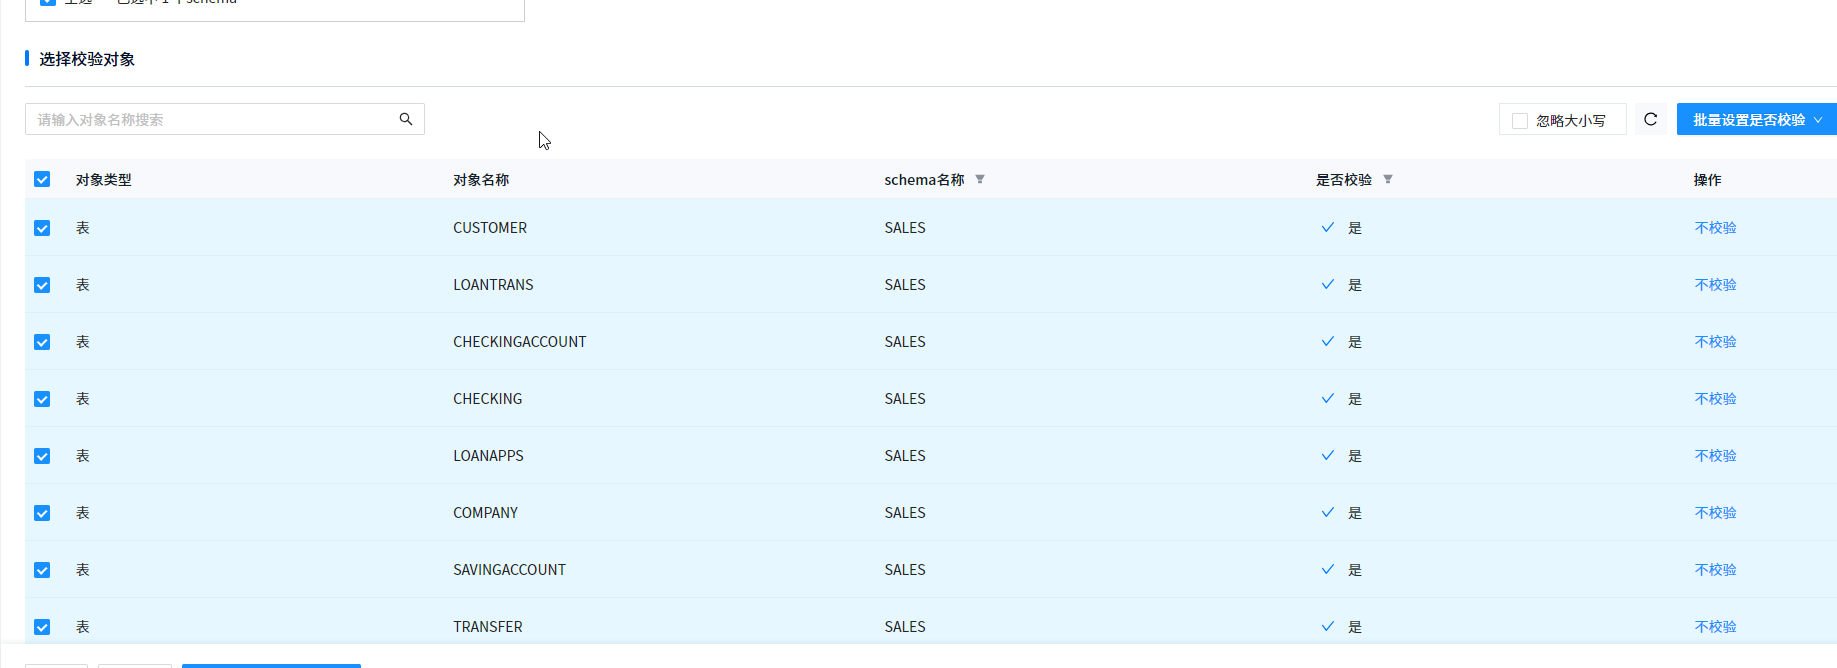
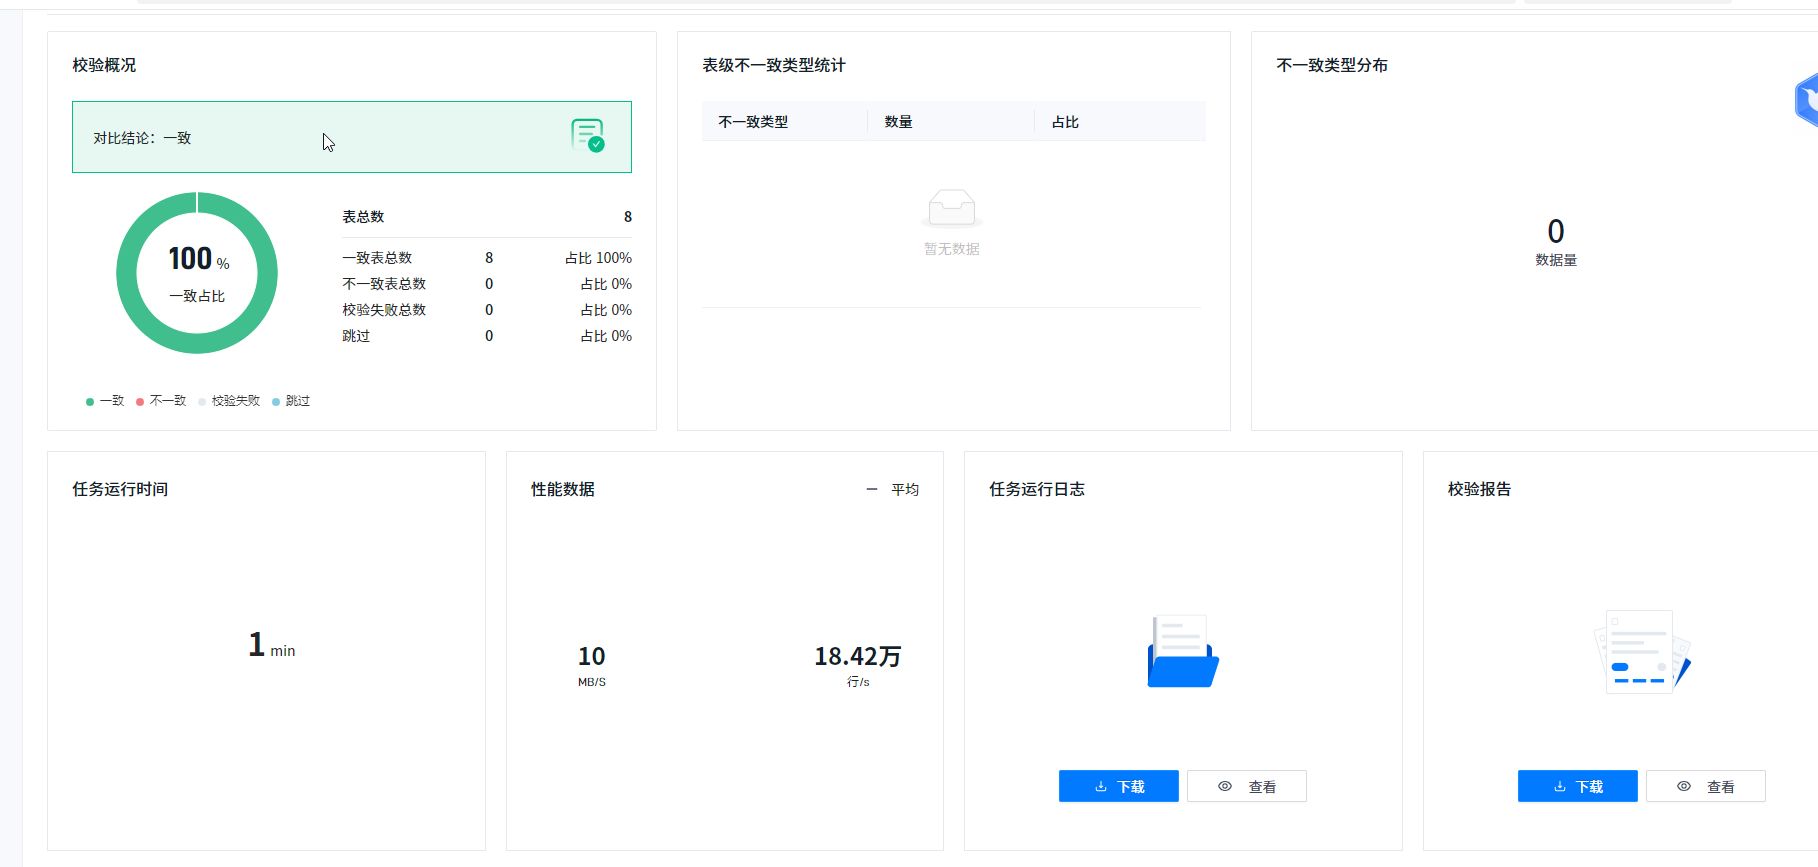
校验结果为全部一致
校验用时1分钟,每秒10M,18万行,任务日志和校验报告可以在线查看和下载。
测试体会:这次崖山迁移平台YMP个人版与运维平台CM,开发平台YDC与23.2LTS一起发布,构成了完整生态,而且简单易用,文档也简明易懂,给数据库信创多了一个选择。
