


操作系统安装
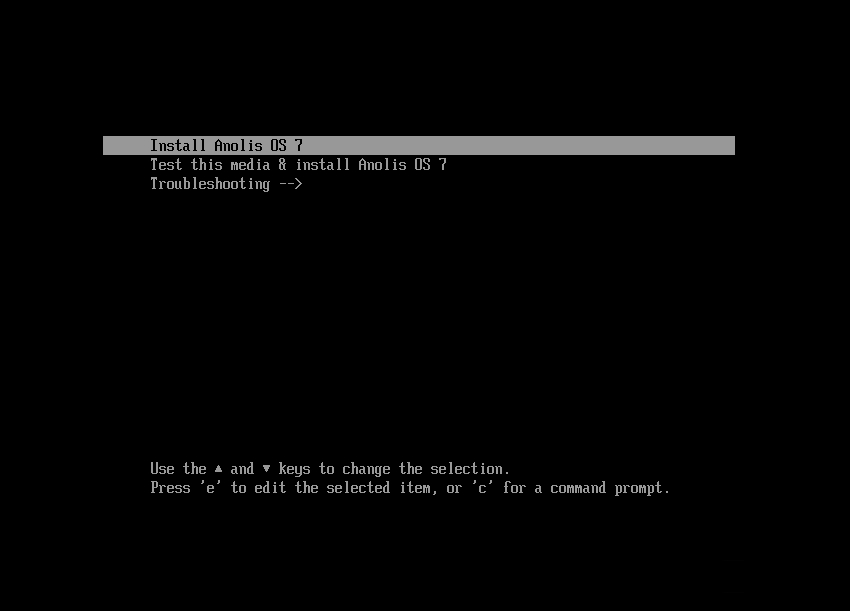
光盘启动,启动到安装界面,选择第一个选项,如下图:
选择后,稍等进入图形安装界面,如下图,默认英文,不改动,直接选择右下角continue

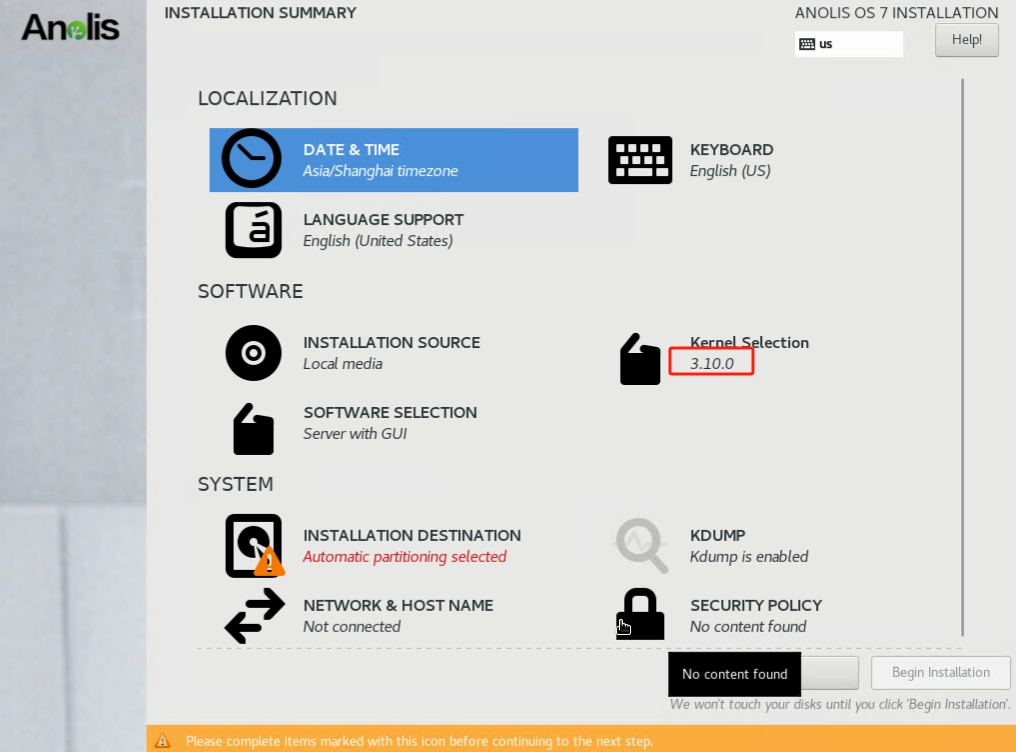
选择DATA&TIME,选择Asia-shanghai


确认Kernel Selection为3.10.0版本,否则进入该项目选择内核版本为3.10.0。
点击SOFTWARE SELECTION进行软件安装包选择
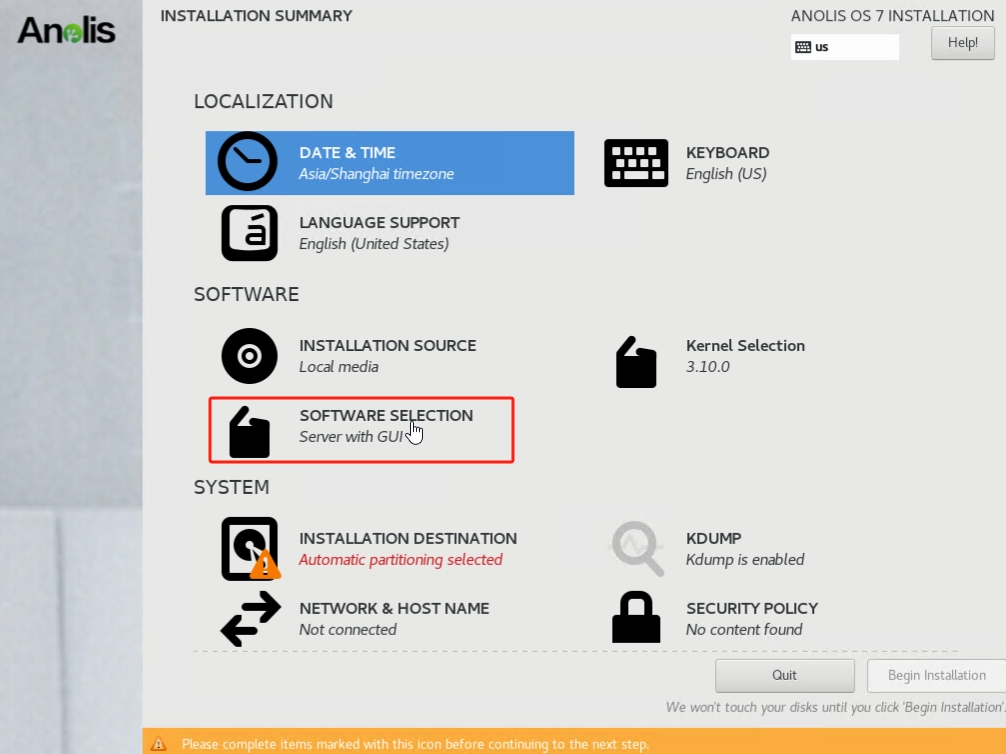
选择如下安装包,如下图:

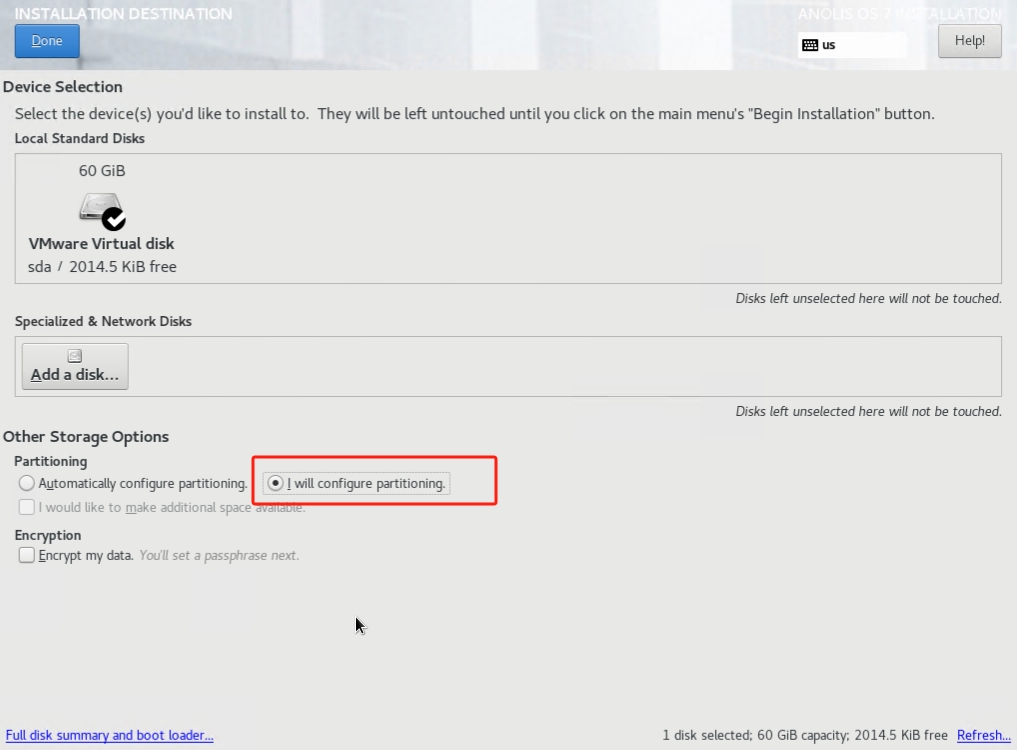
选择INSTALLATION DESTINATION选择进行安装硬盘设置
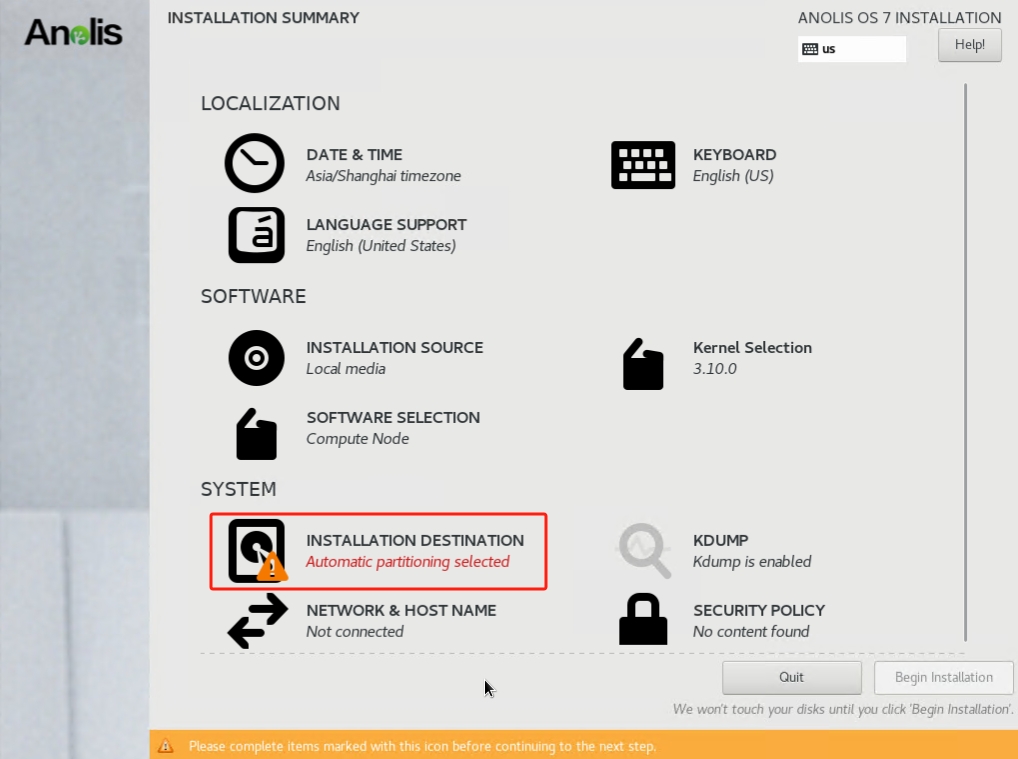
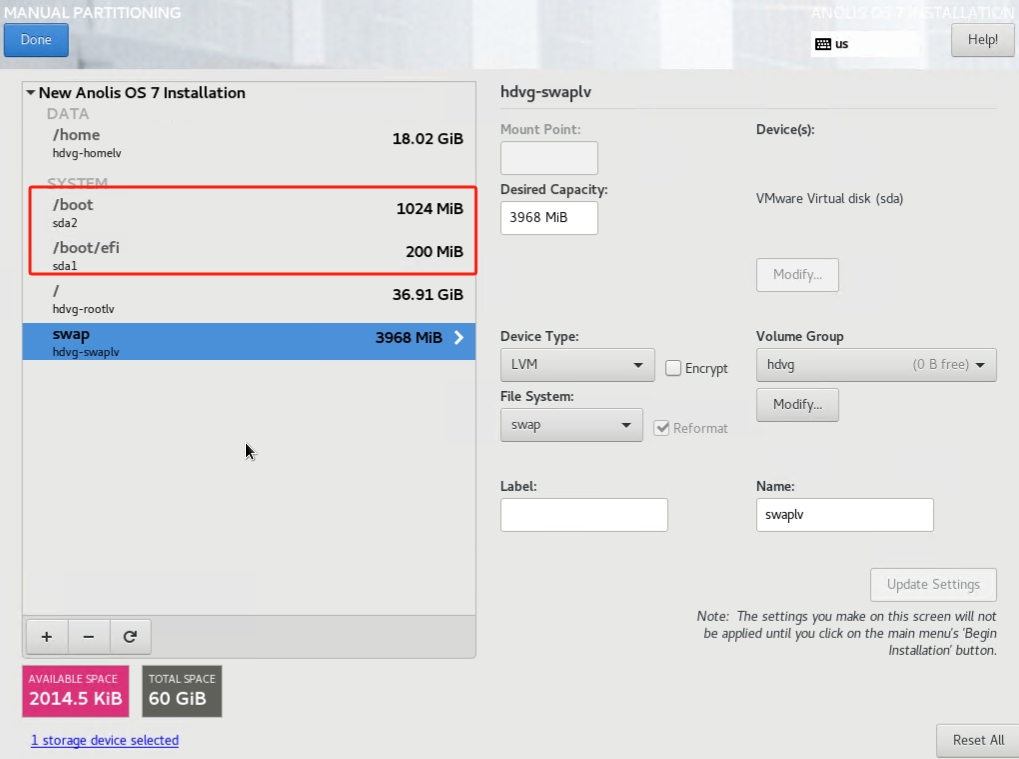
如图,选择本地硬盘,选择红框自己配置各分区
进入后,选择红框,自动创建
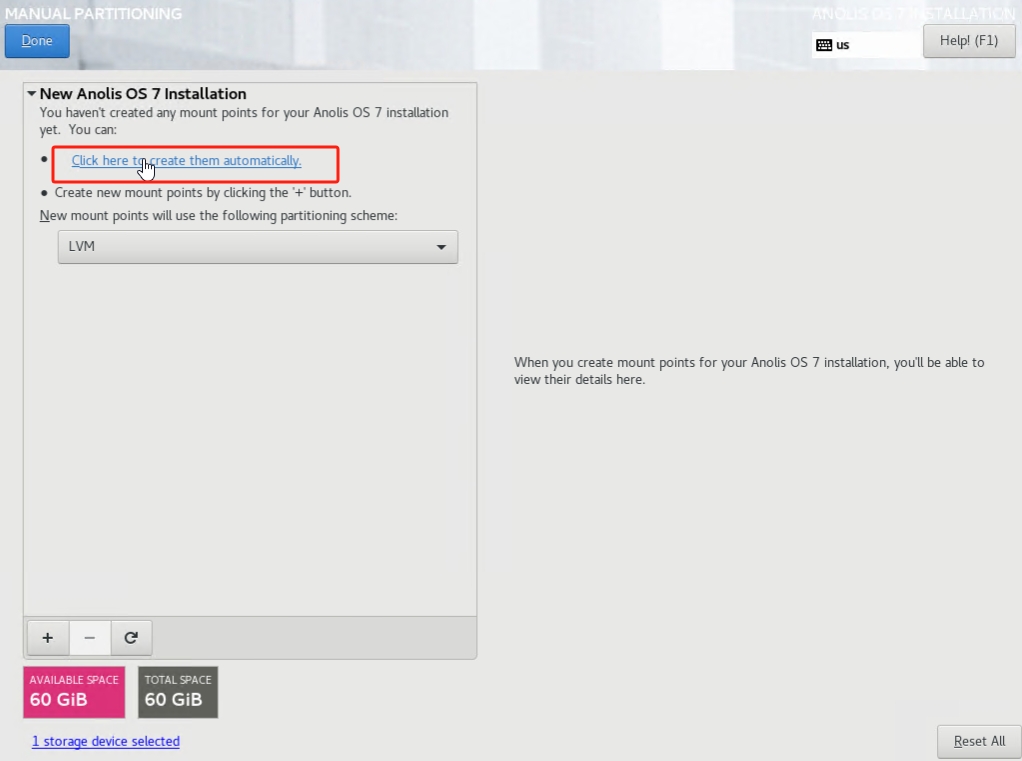
如果设备之前安装过系统,会在下面出现之前的系统分区,可以选择下面的“减号”删除全部原来的系统分区。

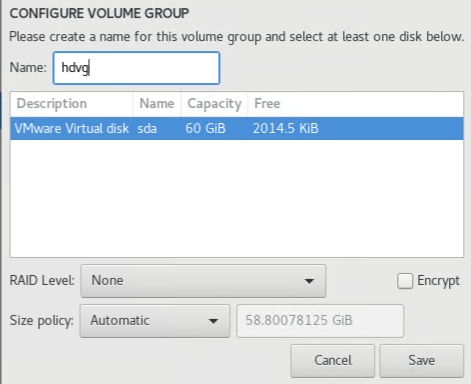
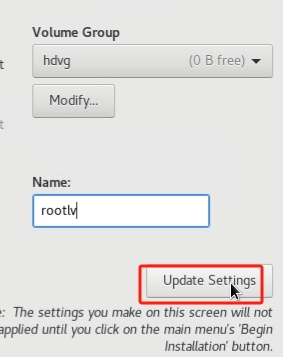
选择自动分区后,安装实际需要对vg、lv的名称、大小进行设置
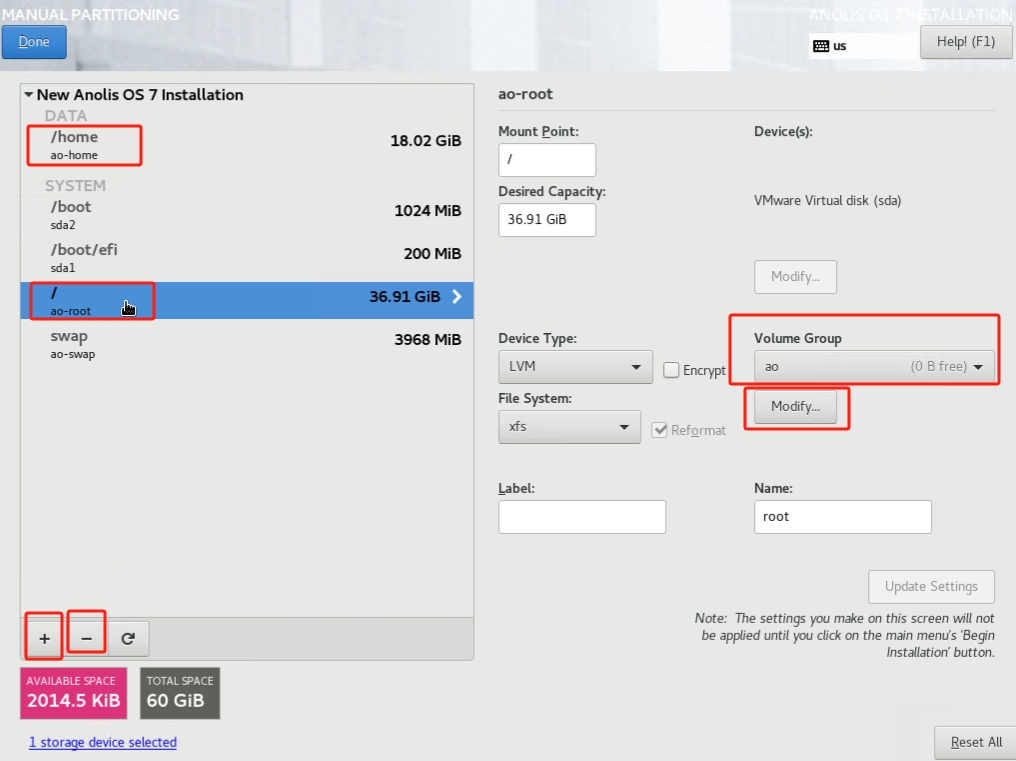
如果是UEFI启动会多一个/boot/efi分区,传统bios启动则没有这个分区,系统会自动设置这个分区,不需要改动。其他mount点设置完成后,选择左上角的Done退出配置界面。
主要的配置完成,选择右下角的Begin Installation开始安装。

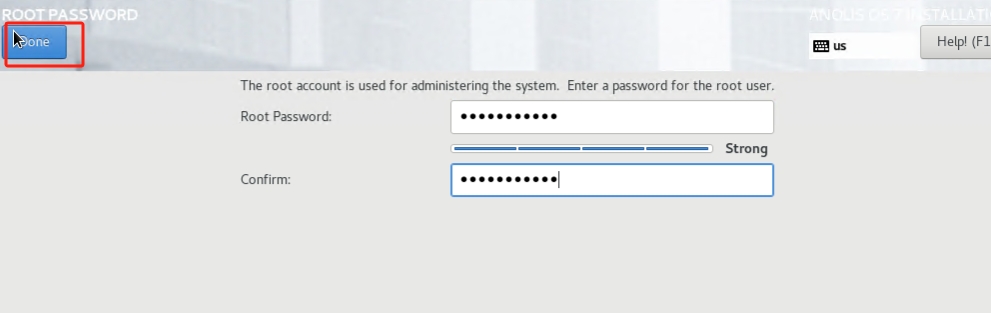
安装过程中,可以通过ROOT PASSWORD按钮设置root密码

安装完成后,右下角选择Reboot
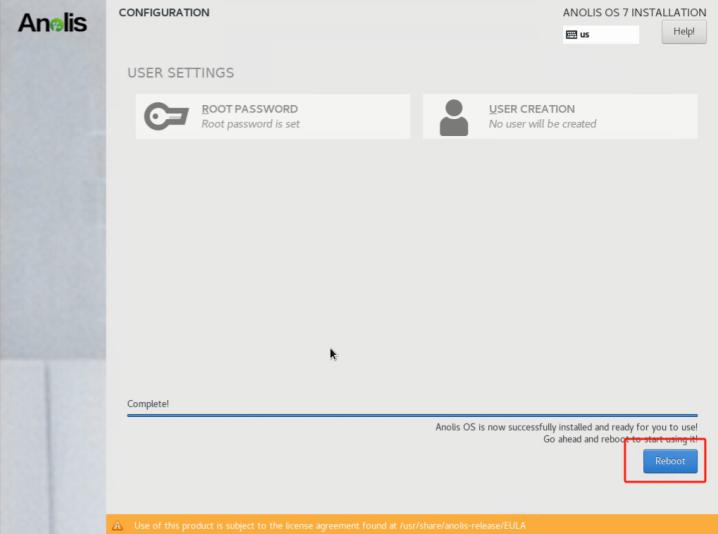
重启后,输入密码进入系统。
软件安装
上传安装iso到系统目录,mount到本地目录/mnt
[root@eb ~]# mount -t iso9660 -o loop /root/AnolisOS-7.9-GA-x86_64-dvd.iso /mnt
删除/etc/yum.repos.d/下的所有repo文件(删除前先备份),然后在/etc/yum.repos.d/目录下建立local.repo,添加如下内容:
[local]
name=local
gpgcheck=0
enabled=1
baseurl=file:///mnt
然后执行:
yum clean all,然后执行yum list看看是否可以列出软件
Yum本地源配置好后,安装如下软件:
yum groupinstall -y additional-devel ;
yum groupinstall -y anaconda-tools ;
yum groupinstall -y base ;
yum groupinstall -y compat-libraries ;
yum groupinstall -y console-internet ;
yum groupinstall -y core ;
yum groupinstall -y debugging ;
yum groupinstall -y desktop-debugging ;
yum groupinstall -y development ;
yum groupinstall -y dial-up ;
yum groupinstall -y file-server ;
yum groupinstall -y fonts ;
yum groupinstall -y hardware-monitoring ;
yum groupinstall -y input-methods ;
yum groupinstall -y internet-browser ;
yum groupinstall -y java-platform ;
yum groupinstall -y large-systems ;
yum groupinstall -y legacy-unix ;
yum groupinstall -y load-balancer ;
yum groupinstall -y multimedia ;
yum groupinstall -y network-file-system-client;
yum groupinstall -y network-tools ;
yum groupinstall -y performance ;
yum groupinstall -y perl-runtime ;
yum groupinstall -y platform-devel ;
yum groupinstall -y remote-system-management ;
yum groupinstall -y ruby-runtime ;
yum groupinstall -y scientific ;
yum groupinstall -y security-tools ;
yum groupinstall -y smart-card ;
yum groupinstall -y system-admin-tools ;
yum groupinstall -y system-management ;
yum groupinstall -y virtualization-platform ;
系统配置
执行如下命令,关闭不必要服务:
systemctl disable libvirtd.service
systemctl disable abrt-oops.service
systemctl disable abrt-ccpp.service
systemctl disable abrtd.service
systemctl disable alsa-restore.service
systemctl disable alsa-store.service
systemctl disable alsa-state.service
systemctl disable cups.service
systemctl disable rhsmcertd.service
systemctl disable rpcbind.service
systemctl disable rpcbind.socket
systemctl disable chronyd.service
systemctl disable multipathd.service
systemctl disable rpcgssd.service
systemctl disable rpcidmapd.service
systemctl disable iscsi.service
systemctl disable mdmonitor.service
systemctl disable postfix.service
systemctl disable dbus-org.freedesktop.ModemManager1.service
systemctl disable auditd.service
systemctl disable iptables.service
锁定不必要账户:
passwd -l daemon
passwd -l bin
passwd -l sys
passwd -l adm
passwd -l lp
passwd -l nobody
passwd -l sshd
passwd -l games
passwd -l nfsnobody
编辑/etc/sysctl.conf添加如下内容:
kernel.sem = 250 32000 100 4096
fs.file-max = 6815744
fs.aio-max-nr = 1048576
vm.vfs_cache_pressure = 200
net.ipv4.ip_local_port_range = 1024 65535
net.core.rmem_default = 16777216
net.core.rmem_max = 16777216
net.core.wmem_default = 16777216
net.core.wmem_max = 16777216
net.ipv4.tcp_rmem = 4096 87380 16777216
net.ipv4.tcp_wmem = 4096 65536 16777216
net.ipv4.tcp_fin_timeout = 10
net.ipv4.tcp_tw_recycle = 1
net.core.netdev_max_backlog = 32768
net.ipv4.tcp_no_metrics_save = 1
net.core.somaxconn = 8192
net.ipv4.tcp_max_orphans = 262144
net.ipv4.tcp_max_syn_backlog = 262144
net.ipv4.tcp_synack_retries = 2
net.ipv4.tcp_syn_retries = 2
kernel.core_uses_pid = 0
执行如下命令:
echo 'PS1=`whoami`@`hostname`'"':'""'""$"PWD"'""'"">""'" >> /etc/profile;
echo 'HISTTIMEFORMAT="`whoami` %Y-%m-%d %H:%M:%S "' >> /etc/profile;
perl -pi -e 's/#Port 22/Port 19222/' /etc/ssh/sshd_config;
perl -pi -e 's/#UseDNS yes/UseDNS no/' /etc/ssh/sshd_config;
上述配置完成后,重启系统。
########注释##########
scp -p19222 root@192.168.1.13:/root/AnolisOS-8.6-x86_64-EB-20230703.iso ./
umount /mnt
cat > /etc/yum.repos.d/local.repo << EOF
[LocalRepo-BaseOS]
name=AnolisOS-8.8 - BaseOS
baseurl=file:///mnt/BaseOS/
enabled=1
gpgcheck=0
[LocalRepo-AppStream]
name=AnolisOS-8.8 - AppStream
baseurl=file:///mnt/
enabled=1
gpgcheck=0
EOF
mount -t iso9660 -o loop /root/AnolisOS-8.6-x86_64-EB-20230703.iso /mnt
yum clean all
yum groupinstall -y additional-devel --allowerasing;
yum groupinstall -y anaconda-tools --skip-broken;
yum groupinstall -y anaconda-tools --allowerasing;
yum groupinstall -y base ;
yum groupinstall -y additional-devel ;
yum groupinstall -y base ;
yum groupinstall -y core ;
yum groupinstall -y debugging ;
yum groupinstall -y desktop-debugging ;
yum groupinstall -y development ;
yum groupinstall -y dial-up ;
yum groupinstall -y file-server ;
yum groupinstall -y fonts ;
yum groupinstall -y hardware-monitoring ;
yum groupinstall -y input-methods ;
yum groupinstall -y internet-browser ;
yum groupinstall -y java-platform ;
yum groupinstall -y large-systems ;
yum groupinstall -y legacy-unix ;
yum groupinstall -y multimedia ;
yum groupinstall -y network-file-system-client;
yum groupinstall -y network-tools ;
yum groupinstall -y performance ;
yum groupinstall -y platform-devel ;
yum groupinstall -y remote-system-management ;
yum groupinstall -y scientific ;
yum groupinstall -y security-tools ;
yum groupinstall -y smart-card ;
yum groupinstall -y virtualization-platform ;
yum install -y glibc-devel
yum install -y libstdc++-devel
yum install -y ncurses-devel
yum install -y ncurses
yum install -y openssl
yum install -y openssl-devel
yum install -y fftw
yum install -y fftw-devel
yum install -y make
yum install -y gcc
yum install -y gcc-c++
