之前三篇文章分别讲解了 File 类,操作 IO 的套路,不能不懂的处理流。
今天的文章是 Java IO 的大结局,我们来聊聊 IO 的其它几个有用的流,内存流,打印流、压缩流。
1
内存操作流

前面讲解的输入和输出都是操作文件的,其实我们也可以将内容写到内存,以及从内存中读取数据。内存操作流也就是字节数组节点流,分为字节数组输入流和字节数组输出流。我们可以使用字节数组输入流 BufferedInputStream 类读取内存中的数据,使用字节数组输出流 ByteArrayOutputStream 类将内容写到内存。
内存操作流一般用于生成临时信息,数据内容比较少的场景下,如果临时信息用文件保存的话,代码执行完毕后需要删除这个临时文件,所以这种有临时信息的存储使用内存操作是最合适的。
下面通过一段代码来演示内存操作流的使用:
@Testpublic void test() throws IOException {read(write());}/*** 字节数组输入流的操作与文件输入操作流的操作一样*/public void read(byte[] src) throws IOException {数据源是传入的字节数组输入流,可以读取其他电脑上内存的内容InputStream is = new BufferedInputStream(new ByteArrayInputStream(src));操作byte[] b = new byte[1024];int len = 0;while ((len = is.read(b)) != -1) {System.out.println(new String(b, 0, len));}is.close();}*** 字节数组输出流的操作与文件输出操作流的操作有区别,因为字节数组输出流有新增的方法,不能使用多态*/public byte[] write() throws IOException {byte[] dest; 输出的目的地选择流,没有入参,不用把dest传入ByteArrayOutputStream bos = new ByteArrayOutputStream();写出String msg = "字节数组输入流的操作与文件输入操作流的操作一样";byte[] src = msg.getBytes();bos.write(src, 0, src.length);bos.flush();字节数组输出流是通过toByteArray方法获取的数据,因此不需要在构造函数传入dest参数dest = bos.toByteArray();bos.close();return dest;}
运行结果:
字节数组输入流的操作与文件输入操作流的操作一样
2
打印流
1、认识打印流
打印流是输出信息最方便的流,主要使用字节打印流 PrintStream,PrintStream 类继承 FilterOutputStream 类,FilterOutputStream 类继承 OutputStream 类。在 PrintStream 类的对象创建的时候可以把 OutputStream 类的对象传入,也就是说 PrintStream 类包装了 OutputStream 类或者 FilterOutputStream 类,这也就是我们经常说的的装饰设计模式,用装饰设计模式包装后,使操作更加方便。
代码示例:
@Testpublic void test() throws IOException {System.out.println("打印流");System.out本身就是PrintStream的实例,所以可以直接赋值PrintStream ps = System.out;ps.println(100); 默认输出到控制台用PrintStream输出到文件File file = new File("D:/file/txt/print.txt");ps = new PrintStream(new BufferedOutputStream(new FileOutputStream(file)));ps.println("print io test ...");ps.flush();ps.close();}
运行结果:
打印流100

2、了解 System 类的三个常量以及 Scanner 类
1、System.in:输入流,表示键盘输入
2、System.out:输出流,表示控制台输出
3、System.err:异常,输出的字体是红色的
另外我们可以使用 Java 提供的 Scanner 类进行数据输入,比如我们通过控制台接收用户的输入,完成输出。Scanner 类提供了一个可以接收 InputStream 类型的构造方法,这就说明只要是字节输入流的子类都可以通过 Scanner 类进行方便的读取,这也是装饰设计模式,需要注意的是:在 Java IO 中使用了大量的装饰模式。
代码演示,包括如何使用可变参数实现资源关闭:
@Testpublic void test1() throws IOException {System的三个常量:System.out.println("test");System.err.println("error"); 输出的字体是红色的InputStream is = System.in; // 键盘输入Scanner scanner = new Scanner(is);System.out.println("Scanner 请输入:");System.out.println(scanner.nextLine());// 封装字节输入流似ScannerBufferedReader br = new BufferedReader(new InputStreamReader(is)); // 字节流转字符流System.out.println("封装字节输入流似Scanner 请输入:");System.out.println(br.readLine());// 键盘输入改为文件输入InputStream is1 = new BufferedInputStream(new FileInputStream(new File("D:/file/txt/print.txt")));Scanner scanner1 = new Scanner(is1);System.out.println(scanner1.nextLine());close(scanner1, is1, scanner, is);}/*** 关闭资源,用可变参数实现,可变参数:用三个点表示,只能放在形参的最后一个位置*/public static void close(Closeable... io) {if (io != null) {for (Closeable closeable : io) {try {if (closeable != null) {closeable.close();}} catch (IOException e) {e.printStackTrace();}}}}
运行结果:
testerrorScanner 请输入:可多看点可多看点封装字节输入流似Scanner 请输入:你好你好print io test ...
3
压缩流
我们经常使用 WinRAR 或 WinZIP 等压缩文件,通过这些软件我们可以把一个很大的文件或者多个文件进行压缩,以方便传输。在 Java 中为了减少传输过程的数据量提供了专门的压缩流,可以将文件或者文件夹压缩成 ZIP、JAR、GZIP等格式。
1、ZIP 文件压缩
压缩文件需要用到压缩输出流 ZipOutputStream 类,每一个被压缩的文件都用一个 ZipEntry 对象表示,用 putNextEntry() 方法可以把 ZipEntry 对象加入到压缩输出流里面,之后调用 closeEntry() 方法关闭当前 ZipEntry 对象。
用一个例子演示单个文件的压缩:
@Testpublic void test() throws IOException {// 指定要压缩的文件夹File srcFile = new File("D:/file/txt/print.txt");// 指定压缩后的文件File zipFile = new File("D:/file/txt/print.zip");// 定义输入文件流InputStream is = new BufferedInputStream(new FileInputStream(srcFile));// 定义压缩输出流OutputStream out = new BufferedOutputStream(new FileOutputStream(zipFile));ZipOutputStream zipOut = new ZipOutputStream(out);// 压缩文件的每一个子文件都是一个ZipEntry,需要为ZipEntry设置名称System.out.println(srcFile.getName());ZipEntry entry = new ZipEntry(srcFile.getName());// 设置entry对象zipOut.putNextEntry(entry);// 关闭当前entry对象zipOut.closeEntry();// 压缩操作byte[] b = new byte[1024];int len = 0;while ((len = is.read(b)) != -1) {zipOut.write(b, 0, len); // 压缩内容}zipOut.flush();zipOut.close();is.close();}
下面是一个压缩文件夹的例子,就是在利用上面的代码加上文件夹的列出文件方法结合递归实现的。
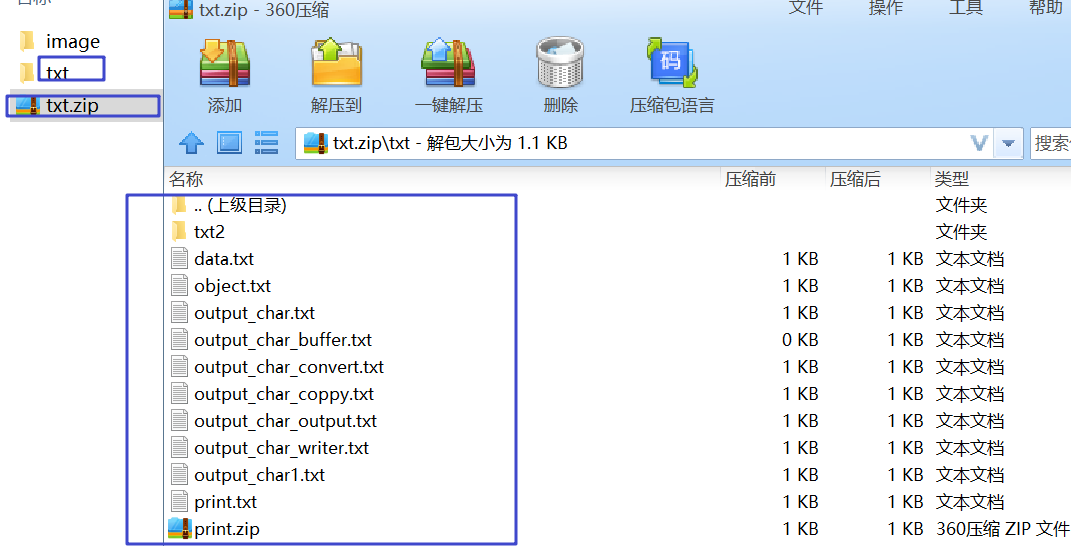
@Testpublic void test1() throws Exception {// 指定要压缩的文件夹File srcFile = new File("D:/file/txt");// 指定压缩后的文件File zipFile = new File("D:/file/txt.zip");// 定义压缩输出流OutputStream out = new BufferedOutputStream(new FileOutputStream(zipFile));ZipOutputStream zipOut = new ZipOutputStream(out);// 压缩文件夹zipFile(zipOut, srcFile, srcFile.getName());zipOut.flush();zipOut.close();}/*** @Description: 递归压缩文件夹<br>* @param zipOut 压缩输出流,必须在外部关闭* @param src 要压缩的目标文件夹* @param zipPath 压缩后的目标文件路径*/public void zipFile(ZipOutputStream zipOut, File src, String zipPath) throws FileNotFoundException, IOException {if (src.isDirectory()) {File[] files = src.listFiles();if (files != null && files.length > 0) {for (File file : files) {// 压缩包中如果要保留原来的文件结构,必须带上父文件夹的名字加一斜杠,否则所有文件都写到压缩包目录下了zipFile(zipOut, file, zipPath + "/" + file.getName());}} else { // 对空文件夹也进行压缩zipOut.putNextEntry(new ZipEntry(zipPath + "/"));zipOut.closeEntry();}} else {InputStream is = new BufferedInputStream(new FileInputStream(src));zipOut.putNextEntry(new ZipEntry(zipPath));byte[] b = new byte[1024];int len = 0;while ((len = is.read(b)) != -1) {zipOut.write(b, 0, len);}zipOut.closeEntry();is.close();}}
运行结果:
2、ZIP 文件解压
在 Java 中每一个压缩文件都可以用 ZipFile 表示,还可以 使用 ZipFile 根据压缩后的文件名称找到每一个压缩文件中的 ZipEntry 对象,并将其进行解压操作。
下面我们分部对上面压缩的2个文件进行解压,首先对单个文件解压:
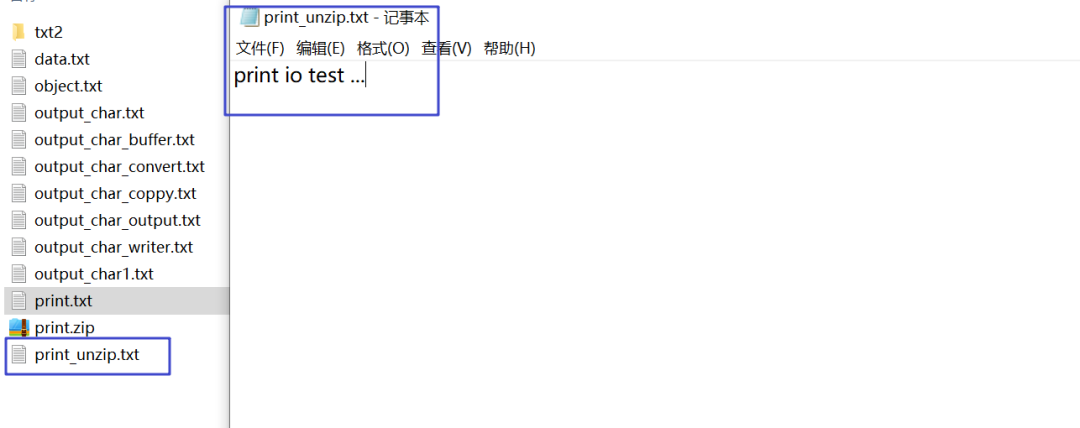
@Testpublic void test2() throws ZipException, IOException {// 找到压缩文件File srcFile = new File("D:/file/txt/print.zip");// 定义解压缩的文件名称File destFile = new File("D:/file/txt/print_unzip.txt");// 创建ZipFile对象ZipFile zipFile = new ZipFile(srcFile);// 根据压缩文件里的名称获取ZipEntry对象,名称必须能找到,否则获取输入流时空指针异常ZipEntry entry = zipFile.getEntry("print.txt");if (entry != null) {// 根据ZipEntry对象获取ZipEntry输入流InputStream is = zipFile.getInputStream(entry);// 创建输出流OutputStream os = new BufferedOutputStream(new FileOutputStream(destFile));// 读取并输出byte[] b = new byte[1024];int len = 0;while ((len = is.read(b)) != -1) {os.write(b, 0, len);}os.flush();os.close();is.close();}zipFile.close();}
运行结果:
以上程序如果一个压缩文件中存在多个文件夹或者多个 ZipEntry 就不行了,要操作更复杂的压缩文件需要用到 ZipInputStream 类实现。ZipInputStream 类可以方便的读取 ZIP 格式的压缩文件,下面我们演示解压复杂压缩文件的代码:
@Testpublic void testUnZip() throws IOException {// 指定要解压缩的文件夹File srcFile = new File("D:/file/txt.zip");// 指定解压缩后的目录String destPath = "D:/file/txt_unzip/";unZipFile(srcFile, destPath);}/*** @Description: 文件夹解压方法<br>* @param srcFile 要解压缩的文件夹* @param destPath 指定解压缩后的目录*/public void unZipFile(File srcFile, String destPath) throws FileNotFoundException, IOException {// 创建zip输入流ZipInputStream zis = new ZipInputStream(new BufferedInputStream(new FileInputStream(srcFile)));ZipEntry entry = null;OutputStream os = null;// 指定解压缩后的文件File destFile = null;while ((entry = zis.getNextEntry()) != null) {destFile = new File(destPath + entry.getName());// entry有两种情况,要么是文件夹,要么是文件if (entry.isDirectory()) { // 如果是文件夹,可以先创建,这样空文件夹也能解压缩destFile.mkdirs();} else {if (!destFile.getParentFile().exists()) { // 创建文件的父目录,否则找不到路径destFile.getParentFile().mkdirs();}os = new BufferedOutputStream(new FileOutputStream(destFile));byte[] b = new byte[1024];int len = 0;while ((len = zis.read(b)) != -1) {os.write(b, 0, len);}os.flush();os.close();}}zis.close();}
以上的压缩与解压缩的代码,大家可以用到自己的项目中。
3、其他格式的压缩输入输出流
ZIP 是一种常见的压缩方式,在Java 开发过程中也可以实现 JAR 和 GZIP 格式的压缩与解压操作。
JAR 压缩的支持类在 java.util.jar 包中,常用类如下:
JAR 压缩输入流:JarInputStream
JAR 压缩输出流:JarOutputStream
JAR 文件:JARFile
JAR 实体:JAREntry
GZIP 是用于 Linux 系统的文件压缩,在 Linux 中经常会使用到*.gz 的文件,就是 GZIP 格式,GZIP 压缩的支持类在 java.util.zip 包中,常用类如下:
JAR 压缩输入流:GZIPInputStream
JAR 压缩输出流:GZIPOutputStream
大家可以自己仿照 ZIP 压缩解压的代码,试着操作一下。
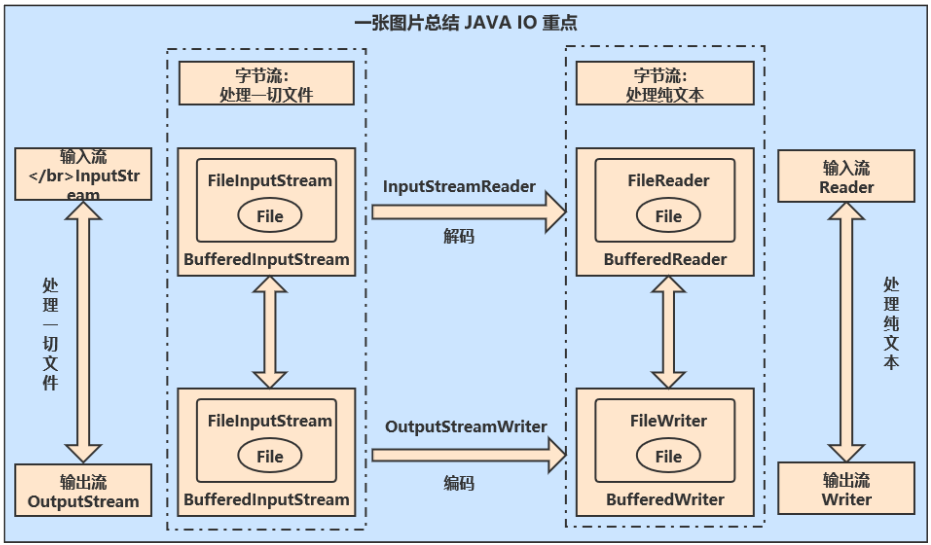
在文章的最后用一张图来总结一下 Java IO 的重点流,大家掌握了字节流和缓存流就足够使用了,IO 操作是有套路的,通过 Java IO 四篇文章的学习,相信 IO 操作对你来说已经不是问题了。