


探秘高效数据交换:Protocol Buffers(protobuf)在Java中的实战指南
目录
• 什么是 Protocol Buffers?
• Protobuf 基本使用方法
• 在 Java 项目中使用 Protobuf
• 数据类型
• 最佳实践
• 总结
Protocol Buffers(简称Protobuf)是由Google开发的一种语言中立、平台中立、可扩展的序列化结构数据格式。它不仅性能优越,还具有良好的可扩展性,被广泛应用于微服务通信、数据存储、配置文件等领域。本文将详细介绍Protobuf的特点、基本使用方法,并具体讲解如何在Java项目中使用Protobuf。
什么是 Protocol Buffers?
Protocol Buffers 是一种与数据结构定义相关的语言,由 Google 开发。它允许开发人员定义数据模型,然后使用自动生成的代码在不同编程语言之间进行高效的数据交换。它的核心思想是通过 .proto
文件定义数据结构,然后通过编译器生成相应的代码,便于在不同编程语言中使用。
Protobuf 的优点
1. 高效的序列化和反序列化:Protobuf 使用二进制格式进行数据传输,速度快且占用空间小。
2. 向后兼容性:可以在不破坏现有代码的情况下对数据结构进行修改和扩展。
3. 多语言支持:Protobuf 支持多种编程语言,包括Java、C++、Python、Go等。
4. 简洁的定义语言:通过简洁的
.proto
文件定义数据结构。
Protobuf 基本使用方法
定义数据结构
通常,我们首先需要创建一个 .proto
文件来定义数据结构。以下是一个简单的 .proto
文件示例:
syntax = "proto3";

package wiki.hadoop.protobuf;

option java_outer_classname = "TestProtobuf";

message Person {
  string name = 1;
  int32 id = 2;
  string email = 3;
  map<string, string> attributes = 4;
}


message Student {
  string name = 1;
  int32 id = 2;
  string email = 3;
  map<string, string> attributes = 4;
}
在上面的示例中:
•
syntax = "proto3";
指定使用 Protobuf 的版本(proto3)。•
package wiki.hadoop.protobuf;
定义了包名。•
option java_outer_classname = "TestProtobuf";
:指定生成的 Java 文件的外部类名为TestProtobuf
。这意味着所有在此文件中定义的消息类将作为TestProtobuf
类的内部静态类生成。•
message
是 Protobuf 中的基本数据结构,可以包含多个字段,每个字段都有一个唯一的编号。
生成代码
使用 Protobuf 编译器(protoc
)将 .proto
文件编译成相应语言的代码。对于 Java,我们可以使用以下命令:
protoc --java_out=./output example.proto
这会在 ./output
目录下生成相应的 Java 类文件。
在 Java 项目中使用 Protobuf
接下来,我们详细介绍如何在 Java 项目中使用 Protobuf。
IDEA环境准备
安装插件

添加依赖
在你的 Java 项目中添加 Protobuf 的依赖。对于 Maven 项目,可以在 pom.xml
中添加以下依赖:
<protobuf.version>3.25.3</protobuf.version>

<dependency>
    <groupId>com.google.protobuf</groupId>
    <artifactId>protobuf-java</artifactId>
    <version>${protobuf.version}</version>
</dependency>

<build>
    <plugins>
        <plugin>
            <!-- 定义 Protobuf Maven 插件 -->
            <groupId>org.xolstice.maven.plugins</groupId>
            <artifactId>protobuf-maven-plugin</artifactId>
            <version>0.6.1</version>
            <configuration>
                <!-- 指定 .proto 文件所在的目录 -->
                <protoSourceRoot>${basedir}/src/main/resources/proto</protoSourceRoot>
                <!-- 指定 protoc 工具的 Maven 坐标, ${protobuf.version} 和 ${os.detected.classifier} 是占位符,分别表示 Protobuf 版本和操作系统分类器 -->
                <protocArtifact>com.google.protobuf:protoc:${protobuf.version}:exe:${os.detected.classifier}</protocArtifact>
                <!-- 指定生成的 Java 文件的输出目录 -->
                <outputDirectory>${project.basedir}/src/main/resources/proto/java</outputDirectory>
                <!-- 生成文件前是否清空目标目录,设置为 false 以防止误删项目文件 -->
                <!-- <clearOutputDirectory>false</clearOutputDirectory> -->
            </configuration>
            <executions>
                <execution>
                    <goals>
                        <!-- 执行 Protobuf 编译目标 -->
                        <goal>compile</goal>
                        <!-- 执行自定义的 Protobuf 编译目标 -->
                        <goal>compile-custom</goal>
                    </goals>
                </execution>
            </executions>
        </plugin>
    </plugins>
    <extensions>
        <!-- 这个扩展必须添加,用于检测操作系统并生成适当的分类器(os.detected.classifier),确保 protoc 工具能够正确运行在不同操作系统上 -->
        <extension>
            <groupId>kr.motd.maven</groupId>
            <artifactId>os-maven-plugin</artifactId>
            <version>1.7.1</version>
        </extension>
    </extensions>
</build>
插件配置完,更新依赖,在Maven中可以看到这个命令,该命令就是用于生成java文件的
编写 .proto
文件
创建一个名为 person.proto
的文件,并定义数据结构:
syntax = "proto3";

package wiki.hadoop.protobuf;

// 定义 Person 消息
message Person {
  string name = 1;
  int32 id = 2;
  string email = 3;
  map<string, string> attributes = 4;
}

// 定义 Student 消息
message Student {
  string name = 1;
  int32 id = 2;
  string email = 3;
  map<string, string> attributes = 4;
}
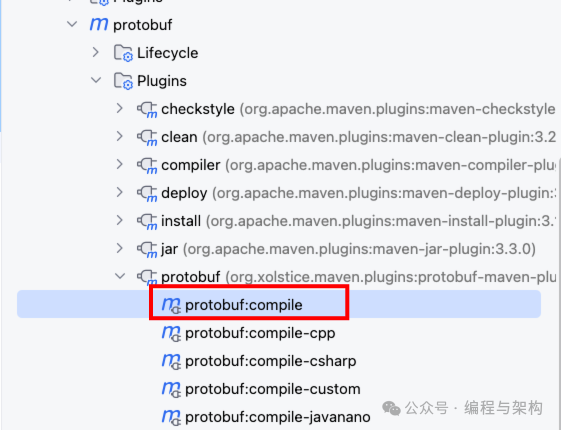
生成 Java 代码
点击运行 protobuf:compile

使用生成的 Java 类
编译后,会生成一个 Person
类,我们可以在 Java 项目中使用它。以下是一个完整的示例,展示如何创建、序列化和反序列化 Person
对象。
创建 Person
对象
package wiki.hadoop;

import wiki.hadoop.protobuf.TestProtobuf;

import com.google.protobuf.InvalidProtocolBufferException;

public class ProtobufExample {
    public static void main(String[] args) throws InvalidProtocolBufferException {
        // 创建 Person 对象并设置 map 字段
        TestProtobuf.Person person =
                TestProtobuf.Person.newBuilder()
                        .setName("John Doe")
                        .setId(1234)
                        .setEmail("john.doe@example.com")
                        .putAttributes("nickname", "Johnny")
                        .putAttributes("role", "admin")
                        .build();

        // 创建 Student 对象并设置所有字段
        TestProtobuf.Student student =
                TestProtobuf.Student.newBuilder()
                        .setName("Jane Smith")
                        .setId(5678)
                        .setEmail("jane.smith@example.com")
                        .putAttributes("grade", "A")
                        .putAttributes("major", "Computer Science")
                        .build();

        // 打印 Student 和 Person 对象的详细信息
        System.out.println("Student Details:" + student);
        System.out.println("Person Details:" + person);

        // 序列化 Student 对象 ,数据传输时使用
        byte[] byteArray = student.toByteArray();

        // ... 传输动作

        // 反序列化 Student 对象
        TestProtobuf.Student deserializedStudent = TestProtobuf.Student.parseFrom(byteArray);
        System.out.println("反序列化后:" + deserializedStudent);
    }
}
在上面的示例中,我们展示了如何创建一个 Person
对象,并将其序列化为字节数组,然后再反序列化回 Person
对象。
修改 Person
对象
Protobuf 提供了方便的 Builder
模式,可以轻松地修改和扩展消息对象。例如:
package wiki.hadoop;

import wiki.hadoop.protobuf.TestProtobuf;

public class ProtobufExample {
    public static void main(String[] args) {
        // 创建 Person 对象并设置 map 字段
        TestProtobuf.Person person =
                TestProtobuf.Person.newBuilder()
                        .setName("John Doe")
                        .setId(1234)
                        .setEmail("john.doe@example.com")
                        .putAttributes("nickname", "Johnny")
                        .putAttributes("role", "admin")
                        .build();

        TestProtobuf.Person john = person.toBuilder().setName("John").build();

        System.out.println(john.getName());
    }
}
Protobuf 的高级功能
Protobuf 不仅仅支持基本的数据类型和消息结构,还提供了许多高级功能,例如嵌套消息、枚举、扩展字段等。
嵌套消息
你可以在一个消息中定义另一个消息:
syntax = "proto3";

package wiki.hadoop.protobuf;

option java_outer_classname = "TestProtobuf";

message Person {
    string name = 1;
    int32 id = 2;
    string email = 3;

    message Address {
        string street = 1;
        string city = 2;
        string state = 3;
        string zip = 4;
    }

    Address address = 4;
}
生成的 Java 类将具有嵌套的结构:
import wiki.hadoop.protobuf.TestProtobuf.Person;
import wiki.hadoop.protobuf.TestProtobuf.Person.Address;

public class ProtobufExample {
    public static void main(String[] args) {
        // 创建 Address 对象
        Address address = Address.newBuilder()
                .setStreet("123 Main St")
                .setCity("Springfield")
                .setState("IL")
                .setZip("62701")
                .build();

        // 创建 Person 对象
        Person person = Person.newBuilder()
                .setName("John Doe")
                .setId(1234)
                .setEmail("john.doe@example.com")
                .setAddress(address)
                .build();

        // 打印 Person 对象
        System.out.println("Name: " + person.getName());
        System.out.println("Address: " + person.getAddress().getStreet());
    }
}
枚举类型
Protobuf 还支持枚举类型:
syntax = "proto3";

package wiki.hadoop.protobuf;

message Person {
    string name = 1;
    int32 id = 2;
    string email = 3;

    enum Gender {
        MALE = 0;
        FEMALE = 1;
    }

    Gender gender = 4;
}
在 Java 中使用枚举类型:
import wiki.hadoop.protobuf.Person;

public class ProtobufExample {
    public static void main(String[] args) {
        // 创建 Person 对象
        Person.Person person = Person.Person.newBuilder()
                .setName("John Doe")
                .setId(1234)
                .setEmail("john.doe@example.com")
                .setGender(Person.Gender.MALE)
                .build();

        // 打印性别
        System.out.println("Gender: " + person.getGender());
    }
}
字段修饰符
在 Protocol Buffers 中,repeated
和 optional
是两个用于修饰字段的关键字,它们有不同的用途和语义。
repeated
repeated
关键字用于表示一个字段可以出现零次或多次,即该字段是一个数组或列表。
特点
• 一个字段可以包含多个值。
• 可以为空(零个元素)。
• 在序列化时,每个元素都将被单独编码。
示例
message Person {
  repeated string phone_numbers = 1;
}
在上面的示例中,phone_numbers
字段可以包含零个或多个电话号码。
Java 使用示例
Person.Builder personBuilder = Person.newBuilder();
personBuilder.addPhoneNumbers("555-1234");
personBuilder.addPhoneNumbers("555-5678");

Person person = personBuilder.build();
for (String phoneNumber : person.getPhoneNumbersList()) {
    System.out.println(phoneNumber);
}
optional
optional
关键字用于表示一个字段可以出现零次或一次,即该字段是可选的。
特点
• 一个字段最多只能包含一个值。
• 可以为空(未设置)。
• 在序列化时,如果字段没有设置值,将不会被编码。
示例
message Person {
  optional string email = 2;
}
在上面的示例中,email
字段可以包含一个电子邮件地址,也可以未设置。
Java 使用示例
Person.Builder personBuilder = Person.newBuilder();
personBuilder.setEmail("johndoe@example.com");

Person person = personBuilder.build();
if (person.hasEmail()) {
    System.out.println(person.getEmail());
} else {
    System.out.println("Email not set.");
}
比较
1. 出现次数:
•
repeated
字段可以出现零次或多次。•
optional
字段最多出现一次。2. 编码方式:
•
repeated
字段的每个元素都将被单独编码。•
optional
字段如果未设置,将不会被编码。3. 访问方式:
•
repeated
字段在 Java 中通常使用List
访问。•
optional
字段在 Java 中使用 getter 方法访问,并且可以使用hasFieldName()
方法检查其是否设置。
注意
• 在 Protocol Buffers 3.0(proto3)中,
optional
关键字被简化,所有字段默认都是optional
,不需要显式声明。• 在 proto3 中,
optional
关键字主要用于与旧版本兼容,并且在一些特定情况下使用,如oneof
。
总结
•
repeated
用于表示一个字段可以包含多个值。•
optional
用于表示一个字段可以包含零个或一个值(在 proto3 中,所有字段默认都是optional
)。
Protobuf 的向后兼容性
Protobuf 的一个重要特性是向后兼容性,即可以在不破坏现有代码的情况下对数据结构进行扩展。添加新的字段时,只需在 .proto
文件中添加新字段,并确保字段编号不冲突:
syntax = "proto3";

package wiki.hadoop.protobuf;

message Person {
    string name = 1;
    int32 id = 2;
    string email = 3;
    string phone = 4; // 新添加的字段
}
编译后生成的代码将包含新字段:
Person.Person person = Person.Person.newBuilder()
        .setName("John Doe")
        .setId(1234)
        .setEmail("john.doe@example.com")
        .setPhone("123-456-7890")
        .build();
总结,Protobuf 是一种高效、灵活的数据交换格式,尤其适用于需要高性能序列化和反序列化的场景。通过定义 .proto
文件,使用 protoc
编译器生成代码,你可以在 Java 项目中轻松地使用 Protobuf 进行数据传输和存储。
希望这篇博客能帮助你更好地理解和使用 Protobuf。如果你需要进一步深入了解 Protobuf,不妨探索以下高级功能和最佳实践:
数据类型
整体介绍
| 类型 | 字段名称 | 描述 |
| 基本类型 | int32 | 32位有符号整数 |
int64 | 64位有符号整数 | |
uint32 | 32位无符号整数 | |
uint64 | 64位无符号整数 | |
sint32 | 32位有符号整数,使用ZigZag编码 | |
sint64 | 64位有符号整数,使用ZigZag编码 | |
fixed32 | 32位有符号固定长度整数 | |
fixed64 | 64位有符号固定长度整数 | |
sfixed32 | 32位有符号固定长度整数,使用ZigZag编码 | |
sfixed64 | 64位有符号固定长度整数,使用ZigZag编码 | |
float | 32位浮点数 | |
double | 64位浮点数 | |
bool | 布尔值(true 或 false) | |
string | 字符串(UTF-8编码) | |
bytes | 字节数组 | |
| 枚举类型 | Status | 枚举类型,包括三个可能的状态:UNKNOWN, ACTIVE, INACTIVE |
| 嵌套消息类型 | NestedMessage | 嵌套消息类型,包含一个字符串字段 nested_field |
| map 类型 | map<string, int32> | 键为 string类型,值为 int32类型 |
| repeated 类型 | repeated string | 重复字段,包含多个字符串 |
| 特殊类型 | google.protobuf.Any | 可以存储任意类型的消息 |
google.protobuf.Timestamp | 表示时间戳 | |
google.protobuf.Duration | 表示时间段 | |
google.protobuf.Struct | 结构化数据类型,可以存储动态键值对 | |
google.protobuf.FieldMask | 用于指定哪些字段应被操作 |
syntax = "proto3";

package example;

// 导入Google提供的一些特殊类型
import "google/protobuf/any.proto";
import "google/protobuf/timestamp.proto";
import "google/protobuf/duration.proto";
import "google/protobuf/struct.proto";
import "google/protobuf/field_mask.proto";

message ExampleMessage {
    // 基本类型
    int32 int_field = 1;
    int64 long_field = 2;
    uint32 uint_field = 3;
    uint64 ulong_field = 4;
    sint32 sint_field = 5;
    sint64 slong_field = 6;
    fixed32 fixed32_field = 7;
    fixed64 fixed64_field = 8;
    sfixed32 sfixed32_field = 9;
    sfixed64 sfixed64_field = 10;
    float float_field = 11;
    double double_field = 12;
    bool bool_field = 13;
    string string_field = 14;
    bytes bytes_field = 15;

    // 枚举类型
    enum Status {
        UNKNOWN = 0;
        ACTIVE = 1;
        INACTIVE = 2;
    }
    Status status_field = 16;

    // 嵌套消息类型
    message NestedMessage {
        string nested_field = 1;
    }
    NestedMessage nested_message = 17;

    // map 类型
    map<string, int32> map_field = 18;

    // repeated 类型
    repeated string repeated_field = 19;

    // 特殊类型
    google.protobuf.Any any_field = 20;
    google.protobuf.Timestamp timestamp_field = 21;
    google.protobuf.Duration duration_field = 22;
    google.protobuf.Struct struct_field = 23;
    google.protobuf.FieldMask field_mask_field = 24;
}
数据类型详细介绍
Map类型
在 Protobuf 中可以使用 map 来表示键值对结构。例如:
syntax = "proto3";

package wiki.hadoop.protobuf;

 message Person {
     string name = 1;
     int32 id = 2;
     string email = 3;
     map<string, string> attributes = 4;
 }
在 Java 中使用 map:
 public class ProtobufExample {
     public static void main(String[] args) {
         // 创建 Person 对象并设置 map 字段
         Person.Person person = Person.Person.newBuilder()
                 .setName("John Doe")
                 .setId(1234)
                 .setEmail("john.doe@example.com")
                 .putAttributes("nickname", "Johnny")
                 .putAttributes("role", "admin")
                 .build();

         // 打印 map 字段
         System.out.println("Attributes: " + person.getAttributesMap());
     }
 }
Any 类型
Protobuf 3 引入了 Any
类型,它允许你嵌入任意类型的 Protobuf 消息。
 syntax = "proto3";

 package wiki.hadoop.protobuf;

 import "google/protobuf/any.proto";

 message Container {
     string name = 1;
     google.protobuf.Any data = 2;
 }
在 Java 中使用 Any
类型:
 import com.google.protobuf.Any;
 import com.google.protobuf.InvalidProtocolBufferException;
 import wiki.hadoop.protobuf.Person;
 import wiki.hadoop.protobuf.Container;

 public class ProtobufExample {
     public static void main(String[] args) {
         // 创建一个 Person 对象
         Person.Person person = Person.Person.newBuilder()
                 .setName("John Doe")
                 .setId(1234)
                 .setEmail("john.doe@example.com")
                 .build();

         // 将 Person 对象封装进 Any 类型
         Any anyPerson = Any.pack(person);

         // 创建 Container 对象
         Container.Container container = Container.Container.newBuilder()
                 .setName("PersonContainer")
                 .setData(anyPerson)
                 .build();

         // 解包 Any 类型
         try {
             Person unpackedPerson = container.getData().unpack(Person.class);
             System.out.println("Unpacked Person Name: " + unpackedPerson.getName());
         } catch (InvalidProtocolBufferException e) {
             e.printStackTrace();
         }
     }
 }
Oneof
oneof
关键字允许你在消息中定义互斥的字段。互斥字段中只能有一个被设置。
 syntax = "proto3";

 package example;

 message Sample {
     string name = 1;
     oneof test_oneof {
         int32 id = 2;
         string email = 3;
     }
 }
在 Java 中使用 oneof
:
package wiki.hadoop;


import wiki.hadoop.protobuf.Preson;

public class ProtobufExample {
    public static void main(String[] args) {
        Preson.Person.Builder builder = Preson.Person.newBuilder();
        builder.setId("1");
        builder.setName("张三");
        builder.setUid(2);
        Preson.Person build = builder.build();
        System.out.println(build);
    }
}
输出结果
uid: 2
最佳实践
1. 字段编号管理: 为了确保 Protobuf 向后兼容性,字段编号一旦分配,尽量不要更改。可以为新增字段预留一些编号。
2. **合理使用
optional
和repeated
**:•
optional
:表示字段可以有也可以没有。默认情况下,proto3 中的所有字段都是 optional 的。•
repeated
:表示字段可以出现零次或多次,相当于数组或列表。3. 版本控制: 对
.proto
文件进行版本控制,确保每次修改都能追溯,并能够与代码版本对应。4. 文档和注释: 在
.proto
文件中添加注释,明确每个字段的用途和含义。syntax = "proto3";
package wiki.hadoop.protobuf;
// Person message represents an individual with basic contact information.
message Person {
string name = 1; // Name of the person
int32 id = 2; // Unique identifier for the person
string email = 3; // Email address of the person
string phone = 4; // Phone number of the person (optional)
}
总结
本文详细介绍了 Protocol Buffers 的基本概念、优点、如何定义和使用 .proto
文件、在 Java 项目中的集成方法,以及一些高级功能和最佳实践。以下是关键点总结:
• 高效的序列化和反序列化:Protobuf 使用二进制格式,提高了数据传输和存储的效率。
• 向后兼容性:Protobuf 允许你在不破坏现有代码的情况下对数据结构进行扩展。
• 多语言支持:Protobuf 支持多种编程语言,便于跨语言数据交换。
• 丰富的功能:支持嵌套消息、枚举、oneof、map、Any 类型等高级功能。
通过实际示例,我们展示了如何在 Java 项目中使用 Protobuf 进行数据定义、序列化和反序列化。在实际项目中,Protobuf 可以极大地提升数据传输和存储的效率,同时保持代码的简洁和可维护性。
