


第一步:新建拓扑图
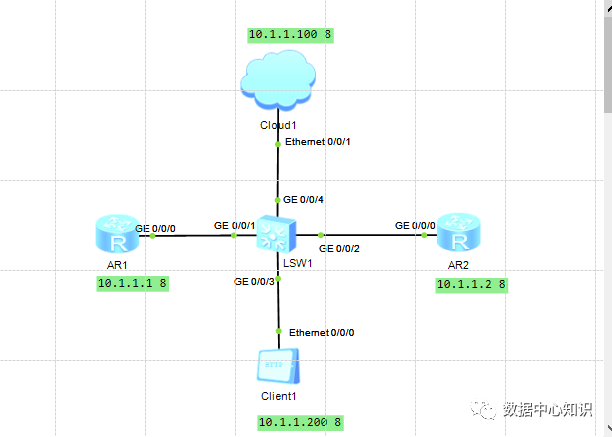
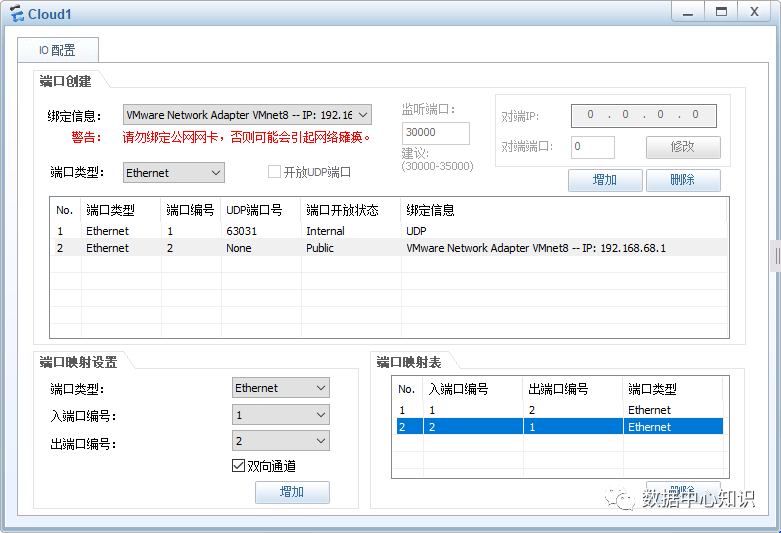
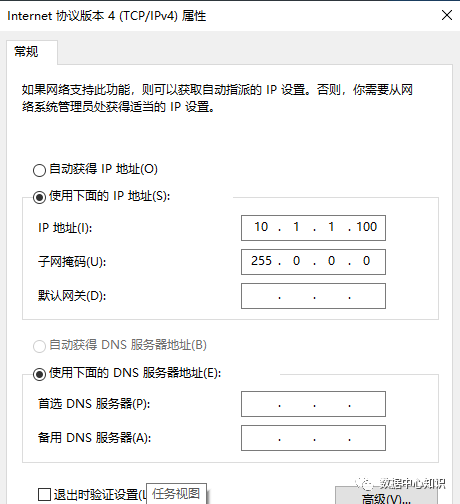
第二步:设置云主机,这里云主机设置完后,可以让本地的虚拟主机通过telnet的方式连接到目的路由器。
第三步:开启设备,打开CLI窗口进行一些必要设置,AR1为默认打开显示界面<用户视图>
system-view
//进入系统视图
[Huawei]sysname R1
//更改设备名称
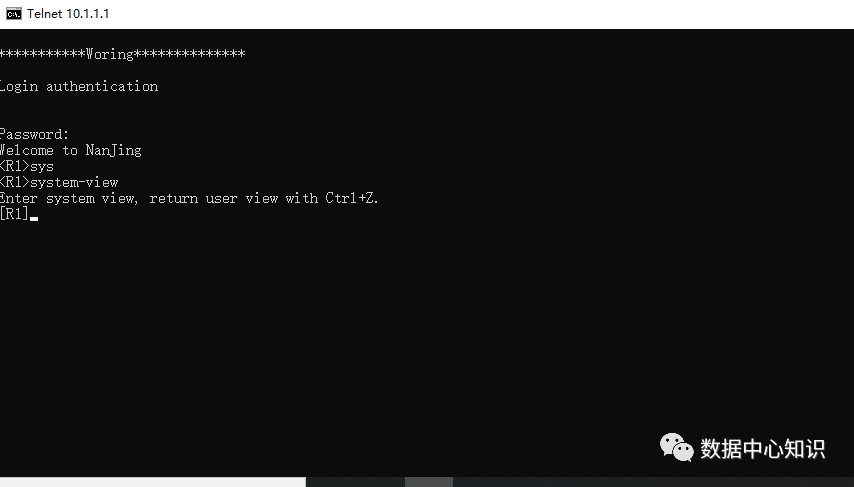
[R1]header login information "****Woring***"
//设置登录前显示内容
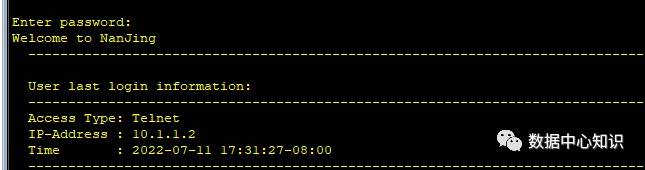
[R1]header shell information "Welcome to NanJing"
//设置登录成功后显示内容
[R1]return
//退回到用户视图
save
The current configuration will be written to the device.
Are you sure to continue? (y/n)[n]:
//只有在用户视图里面可以执行保存操作,选择y保存
[R1-GigabitEthernet0/0/0]quit
//退回到上一次视图
//配置console用户接口登录密码
[R1]user-interface console 0
[R1-ui-console0]authentication-mode password
Please configure the login password (maximum length 16):123
//配置console口登录密码为123
[R1-ui-console0]set authentication password cipher 123
//加密的方式配置console口登录密码为123
[R1-ui-console0]display this
//查看当前接口的配置内容
//配置vty用户接口登录密码
[R1]user-interface vty 0 4
[R1-ui-vty0-4]authentication-mode password
Please configure the login password (maximum length 16):123
[R1-ui-vty0-4]set authentication password cipher 123
[R1-ui-console0]display this
//显示此接口的配置信息
******************************************************************
[V200R003C00]
user-interface con 0
authentication-mode password
set authentication password cipher %$%$CUar)5LxCa/6C7h\k,,$w+ItZQY]QMd=VLU+3c
|IVI$w.,%$%$
user-interface vty 0 4
authentication-mode password
set authentication password cipher %$%$CUar)5LxCa/6C7h\k,,$w+ItZQY]QMd=VLU+3c
|IVI$w.,%$%$
user-interface vty 16 20
return
******************************************************************
[R1]int GigabitEthernet 0/0/0
//进入0端口配置IP
[R1-GigabitEthernet0/0/0]ip address 10.1.1.1 8
//ip地址为10.1.1.1 子网掩码为8
接下来接着配置R2 0/0/0口的ip
[R2]interface GigabitEthernet 0/0/0
//进入0端口配置IP
[R2-GigabitEthernet0/0/0]ip address 10.1.1.2 8 ip地址为10.1.1.2 子网掩码为8
ping 10.1.1.1
//pingR1的IP地址能ping通
******************************************************************
PING 10.1.1.1: 56 data bytes, press CTRL_C to break
Reply from 10.1.1.1: bytes=56 Sequence=1 ttl=255 time=50 ms
Reply from 10.1.1.1: bytes=56 Sequence=2 ttl=255 time=50 ms
Reply from 10.1.1.1: bytes=56 Sequence=3 ttl=255 time=50 ms
Reply from 10.1.1.1: bytes=56 Sequence=4 ttl=255 time=50 ms
Reply from 10.1.1.1: bytes=56 Sequence=5 ttl=255 time=60 ms
*************************************************************
★此时用R2 telnet连接R1时,会发现进不了系统视图,这是因为vty的操作权限没有打开造成的。
[R1]user-interface vty 0 4
[R1-ui-vty0-4]user privilege level 3
\\进入vty视图更改管理等级
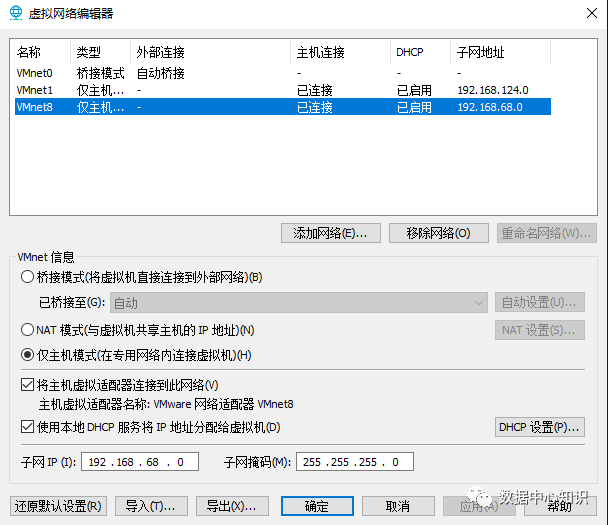
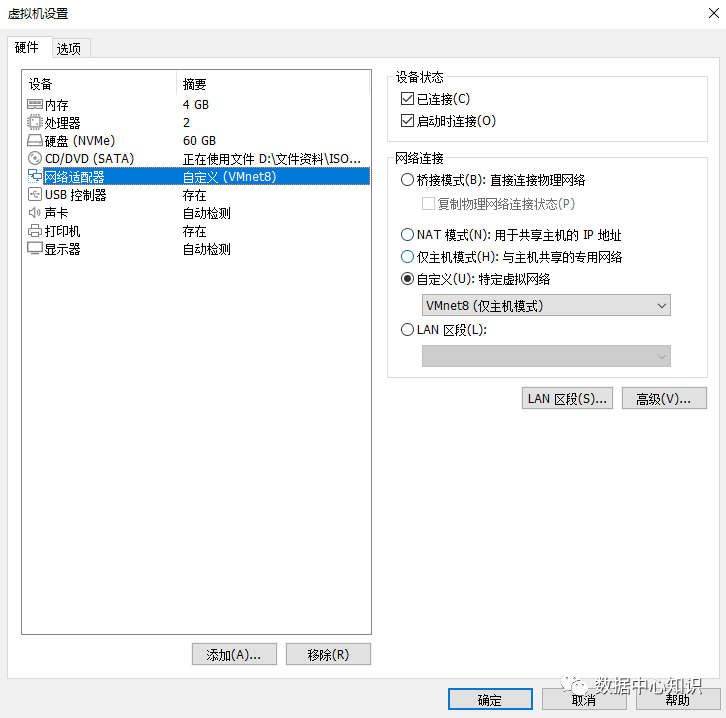
第四步:打开vmware虚拟机,检查vmware网络设置和设置win10虚拟机配置
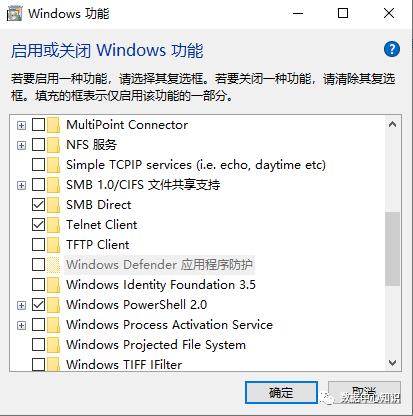
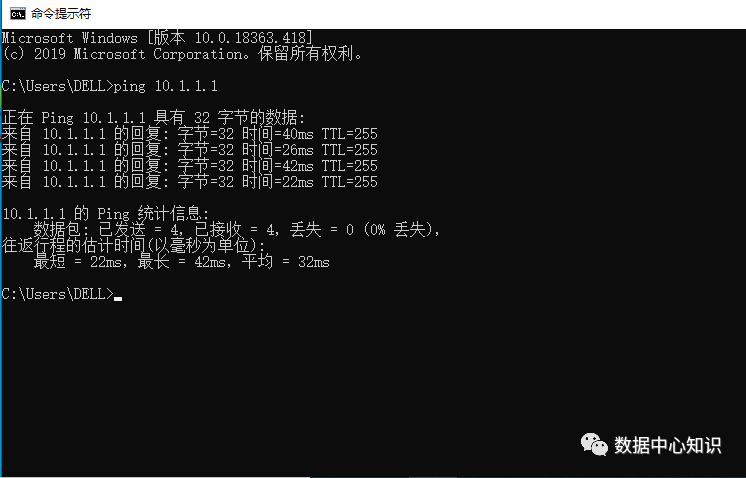
打开cmd测试能ping通
测试能telnet成功,但是这样的连接都是明文的,很不安全。所以用stelnet的方式。
2.优化:多用户登录用各自的密码登录(AAA认证模式)
[R1]user-interface vty 0 4
/进到vty里面
[R1-ui-vty0-4]authentication-mode aaa
//认证方式切换到AAA
[R1-ui-vty0-4]quit 退出
[R1-aaa] 进入AAA视图
[R1-aaa]local-user admin password cipher 123
//创建admin及加密密码123
[R1-aaa]local-user admin privilege level 3
//用户等级调为3
[R1-aaa]local-user admin service-type ssh telnet
//用来运行telnet服务
[R1-aaa]display this
//显示结果如下
*************************************************************
[V200R003C00]
aaa
authentication-scheme default
authorization-scheme default
accounting-scheme default
domain default
domain default_admin
local-user admin password cipher %$%$QvFVYTew~PD3cB@V'$(=Uht)%$%$
local-user admin privilege level 3
local-user admin service-type telnet
*************************************************************
[R1]display rsa local-key-pair public
//查看证书
[R1]rsa local-key-pair create
生成新证书
Input the bits in the modulus[default = 512]:1024
//建议是1024
[R1-ui-vty0-4]protocol inbound ssh
进入到vty,添加protocol inbound ssh
进入到aaa视图[R1-aaa]display this
[V200R003C00]
aaa
authentication-scheme default
authorization-scheme default
accounting-scheme default
domain default
domain default_admin
local-user admin password cipher %$%$QvFVYTew~PD3cB@V'$(=Uht)%$%$
local-user admin privilege level 3
local-user admin service-type ssh
[R1]display rsa local-key-pair public
//查看证书
[R1]rsa local-key-pair create
生成新证书
Input the bits in the modulus[default = 512]:1024
//建议是1024
[R1-ui-vty0-4]protocol inbound ssh
进入到vty,添加protocol inbound ssh
进入到aaa视图[R1-aaa]display this
*************************************************************
[V200R003C00]
aaa
authentication-scheme default
authorization-scheme default
accounting-scheme default
domain default
domain default_admin
local-user admin password cipher %$%$QvFVYTew~PD3cB@V'$(=Uht)%$%$
local-user admin privilege level 3
local-user admin service-type ssh
*************************************************************
[R1]ssh user admin authentication-type password
//设置ssh admin用户认证的方式为密码(这个设置好像是默认的)
[R1]display ssh user-information
//查看ssh 认证的方式

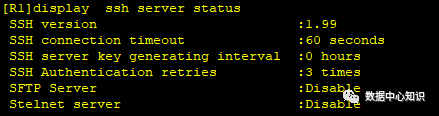
[R1]display ssh server status \\查看ssh 的状态,默认是关闭的,需要改为enable
[R1]stelnet server enable
最后在R2 stelnet 10.1.1.1
仍然连不上,是因为客户端第一次联机都要运行
[R2]ssh client first-time enable
再次测试发现已经可以连通,试验结束!
一个专注于企业IT服务的公众号!欢迎关注。
