


在上一篇Spring Cloud Alibaba基础教程第一篇:使用Nacos实现服务注册与发现文章的学习,我们演示Nacos来实现服务的注册与发现,同时也介绍如何通过LoadBalancerClient接口来获取某个服务的具体实例,并根据实例信息来发起服务接口消费请求。通过代码可以看到要手动添加服务以及进行URL链接拼接比较麻烦的,有学过Spring Cloud的朋友应该知道两种调用方式,Ribbon和Feign,所以接下来,我们来演示下这样的服务消费方式
SpringCloud
版本整合Eureka时可以很好的通过结合Ribbon
+RestTemplate
实例来共同完成服务调用的负载均衡
,当然Nacos Discovery
同样可以无缝的对接Ribbon
来完成LoadBalance
请求健康的服务地址。
Nacos Discovery
内部默认集成了Ribbon
,集成的方式跟Eureka
几乎一致。
没接触过两者的可以先看下Spring Cloud教程
SpringCloud详细教程|第二篇:客户端负载平衡器Ribbon(Greenwich版本)
SpringCloud详细教程|第三篇:声明性REST客户端Feign(Greenwich版本)
一. 使用Ribbon+RestTemplate
创建消费者应用
按照上一篇的项目进行创建命名为resttemplate-server
pom.xml文件
<?xml version="1.0" encoding="UTF-8"?>
<project xmlns="http://maven.apache.org/POM/4.0.0" xmlns:xsi="http://www.w3.org/2001/XMLSchema-instance"
xsi:schemaLocation="http://maven.apache.org/POM/4.0.0 http://maven.apache.org/xsd/maven-4.0.0.xsd">
<modelVersion>4.0.0</modelVersion>
<parent>
<groupId>com.xd</groupId>
<artifactId>SpringCloudAlibabaLearn</artifactId>
<version>1.0-SNAPSHOT</version>
<relativePath>../</relativePath>
</parent>
<artifactId>alibaba-nacos-resttemplate-server</artifactId>
<version>0.0.1-SNAPSHOT</version>
<name>alibaba-nacos-resttemplate-server</name>
<description>RestTemplate调用服务</description>
<dependencies>
<dependency>
<groupId>org.springframework.boot</groupId>
<artifactId>spring-boot-starter</artifactId>
</dependency>
</dependencies>
<build>
<plugins>
<plugin>
<groupId>org.springframework.boot</groupId>
<artifactId>spring-boot-maven-plugin</artifactId>
</plugin>
</plugins>
</build>
</project>复制
application.yml
在application.properties
配置文件内相关的信息,如下所示:
server.port=8082
#resttemplate消费者
spring.application.name=resttemplate-server
#注册服务到nacos
spring.cloud.nacos.discovery.server-addr=127.0.0.1:8848复制
创建请求类,并实现一个接口
主要使用ResteTemplate
来调用服务,在入口类内添加如下代码:
package com.xd.alibabanacosresttemplateserver;
import org.springframework.beans.factory.annotation.Autowired;
import org.springframework.boot.SpringApplication;
import org.springframework.boot.autoconfigure.SpringBootApplication;
import org.springframework.cloud.client.discovery.EnableDiscoveryClient;
import org.springframework.cloud.client.loadbalancer.LoadBalanced;
import org.springframework.context.annotation.Bean;
import org.springframework.web.bind.annotation.GetMapping;
import org.springframework.web.bind.annotation.RestController;
import org.springframework.web.client.RestTemplate;
/**
* ribbon方式消费请求路径
*/
@RestController
@EnableDiscoveryClient
@SpringBootApplication
public class AlibabaNacosResttemplateServerApplication {
public static void main(String[] args) {
SpringApplication.run(AlibabaNacosResttemplateServerApplication.class, args);
}
/**
* 使用RestTemplate
* 两种调用方法 一种是服务id(要开启负载均衡)一个是域名(不用开启负载均衡)
* 实例化RestTemplate
*@LoadBalanaced 这个注解对于学过SpringCloud的朋友是熟悉的,该注解开启RestTemplate使用Ribbon来做负载均衡
* @return
*/
@Bean
// @LoadBalanced
public RestTemplate restTemplate() {
return new RestTemplate();
}
@Autowired
private RestTemplate restTemplate;
@GetMapping("/testOne")
public String testOne() {
// 使用域名时 将@LoadBalanced注解注释 -> 自己实现 ip:端口号/调用连接
String result = restTemplate.getForObject("http://localhost:8080/echo/lhd", String.class);
return "Return : " + result;
}
/**
* 我们在调用服务时是通过服务名的方式来进行指定路径请求
* Ribbon会自动根据provider-service服务名去Nacos Server拉取所有健康的服务列表
* 根据负载的策略来获取一个具体服务的ip + port再进行访问
* @return
*/
@GetMapping("/testTwo")
public String testTwo() {
// 使用负载均衡
String result = restTemplate.getForObject("http://provider-service/echo/lhd", String.class);
return "Return : " + result;
}
}复制
上面👆主要讲述:
在微服务的使用中如果使用RestTemplate
来进行rpc远程调用的时候 ,在调用会员服务的时候有的会选择使用会员服务端在注册中心注册的名称来进行远程调用 也有的会直接使用域名(ip:port)进行调用,在这个过程中如果使用会员的注册名称的话在RestTemplate
那里开启 负载均衡 : @LoadBalanced
如果是使用域名进行调用就不用开启负载均衡
运行测试
第一步:启动alibaba-nacos-provider-server服务
没有的可以下载启动即可
第二步:启动本章alibaba-nacos-resttemplate-server服务
第三步:访问测试
打开浏览器访问: http://localhost:8082/testOne 或者 http://localhost:8082/testTwo
查看返回内容如下所示:

打开@LoadBalanced
进行服务时,会自动进行负载,获取可用的服务地址,控制台日志信息如下:

二. 使用Feign
创建消费者应用
按照上一篇的项目进行创建命名为resttemplate-server
pom.xml文件
<?xml version="1.0" encoding="UTF-8"?>
<project xmlns="http://maven.apache.org/POM/4.0.0" xmlns:xsi="http://www.w3.org/2001/XMLSchema-instance"
xsi:schemaLocation="http://maven.apache.org/POM/4.0.0 http://maven.apache.org/xsd/maven-4.0.0.xsd">
<modelVersion>4.0.0</modelVersion>
<parent>
<groupId>com.xd</groupId>
<artifactId>SpringCloudAlibabaLearn</artifactId>
<version>1.0-SNAPSHOT</version>
<relativePath>../</relativePath>
</parent>
<artifactId>alibaba-nacos-feign-server</artifactId>
<version>0.0.1-SNAPSHOT</version>
<name>alibaba-nacos-feign-server</name>
<description>Feign消费调用</description>
<properties>
<java.version>1.8</java.version>
</properties>
<dependencies>
<dependency>
<groupId>org.springframework.boot</groupId>
<artifactId>spring-boot-starter</artifactId>
</dependency>
</dependencies>
<build>
<plugins>
<plugin>
<groupId>org.springframework.boot</groupId>
<artifactId>spring-boot-maven-plugin</artifactId>
</plugin>
</plugins>
</build>
</project>复制
application.yml
在application.properties
配置文件内相关的信息,如下所示:
server.port=8083
#feign消费者
spring.application.name=feign-server
#注册服务到nacos
spring.cloud.nacos.discovery.server-addr=127.0.0.1:8848复制
创建请求类,并实现一个接口
主要使用ResteTemplate
来调用服务,在入口类内添加如下代码:
package com.xd.alibabanacosfeignserver;
import org.springframework.beans.factory.annotation.Autowired;
import org.springframework.boot.SpringApplication;
import org.springframework.boot.autoconfigure.SpringBootApplication;
import org.springframework.cloud.client.discovery.EnableDiscoveryClient;
import org.springframework.cloud.openfeign.EnableFeignClients;
import org.springframework.cloud.openfeign.FeignClient;
import org.springframework.web.bind.annotation.GetMapping;
import org.springframework.web.bind.annotation.PathVariable;
import org.springframework.web.bind.annotation.RestController;
@EnableFeignClients // 开启feign调用
@RestController
@EnableDiscoveryClient
@SpringBootApplication
public class AlibabaNacosFeignServerApplication {
public static void main(String[] args) {
SpringApplication.run(AlibabaNacosFeignServerApplication.class, args);
}
/**
* 使用@FeignClient注解来指定这个接口所要调用的服务名称
*/
@FeignClient("provider-service")
interface Client {
@GetMapping("/echo/{name}")
String hello(@PathVariable(name = "name") String name);
}
// 定义feign客户端
@Autowired
private Client client;
// 调用
@GetMapping("/test")
public String test() {
String result = client.hello("lhd");
return "Return : " + result;
}
}复制
这里主要描述: 通过@EnableFeignClients
注解开启扫描Spring Cloud Feign
客户端的功能;然后又创建一个Feign的客户端接口定义。使用@FeignClient
注解来指定这个接口所要调用的服务名称,下面就是绑定provider-service服务的/echo/{name}接口的例子。最后,在Controller中,注入了Client接口的实现,并调用test方法来触发对服务提供方的调用
运行测试
第一步:启动alibaba-nacos-provider-server服务
没有的可以下载启动即可
第二步:启动本章alibaba-nacos-resttemplate-server服务
第三步:访问测试
打开浏览器访问: http://localhost:8083/test
查看返回内容如下所示:
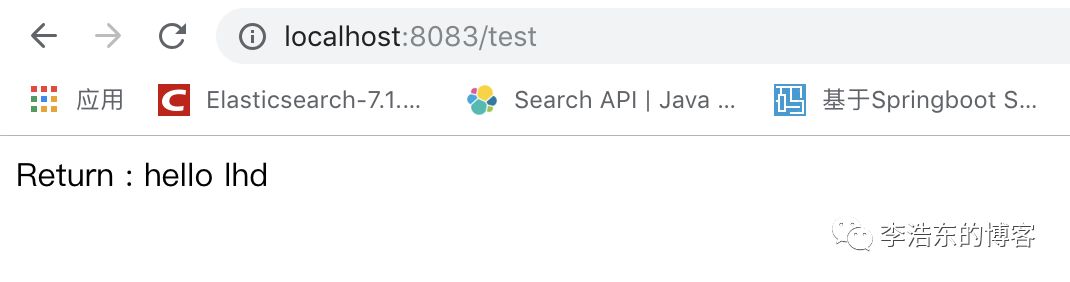
查看控制台发现,同样进行了负载均衡,因为Feign封装了Ribbon, Feign是在Ribbon的基础上进行了一次改进,采用接口的方式,将需要调用的其他服务的方法定义成抽象方法就行了

四. 参考资料:
Nacos官方文档: https://nacos.io/zh-cn
Nacos相关博客: http://blog.didispace.com/spring-cloud-alibaba-1
五. 代码示例
GitHub: https://github.com/LiHaodong888/SpringCloudAlibabaLearn
码云: https://gitee.com/li_haodong/SpringCloudAlibabaLearn
如果您对这些感兴趣,欢迎star、follow、收藏、转发给予支持!

