
环境拓扑:
Jenkins -192.168.1.30
Gitlab -192.168.1.31
LB -192.168.1.32
Web1 -192.168.1.33
Web2 -192.168.1.34
SonarQube -192.168.1.35
1.SonarQube基本概述
SonarQube官网:https://www.sonarqube.org/
SonarQube是一个开源的代码质量管理系统,用于检测代码中的错误,漏洞和代码规范。它可以现有的Gitlab、Jenkins集成,以便在项目拉取后进行连续的代码检查。

2.使用SonarQube前提
1.SonarQube基于Java开发,所以需要安装open JDK8版本。
2.SonarQube需要依赖MySQL数据库,至少5.6版本以上。
3.SonarQube的小型实例至少需要4GB内存,如果是大型实例需要16GB。
3.SonarQube服务安装
-基础环境配置
[root@localhost ~]# hostname SonarQube[root@localhost ~]# echo SonarQube > /etc/hostname--永久关闭防火墙和Selinux[root@Jenkins/Gitlab/LB/Web1/Web2/SonarQube ~]# systemctl disable firewalld[root@Jenkins/Gitlab/LB/Web1/Web2/SonarQube ~]# systemctl stop firewalld[root@Jenkins/Gitlab/LB/Web1/Web2/SonarQube ~]# setenforce 0[root@Jenkins/Gitlab/LB/Web1/Web2/SonarQube ~]# sed -i 's/enforcing/disabled/' /etc/selinux/config[root@Jenkins/Gitlab/LB/Web1/Web2/SonarQube ~]# getenforce
-安装下载SonarQube依赖工具
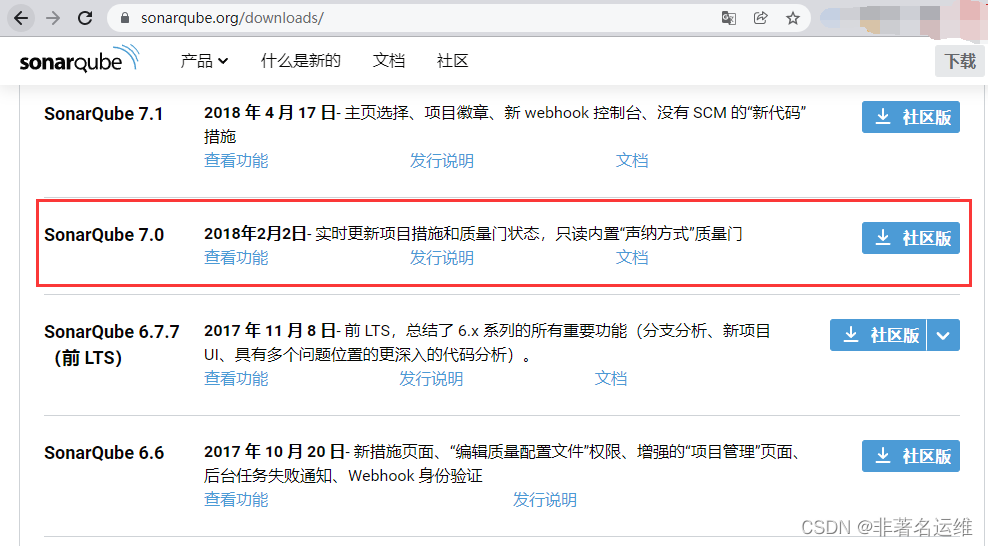
[root@SonarQube ~]# yum -y install net-tools git java unzip vim wget[root@SonarQube ~]# wget https://binaries.sonarsource.com/Distribution/sonarqube/sonarqube-7.0.zip[root@SonarQube ~]# wget https://binaries.sonarsource.com/Distribution/sonar-scanner-cli/sonar-scanner-cli-4.1.0.1829-linux.zip[root@SonarQube ~]# wget https://mirrors.tuna.tsinghua.edu.cn/mysql/yum/mysql-5.6-community-el7-x86_64/mysql-community-client-5.6.45-2.el7.x86_64.rpm[root@SonarQube ~]# wget https://mirrors.tuna.tsinghua.edu.cn/mysql/yum/mysql-5.6-community-el7-x86_64/mysql-community-common-5.6.45-2.el7.x86_64.rpm[root@SonarQube ~]# wget https://mirrors.tuna.tsinghua.edu.cn/mysql/yum/mysql-5.6-community-el7-x86_64/mysql-community-libs-5.6.45-2.el7.x86_64.rpm[root@SonarQube ~]# wget https://mirrors.tuna.tsinghua.edu.cn/mysql/yum/mysql-5.6-community-el7-x86_64/mysql-community-server-5.6.45-2.el7.x86_64.rpm[root@SonarQube ~]# ll总用量 276940-rw-r--r--. 1 root root 20515804 3月 15 11:12 mysql-community-client-5.6.45-2.el7.x86_64.rpm-rw-r--r--. 1 root root 263300 3月 15 11:12 mysql-community-common-5.6.45-2.el7.x86_64.rpm-rw-r--r--. 1 root root 2130748 3月 15 11:12 mysql-community-libs-5.6.45-2.el7.x86_64.rpm-rw-r--r--. 1 root root 62561972 3月 15 11:12 mysql-community-server-5.6.45-2.el7.x86_64.rpm-rw-r--r--. 1 root root 155709573 3月 15 11:12 sonarqube-7.0.zip-rw-r--r--. 1 root root 42392440 3月 15 11:12 sonar-scanner-cli-4.1.0.1829-linux.zip[root@SonarQube ~]# yum -y localinstall mysql-community-* #安装数据库相关软件包并解决依赖
sonarqube-7.0.zip下载sonar-scanner-cli-4.1.0.1829-linux.zip下载mysql-community-client-5.6.45-2.el7.x86_64.rpm下载mysql-community-common-5.6.45-2.el7.x86_64.rpm下载mysql-community-libs-5.6.45-2.el7.x86_64.rpm下载mysql-community-server-5.6.45-2.el7.x86_64.rpm下载

-启动数据库,配置数据库连接密码并创建sonar库[root@SonarQube ~]# systemctl start mysqld #启动mysql数据库[root@SonarQube ~]# mysqladmin password 123qqq...A #配置mysql连接密码[root@SonarQube ~]# mysql -uroot -p123qqq...A -e "create database sonar default character set utf8;" #创建sonar数据库并配置字符集为utf8[root@SonarQube ~]# mysql -uroot -p123qqq...A -e "show databases;" #查看mysql数据库中所有的库+--------------------+| Database |+--------------------+| information_schema || mysql || performance_schema || sonar |+--------------------+
-解压安装SonarQube
[root@SonarQube ~]# ll sonarqube-7.0.zip-rw-r--r--. 1 root root 155709573 3月 15 11:12 sonarqube-7.0.zip[root@SonarQube ~]# unzip sonarqube-7.0.zip -d /usr/local/ #将sonarqube解压至/usr/local下[root@SonarQube ~]# ln -s /usr/local/sonarqube-7.0/ /usr/local/sonarqube #配置sonarqube软链接[root@SonarQube ~]# ll /usr/local/ #查看sonarqube目录总用量 0drwxr-xr-x. 2 root root 6 4月 11 2018 bindrwxr-xr-x. 2 root root 6 4月 11 2018 etcdrwxr-xr-x. 2 root root 6 4月 11 2018 gamesdrwxr-xr-x. 2 root root 6 4月 11 2018 includedrwxr-xr-x. 2 root root 6 4月 11 2018 libdrwxr-xr-x. 2 root root 6 4月 11 2018 lib64drwxr-xr-x. 2 root root 6 4月 11 2018 libexecdrwxr-xr-x. 2 root root 6 4月 11 2018 sbindrwxr-xr-x. 5 root root 49 12月 3 19:51 sharelrwxrwxrwx. 1 root root 25 3月 15 11:30 sonarqube -> /usr/local/sonarqube-7.0/drwxr-xr-x. 11 root root 141 2月 2 2018 sonarqube-7.0drwxr-xr-x. 2 root root 6 4月 11 2018 src
-修改SonarQube连接数据库配置文件
[root@SonarQube ~]# vim /usr/local/sonarqube/conf/sonar.properties ... 15 # The schema must be created first. 16 sonar.jdbc.username=root #连接数据库的username 17 sonar.jdbc.password=123qqq...A #连接数据库的密码 ... 23 #----- MySQL 5.6 or greater 24 # Only InnoDB storage engine is supported (not myISAM). 25 # Only the bundled driver is supported. It can not be changed. 26 sonar.jdbc.url=jdbc:mysql://localhost:3306/sonar?useUnicode=true&characterEncoding=utf8&rewriteBatchedSt atements=true&useConfigs=maxPerformance&useSSL=false #打开连接mysql数据库驱动,数据库在本机不做修改(即localhost:3306) ...
-启动SonarQube(必须使用普通用户才能正常启动)
[root@SonarQube ~]# useradd sonar #创建sonar普通用户[root@SonarQube ~]# chown -R sonar:sonar /usr/local/sonarqube #给sonarqube程序目录授权[root@SonarQube ~]# chown -R sonar:sonar /usr/local/sonarqube-7.0/[root@SonarQube ~]# ll /usr/local/sonarqube-7.0/总用量 12drwxr-xr-x. 8 sonar sonar 136 2月 2 2018 bindrwxr-xr-x. 2 sonar sonar 50 2月 2 2018 conf-rw-r--r--. 1 sonar sonar 7651 2月 2 2018 COPYINGdrwxr-xr-x. 2 sonar sonar 24 2月 2 2018 datadrwxr-xr-x. 7 sonar sonar 150 2月 2 2018 elasticsearchdrwxr-xr-x. 4 sonar sonar 40 2月 2 2018 extensionsdrwxr-xr-x. 9 sonar sonar 138 2月 2 2018 libdrwxr-xr-x. 2 sonar sonar 6 2月 2 2018 logsdrwxr-xr-x. 2 sonar sonar 24 2月 2 2018 tempdrwxr-xr-x. 9 sonar sonar 4096 2月 2 2018 web[root@SonarQube ~]# su - sonar -c "/usr/local/sonarqube/bin/linux-x86-64/sonar.sh start" #使用普通用户sonar启动sonarqube[root@SonarQube ~]# ss -antulp | grep :9000 #查看sonarqube运行端口tcp LISTEN 0 25 :::9000 :::* users:(("java",pid=12784,fd=119))
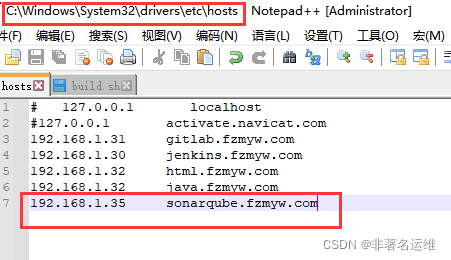
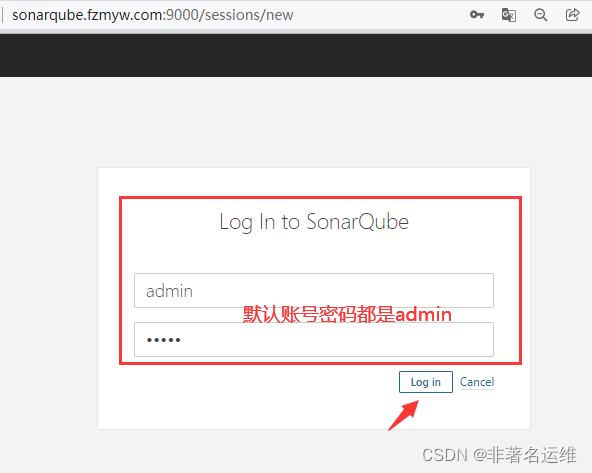
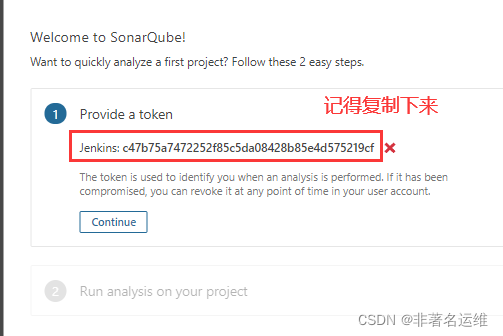
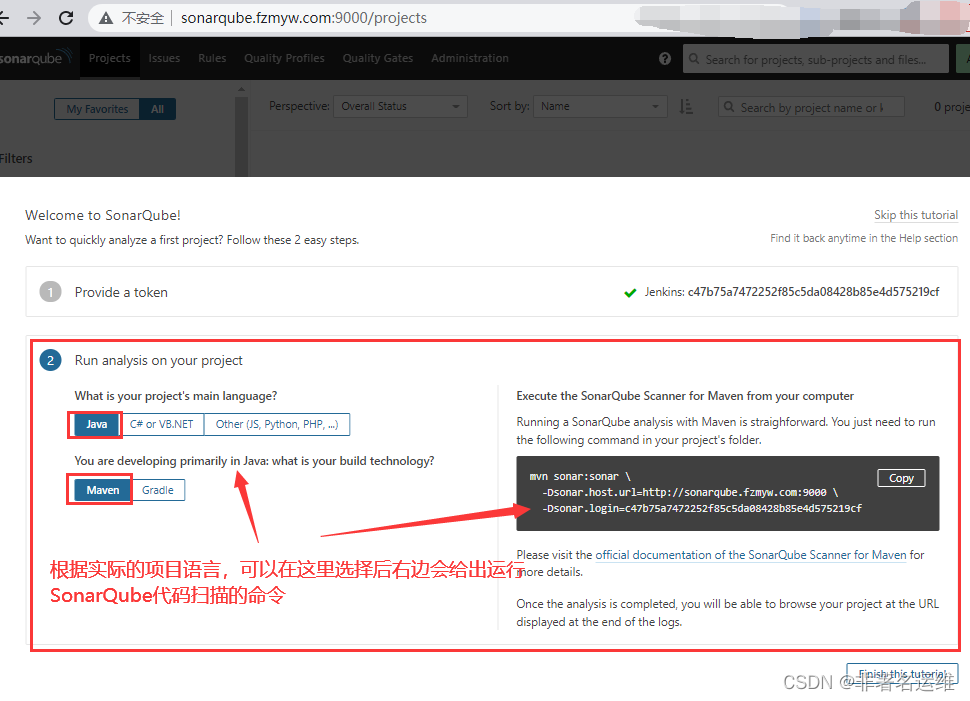
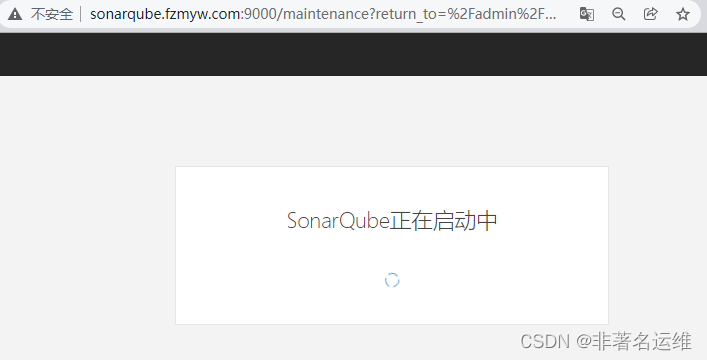
-访问SonarQube并生成连接SonarQube的令牌(密码)
Windows访问时需配置域名解析(假域名)


4.Sonarqube插件管理
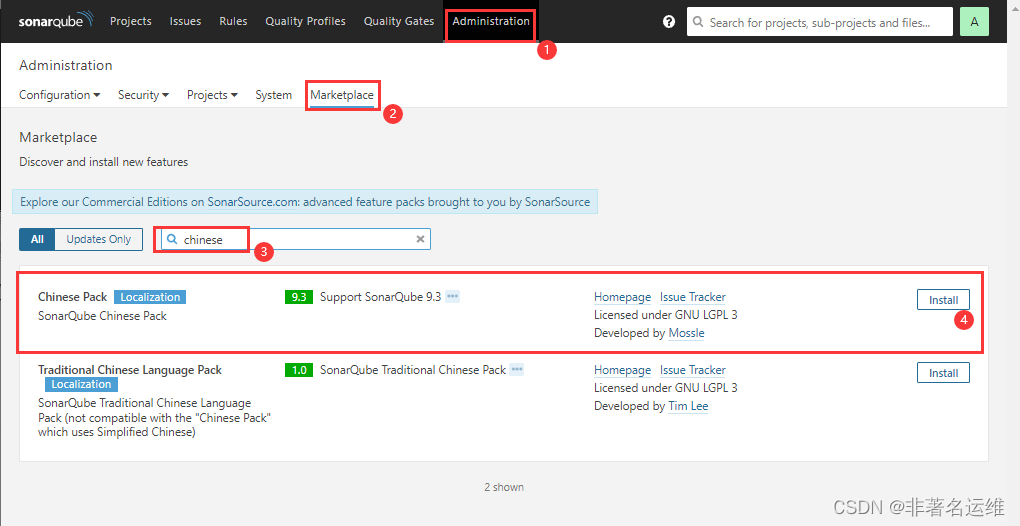
-安装SonarQube中文汉化插件
1.页面上找到Administration > Marketplace -->搜索框chinese,出现一个Chinese Pack,然后点击install。
2.界面会提示reset重启SonarQube,重启再次打开则为汉化。
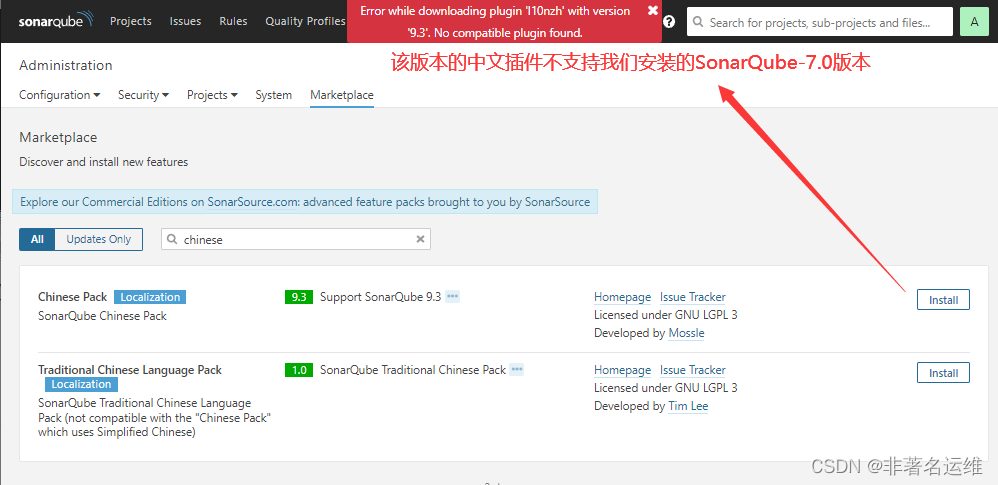
手动安装中文汉化插件:1.下载要安装的插件,该版本需要与您的 SonarQube 版本兼容。
2.将下载的插件jar包放入$SONARQUBE_HOME/extensions/plugins中,并删除相同插件的其他版本。
3.重新启动您的 SonarQube 服务器。


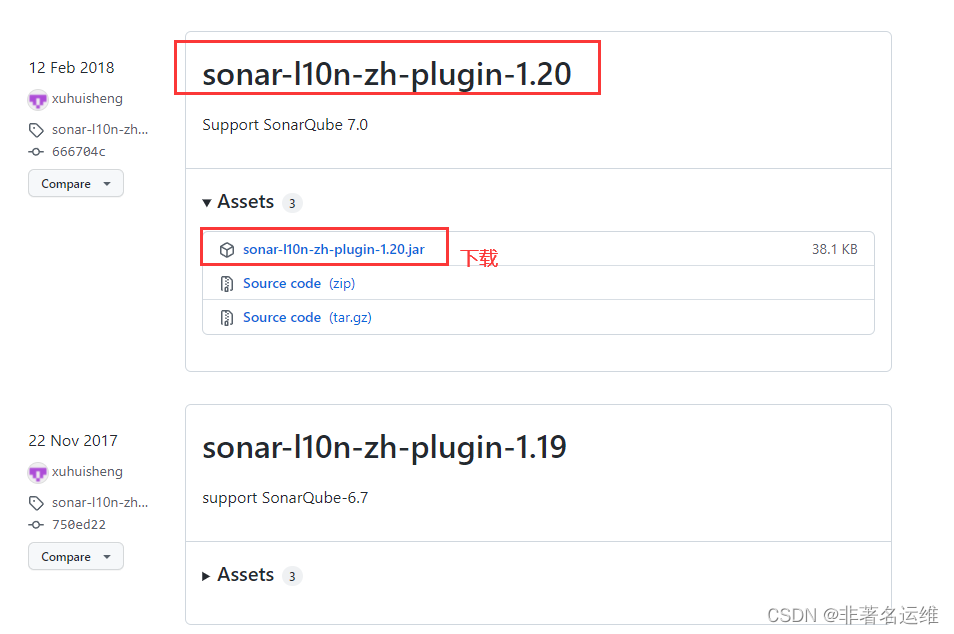
[root@SonarQube ~]# wget https://github.com/xuhuisheng/sonar-l10n-zh/releases/download/sonar-l10n-zh-plugin-1.20/sonar-l10n-zh-plugin-1.20.jar[root@SonarQube ~]# ll sonar-l10n-zh-plugin-1.20.jar-rw-r--r--. 1 root root 39062 12月 8 13:20 sonar-l10n-zh-plugin-1.20.jar[root@SonarQube ~]# mv sonar-l10n-zh-plugin-1.20.jar /usr/local/sonarqube/extensions/plugins/[root@SonarQube ~]# chown -R sonar:sonar /usr/local/sonarqube/extensions/plugins/sonar-l10n-zh-plugin-1.20.jar[root@SonarQube ~]# ll /usr/local/sonarqube/extensions/plugins/ 总用量 36088-rw-r--r--. 1 sonar sonar 92 2月 2 2018 README.txt-rw-r--r--. 1 sonar sonar 1460815 1月 29 2018 sonar-csharp-plugin-6.7.1.4347.jar-rw-r--r--. 1 sonar sonar 1618672 1月 29 2018 sonar-flex-plugin-2.3.jar-rw-r--r--. 1 sonar sonar 6813805 2月 2 2018 sonar-java-plugin-5.1.0.13090.jar-rw-r--r--. 1 sonar sonar 3373769 1月 29 2018 sonar-javascript-plugin-4.0.0.5862.jar-rw-r--r--. 1 sonar sonar 39062 12月 8 13:20 sonar-l10n-zh-plugin-1.20.jar-rw-r--r--. 1 sonar sonar 2774137 2月 2 2018 sonar-php-plugin-2.12.1.3018.jar-rw-r--r--. 1 sonar sonar 1509434 2月 2 2018 sonar-python-plugin-1.9.0.2010.jar-rw-r--r--. 1 sonar sonar 3625962 1月 29 2018 sonar-scm-git-plugin-1.3.0.869.jar-rw-r--r--. 1 sonar sonar 6680471 1月 29 2018 sonar-scm-svn-plugin-1.6.0.860.jar-rw-r--r--. 1 sonar sonar 1663416 2月 2 2018 sonar-typescript-plugin-1.5.0.2122.jar-rw-r--r--. 1 sonar sonar 7368250 1月 29 2018 sonar-xml-plugin-1.4.3.1027.jar[root@SonarQube ~]# su - sonar -c "/usr/local/sonarqube/bin/linux-x86-64/sonar.sh restart"Stopping SonarQube...Waiting for SonarQube to exit...Stopped SonarQube.Starting SonarQube...Started SonarQube.
-安装代码检查插件 系统界面安装不了的插件可以去Github找SonarQube版本对应的插件版本jar包下载下来手动安装
默认已经安装了C、Java、Python、Php、Js等代码的质量分析工具,可以根据项目自行安装html、css、go这些代码的质量分析工具。
注意:
一个项目如果使用了java、css、js、html等语言,那么默认情况下仅会检测java、js等代码的漏洞和bug,因为未安装另外2个语言的代码质量分析插件,所以不分析这2个语言的质量。
如果安装了html、css等插件,那么则会检查该项目代码中java、js、html、css等代码的漏洞和bug。
5.SonarQube项目分析实践
1.分析Html语言的项目
-安装sonar-scanner
项目依赖于sonar-scanner命令,所以需要安装sonar-scanner工具,SonarQube服务端只需要提供服务,代码质量分析需要在Jenkins上做,所以sonar-scanner工具安装在Jenkins服务器上。
[root@Jenkins ~]# ll sonar-scanner-cli-4.1.0.1829-linux.zip-rw-r--r-- 1 root root 42392440 3月 15 13:58 sonar-scanner-cli-4.1.0.1829-linux.zip[root@Jenkins ~]# unzip sonar-scanner-cli-4.1.0.1829-linux.zip -d /usr/local/[root@Jenkins ~]# ln -s /usr/local/sonar-scanner-4.1.0.1829-linux/ /usr/local/sonar-scanner[root@Jenkins sonar-scanner]# ll总用量 0drwxr-xr-x 2 root root 54 9月 8 2019 bindrwxr-xr-x 2 root root 38 9月 8 2019 confdrwxr-xr-x 6 root root 68 9月 8 2019 jredrwxr-xr-x 2 root root 46 9月 8 2019 lib
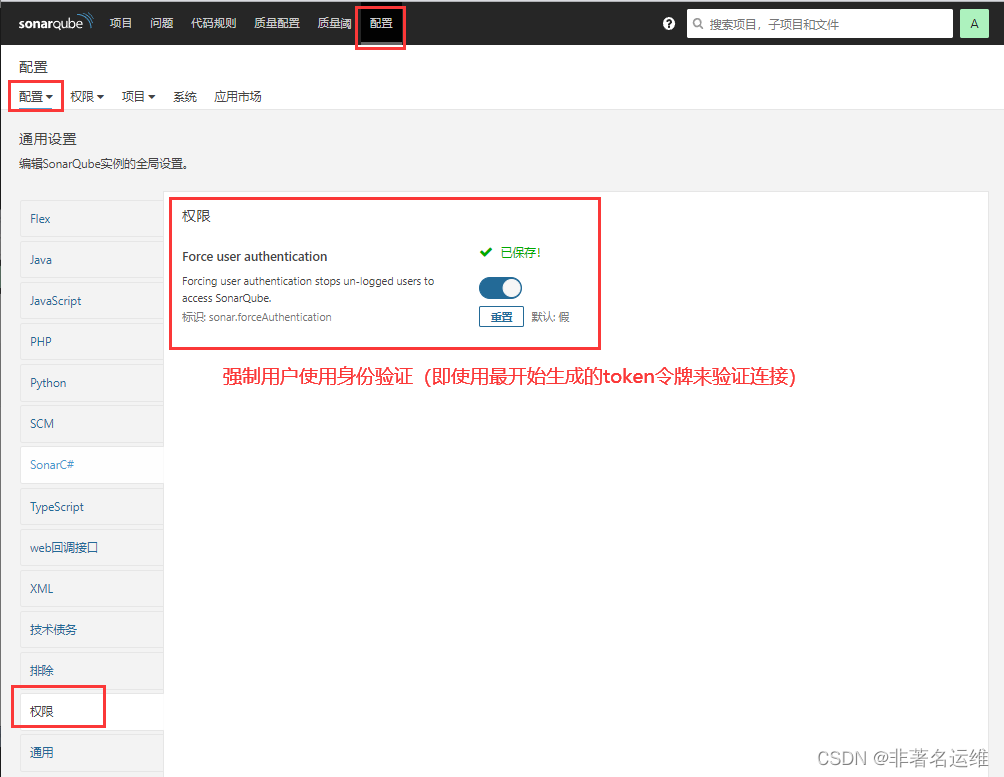
-配置sonar-scanner客户端指向SonarQube服务端,以及认证的Token
[root@Jenkins sonar-scanner]# vim conf/sonar-scanner.properties#----- Default SonarQube serversonar.host.url=http://192.168.1.35:9000 #指明SonarQube的服务端sonar.login=c47b75a7472252f85c5da08428b85e4d575219cf #添加刚才在SonarQube系统界面生成的Jenkins的token令牌(开启用户验证需要提前在SonarQube系统界面权限出开启“强制使用身份验证”,后面进行代码质量分析时可以不用在命令行添加token命令,因为配置文件已经写好了)#----- Default source code encodingsonar.sourceEncoding=UTF-8 #SonarQube字符集
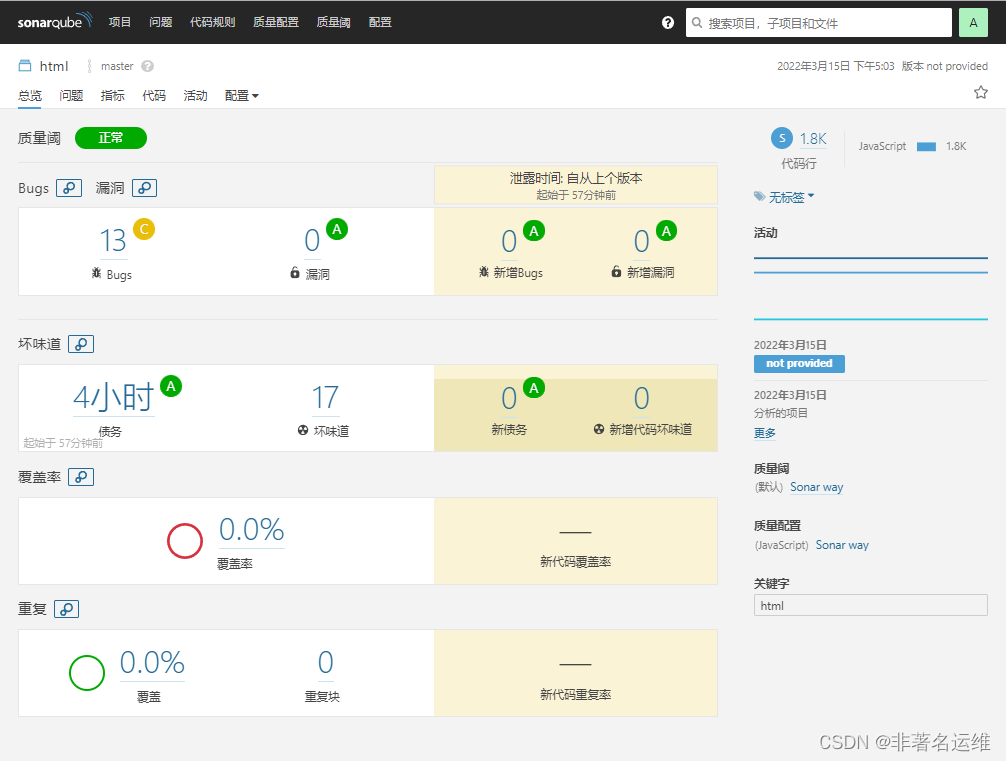
-手动从Gitlab仓库获取代码,进入项目目录.使用sonar-scanner迸行代码扫描[root@Jenkins sonar-scanner]# cd /var/lib/jenkins/workspace/freestyle-nongye #进入项目目录(html语言静态项目)[root@Jenkins freestyle-nongye]# /usr/local/sonar-scanner/bin/sonar-scanner -Dsonar.projectKey=html -Dsonar.sources=. -X #手动对项目代码进行质量分析扫描,项目代码路径为.当前路径下17:03:30.633 INFO: Scanner configuration file: /usr/local/sonar-scanner-4.1.0.1829-linux/conf/sonar-scanner.properties17:03:30.634 INFO: Project root configuration file: NONE17:03:30.658 INFO: SonarQube Scanner 4.1.0.182917:03:30.658 INFO: Java 11.0.3 AdoptOpenJDK (64-bit)17:03:30.658 INFO: Linux 3.10.0-862.el7.x86_64 amd6417:03:30.802 DEBUG: keyStore is :17:03:30.802 DEBUG: keyStore type is : pkcs1217:03:30.802 DEBUG: keyStore provider is :17:03:30.802 DEBUG: init keystore......17:03:30.803 DEBUG: init keymanager of type SunX50917:03:30.949 DEBUG: Create: /root/.sonar/cache17:03:30.958 INFO: User cache: /root/.sonar/cache17:03:30.958 DEBUG: Create: /root/.sonar/cache/_tmp17:03:37.869 INFO: Note that you will be able to access the updated dashboard once the server has processed the submitted analysis report17:03:37.869 INFO: More about the report processing at http://192.168.1.35:9000/api/ce/task?id=AX-M0Y1_K1PbXHMf8HZS17:03:37.869 DEBUG: Report metadata written to /var/lib/jenkins/workspace/freestyle-nongye/.scannerwork/report-task.txt17:03:37.870 DEBUG: Post-jobs :17:03:37.872 INFO: Task total time: 5.981 s17:03:38.003 INFO: ------------------------------------------------------------------------17:03:38.003 INFO: EXECUTION SUCCESS17:03:38.003 INFO: ------------------------------------------------------------------------17:03:38.003 INFO: Total time: 7.398s17:03:38.043 INFO: Final Memory: 7M/114M17:03:38.043 INFO: ------------------------------------------------------------------------
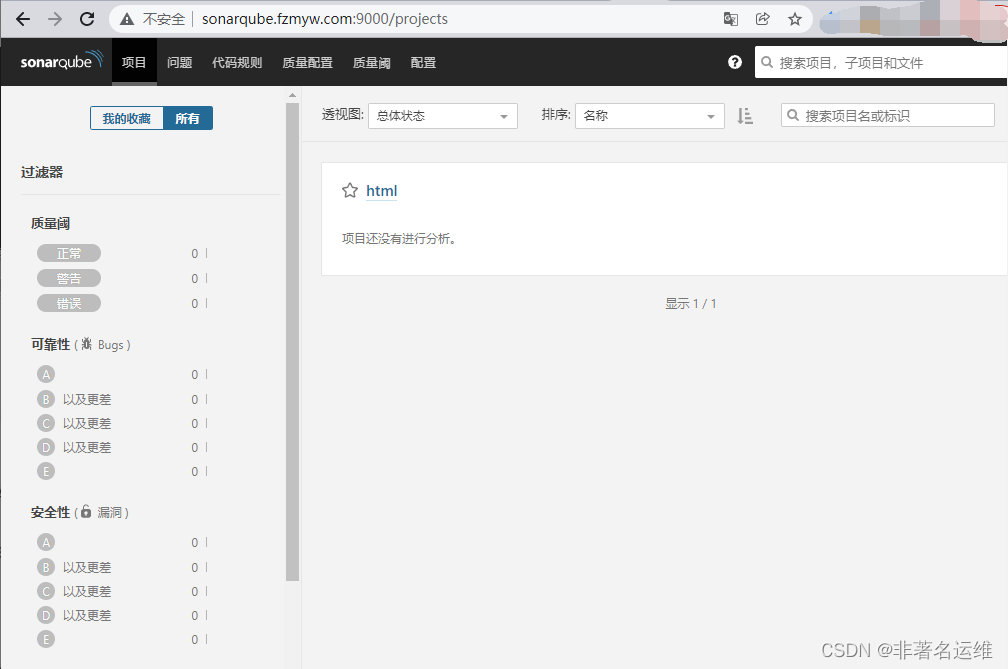
-访问SonarQube,查看刚才扫描的html代码项目

2.分析Java语言的项目
Java项目可以也通过maven进行代码质检,无需使用sonar-scanrger工具的扫描命令方式,有maven工具即可使用maven的扫描命令。
-1.手动从gitlab仓库获取Java代码,进入项目目录,使用mvn工具命令进行代码扫描
[root@Jenkins ~]# cd /var/lib/jenkins/workspace/maven-java-demo[root@Jenkins maven-java-demo]# ll总用量 56-rw-r--r-- 1 root root 20549 3月 10 13:39 company.sqldrwxr-xr-x 2 root root 47 3月 10 13:39 lib-rw-r--r-- 1 root root 6468 3月 10 13:39 mvnw-rw-r--r-- 1 root root 4994 3月 10 13:39 mvnw.cmd-rw-r--r-- 1 root root 8258 3月 10 13:39 pom.xml-rw-r--r-- 1 root root 36 3月 11 18:31 README.mddrwxr-xr-x 3 root root 18 3月 10 13:39 srcdrwxr-xr-x 7 root root 156 3月 11 18:31 target[root@Jenkins maven-java-demo]# mvn sonar:sonar -Dsonar.host.url=http://192.168.1.35:9000 -Dsonar.login=c47b75a7472252f85c5da08428b85e4d575219cf #使用maven的sonar-scanrger工具扫描命令对java代码进行分析扫描...[INFO] Analysis report uploaded in 419ms[INFO] ANALYSIS SUCCESSFUL, you can browse http://192.168.1.35:9000/dashboard/index/com.dbsun:dbSun[INFO] Note that you will be able to access the updated dashboard once the server has processed the submitted analysis report[INFO] More about the report processing at http://192.168.1.35:9000/api/ce/task?id=AX-M3yu6K1PbXHMf8HZZ[INFO] Task total time: 21.696 s[INFO] ------------------------------------------------------------------------[INFO] BUILD SUCCESS[INFO] ------------------------------------------------------------------------[INFO] Total time: 01:00 min[INFO] Finished at: 2022-03-15T17:18:30+08:00[INFO] ------------------------------------------------------------------------
-2.手动从gitlab仓库获取Java代码,进入项目目录,使用sonar-scanrger工具命令进行代码扫描
[root@Jenkins maven-java-demo]# /usr/local/sonar-scanner/bin/sonar-scanner -Dsonar.projectKey=java -Dsonar.sources=. -X
-访问SonarQube,查看刚才扫描的Java代码项目

6.Jenkins集成SonarQube
通常SonarQube需要配合持续集成工具一起使用,可以做到拉取最新代码则立即进行质量检测。
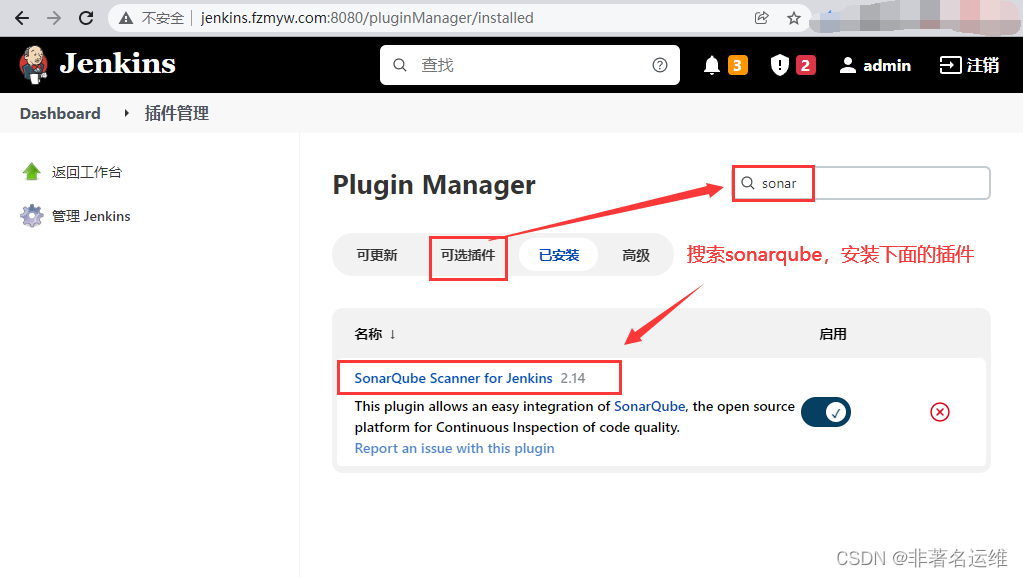
-插件安装。系统管理-->插件管理-->搜索SonarQube Scanner for Jenkins插件安装
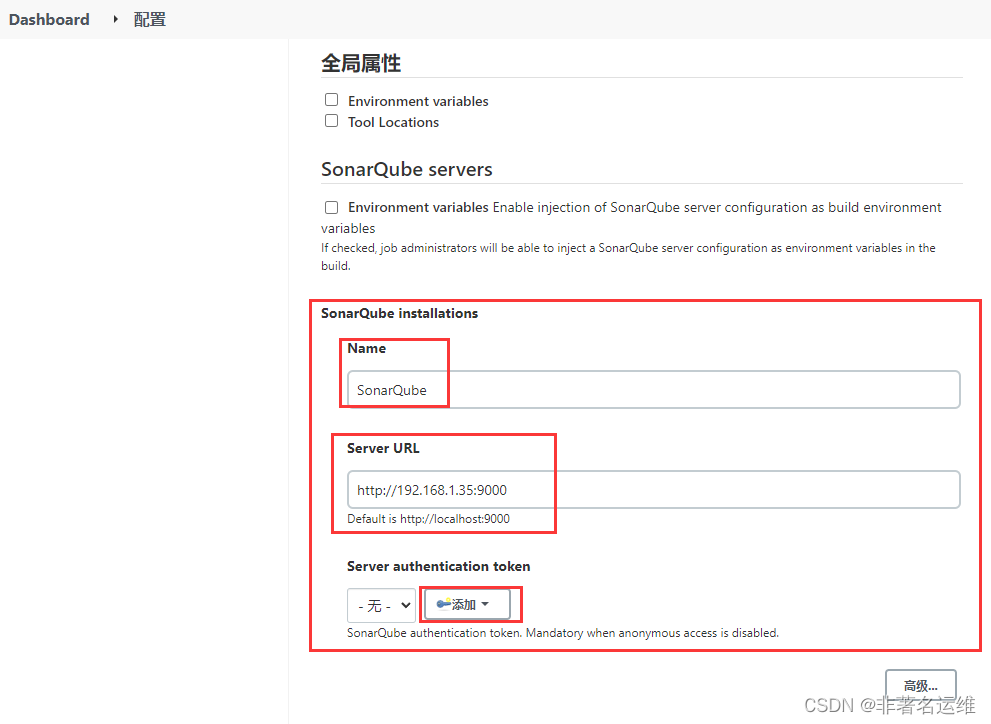
-需要在Jenkins上配置SonarQube服务端系统管理-->系统设置-->SonarQube (告诉Jenkins SonarQube的Servers服务端地址)
Name:可以随意填写
Server URL:添加SonarQube的地址
Server authentication token:添加一个类型为Secret text的凭证,填写之前安装SonarQube时创建的Token令牌(如果在SonarQube安装时没有创建Token令牌,则在配置->权限-->Force user authentication关闭则可忽略进行用户token验证操作。)

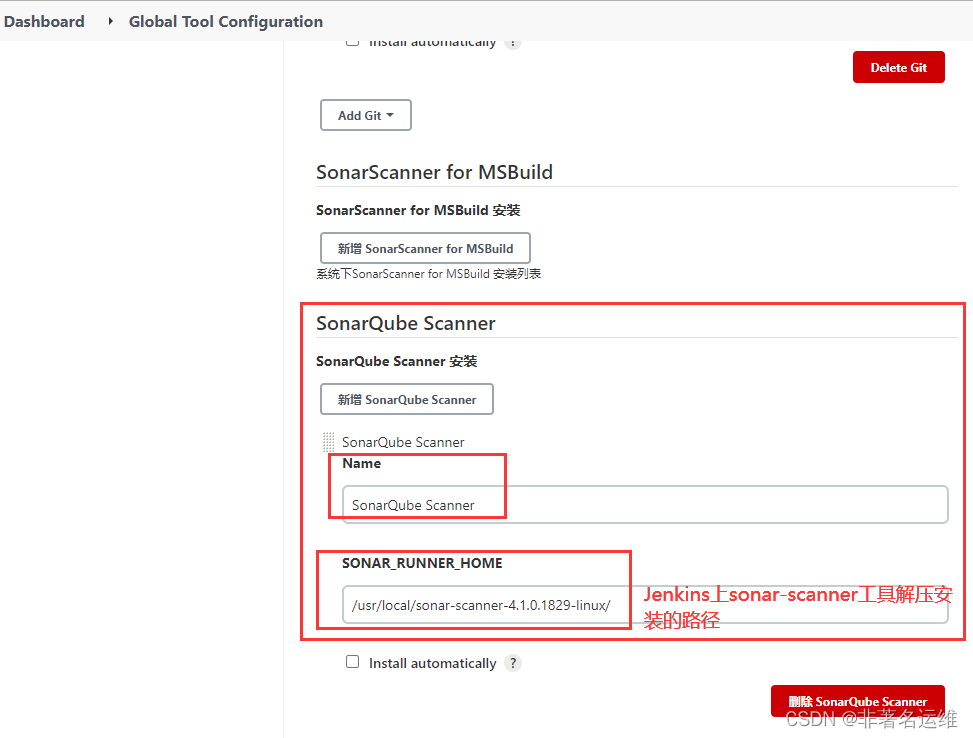
-还需要在Jenkins上配置Sonar-Scanner工具路径
系统管理-->全局工具配置(告诉Jenkins SonarScanner在本地的哪个路径)
Name:可以随意填写,但最好有规范
SONAR_RUNNER_HOME:填写sonar-scanner本地路径(如果不配置sonar-scanner路径,则无法进行代码扫描)
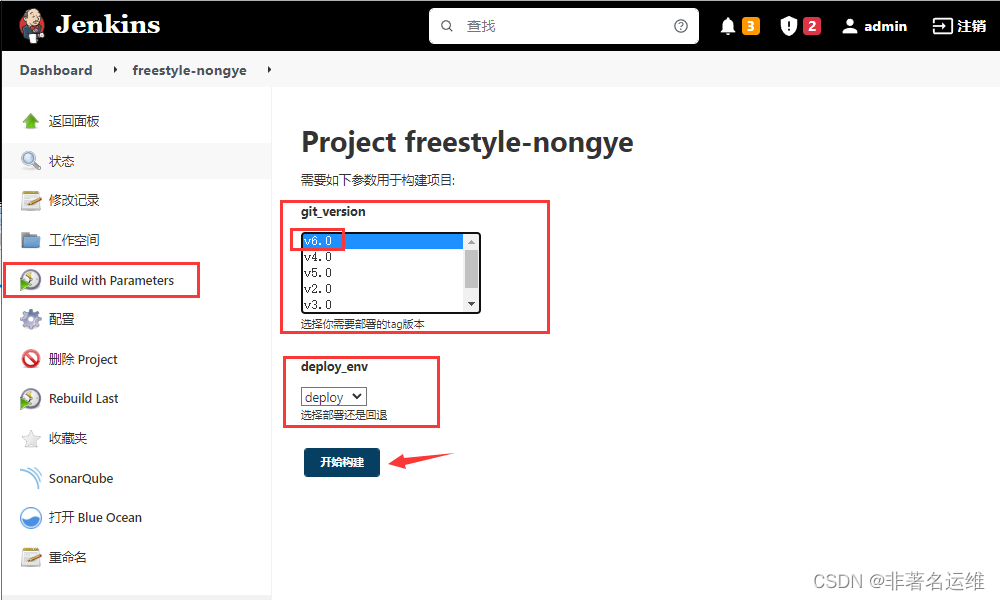
7.配置Jenkins上FreeStyle项目集成SonarQube
-找到之前的freestyle项目,新增构建步骤,使用下面的代码质量分析参数
sonar. projectName=${J0B_NAME} :项目在SonarQube上显示名称 sonar.projectKey=html :项目的唯一标识,不能重复sonar. sources=. :扫描哪个项目的源码路径


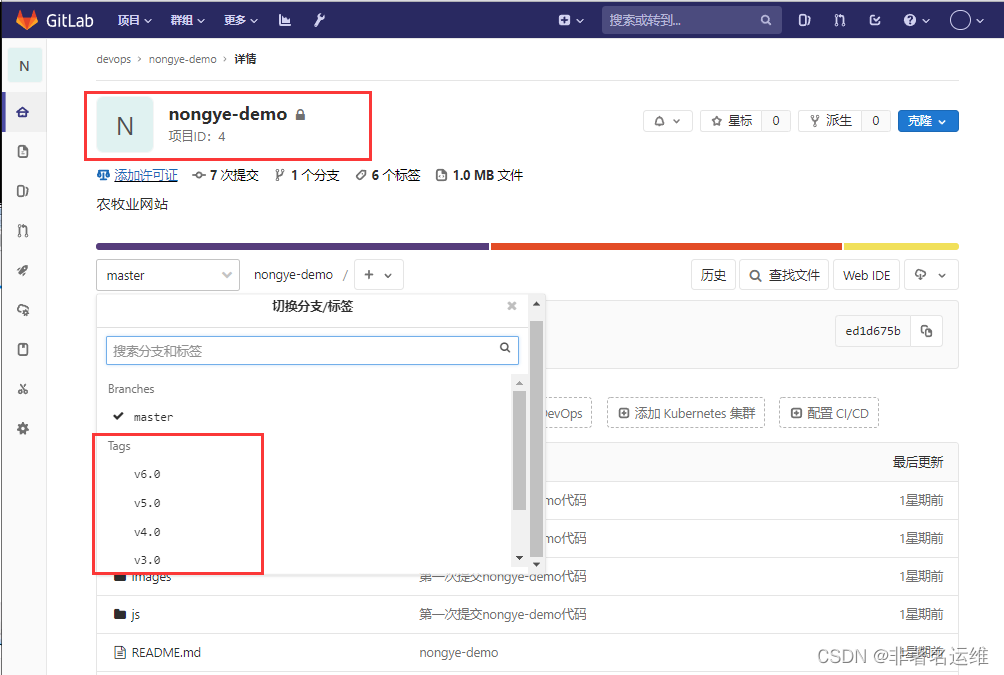
-开发修改代码提交新的tag版本至Gitlab[root@Gitlab ~]# cd nongye-demo[root@Gitlab nongye-demo]# vim index.html[root@Gitlab nongye-demo]# git add .[root@Gitlab nongye-demo]# git commit -m "v6.0"[root@Gitlab nongye-demo]# git tag -a "v6.0" -m "v6.0"[root@Gitlab nongye-demo]# git push origin v6.0
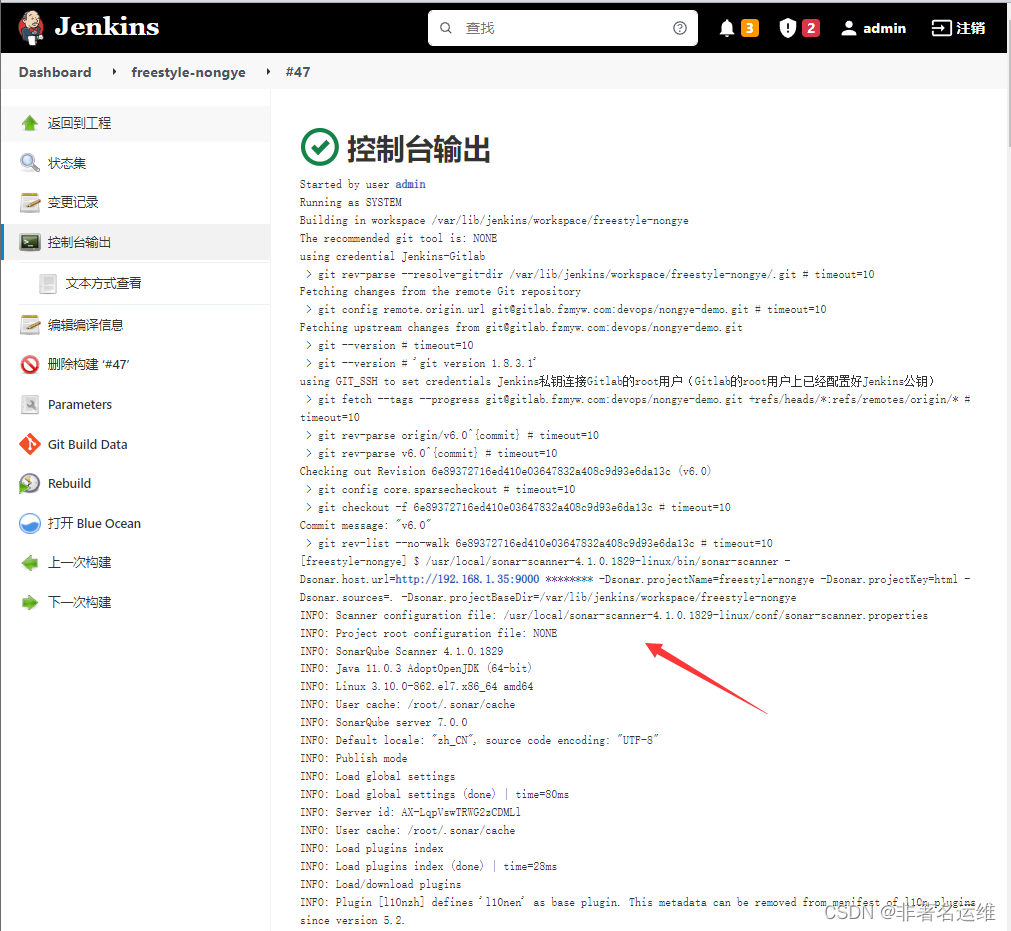
-检查SonarQube质检结果
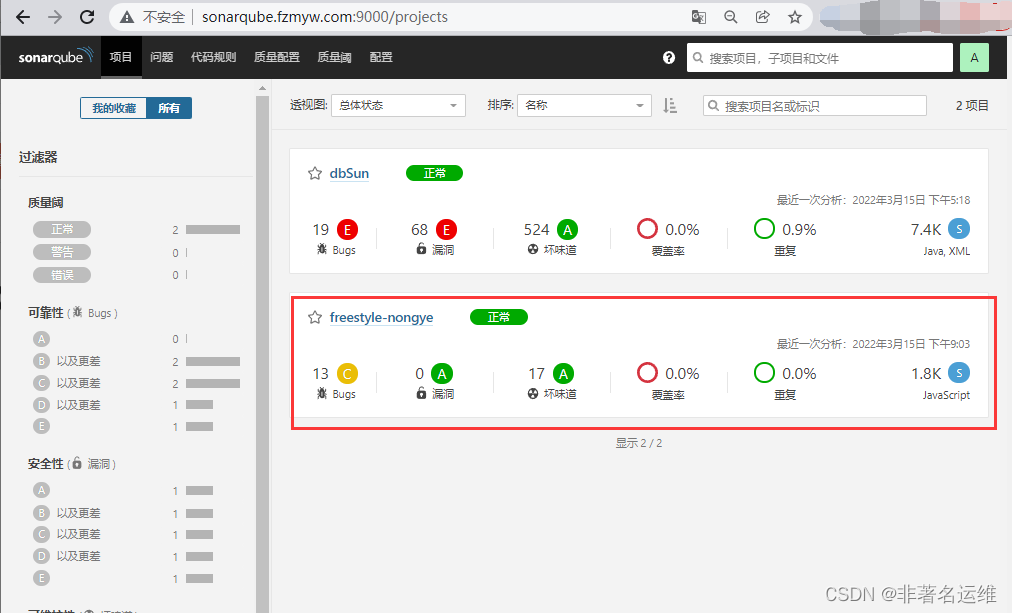
-访问经Jenkins代码质量分析检测后自动发布的项目版本
8.配置Jenkins上Maven项目集成SonarQube
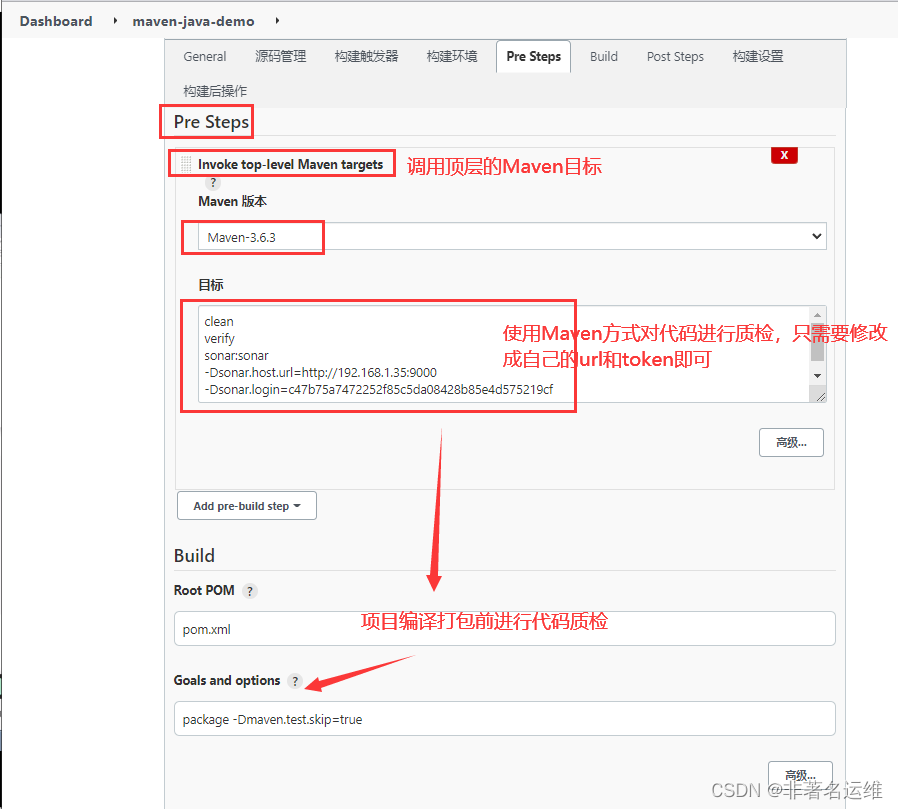
maven项目可以使用Sonar-Scanner工具,也可以使用maven的方式进行检测,两种方式任选其一即可。
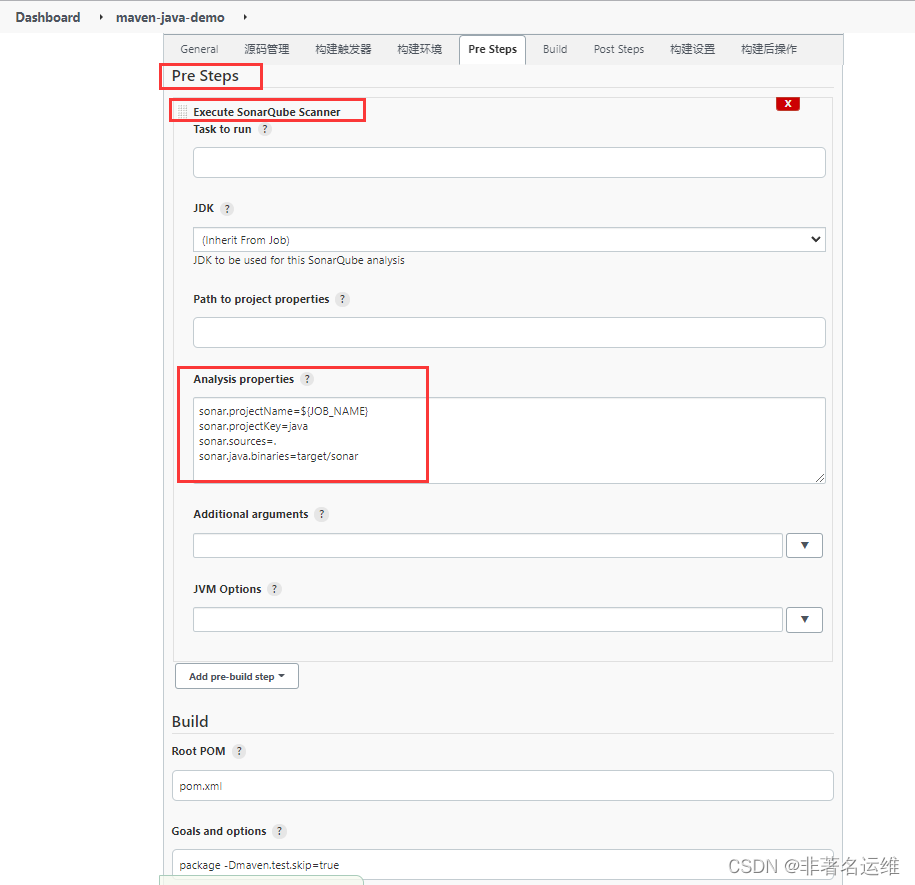
1.第一种方式,通过Sonar-Scannet方式进行代码质检。
sonar. projectName=${JOB_NAME}
sonar. projectKey=java
sonar. sources=.
sonar.java.binaries=target/sonar
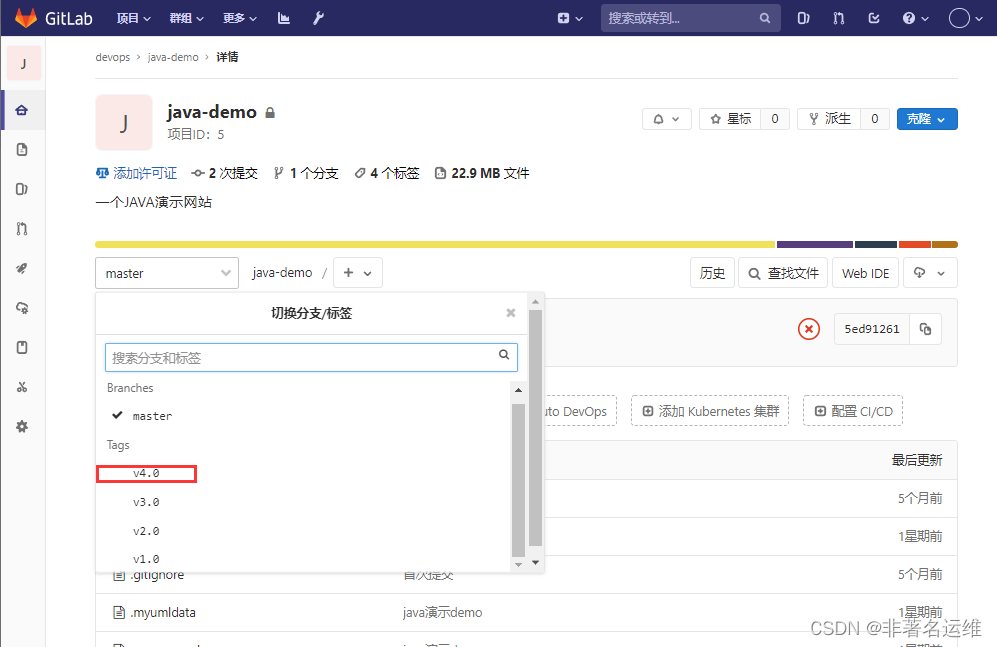
-开发修改代码提交新的tag版本至Gitlab
[root@Gitlab ~]# cd company/[root@Gitlab company]# echo "提交v4.0版本代码" >> README.md[root@Gitlab company]# git add .[root@Gitlab company]# git commit -m "v4.0"[root@Gitlab company]# git tag -a "v4.0" -m "v4.0"[root@Gitlab company]# git push origin v4.0

clean
verify
sonar:sonar
-Dsonar.host.url=http://192.168.1.35:9000
-Dsonar.login=c47b75a7472252f85c5da08428b85e4d575219cf


温馨提示
如果您喜欢本文,就请动动您的发财手为本文留言转发在看,想获取更多运维相关内容,请记得关注我。