


三四年前,就从好友处听说了有这么一个数据库,但总因各种原因没去了解,利用周末时间,简单了解并记录如下。
注:以下实验环境,操作系统为CentoOS 7.4,PostgreSQL版本为9.6。
一、安装
PostgreSQL有三种安装方式:YUM,二进制包,源码编译。
1.1 二进制包安装
(1)下载需要的安装包
https://www.enterprisedb.com/download-postgresql-binaries
(2)将安装包上传至服务器并解压
[root@postgres local]# tar -xzvf postgresql-9.6.14-2-linux-x64-binaries.tar.gz[root@postgres local]# ls -lrttotal 119548drwxr-xr-x. 2 root root 6 Nov 5 2016 srcdrwxr-xr-x. 2 root root 6 Nov 5 2016 sbindrwxr-xr-x. 2 root root 6 Nov 5 2016 libexecdrwxr-xr-x. 2 root root 6 Nov 5 2016 lib64drwxr-xr-x. 2 root root 6 Nov 5 2016 libdrwxr-xr-x. 2 root root 6 Nov 5 2016 includedrwxr-xr-x. 2 root root 6 Nov 5 2016 gamesdrwxr-xr-x. 2 root root 6 Nov 5 2016 etcdrwxr-xr-x. 2 root root 6 Nov 5 2016 bindrwxr-xr-x. 5 root root 49 Jun 9 08:23 sharedrwxrwxr-x 9 root root 104 Jun 25 20:45 pgsql-rw-r--r-- 1 root root 122416210 Jul 27 12:56 postgresql-9.6.14-2-linux-x64-binaries.tar.gz
(3)创建用户并配置密码
[root@postgres local]# useradd postgres[root@postgres local]# passwd postgresChanging password for user postgres.New password:BAD PASSWORD: The password fails the dictionary check - it is too simplistic/systematicRetype new password:passwd: all authentication tokens updated successfully.
(4)创建数据目录并授权
[root@postgres local]# mkdir -p data/pg_data[root@postgres local]# chown postgres:postgres -R data[root@postgres local]# chown postgres:postgres -R pgsql/
(5)初始化数据库
--PostgreSQL不允许使用root进行初始化[root@postgres bin]# ./initdb -D data/pg_data/initdb: cannot be run as rootPlease log in (using, e.g., "su") as the (unprivileged) user that willown the server process.--切换至postgres用户进行初始化[postgres@postgres ~]$ usr/local/pgsql/bin/initdb -D data/pg_data/The files belonging to this database system will be owned by user "postgres".This user must also own the server process.The database cluster will be initialized with locale "en_US.UTF-8".The default database encoding has accordingly been set to "UTF8".The default text search configuration will be set to "english".Data page checksums are disabled.fixing permissions on existing directory data/pg_data ... okcreating subdirectories ... okselecting default max_connections ... 100selecting default shared_buffers ... 128MBselecting default timezone ... PRCselecting dynamic shared memory implementation ... posixcreating configuration files ... okrunning bootstrap script ... okperforming post-bootstrap initialization ... oksyncing data to disk ... okWARNING: enabling "trust" authentication for local connectionsYou can change this by editing pg_hba.conf or using the option -A, or--auth-local and --auth-host, the next time you run initdb.Success. You can now start the database server using:usr/local/pgsql/bin/pg_ctl -D data/pg_data/ -l logfile start
(6)调整参数配置
[postgres@postgres ~]$ cat data/pg_data/postgresql.auto.conf# Do not edit this file manually!# It will be overwritten by the ALTER SYSTEM command.logging_collector=on--此时添加logging_collector参数目的是让日志输出到指定目录中,其它作用下面再讨论。
(7)启动数据库
[postgres@postgres ~]$ usr/local/pgsql/bin/pg_ctl -D data/pg_data/ startserver starting[postgres@postgres ~]$ LOG: redirecting log output to logging collector processHINT: Future log output will appear in directory "pg_log".日志输出如下:LOG: database system was shut down at 2019-07-27 13:07:07 CSTLOG: MultiXact member wraparound protections are now enabledLOG: database system is ready to accept connectionsLOG: autovacuum launcher started
(8)关闭数据库
[postgres@postgres ~]$ usr/local/pgsql/bin/pg_ctl -D data/pg_data/ stopwaiting for server to shut down.... doneserver stopped日志输出如下:LOG: received fast shutdown requestLOG: aborting any active transactionsLOG: autovacuum launcher shutting downLOG: shutting downLOG: database system is shut down
1.2 源码安装
(1)下载源码安装包
https://www.postgresql.org/ftp/source/v9.6.14/
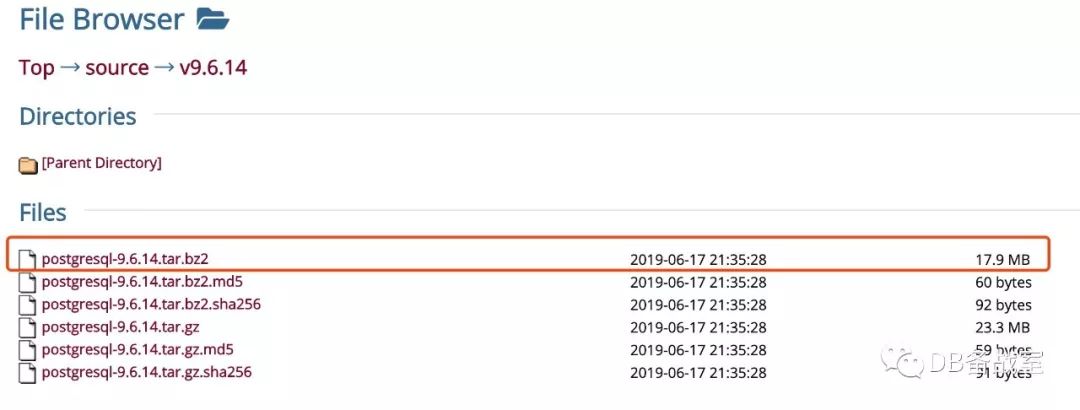
(2)上传并解压
[root@postgres soft]# bzip2 -d postgresql-9.6.14.tar.bz2[root@postgres soft]# tar -xvf postgresql-9.6.14.tar[root@postgres soft]# ls -lrttotal 117560drwxrwxrwx 6 root root 273 Jun 18 05:35 postgresql-9.6.14-rw-r--r-- 1 root root 120381440 Jul 27 12:55 postgresql-9.6.14.tar
(3)configure
[root@postgres soft]# cd postgresql-9.6.14[root@postgres postgresql-9.6.14]# ./configure--这里可能会有缺包报错,一般按照提示安装需求的包即可--实验环境,约30秒执行完成
(4)make && make install
[root@postgres postgresql-9.6.14]# make.....(输出省略,实验环境约需3分钟)最后输出,代表make完成:All of PostgreSQL successfully made. Ready to install.[root@postgres postgresql-9.6.14]# make install....(输出省略)PostgreSQL installation complete.
(5)之后的步骤与用二进制包安装基本一致,可参考上面1.1章节的2到8步骤
二、一些基础操作
2.1 创建database
(1)createdb 命令创建[postgres@postgres bin]$ ./createdb test1(2)命令行模式下创建postgres=# create database test2;CREATE DATABASE
2.2 建表并插入数据
test1=# create table t1 (id int,name char(40),constraint t1_pk primary key(id));CREATE TABLEtest1=# insert into t1 values (1,'张三');INSERT 0 1test1=# select * from t1;id | name----+--------------------------------------------1 | 张三(1 row)
2.3 创建用户并测试登录
test1=# create user cg with login password '123456';CREATE ROLEtest1=# alter database test2 owner to cg;ALTER DATABASE[postgres@postgres bin]$ ./psql -U cg -d test2psql (9.6.14)Type "help" for help.test2=> select user;current_user--------------cg(1 row)test2=> create table t2 (id int,name char(30),constraint t2_pk primary key(id));CREATE TABLEtest2=> insert into t2 values (1,'李四');INSERT 0 1test2=> select * from t2;id | name----+----------------------------------1 | 李四(1 row)
2.4 psql中的一些操作
(1)查看database
postgres=# \lList of databasesName | Owner | Encoding | Collate | Ctype | Access privileges-----------+----------+----------+-------------+-------------+-----------------------postgres | postgres | UTF8 | en_US.UTF-8 | en_US.UTF-8 |template0 | postgres | UTF8 | en_US.UTF-8 | en_US.UTF-8 | =c/postgres +| | | | | postgres=CTc/postgrestemplate1 | postgres | UTF8 | en_US.UTF-8 | en_US.UTF-8 | =c/postgres +| | | | | postgres=CTc/postgrestest1 | postgres | UTF8 | en_US.UTF-8 | en_US.UTF-8 |test2 | cg | UTF8 | en_US.UTF-8 | en_US.UTF-8 |(5 rows)postgres=# \l test2List of databasesName | Owner | Encoding | Collate | Ctype | Access privileges-------+-------+----------+-------------+-------------+-------------------test2 | cg | UTF8 | en_US.UTF-8 | en_US.UTF-8 |(1 row)
(2)切换数据库
postgres=# \c test1You are now connected to database "test1" as user "postgres".test1=# \c postgresYou are now connected to database "postgres" as user "postgres".
(3)查看当前database下的表信息(当前模式搜索录下)
test1=# \dList of relationsSchema | Name | Type | Owner--------+------+-------+----------public | t1 | table | postgres(1 row)test1=# \d t1Table "public.t1"Column | Type | Modifiers--------+---------------+-----------id | integer | not nullname | character(40) |Indexes:"t1_pk" PRIMARY KEY, btree (id)
(4)输出结果纵向显示
test1=# select * from t2;id | name | age----+---------------------------------------+-----1 | 张三 | 192 | 李四 | 333 | 王五 | 15(3 rows)test1=# \xExpanded display is on.test1=# select * from t2;-[ RECORD 1 ]-------------------------------id | 1name | 张三age | 19-[ RECORD 2 ]-------------------------------id | 2name | 李四age | 33-[ RECORD 3 ]-------------------------------id | 3name | 王五age | 15
(5)只显示行数据
test1=# select * from t2;id | name | age----+---------------------------------------+-----1 | 张三 | 192 | 李四 | 333 | 王五 | 15(3 rows)test1=# \tTuples only is on.test1=# select * from t2;1 | 张三 | 192 | 李四 | 333 | 王五 | 15
(6)进入/退出psql命令行模式
[postgres@postgres bin]$ ./psqlpsql (9.6.14)Type "help" for help.postgres=# \q[postgres@postgres bin]$
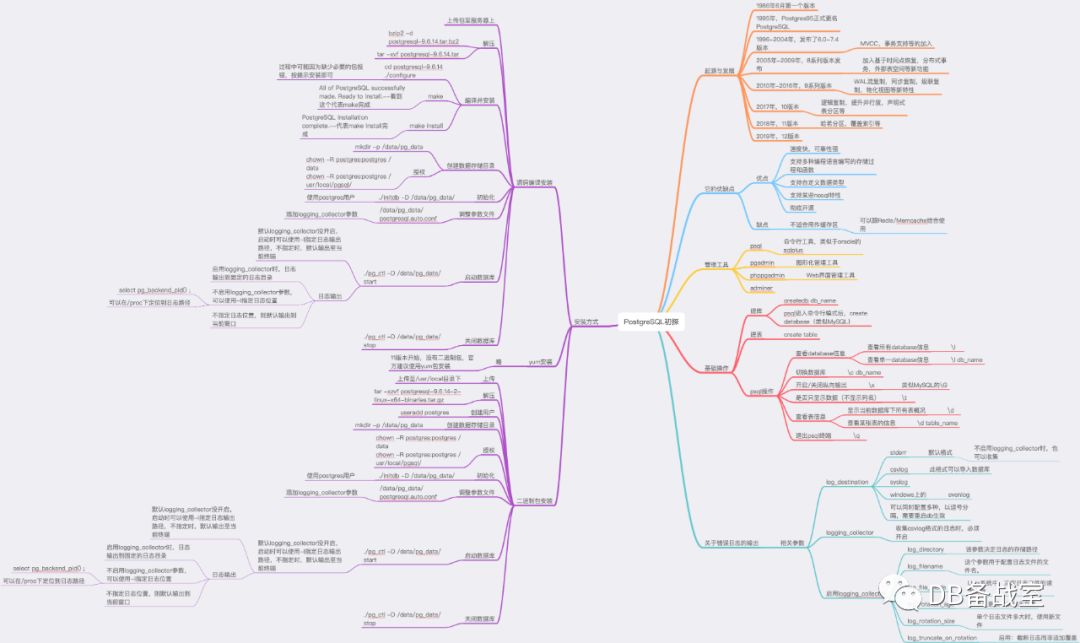
最后附上这部分的学习思维导图
文章转载自DB备战室,如果涉嫌侵权,请发送邮件至:contact@modb.pro进行举报,并提供相关证据,一经查实,墨天轮将立刻删除相关内容。
