


Oracle19c Rac Database在Windows Server 2012 R2 X64上的安装
Word版在本人同名的文档中
《Oracle 19c Rac Database 在 Windows Server 2012 R2上的安装.docx - 墨天轮文档》https://www.modb.pro/doc/74170。
服务器硬件 Checklist
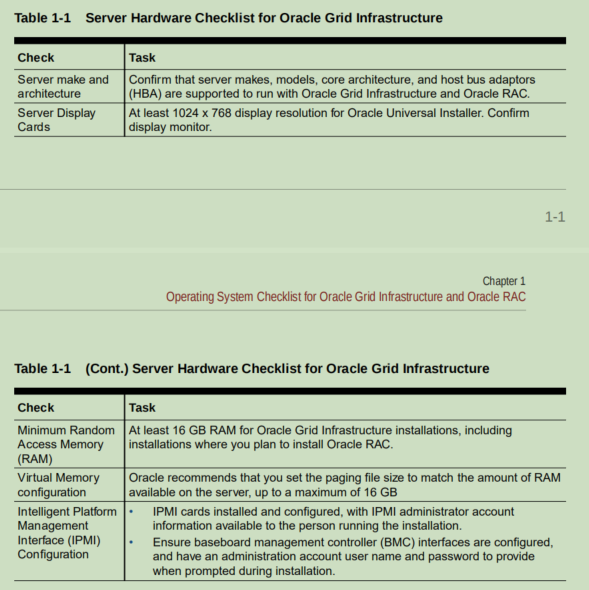
这里面第一、二项满足;第三项采用虚拟机安装,内存最多只能到10G,不满足;第四项满足,第五项不满足(安装时未选择)。
操作系统 Checklist for Oracle Grid Infrastructure and Oracle RAC
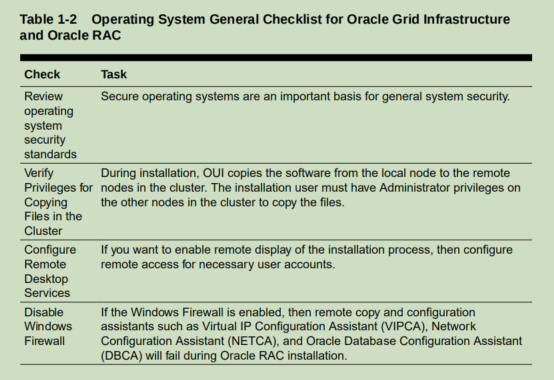
第一项满足,第二项通过共享安装磁盘,添加安装用户到安全组中,满足要求(验证net use \\节点名称\安装盘共享名)。第三项,通过设置相同用户名、口令的账户或域用户满足要求(域用户可以通过regedit中,连接到另外的计算机验证)。第四项通过关闭防火墙满足。(netsh advfirewall set allprofiles state off,验证netsh advfirewall show allprofiles state )
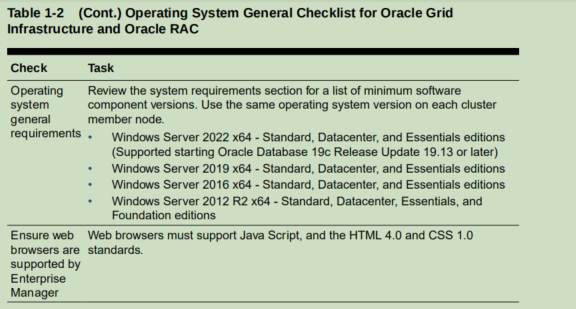
第一项windows server 2012R2 X64,满足,第二项满足。
服务器配置 Checklist
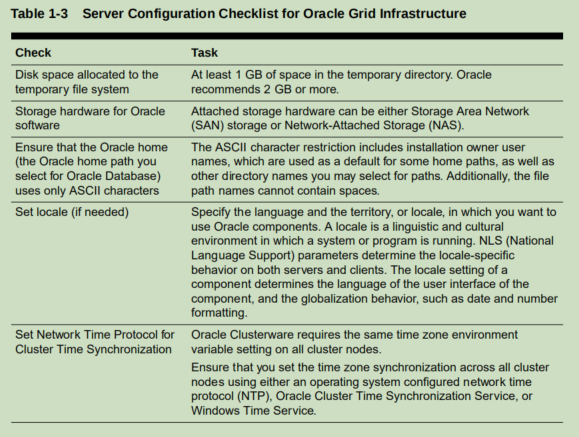
- 通过安装系统时,预留磁盘空间,保证满足要求。
- 通过链接服务器ISCSI磁盘满足。
- 满足。
- 满足。
- 禁用windows time服务,满足。
Oracle Grid Infrastructure 网络Checklist

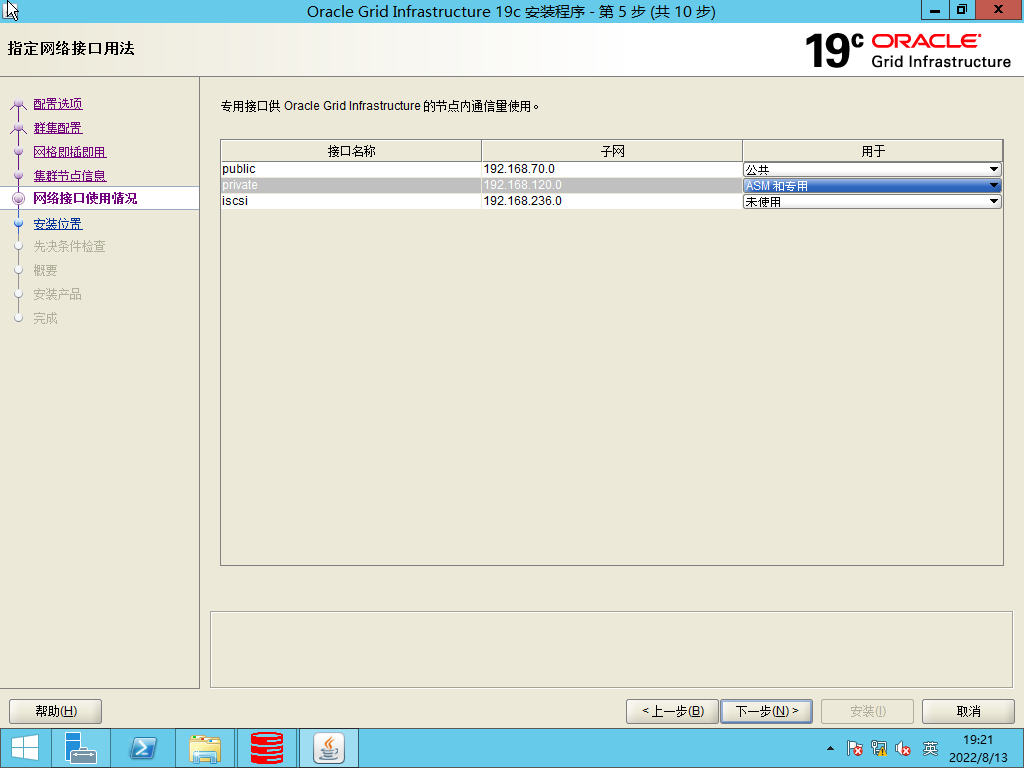
- 二项通过虚拟机网络设置,满足最低1GbE的要求。第三项满足(禁用IPV6,regedit注册表中增加DisableDHCPMediaSense=1,ip设定中修改相关内容)。第四项满足(安装时选择private+asm)
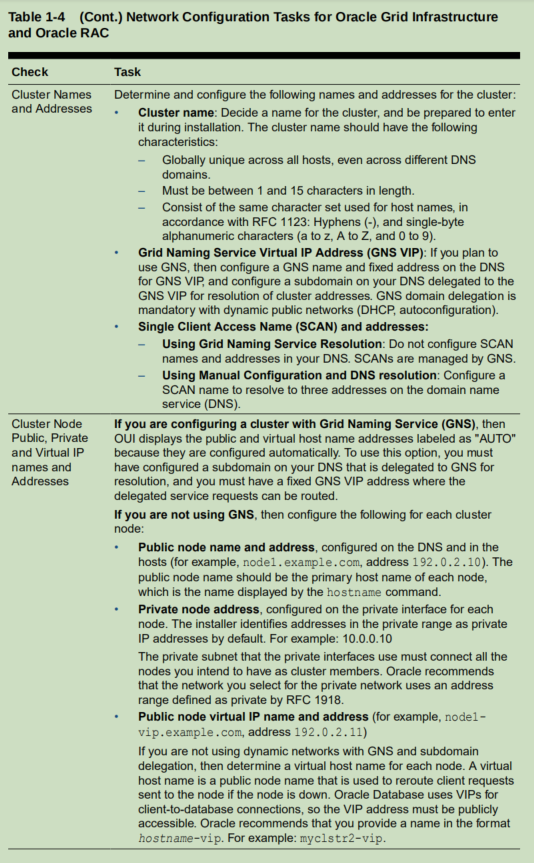
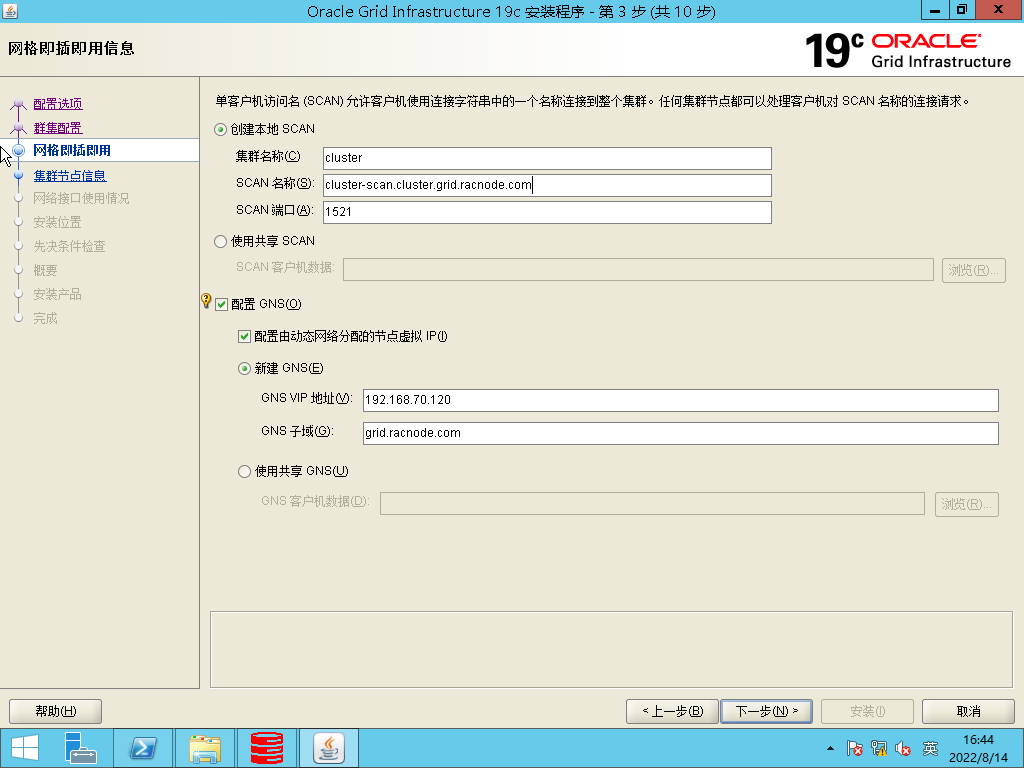
第一项中涉及到GNS,拟采用DNS委托域gns-vip,DHCP方式满足要求,或DNS三个scanIP,手动设置相关IP及名称服务。
第二项与第一项相关,GNS自动配置vip名称地址,手动需提前设定在DNS中。
用户环境配置Checklist

- 满足。安装第三台服务器,设定为主域控制器,创建相关用户grid,oracle,添加到相关组中及本地组中(创建相关组,可参考官网相关文档)
- 满足。设定temp=%SystemRoot%\TEMP
- 全新安装,不涉及。满足。
- 满足。
- Change the elevation prompt behavior for administrators to "Elevate without prompting" to allow for userequivalence to function properly :
• Open a command prompt and type "secpol.msc" to launch the Security Policy Console management utility.
• From the Local Security Settings console tree, click Local Policies, and then Security Options,Scroll down to and double-click User Account Control: Behavior of the elevation prompt for administrators.
• From the drop-down menu, select: "Elevate without prompting (tasks requesting elevation will automatically run as elevated without prompting the administrator)"
• Click OK to confirm the changes.
• Repeat the previous steps on ALL cluster nodes.
- Ensure that the Administrators group is listed under "Manage auditing and security log":
Open a command prompt and type "secpol.msc" to launch the Security Policy Console management utility.
• Click on "Local Policies"
• Click on "User Rights Assignment"• Locate and double click the "Manage auditing and security log" in the listing of User Rights Assignments.
• If the Administrators group is NOT listed in the "Local Security Settings" tab, add the group now.
• Click OK to save the changes (if changes were made).
• Repeat the previous steps on ALL cluster nodes.
存储Checklist

- 预留足够的安装磁盘,60G。满足。
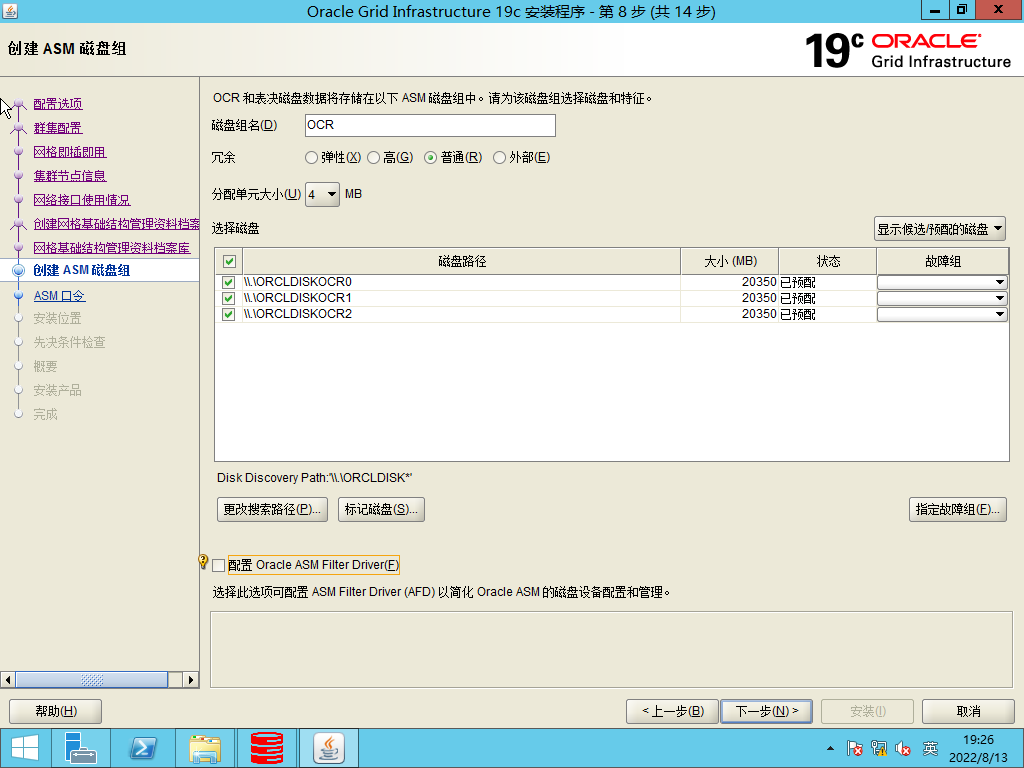
- CRS=3*20G,data=50G,fra=50G
- Asmca创建相关盘组。
安装计划Checklist
可以不做。
配置服务器 for Oracle Grid Infrastructure and Oracle RAC
检查服务器硬件和内存配置
2.1.1 检查系统可用Ram
Oracle建议最小为16G。使用控制面板检查。
• Open System in the control panel and Select the General tab.
• Alternatively, start the Windows Task Manager, then select the Performance tab to view the available memory for your system.
2.1.2 检查系统虚拟内存
与内存大小相等即可。
1. From the Control panel, select System.
2. In the System Properties window, select the Advanced tab.
3. Under Performance, click Performance Options, or Settings.
4. In the Performance Options window, click the Advanced tab.
2.1.3 检查处理器类型
根据结果选择安装文件
1. From the Start menu, select Run. In the Run window, type in msinfo32.exe.
2. In the System Summary display, locate the System Type entry.
• If the value for System Type is x64-based PC, then you have a 64-bit system.
• If the value for System Type is x86-based PC, then you have a 32-bit system.
- 检查可用磁盘空间
运行Diskmgmt.msc
- 检查可用TEMP磁盘空间
TEMP=C:\WINDOWS\TEMP
TMP=C:\WINDOWS\TEMP
1. From the Control Panel, select System.
2. Select Advanced System Settings.
3. In the System Properties windows, select the Advanced tab, then click Environment Variables.
4. Modify the value of the TEMP environment variable in the user variables list.
服务器要求
相同的软件及硬件架构(Windows server 2012 R2 X64 standard版,1cpu 2cores,10g ram 60g disk)
服务器最小硬件、内存与存储要求
略。
集群时间同步
禁用windows time service,没有使用NTP服务。
如果使用了Windows time service,则需如下配置:
1. To configure Windows Time service, use the following command on each node:
C:\> W32tm /register
2. To modify the Windows Time service to work in an Oracle RAC environment,
perform the following steps:
a. Open the Registry Editor (regedit)
b. Locate the HKEY_LOCAL_MACHINE\SYSTEM\CurrentControlSet\Services\W32Time\Config key.
c. Set the following Windows Time service parameters to these decimal values:
• MaxPosPhaseCorrection to 600
• MaxNegPhaseCorrection to 600
• MaxAllowedPhaseOffset to 600
These parameter settings specify that small time adjustments are allowed when the time difference between the reference and cluster nodes is under 10 minutes.
3. To put the changes into effect, use the following command:
C:\> W32tm /config /update
如使用NTP服务,则需如下配置:
If you decide to use NTP instead of the Windows Time service, then, after you have installed the NTP client software on each cluster node, you must start the NTP service with the -x option to prevent time from being adjusted backward. Restart the network time protocol service after you complete this task:
1. Use the registry editor to edit the value for the ntpd executable under
HKEY_LOCAL_MACHINE\SYSTEM\CurrentControlSet\Services\NTP.
2. Add the -x option to the Image Path key value, behind %INSTALLDIR%\ntpd.exe.
3. Restart the NTP service using the following commands:
net stop NTP
net start NTP
为 Oracle Grid Infrastructure and Oracle RAC配置节点操作系统
确认集群节点间拷贝文件权限
Net use \\nodename\c$ (如不需要可加参数/delete去掉)
防火墙设置(见1.2)
检查操作系统版本
1. Right-click My Computer and select Properties.
2. On the General tab, under the heading of System, view the displayed text.
确保是64位系统。
为 Oracle Grid Infrastructure and Oracle RAC配置节点网络
每个节点配置三块千兆网卡,一块命名为public,一块命名为private&asm,另一块命名为iscsi(磁盘连接)。分别在三个不同的网段。 禁用IPv6。
DC、DNS、DHCP位于public,iSCSI服务器位于iscsi。关于SCAN的具体可参考《oracle single client access name》an oracle white paper(官网)。
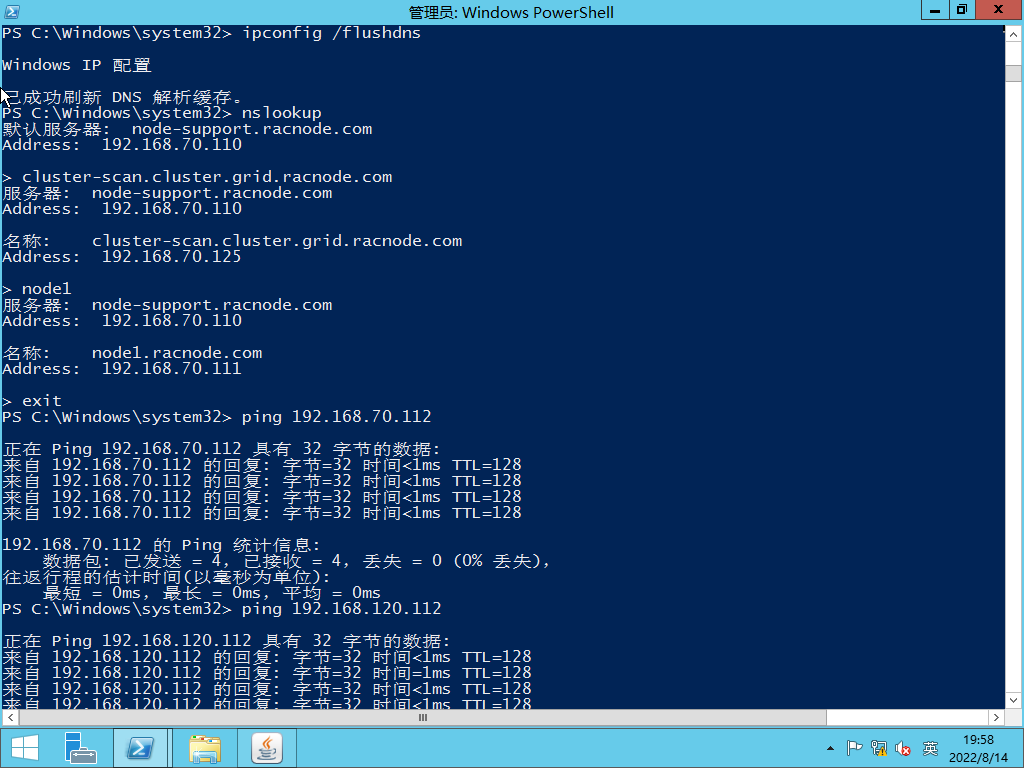
(如手动,则只需要DNS服务,所有名字须由DNS解析。)
(Dns配置后,可使用ping、nslookup命令检查结果)
具体网络配置如下:
.Disabling Windows Media Sensing
1. Backup the Windows registry.
2. Use Registry Editor to view the following key in the registry:
HKEY_LOCAL_MACHINE\System\CurrentControlSet\Services\Tcpip\Parameters
3. Add a new DWORD value to the Parameters subkey:
Value Name: DisableDHCPMediaSense Value: 1
4. Exit the Registry Editor and restart the computer.
5. Repeat steps 1 through 4 on each node in your cluster.
Deconfigure DNS Registration for Public Network Adapter
1. Start the Windows Server Manager application.
2. Select View Network Connections.
3. Right-click the network adapter that provides the Public network interface and select
Properties.
4. Select the Networking tab, and then select Internet Protocol Version 4 (TCP/IPv4).
Note: If you configure this setting in IPv4, then Windows automatically configures the same setting for IPv6
5. Click Properties.
6. On the General tab, click Advanced.
7. Select the DNS tab.
8. Deselect Register this connection's addresses in DNS.
Manually Configure Automatic Metric Values
1. In Control Panel, double-click Network Connections.
2. Right-click a network interface, and then click Properties.
3. Click Internet Protocol (TCP/IP), and then click Properties.
4. On the General tab, click Advanced.
5. To specify a metric, on the IP Settings tab, click to clear the Automatic metric check box.
6. In the Interface Metric field, set the public network interface metric to a lower value than the private network interface. This assigns a higher priority to public network in the binding order.
For example, if you set the public network interface metric to 100 and the private network interface metric to 300, then the public network is assigned a higher priority than the private network.
Network Interface Binding Order (and Protocol Priorities)
It is required that the Public interface be listed first in the network interface binding order on ALL cluster nodes.
Perform the follow tasks to ensure this requirement is met:
Click Start, click Run, type "ncpa.cpl", and then click OK.
• In the menu bar on the top of the window click "Advanced" and choose "Advanced Settings" (If the "Advanced" is not showing, click 'Alt' to enable that menu item).
• Under the Adapters and Bindings tab use the up arrow to move the Public interface to the top of the Connections list.
• Under Binding order for increase the priority of IPv4 over IPv6
• Click OK to save the changes
• Repeat the previous steps on ALL cluster nodes
Setting UDP and TCP Dynamic Port Range for Oracle RAC Installations
1. Open a command line window as an Administrator user.
2. Run the following commands to set the dynamic port range:
netsh int ipv4 set dynamicport udp start=9000 num=56000
netsh int ipv4 set dynamicport tcp start=9000 num=56000
3. Run the following commands to verify that the dynamic port range was set:
netsh int ipv4 show dynamicport udp
netsh int ipv4 show dynamicport tcp
Configuring DNS for Domain Delegation to Grid Naming Service
You must configure the DNS to send GNS name resolution requests using DNS forwarders. If the DNS server is running on a Windows server that you administer, then the following steps must be performed to configure DNS:
1. Click Start, then select Programs. Select Administrative Tools and then click DNS manager.
The DNS server configuration wizard starts automatically.
2. Use the wizard to create an entry for the GNS virtual IP address, where the address is a valid DNS name.
For example, if the cluster name is mycluster, and the domain name is example.com, and the IP address is 192.0.2.1, you could create an entry similar to the following:
mycluster-gns-vip.example.com: 192.0.2.1
The address you provide must be routable.
3. To configure DNS forwarders, click Start, select Administrative Tools, and then select DNS.
4. Right-click ServerName, where ServerName is the name of the server, and then click the Forwarders tab.
5. Click New, then type the name of the DNS domain for which you want to forward queries in the DNS domain box, for example, clusterdomain.example.com. Click OK.
6. In the selected domain's forwarder IP address box, type the GNS VIP address, and then click Add.
7. Click OK to exit.
为Grid Infrastructure and Oracle RAC配置用户、组和目录
创建安装组和用户
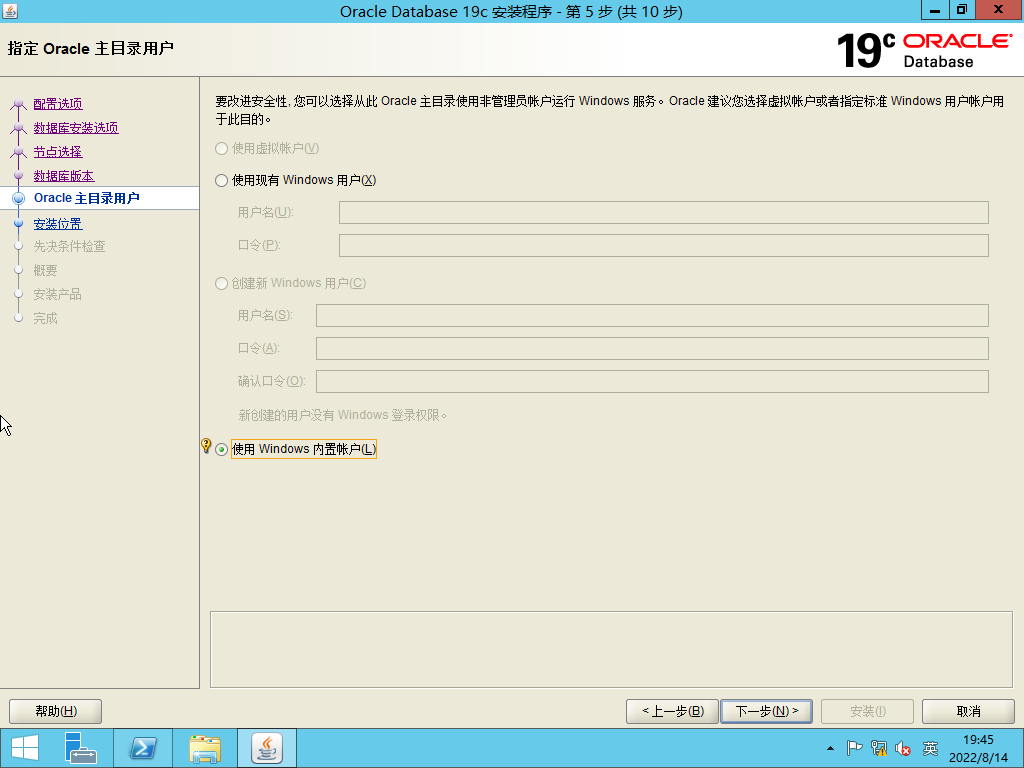
在DC上创建组oinstall,创建grid和oracle两个账户,并在节点中加入Administrators组中。如果不希望用内建账户安装,也可在域中创建相应的账户。因为是全新安装,所以使用了内建账户(oracle不推荐)。安装结束后,要注意相关配置的运行权限。
检查tmp、temp文件夹的设定。
创建相关目录
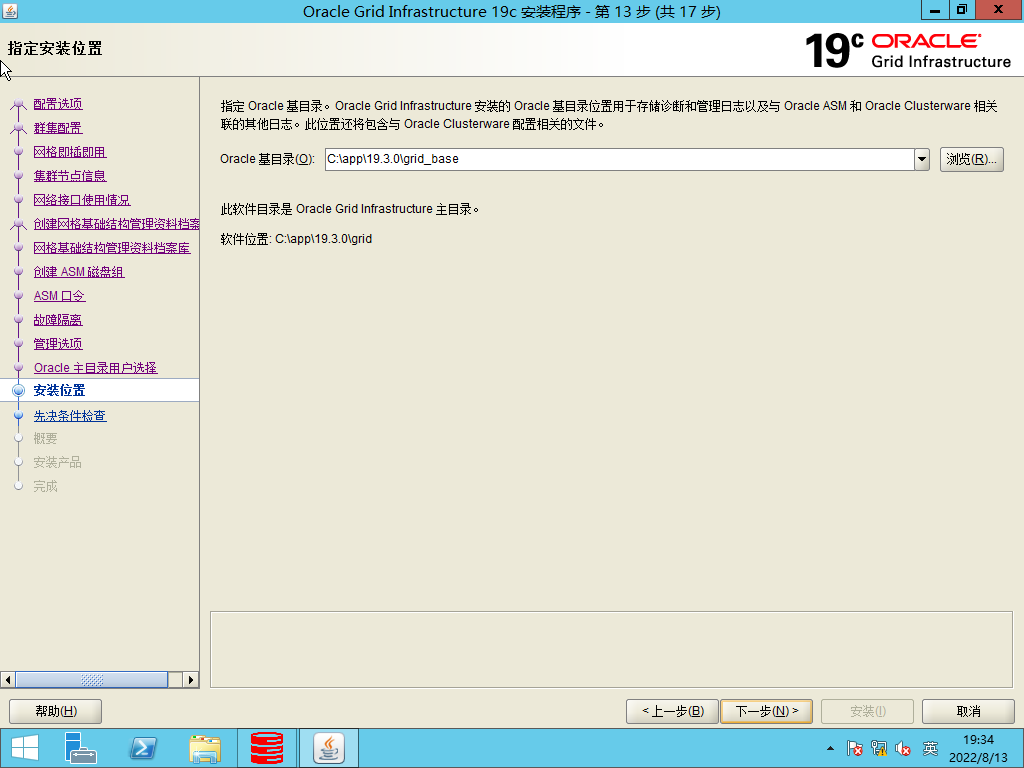
创建Oracle base目录c:\app\grid和Grid home directory C:\app\19.3.0\grid
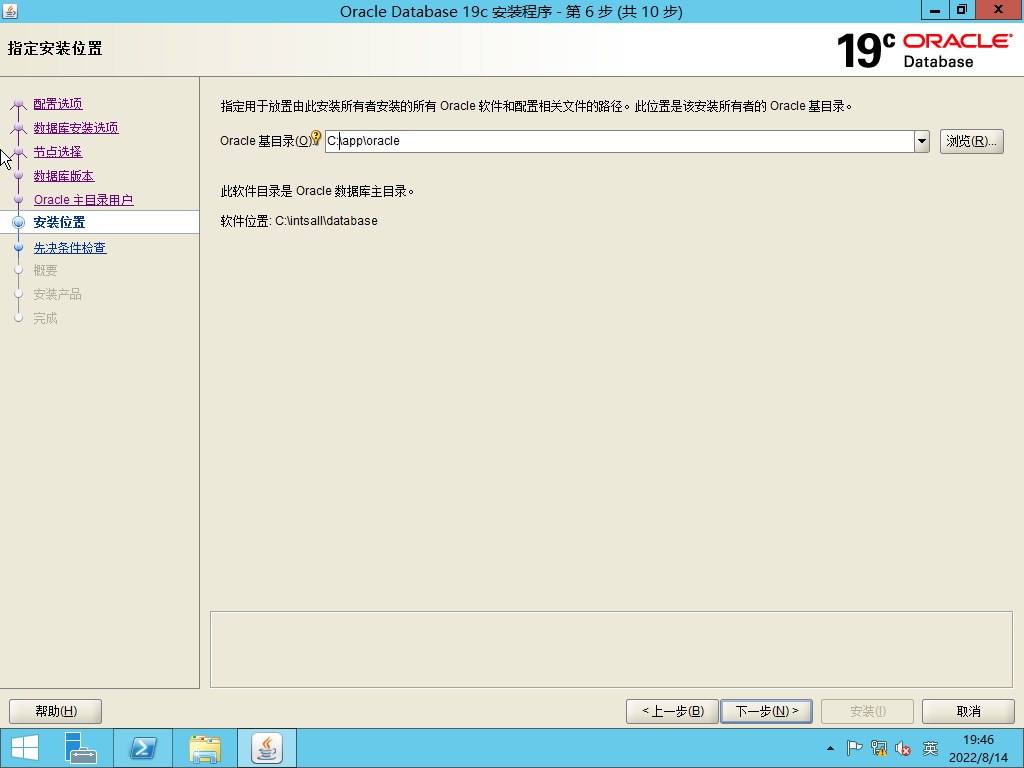
c:\app\oracle
C:\> mkdir \install
C:\> mkdir \install\database
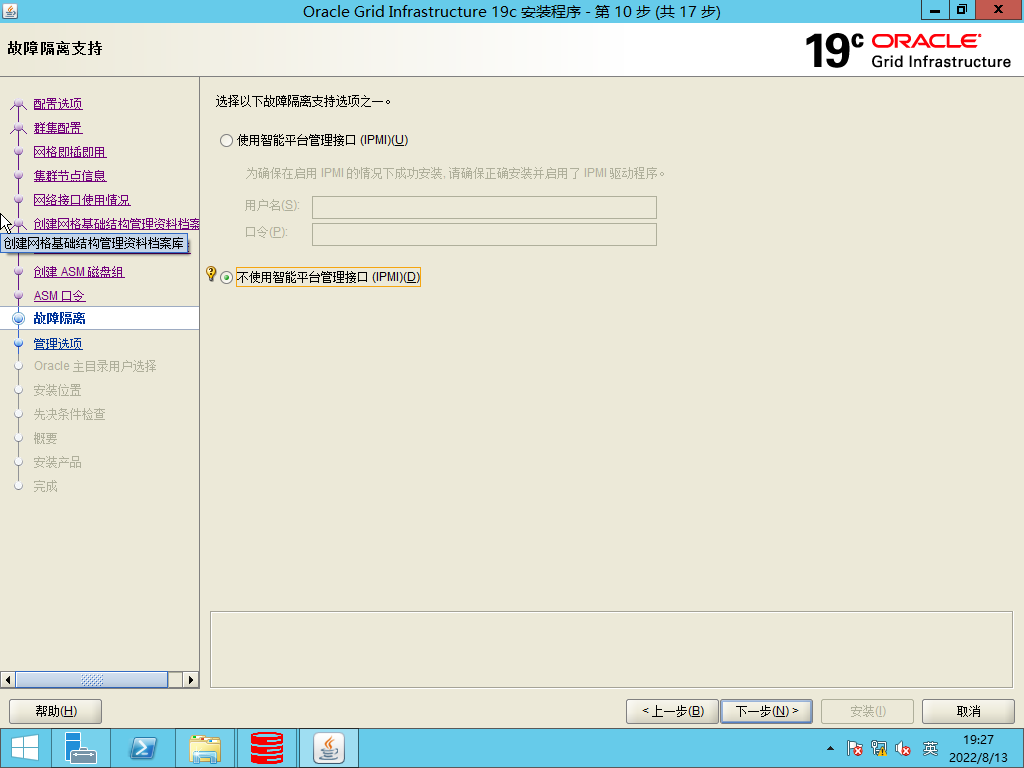
不使用Enabling Intelligent Platform Management Interface (IPMI)
为Grid Infrastructure and Oracle RAC配置磁盘
具体可参见https://blog.csdn.net/blvyoucan/article/details/71170754。
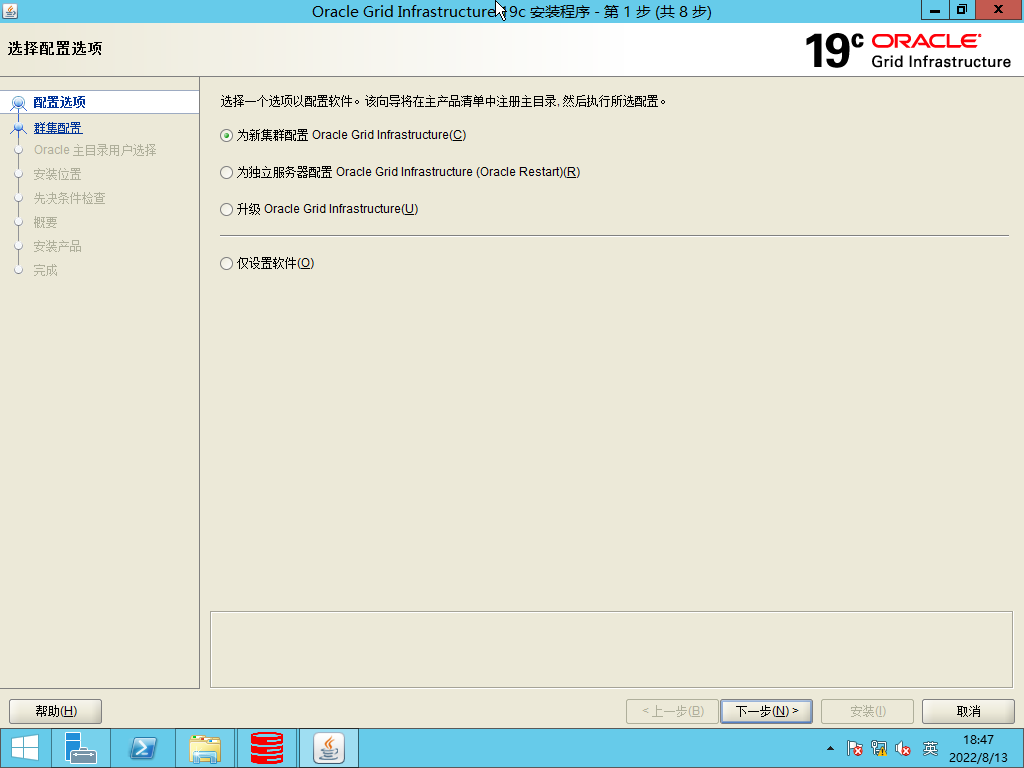
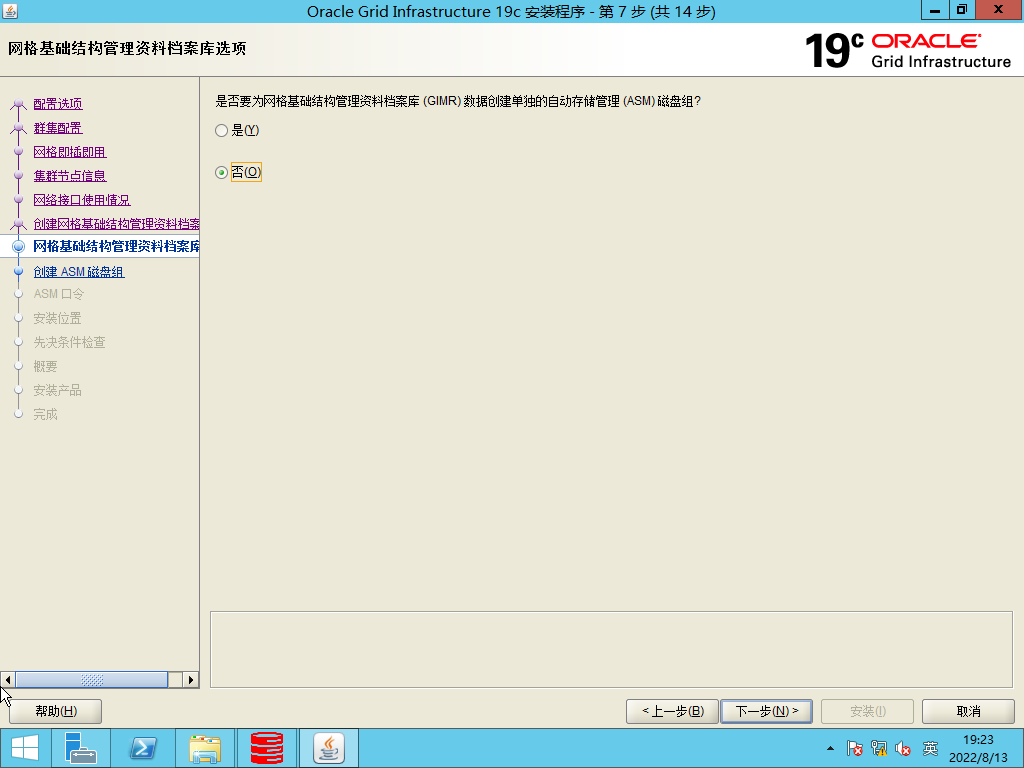
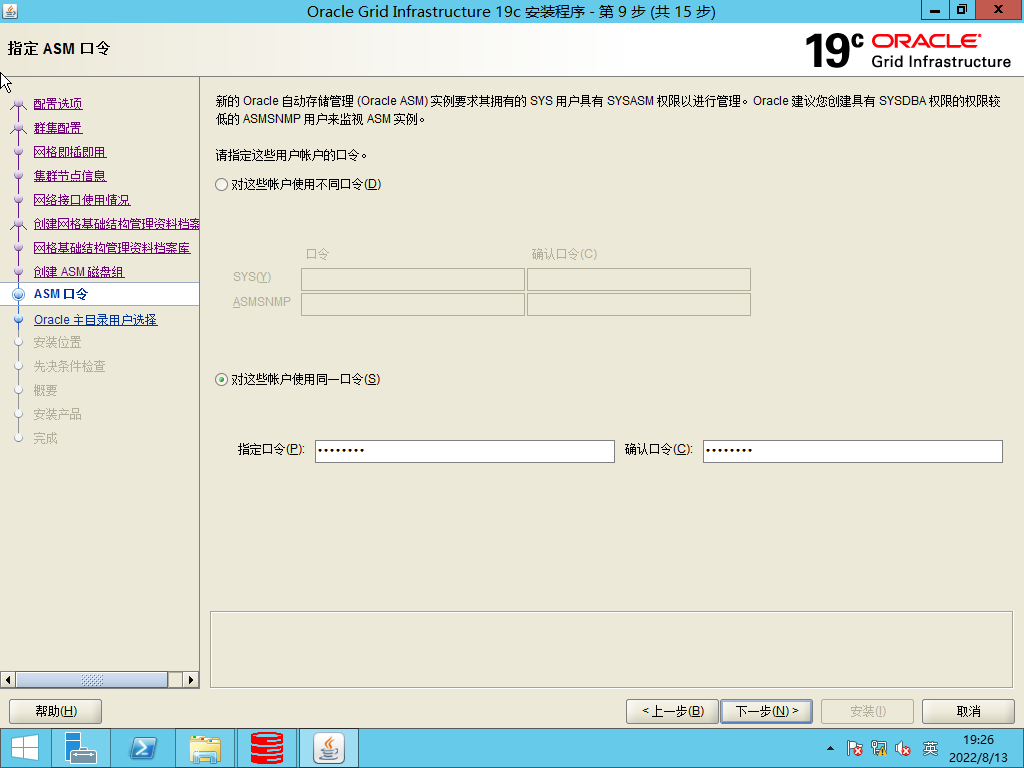
安装Oracle Grid Infrastructure for a Cluster
将安装文件解压缩到Grid home directory 中,运行setup.exe.(有多种安装方式根据自己的情况选择),(如出现api-ms-win-crt-runtime动态链接库错误,需要打补丁,安装Microsoft Visual C++ 2015/2017 Redistributable,具体参见https://blog.csdn.net/z366188741/article/details/117744446)
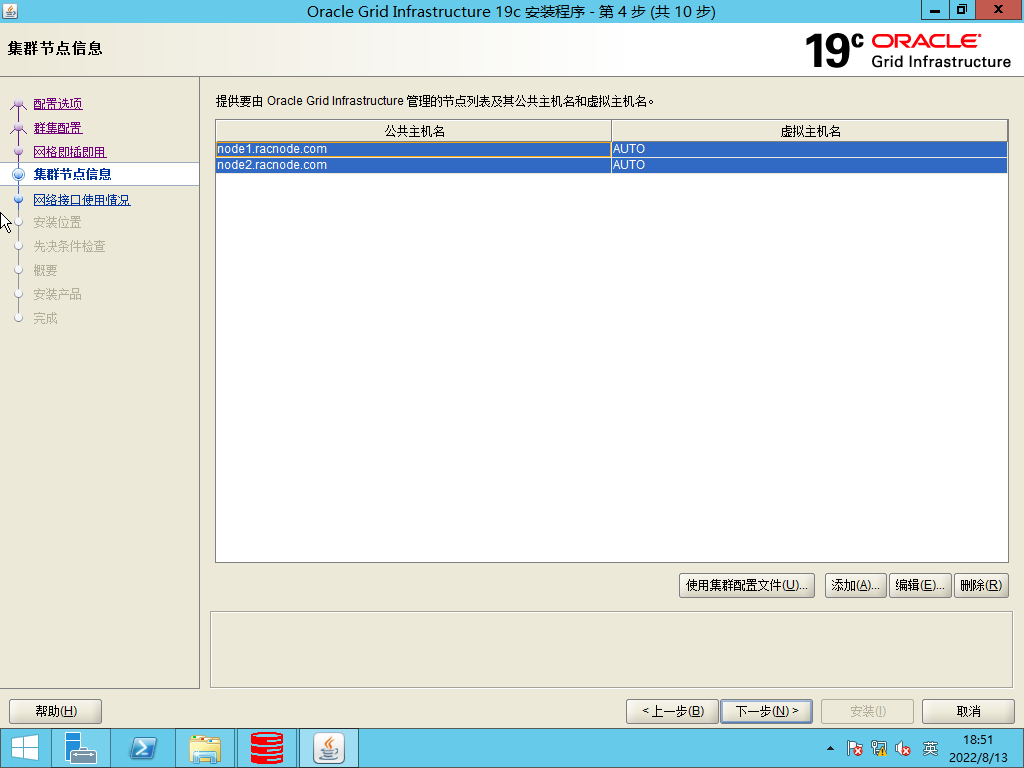
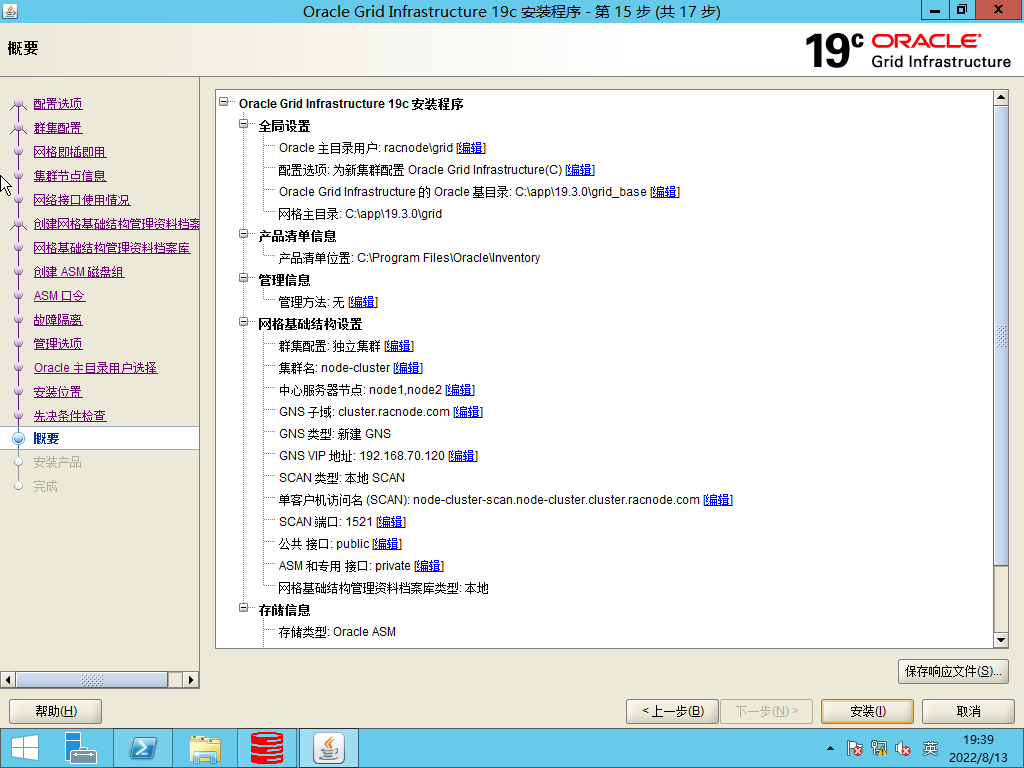
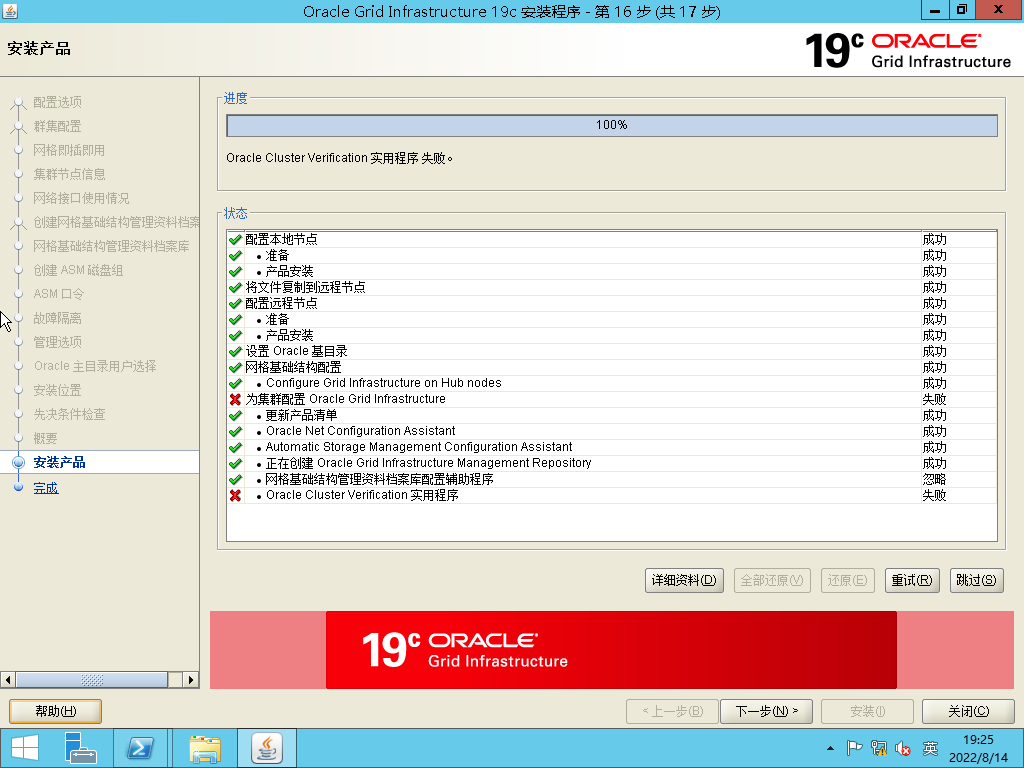
具体安装过程截图如下:
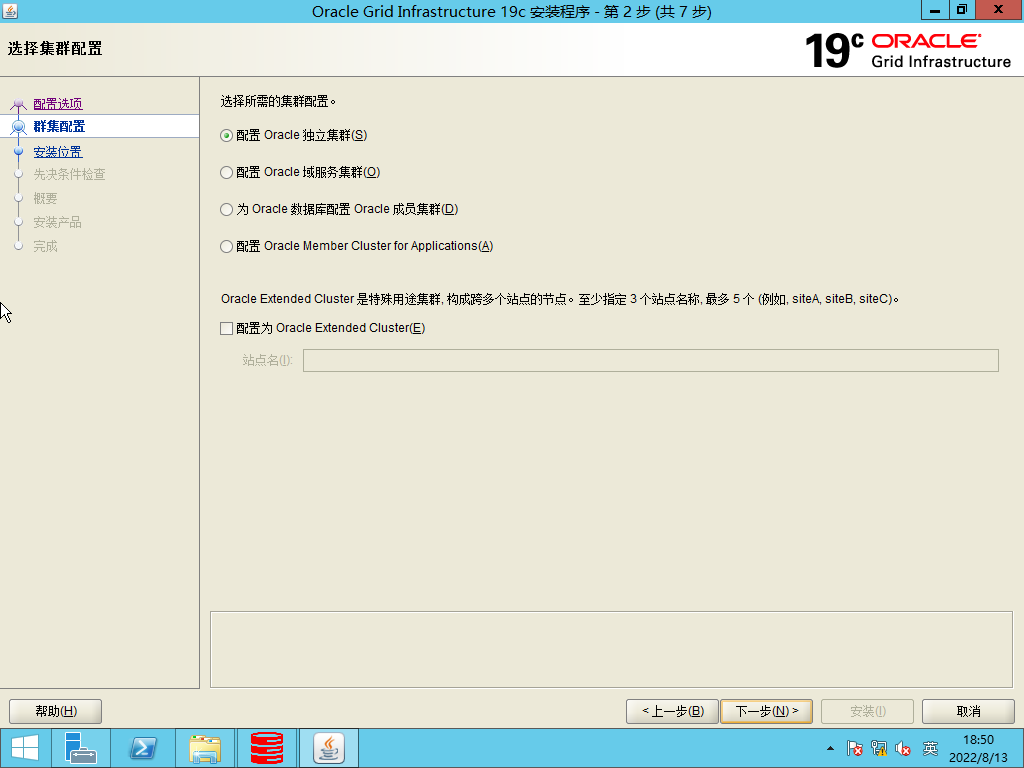
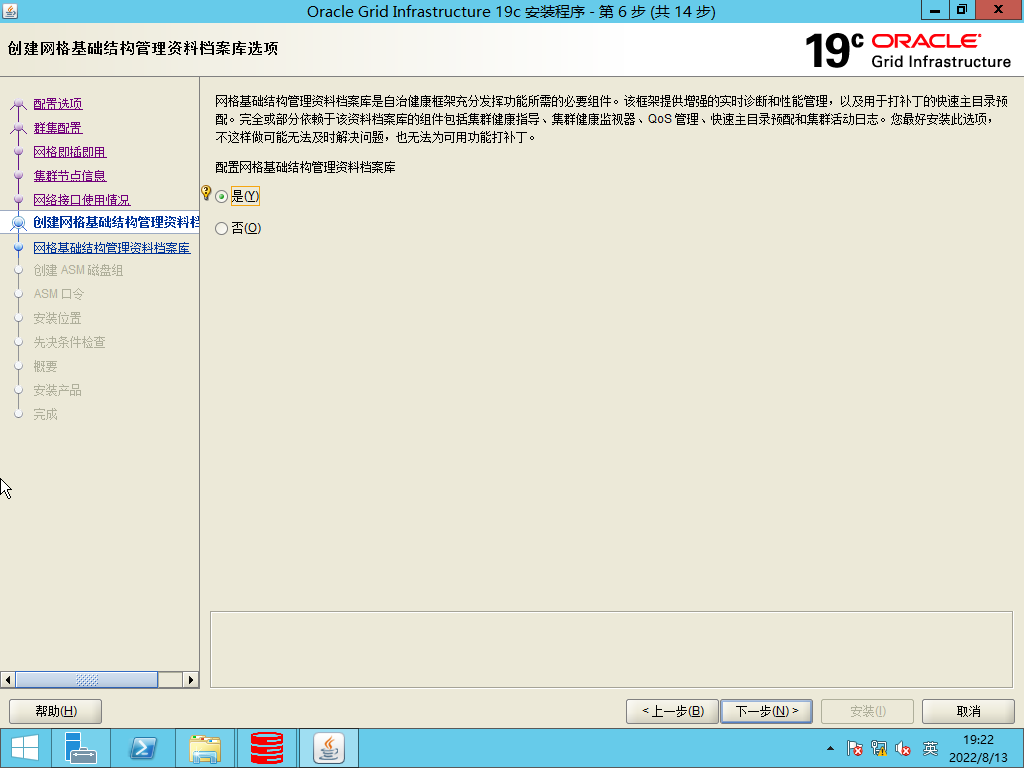

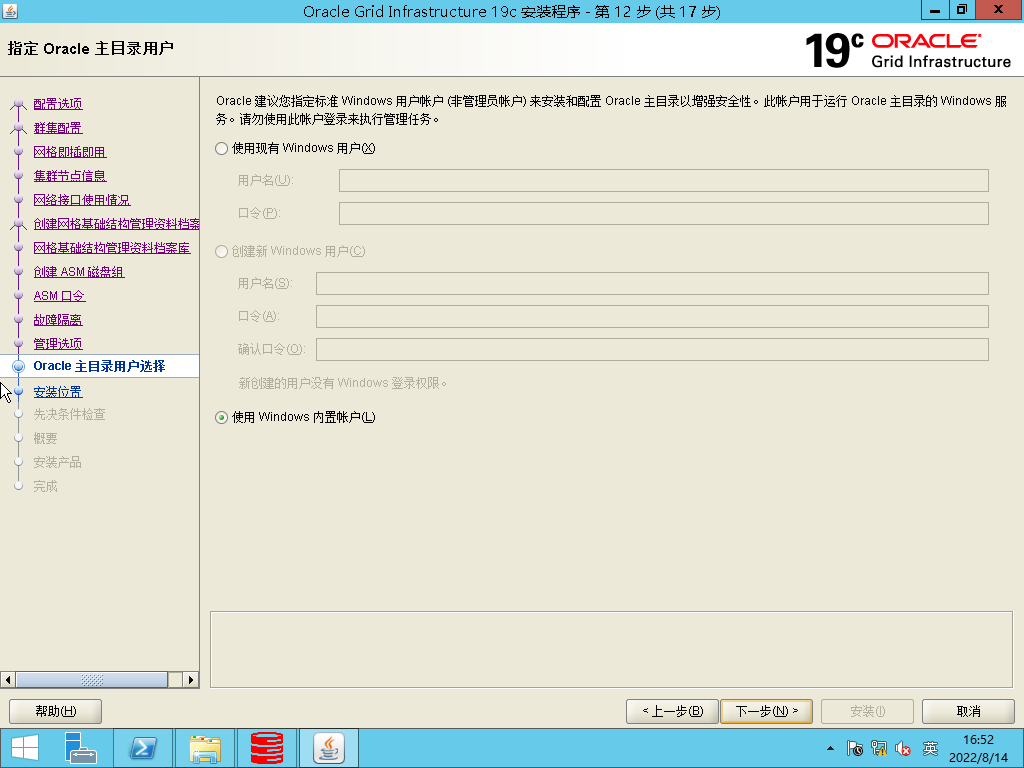
(使用Windows内置帐户)
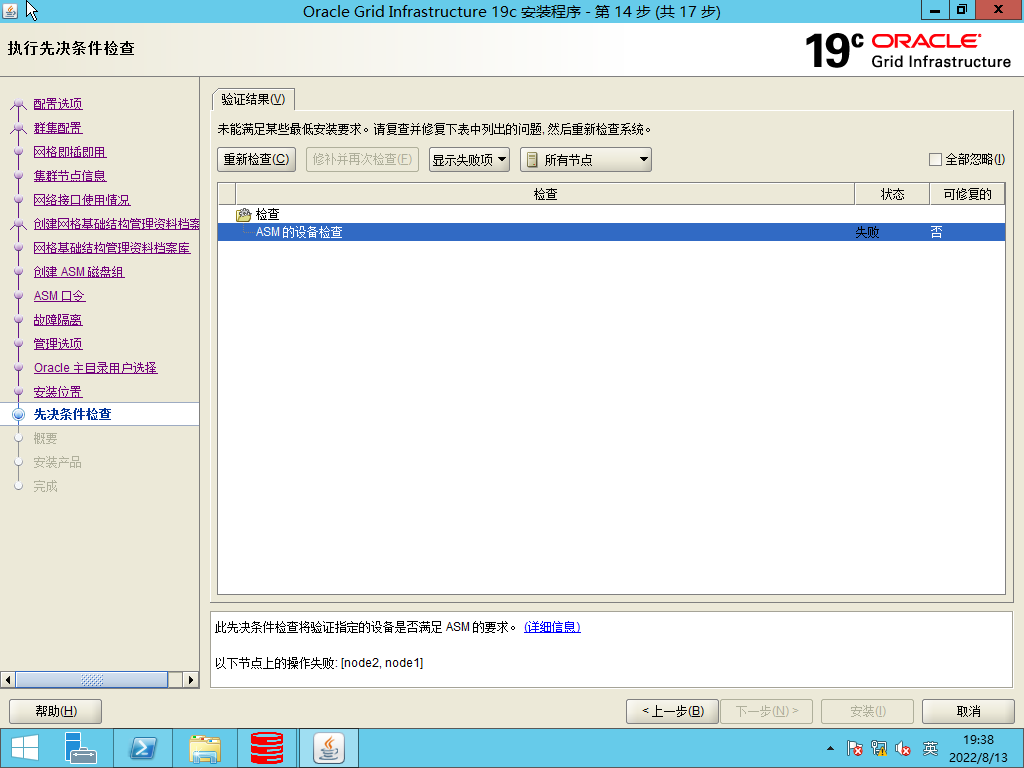
选择忽略。(从12c开始一直都是报这个检查失败)
安装开始
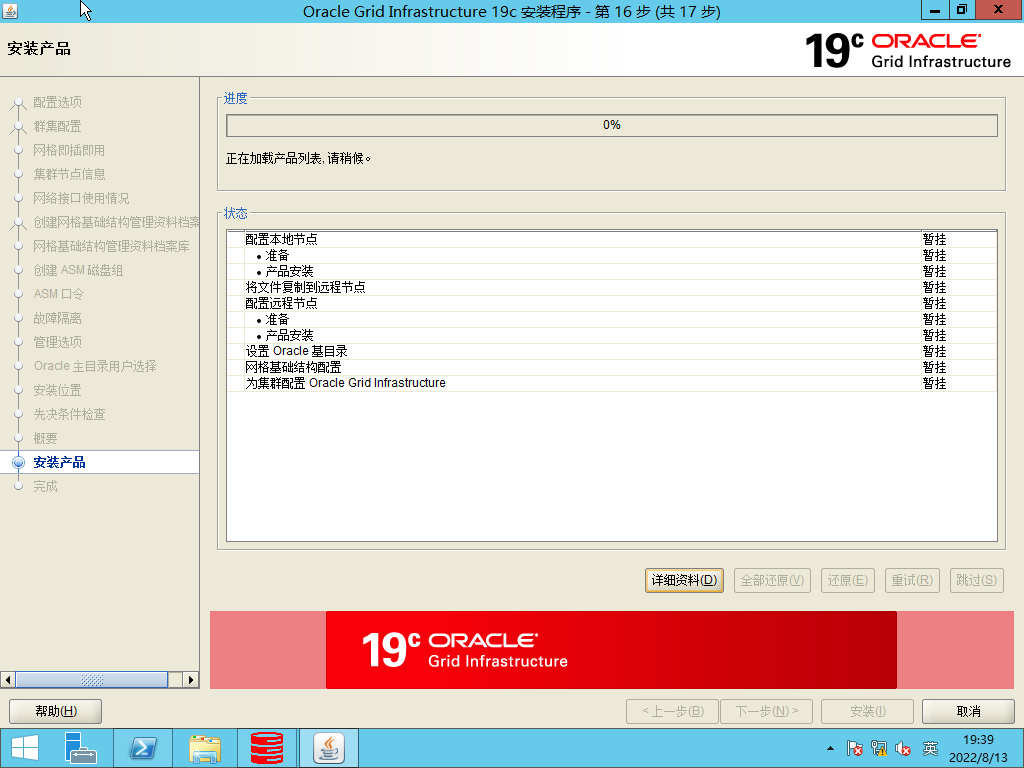
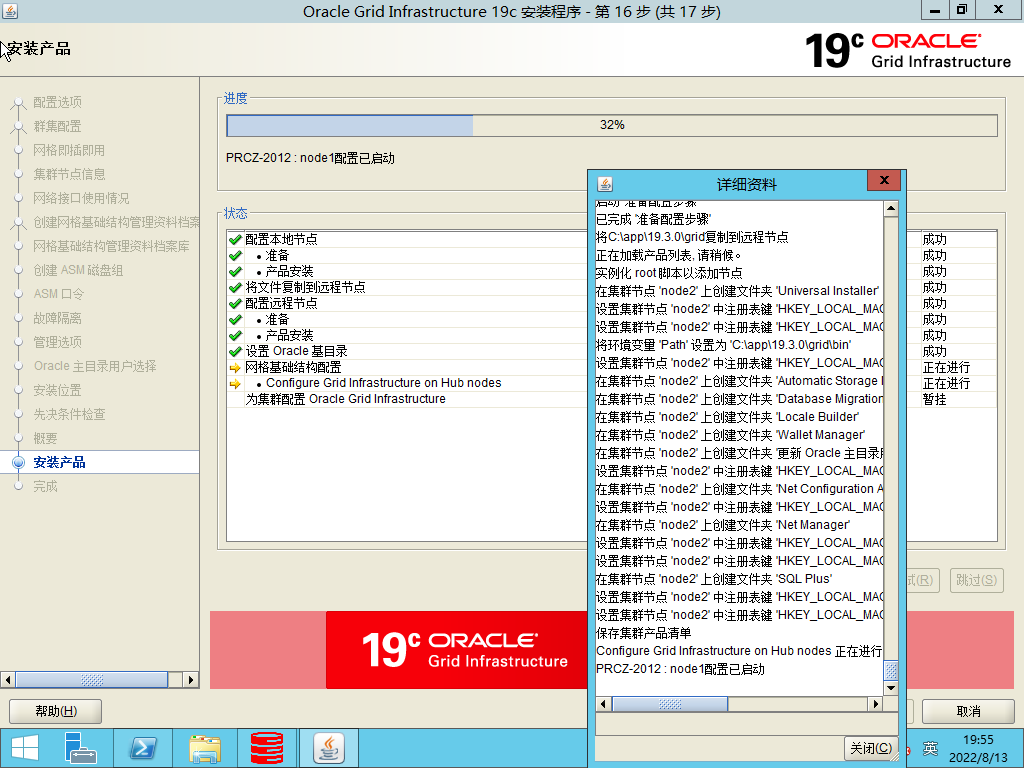
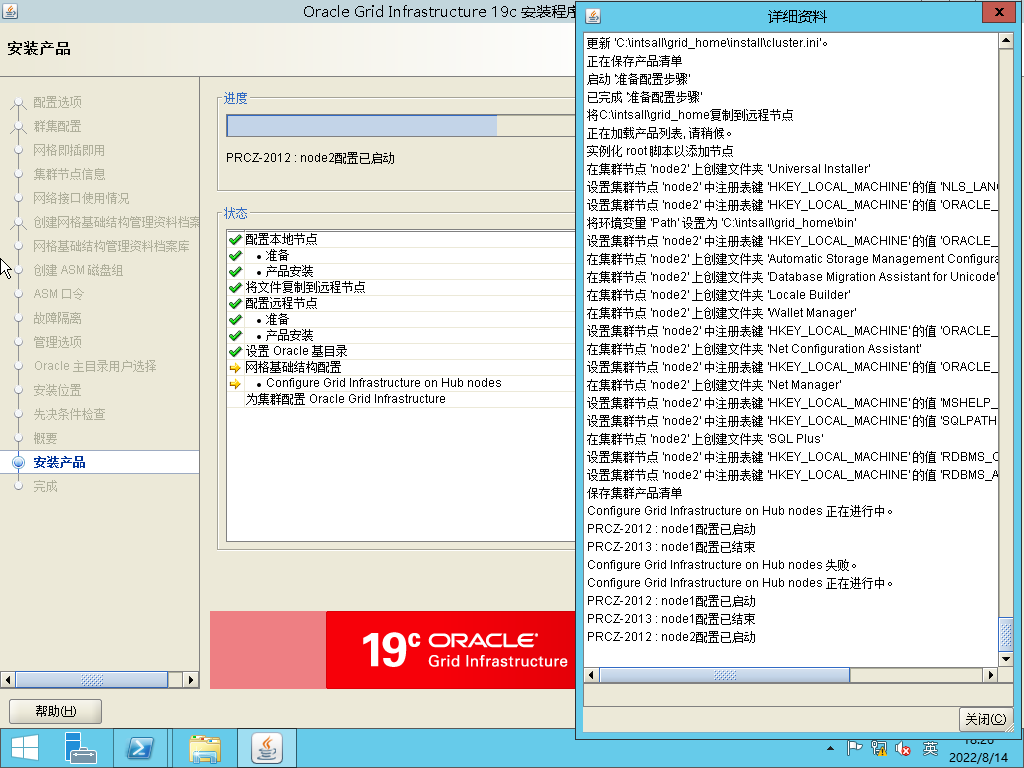
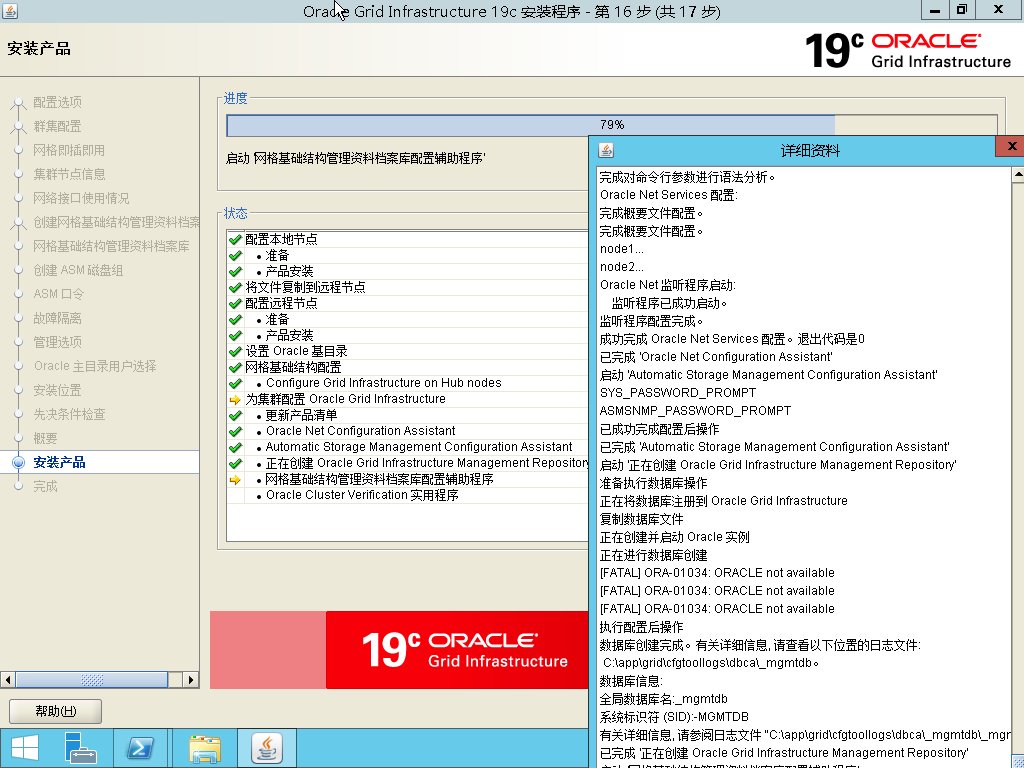
时间相当长,大约2小时。

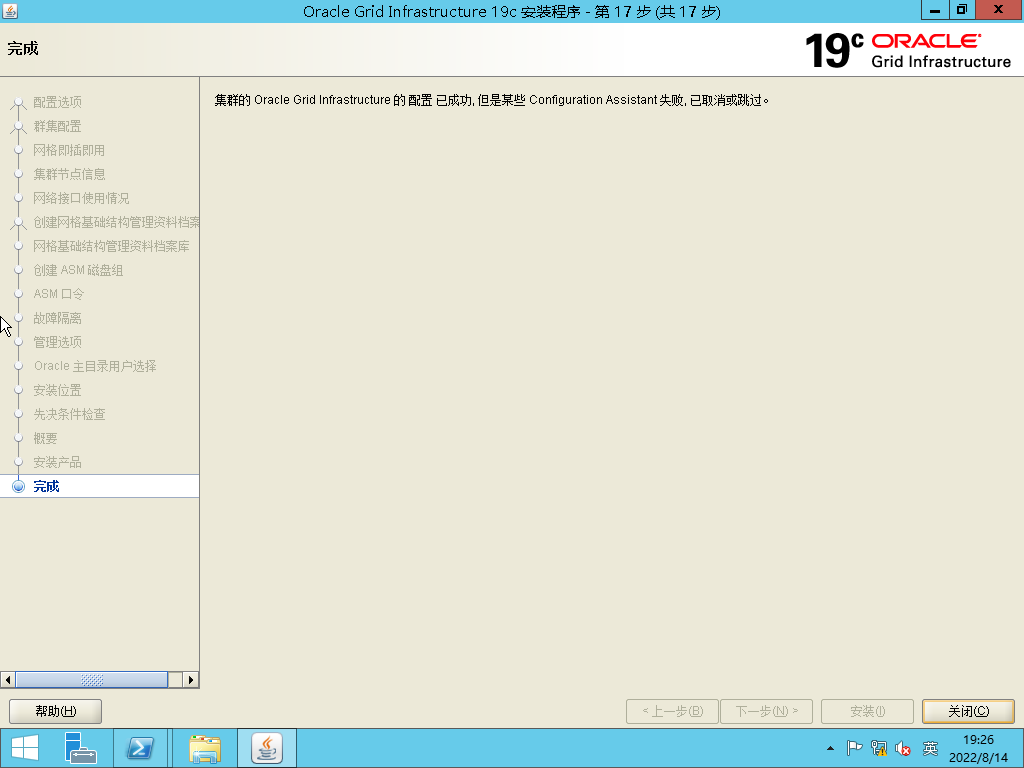
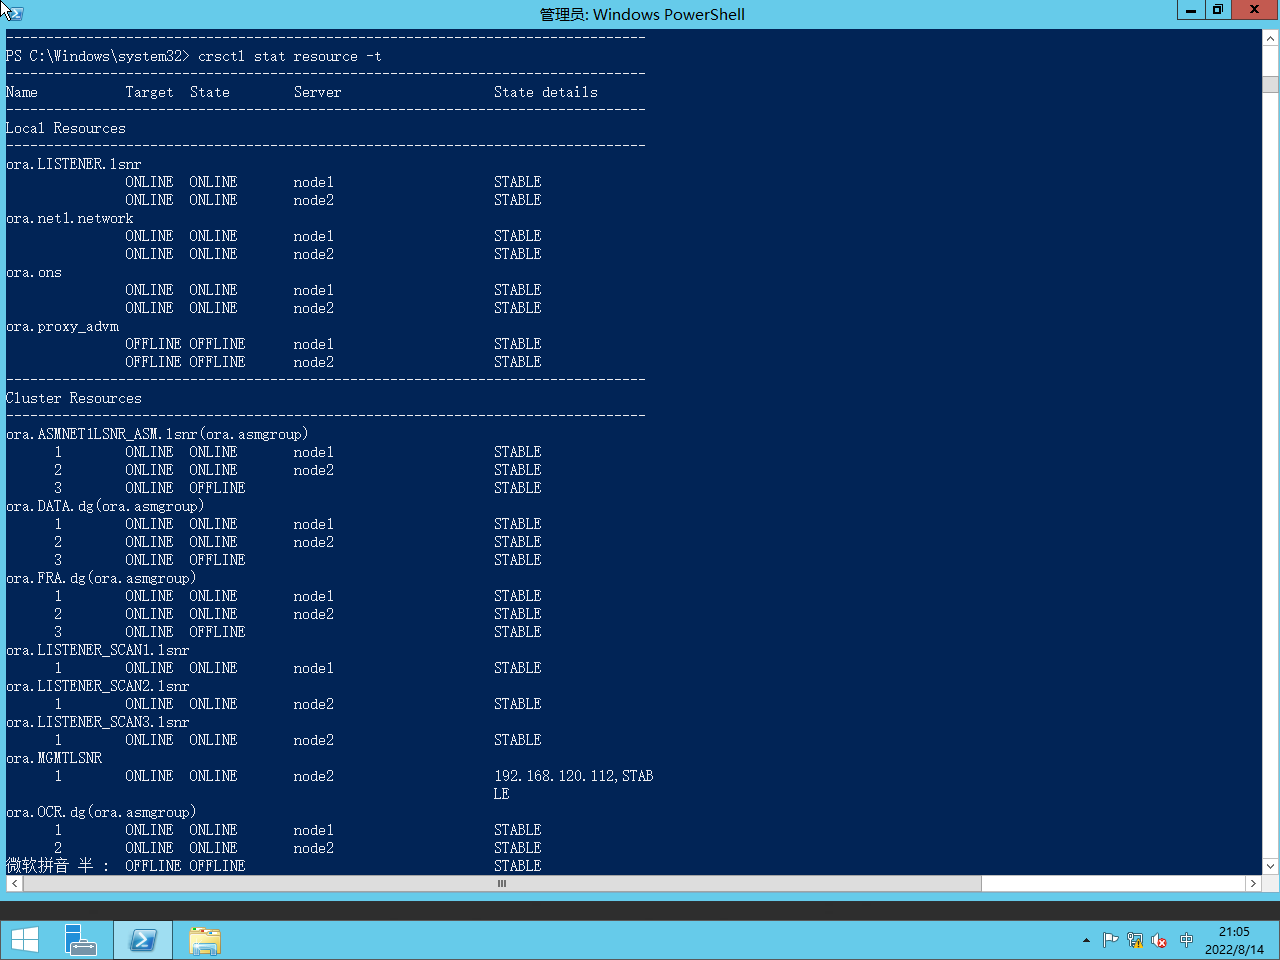
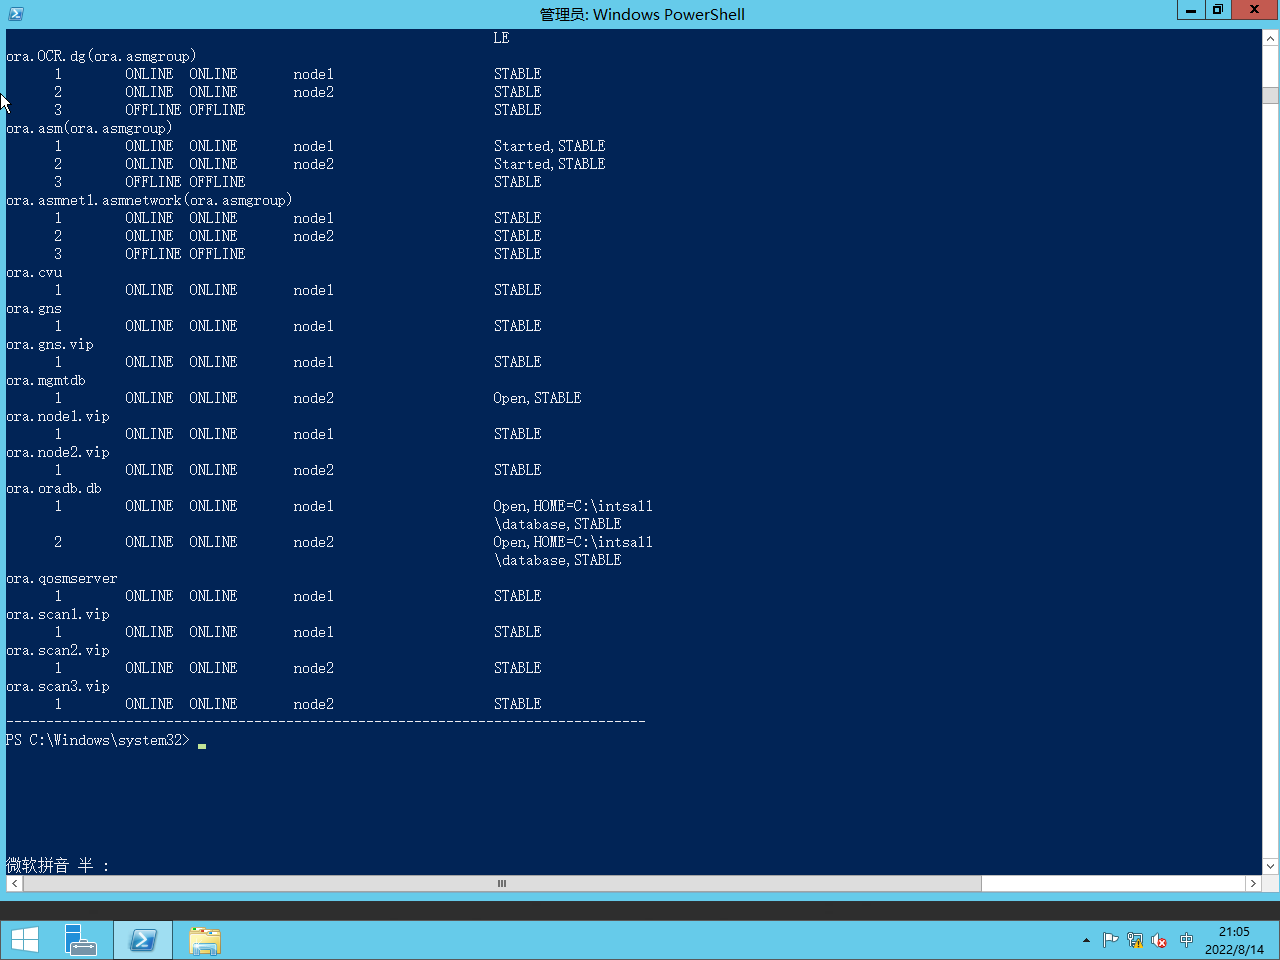
Crsctl status resource -t 验证相关服务是否成功启动。
安装数据库
磁盘组准备
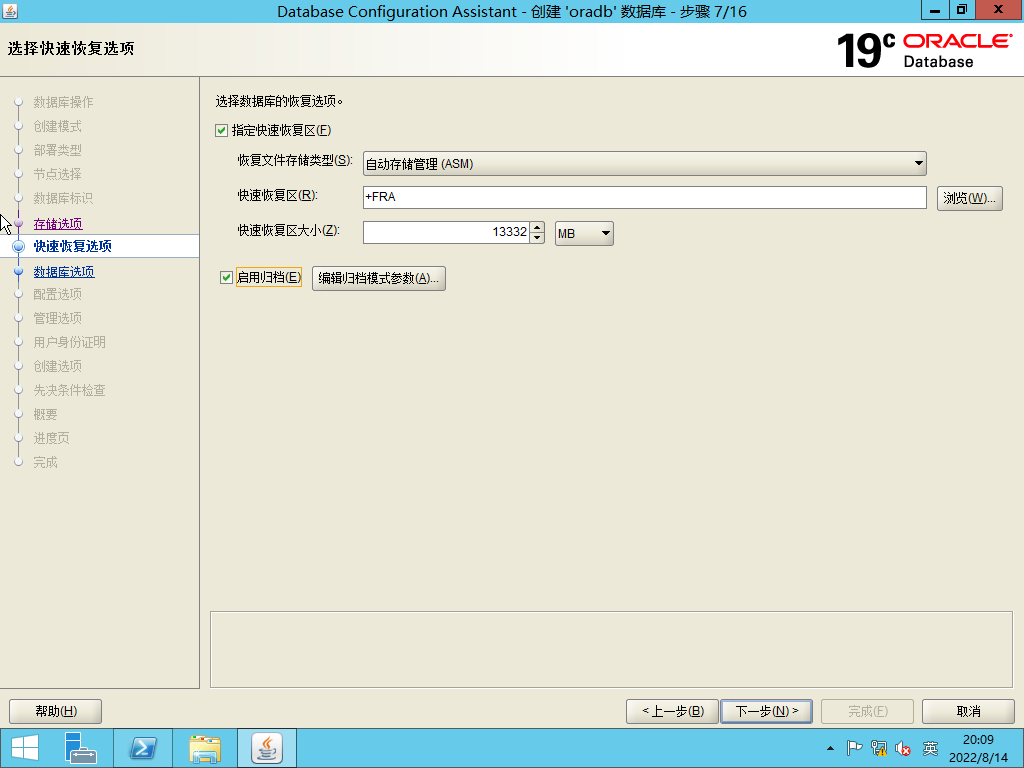
Asmca 进入图形化界面,创建磁盘组,过程省略,其中CRS存储OCR和Votedisk,DATA用于存放数据。Fra用于存储闪回区和归档.
安装数据库文件
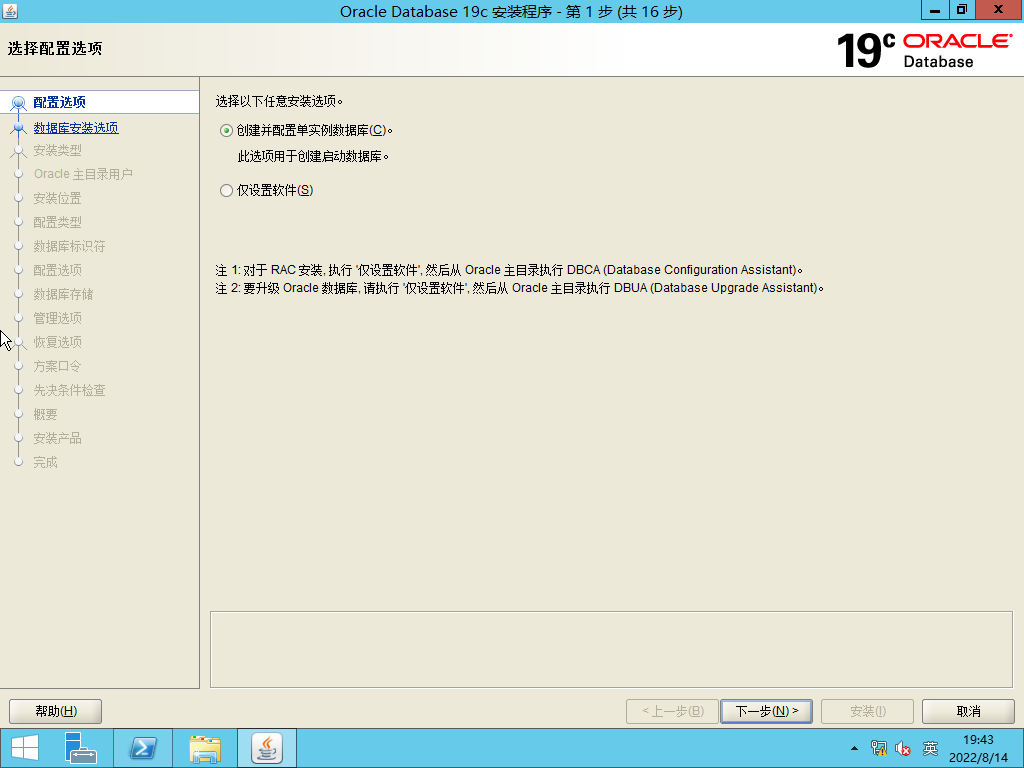
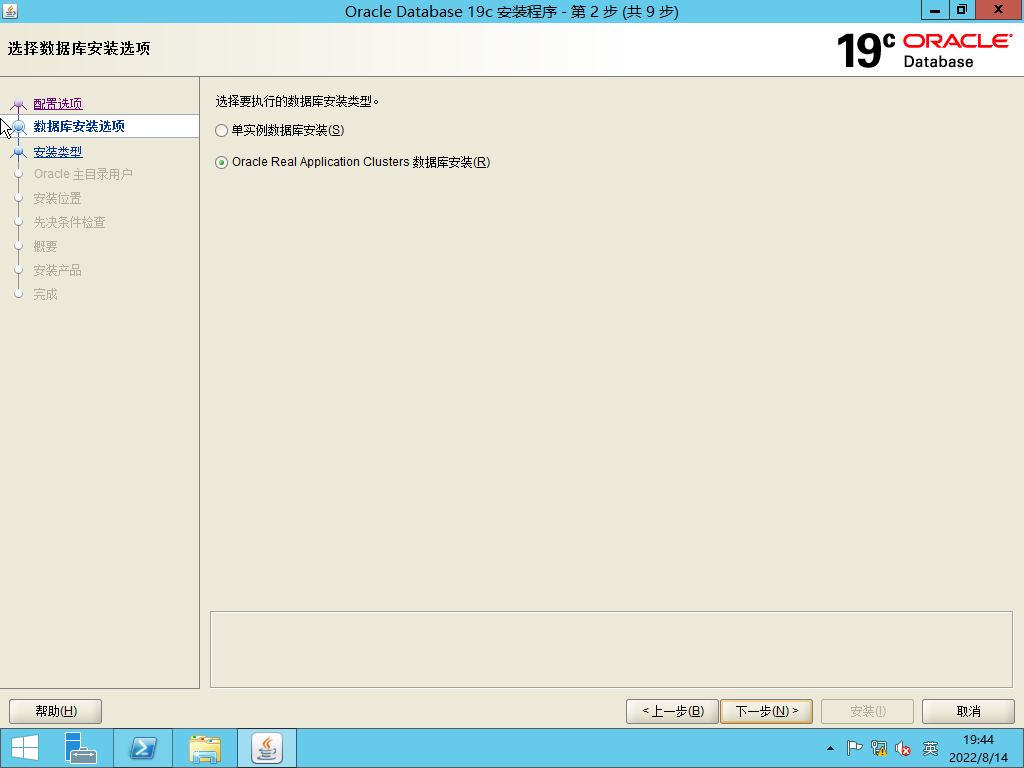
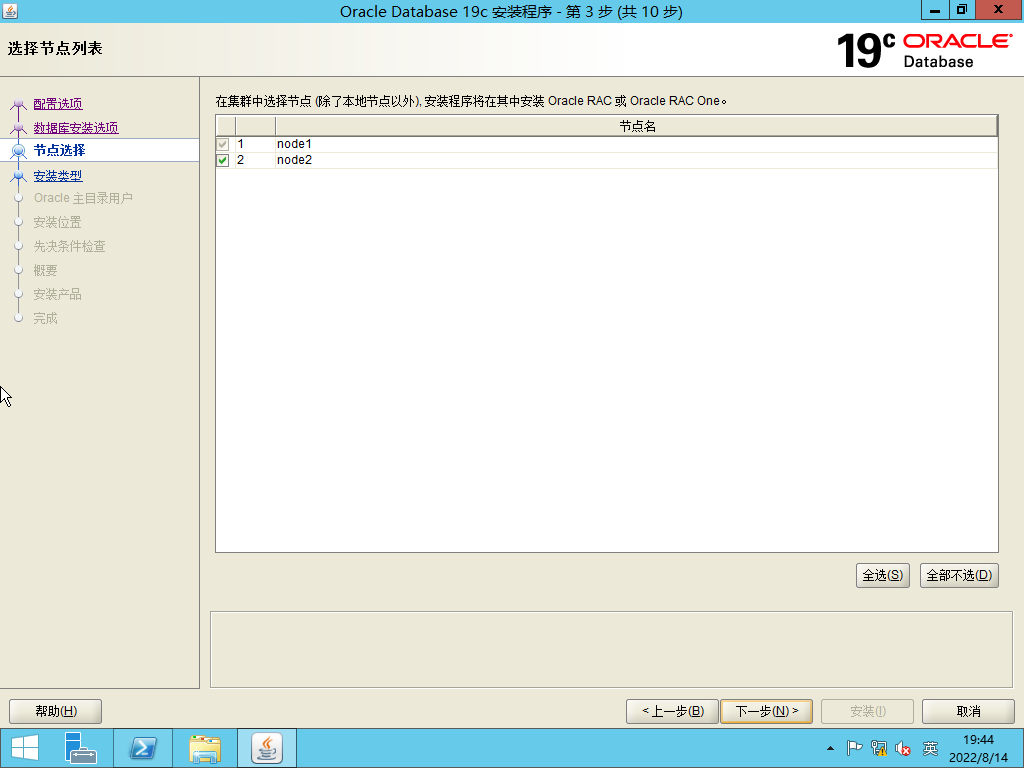
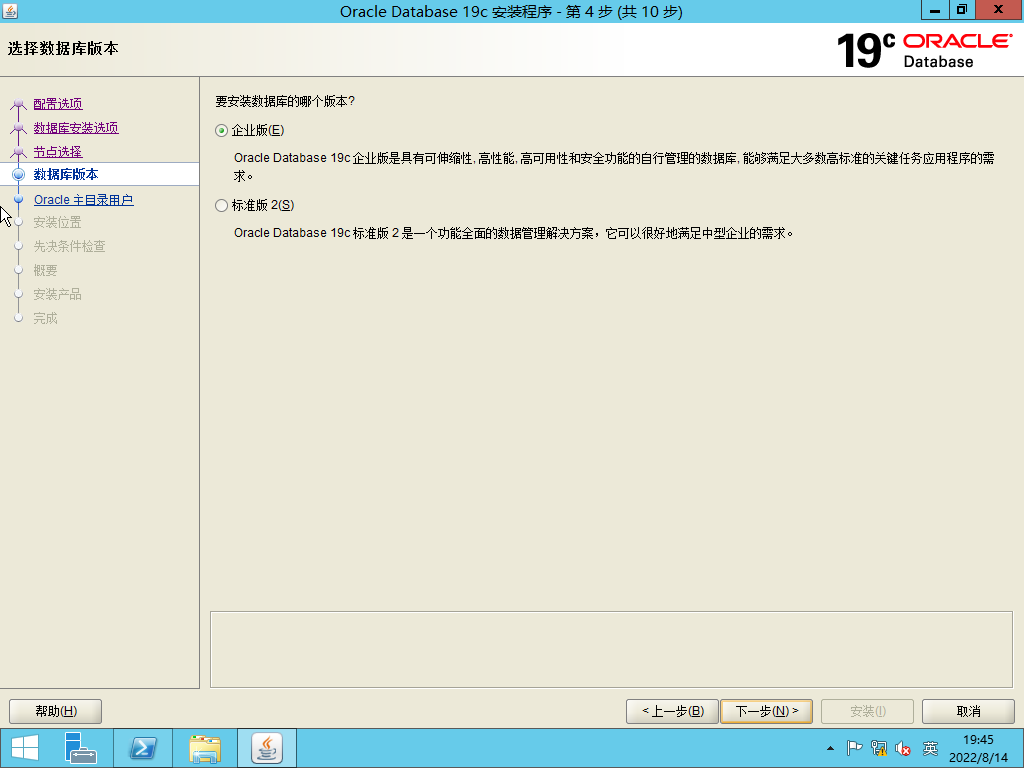
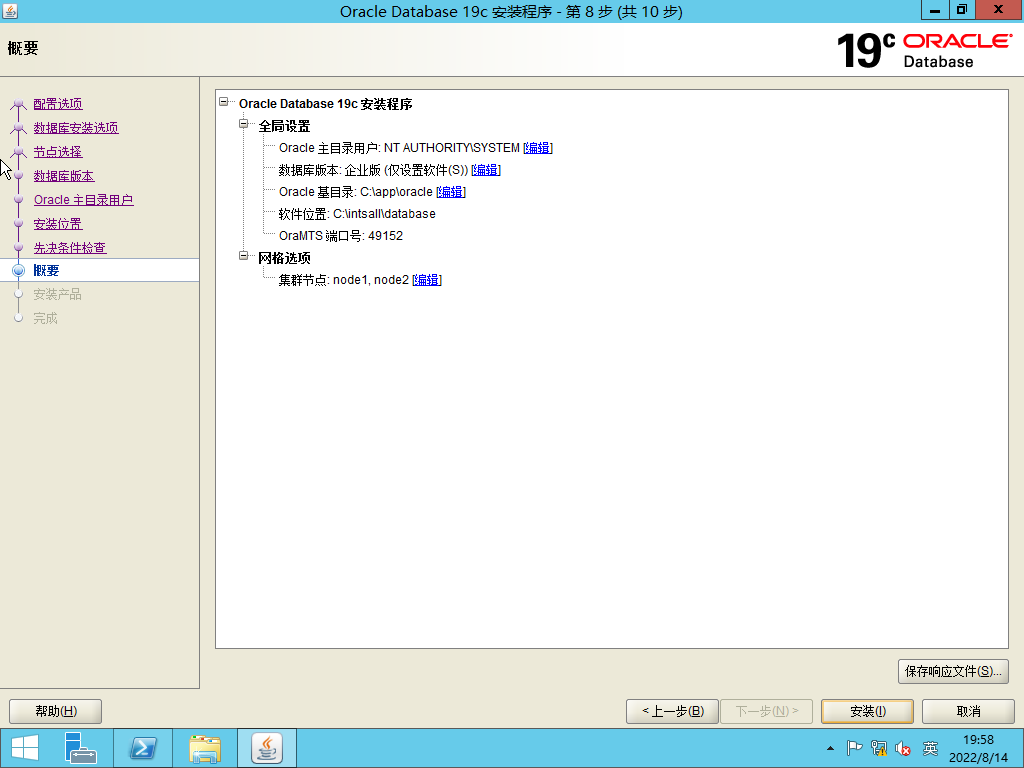
解压缩文件到目录c:\install\database,运行setup.exe程序,选择只安装软件,具体界面如下:

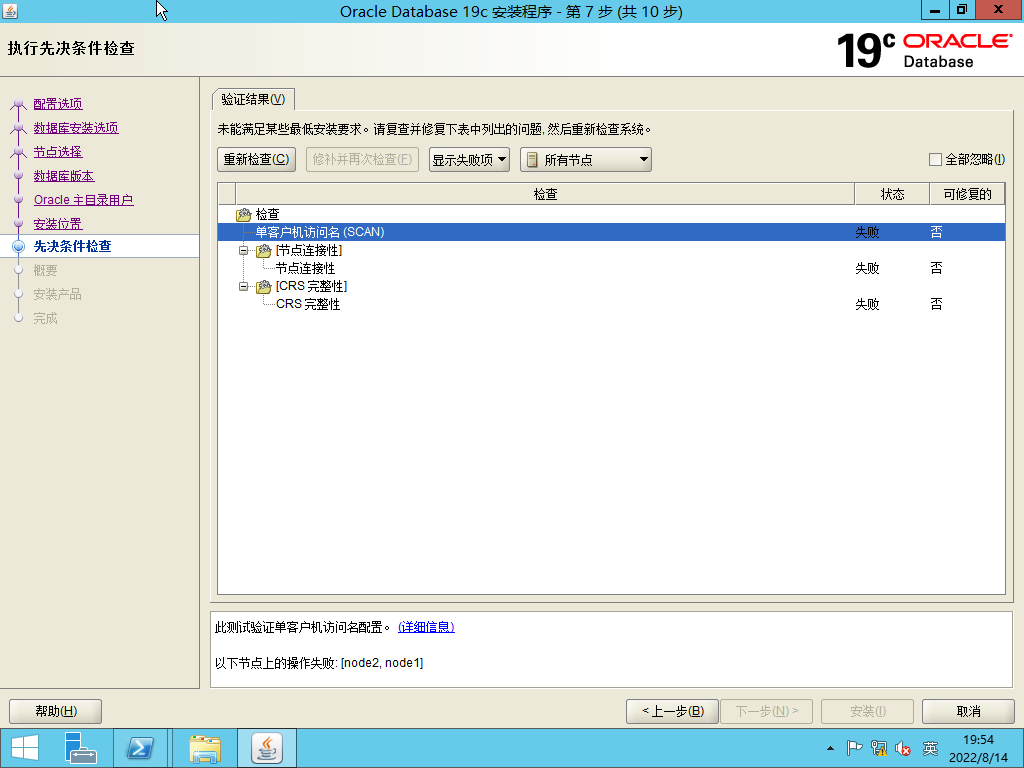
选择忽略。

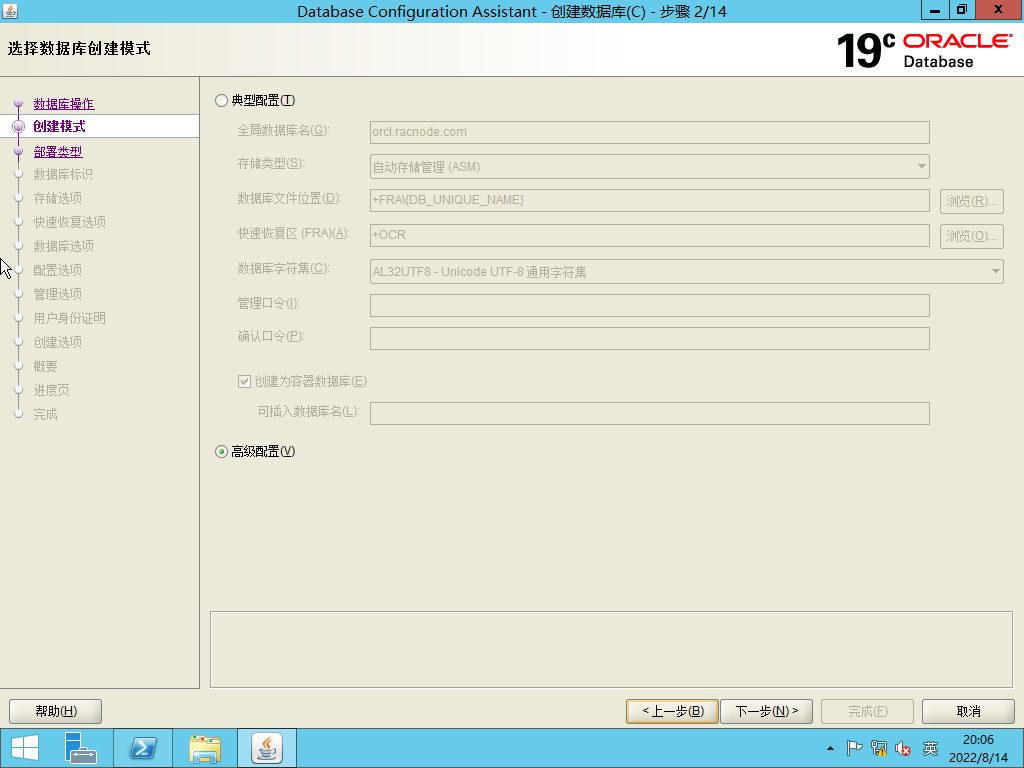
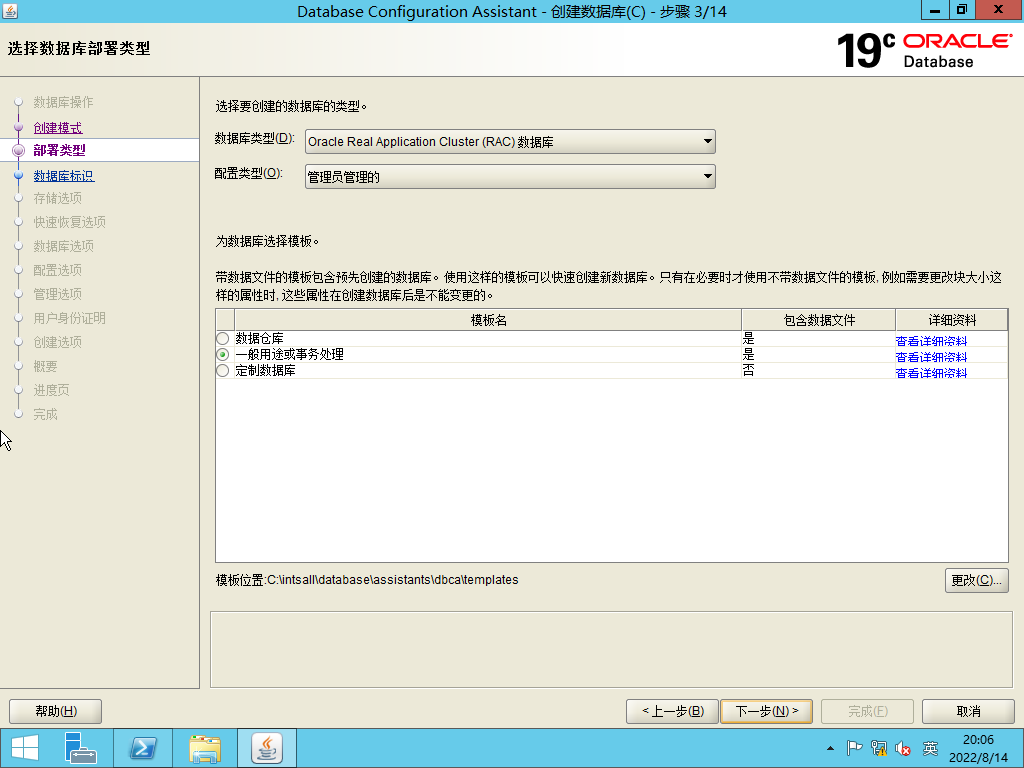
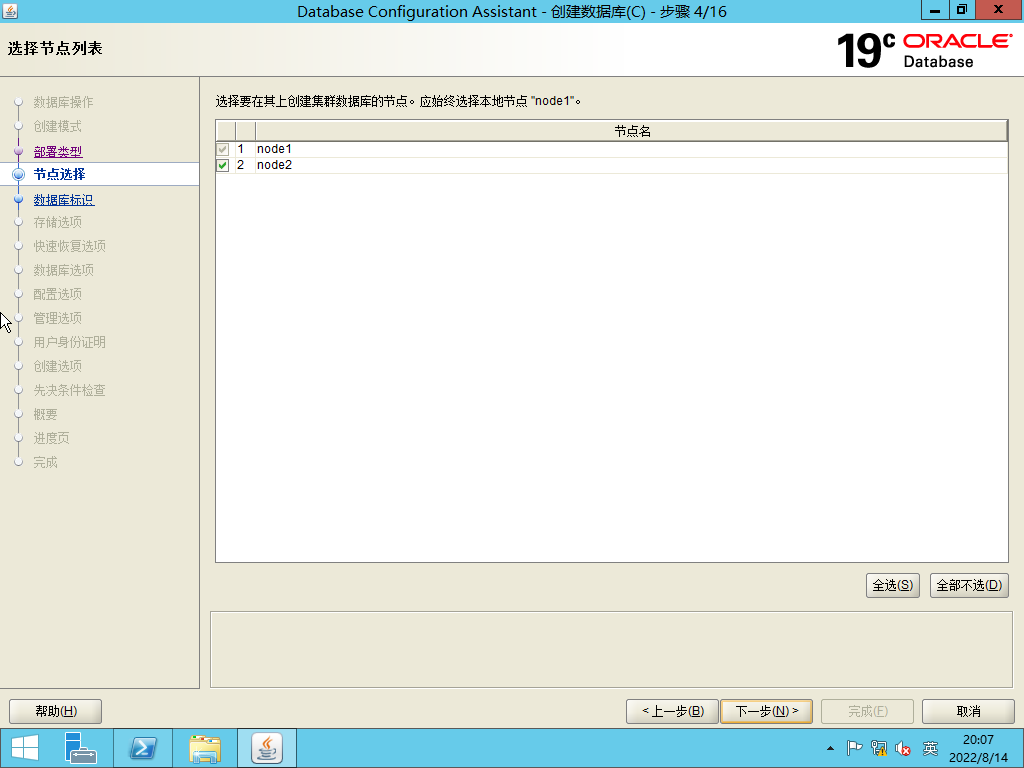
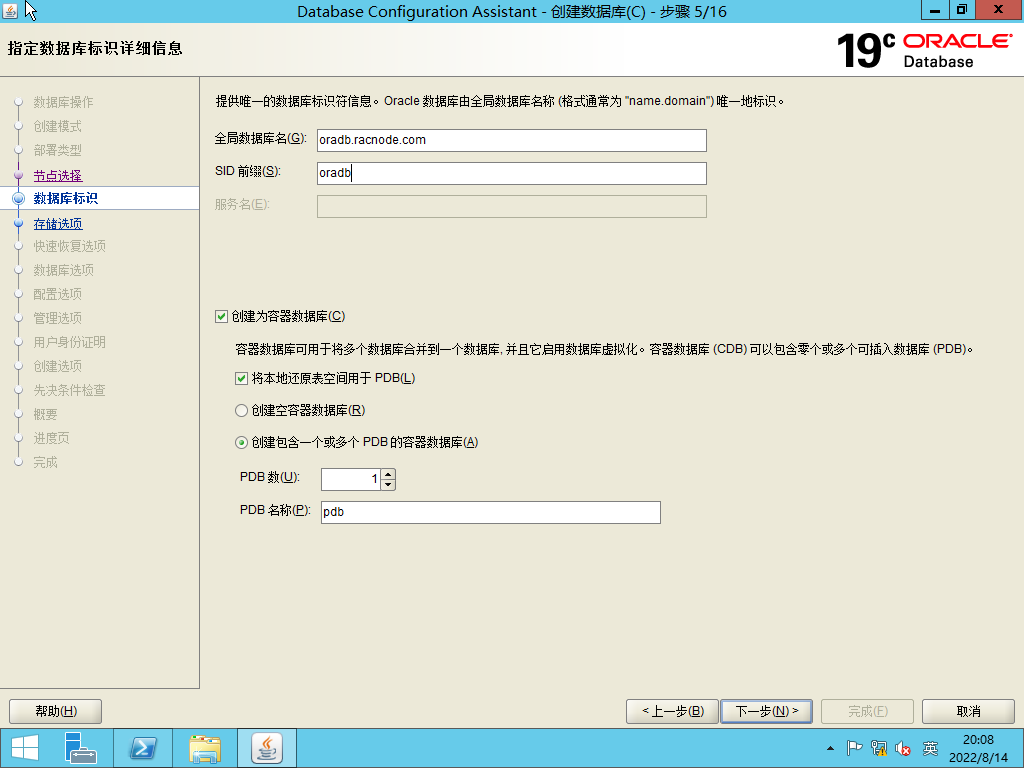
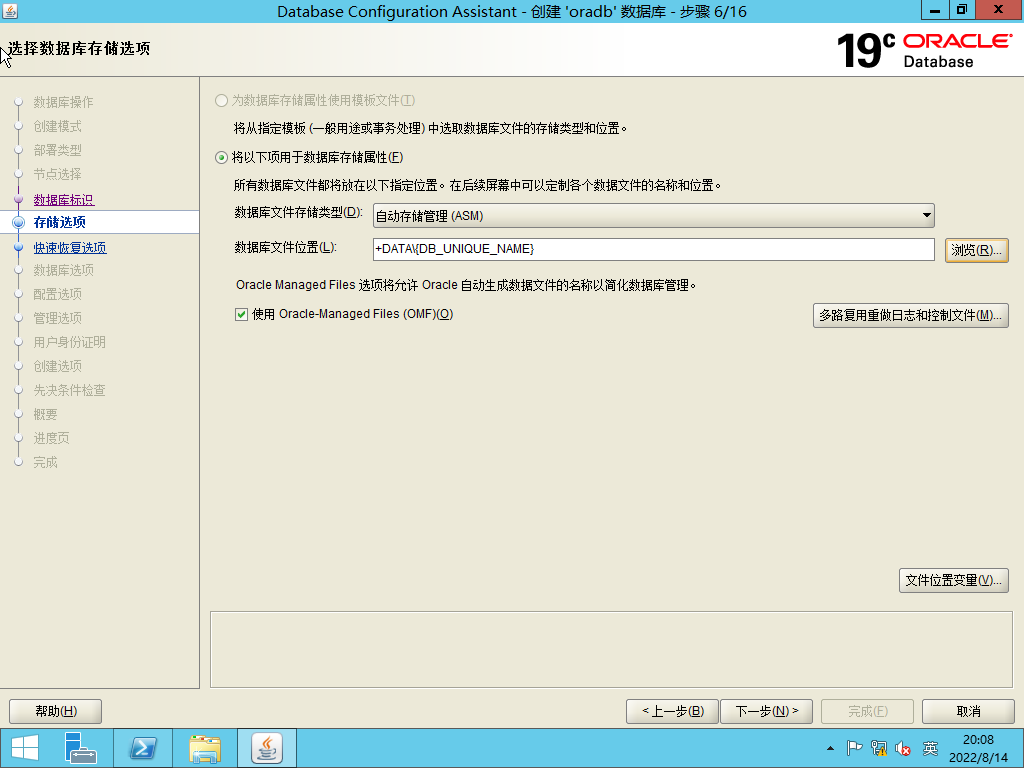
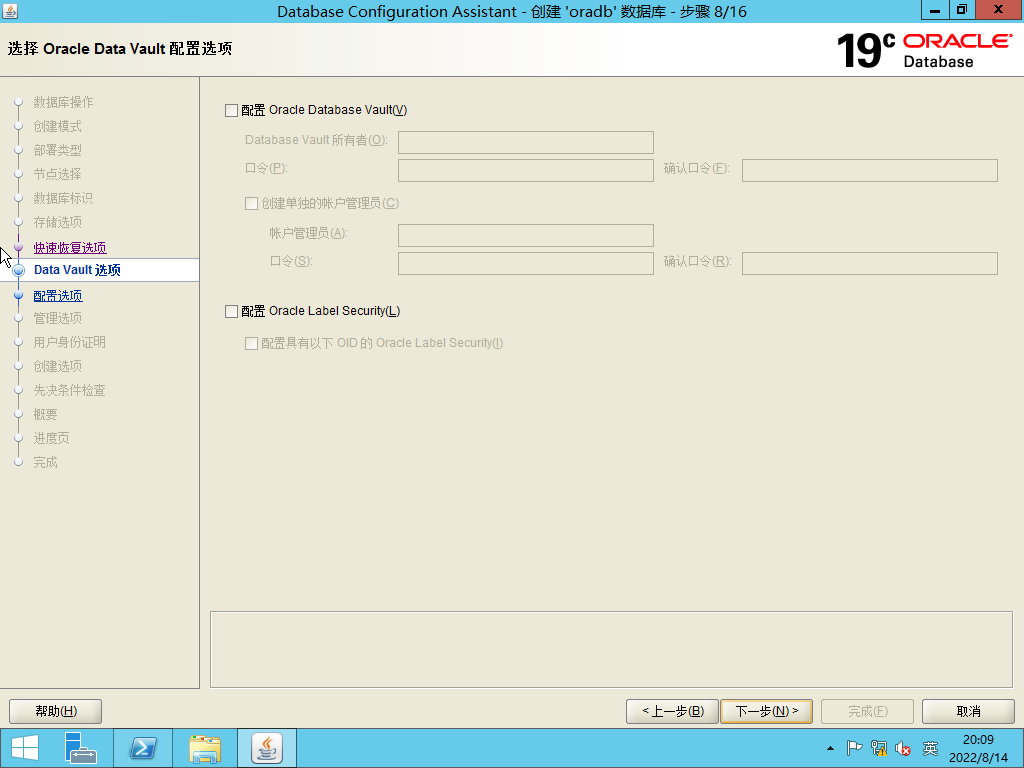
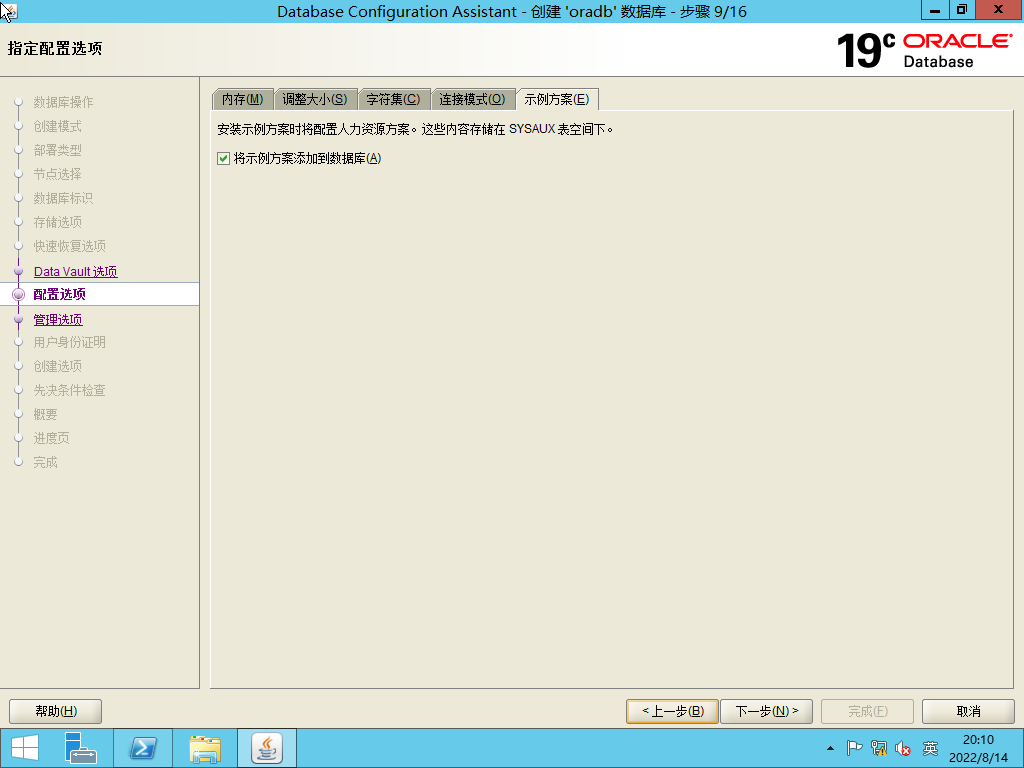
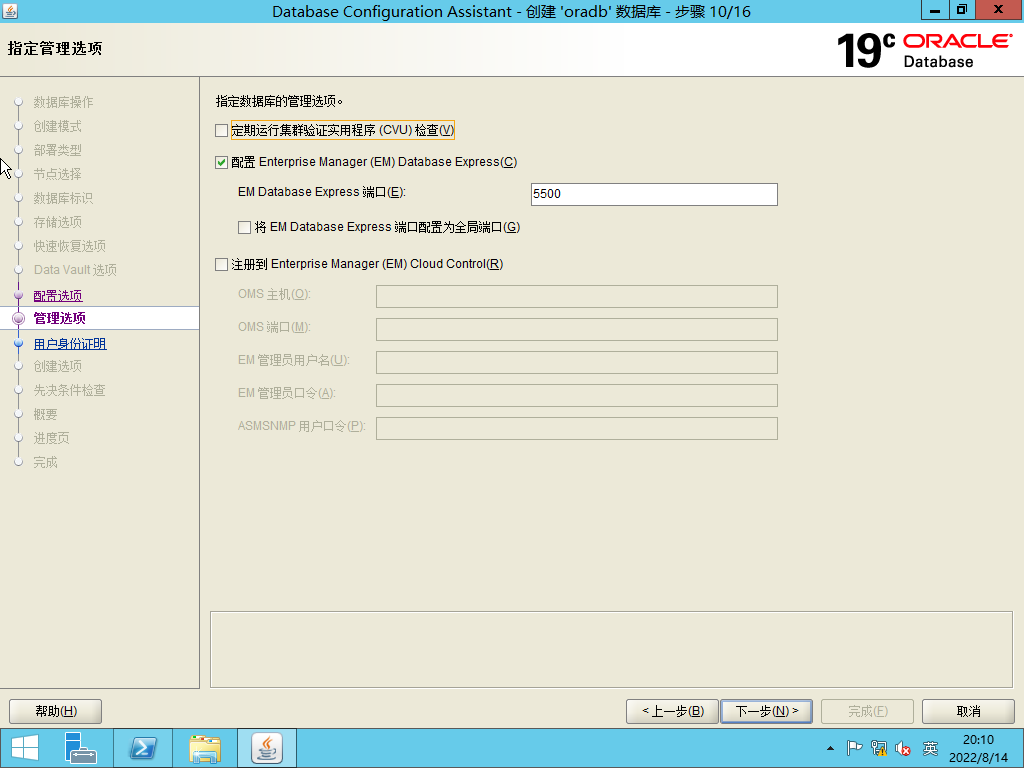
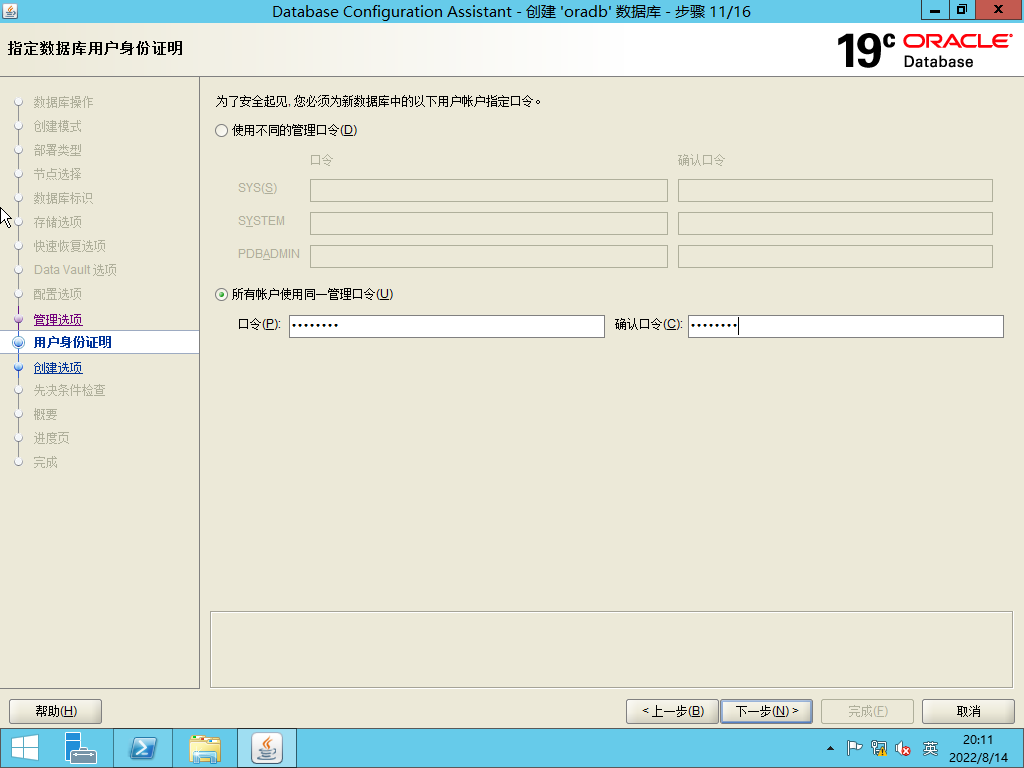
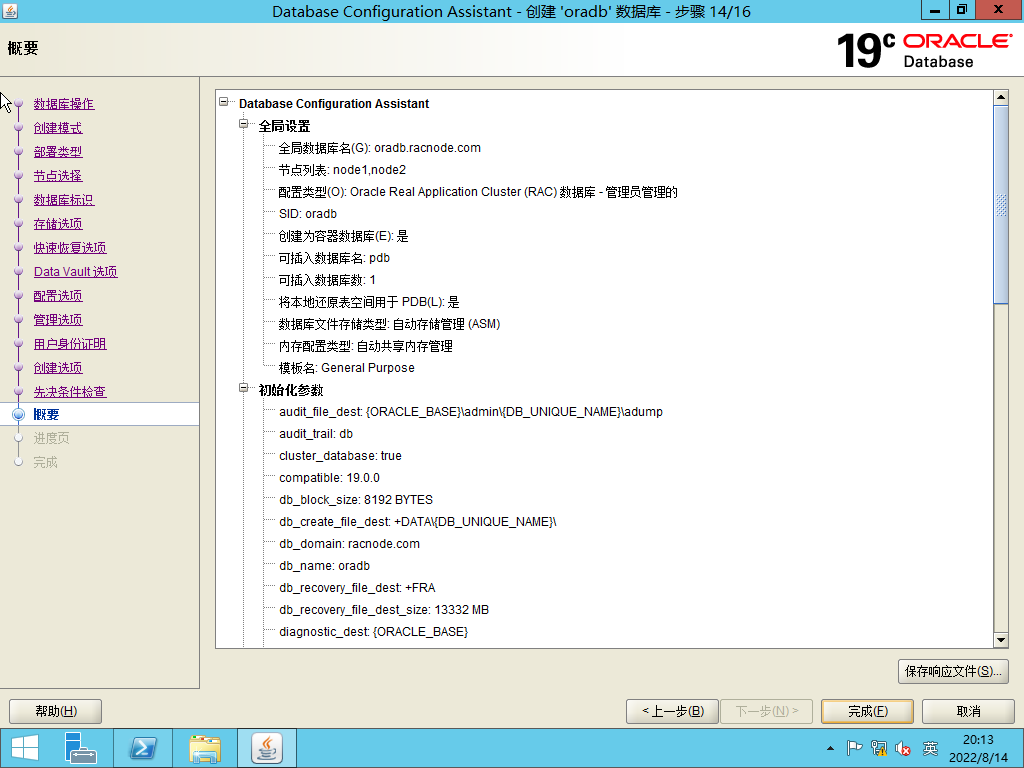
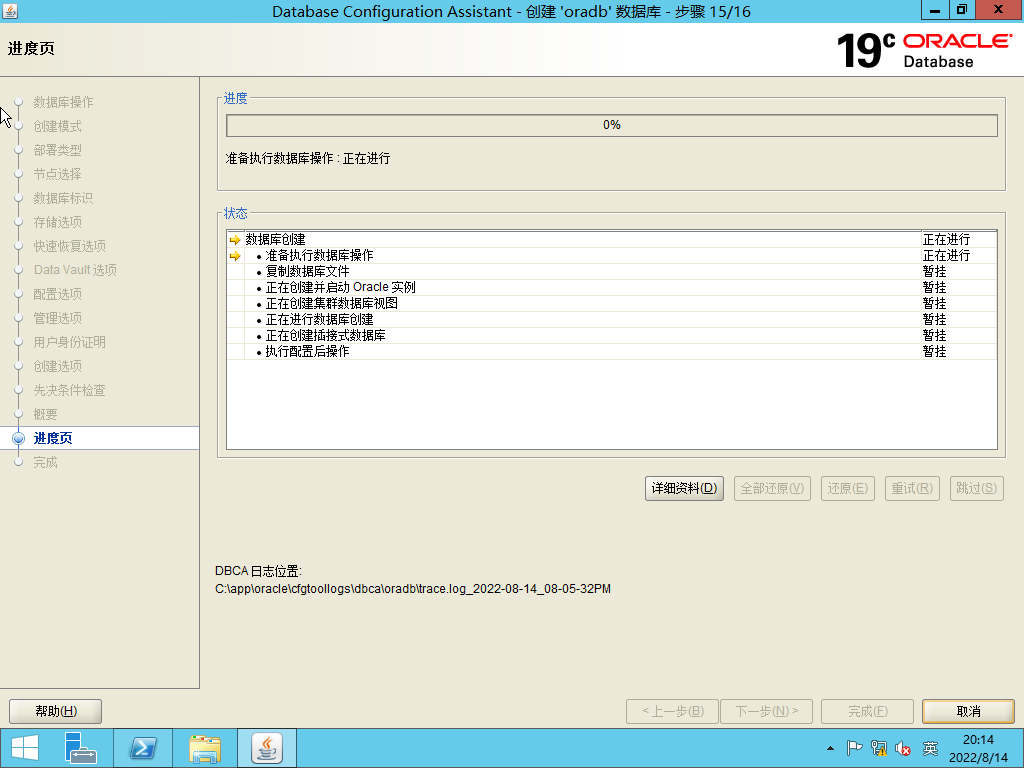
创建数据库
DBCA创建数据库,具体步骤如下:
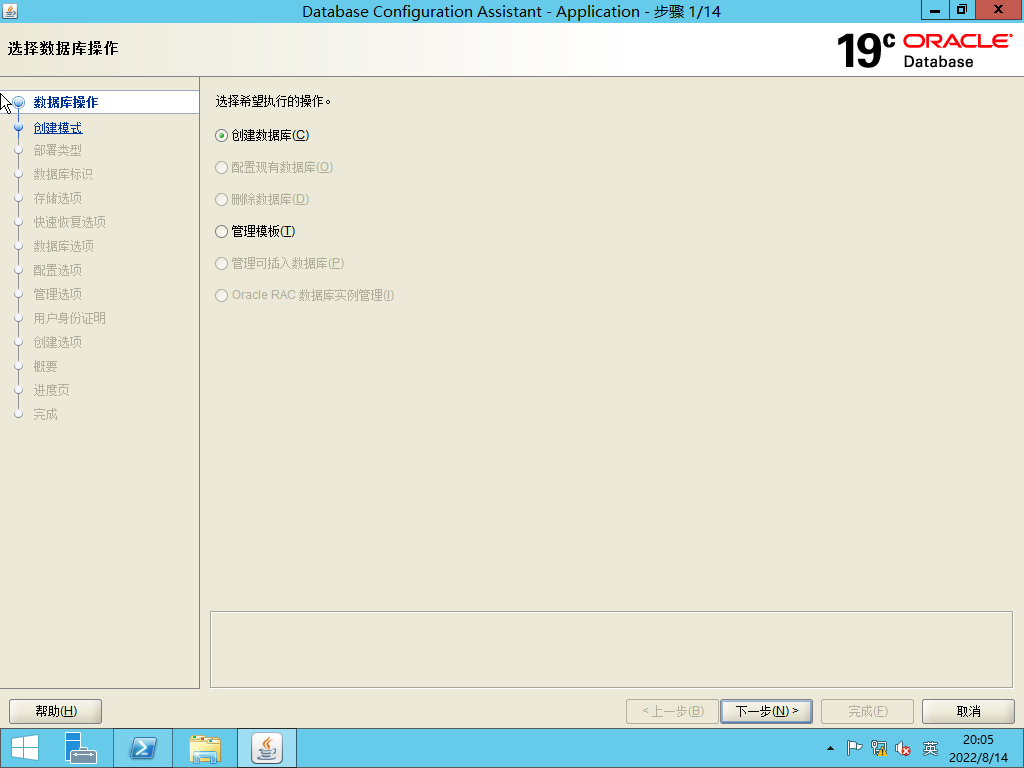
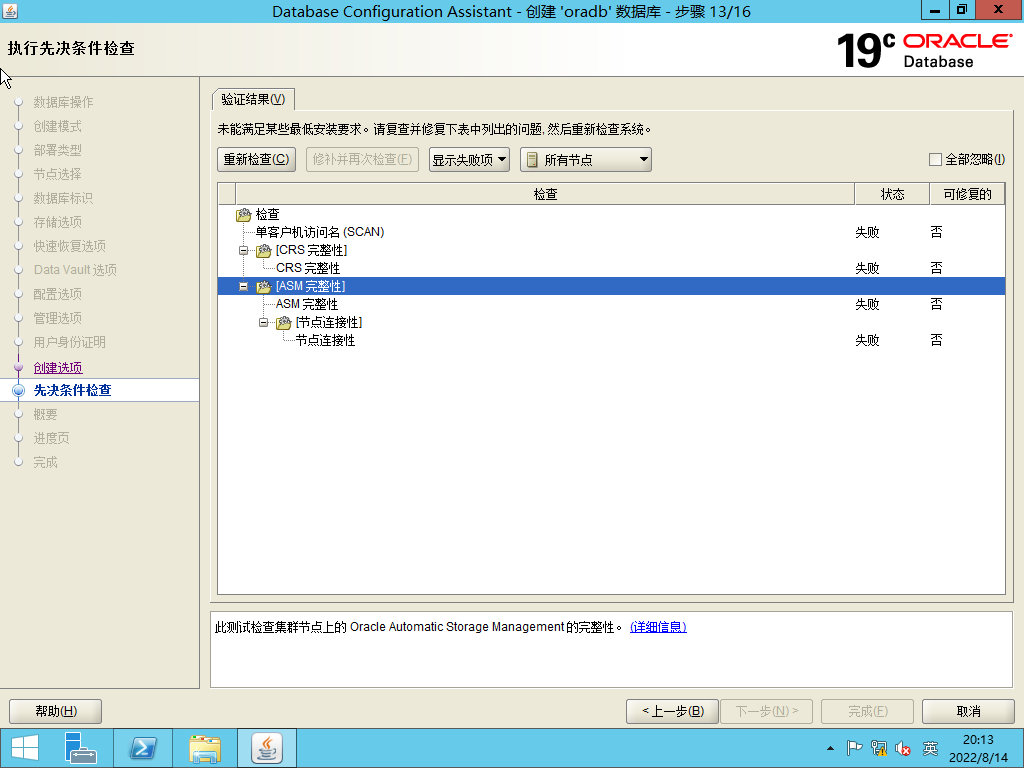
选择全部忽略。
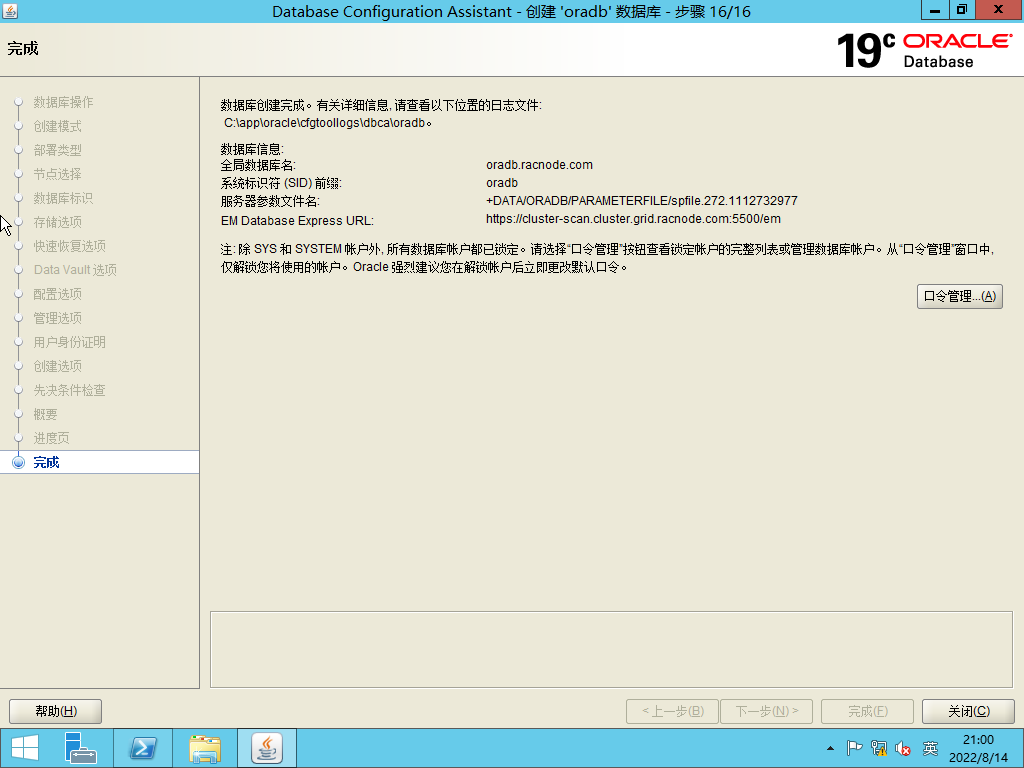
至此安装完毕。
测试安装结果
服务是否正常启动
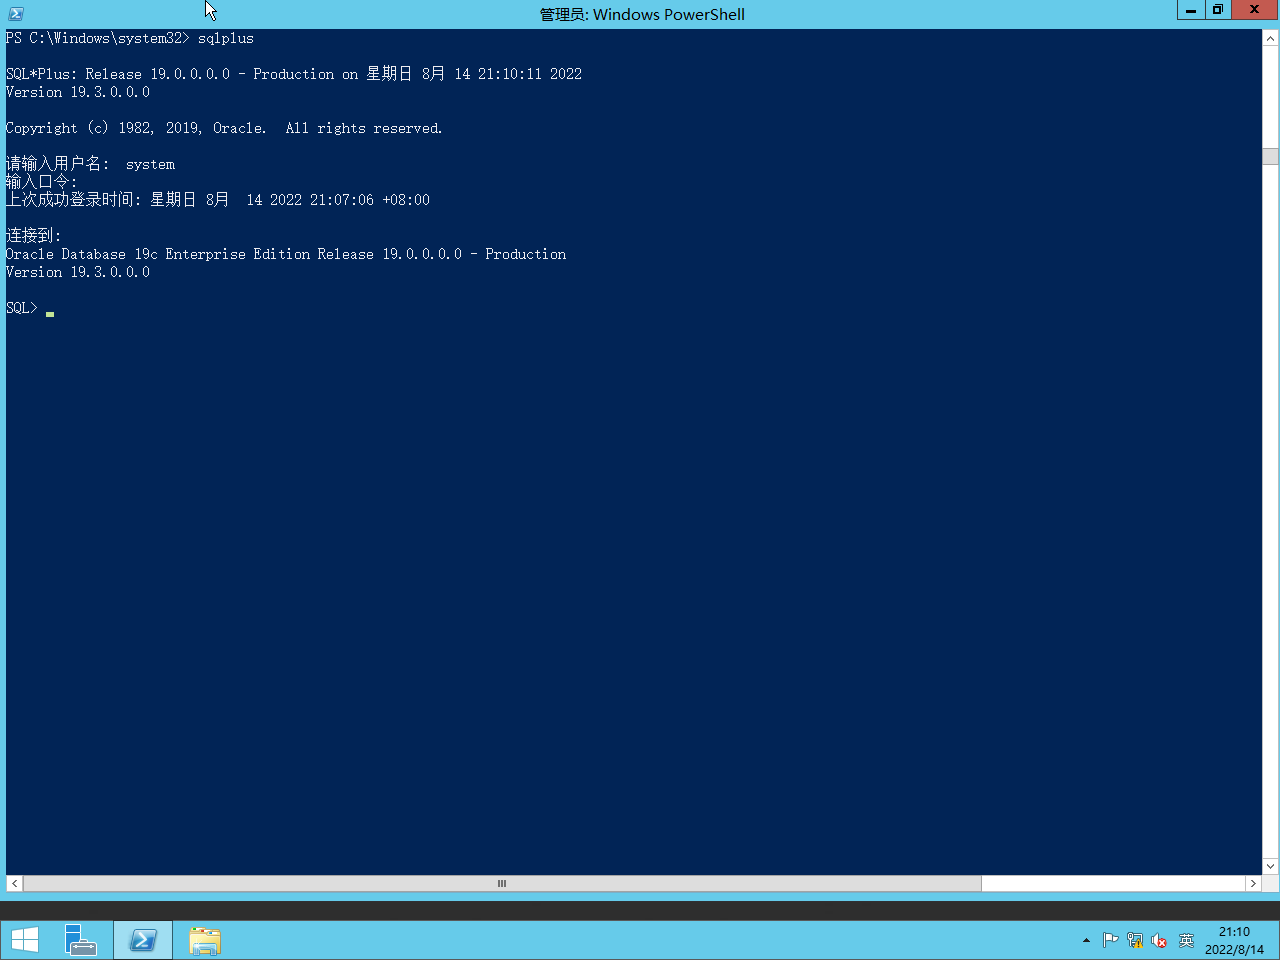
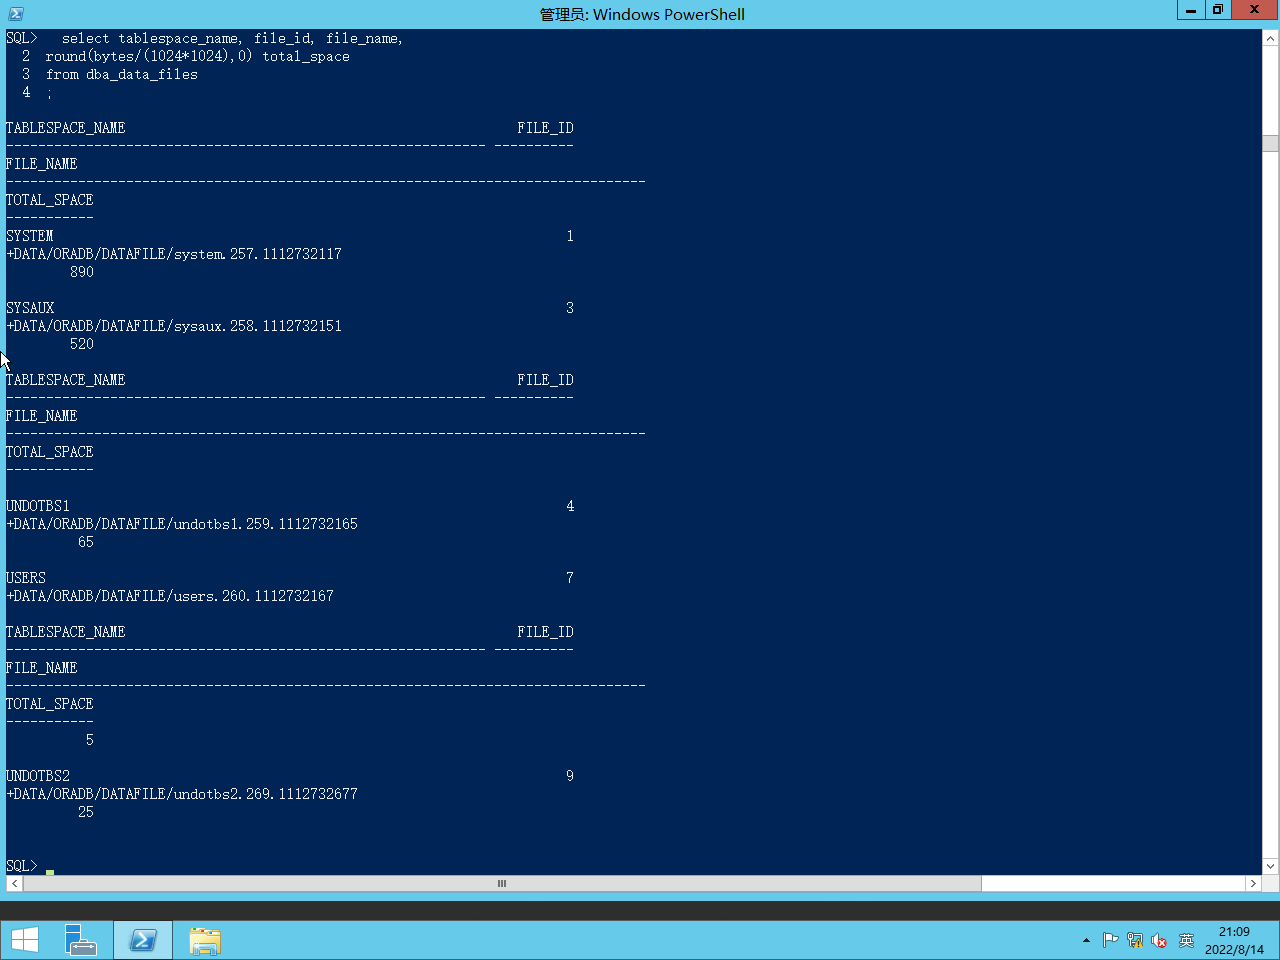
数据库实例是否能够连接
评论

 0 点赞
0 点赞


