


2022年7月,南大通用GBase 8c于openGauss Developer Day 2022峰会正式亮相发布。GBase 8c是业内首个基于openGauss3.0发布的多模多态的分布式数据库,支持行存、列存、内存等多种存储模式和单机、主备与分布式等多种部署形态。
前文【快速搭建 GBase 8c 集群环境】已阐述如何快速搭建 GBase 8c 集群环境,本文将汇集 GBase 8c 的常用命令。
GBase 8c 数据库分布式形态采用 share nothing 的分布式架构,计算节点和存储节点分离。节点间通过高速网络进行通信,所有节点都有主从互备,确保系统的极致高可用。
GBase 8c 的主要节点分为三类,分别是协调器(Coordinator,CN)、数据节点(Data Node,DN)、全局事务管理器(Global Transaction Manager,GTM)。部署一套 GBase 8c 分布式环境至少需要以下节点:
- 1个 GHA_SERVER 节点
- 1个 DCS 节点
- 1个 GTM 节点
- 1个 CN 节点
- 2个 DN 节点
下文将直接使用节点缩写。
常见命令
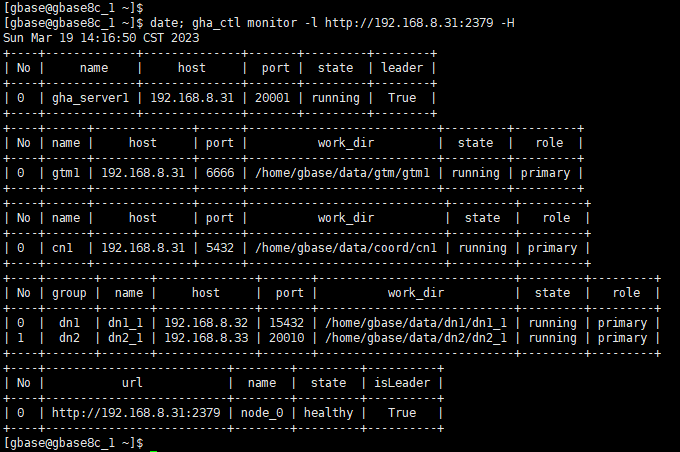
1. 查看 GBase 8c 所有组件状态
gha_ctl monitor -l http://192.168.8.31:2379 -H复制
2. 查看 GHA_SERVER 节点状态
[gbase@gbase8c_1 ~]$ gha_ctl monitor server -l http://192.168.8.31:2379 { "cluster": "gbase", "version": "V5_S3.0.0B76", "server": [ { "name": "gha_server1", "host": "192.168.8.31", "port": "20001", "state": "running", "isLeader": true } ] }复制
3. 查看 DCS 节点状态
[gbase@gbase8c_1 ~]$ gha_ctl monitor dcs -l http://192.168.8.31:2379 { "cluster": "gbase", "version": "V5_S3.0.0B76", "dcs": { "clusterState": "healthy", "members": [ { "url": "http://192.168.8.31:2379", "id": "bfb7ea6d0aaed3aa", "name": "node_0", "isLeader": true, "state": "healthy" } ] } }复制
4. 查看 GTM 节点状态
[gbase@gbase8c_1 ~]$ gha_ctl monitor gtm -l http://192.168.8.31:2379 { "cluster": "gbase", "version": "V5_S3.0.0B76", "gtm": [ { "name": "gtm1", "host": "192.168.8.31", "port": "6666", "workDir": "/home/gbase/data/gtm/gtm1", "agentPort": "8001", "state": "running", "role": "primary", "agentHost": "192.168.8.31" } ] }复制
5. 查看 CN 节点状态
[gbase@gbase8c_1 ~]$ gha_ctl monitor coordinator -l http://192.168.8.31:2379 { "cluster": "gbase", "version": "V5_S3.0.0B76", "coordinator": [ { "name": "cn1", "host": "192.168.8.31", "port": "5432", "workDir": "/home/gbase/data/coord/cn1", "agentPort": "8003", "state": "running", "role": "primary", "agentHost": "192.168.8.31", "central": true } ] }复制
6. 查看 DN 节点状态
[gbase@gbase8c_1 ~]$ gha_ctl monitor datanode -l http://192.168.8.31:2379 { "cluster": "gbase", "version": "V5_S3.0.0B76", "datanode": { "dn1": [ { "name": "dn1_1", "host": "192.168.8.32", "port": "15432", "workDir": "/home/gbase/data/dn1/dn1_1", "agentPort": "8005", "state": "running", "role": "primary", "agentHost": "192.168.8.32" } ], "dn2": [ { "name": "dn2_1", "host": "192.168.8.33", "port": "20010", "workDir": "/home/gbase/data/dn2/dn2_1", "agentPort": "8007", "state": "running", "role": "primary", "agentHost": "192.168.8.33" } ] } }复制
7. 在 CN 节点以 gbase 用户连接 GBase 8c 数据库
[gbase@gbase8c_1 ~]$ gsql -d postgres gsql ((multiple_nodes GBase8cV5 3.0.0B76 build 47948f99) compiled at 2023-02-27 16:04:20 commit 0 last mr 1232 ) Non-SSL connection (SSL connection is recommended when requiring high-security) Type "help" for help. postgres=# \conninfo You are connected to database "postgres" as user "gbase" via socket in "/home/gbase/gbase_db/tmp" at port "5432". postgres=#复制
8. 查看 CN 节点上的参数
[gbase@gbase8c_1 ~]$ gs_guc check -Z coordinator -N all -I all -c "listen_addresses" The gs_guc run with the following arguments: [gs_guc -Z coordinator -N all -I all -c listen_addresses check ]. Total GUC values: 1. The value of parameter listen_addresses is same on all instances. listen_addresses='localhost,192.168.8.31'复制
9. 在 CN 节点配置允许任意 IP 访问集群
[gbase@gbase8c_1 ~]$ gs_guc reload -Z coordinator -N all -I all -h "host all all 0.0.0.0/0 sha256" The gs_guc run with the following arguments: [gs_guc -Z coordinator -N all -I all -h host all all 0.0.0.0/0 sha256 reload ]. Begin to perform the total nodes: 3. Popen count is 1, Popen success count is 1, Popen failure count is 0. Begin to perform gs_guc for coordinators. Command count is 1, Command success count is 1, Command failure count is 0. Total instances: 1. ALL: Success to perform gs_guc!复制
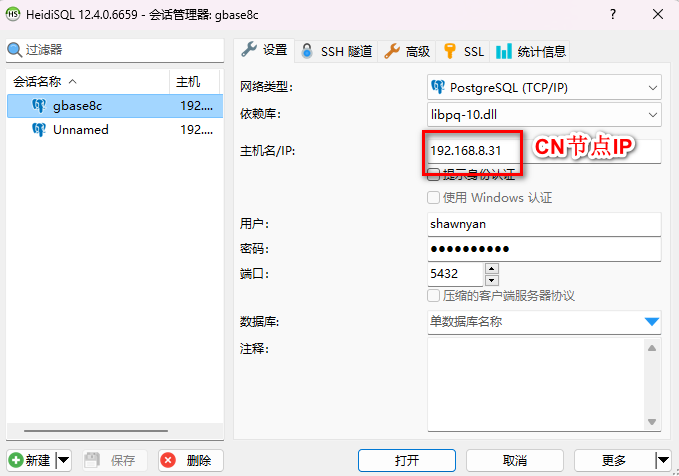
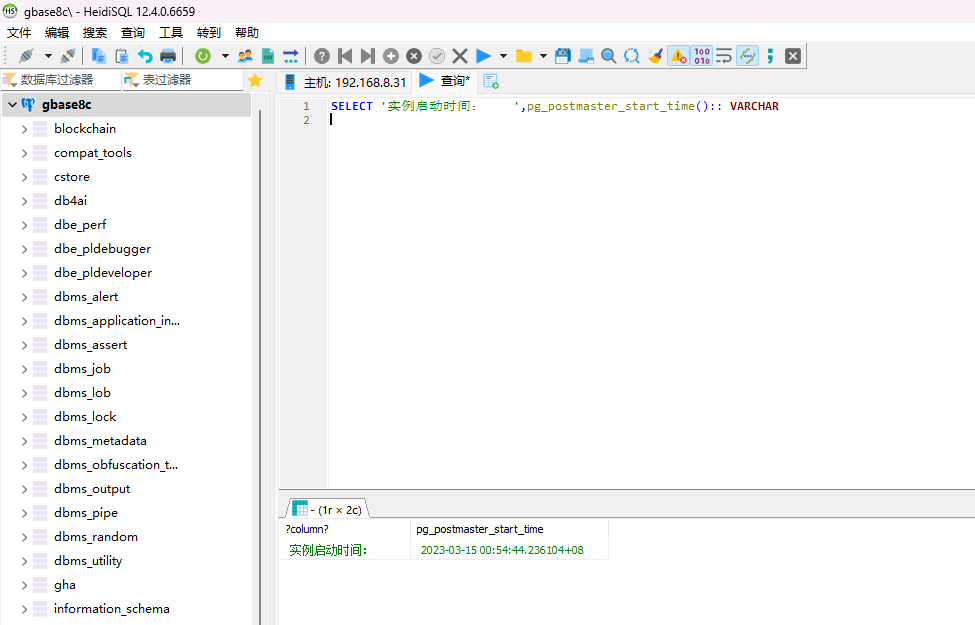
10. 使用数据库管理工具远程连接 GBase 8c 数据库
使用数据库管理工具连接 GBase 8c 数据库,这里 IP 地址填写 CN 节点的 IP 地址,用户可以自己创建一个新用户。
[gbase@gbase8c_1 ~]$ gsql gsql ((multiple_nodes GBase8cV5 3.0.0B76 build 47948f99) compiled at 2023-02-27 16:04:20 commit 0 last mr 1232 ) Non-SSL connection (SSL connection is recommended when requiring high-security) Type "help" for help. gbase=# create user shawnyan login password 'xxxxxxxx'; CREATE ROLE gbase=#复制
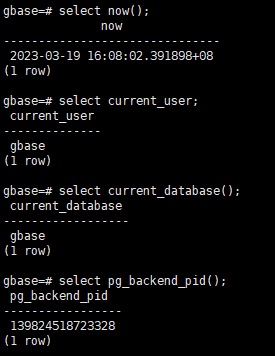
11. 查看当前用户连接信息
gbase=# \conninfo You are connected to database "gbase" as user "gbase" via socket in "/home/gbase/gbase_db/tmp" at port "5432". gbase=# select current_user; current_user -------------- gbase (1 row)复制
12. 使用 GBase 8c 提供的 gs_check 工具检查系统 CPU 情况
- CPU 使用率
[gbase@gbase8c_1 ~]$ gs_check -i CheckCPU -L 2023-03-19 16:21:10 [NAM] CheckCPU 2023-03-19 16:21:10 [STD] 检查主机CPU占用率,如果idle 大于30%,或者 iowait 小于 30%.则检查项通过,否则检查项不通过 2023-03-19 16:21:10 [RST] OK 2023-03-19 16:21:10 [RAW] Linux 3.10.0-1160.83.1.el7.x86_64 (gbase8c_1.shawnyan.com) 03/19/23 _x86_64_ (2 CPU) 16:21:05 CPU %user %nice %system %iowait %steal %idle 16:21:06 all 10.05 0.00 5.29 0.00 0.00 84.66 16:21:07 all 17.89 0.00 11.05 0.00 0.00 71.05 16:21:08 all 11.92 0.00 3.63 0.00 0.00 84.46 16:21:09 all 14.58 0.00 5.73 0.00 0.00 79.69 16:21:10 all 12.11 0.00 2.63 0.00 0.00 85.26 Average: all 13.31 0.00 5.66 0.00 0.00 81.03复制
- CPU 超线程是否开启
[gbase@gbase8c_1 ~]$ gs_check -i CheckHyperThread Parsing the check items config file successfully Distribute the context file to remote hosts successfully Start to health check for the cluster. Total Items:1 Nodes:3 Checking... [=========================] 1/1 Start to analysis the check result CheckHyperThread............................NG The item run on 3 nodes. ng: 3 The ng[gbase8c_1.shawnyan.com,gbase8c_2.shawnyan.com,gbase8c_3.shawnyan.com] value: Hyper-threading is down. Analysis the check result successfully Failed. All check items run completed. Total:1 NG:1 For more information please refer to /home/gbase/gbase_db/om_89583529/script/gspylib/inspection/output/CheckReport_202303195907865608.tar.gz复制
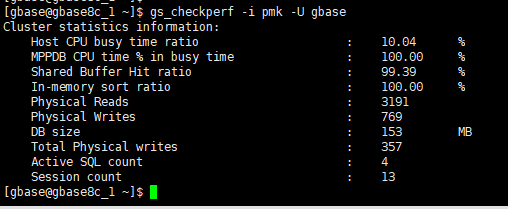
13. 使用 GBase 8c 提供的 gs_checkperf 工具检查数据库性能状态
[gbase@gbase8c_1 ~]$ gs_checkperf -i pmk -U gbase Cluster statistics information: Host CPU busy time ratio : 10.04 % MPPDB CPU time % in busy time : 100.00 % Shared Buffer Hit ratio : 99.39 % In-memory sort ratio : 100.00 % Physical Reads : 3191 Physical Writes : 769 DB size : 153 MB Total Physical writes : 357 Active SQL count : 4 Session count : 13 [gbase@gbase8c_1 ~]$复制
14. 查看各组件日志
- GTM
cd /home/gbase/gbase_db/log/pg_log/gtm1 tailf postgresql-2023-03-16_000000.log复制
- CN
cd /home/gbase/gbase_db/log/pg_log/cn1 tailf postgresql-2023-03-16_000000.log复制
- DN
cd /home/gbase/gbase_db/log/pg_log/dn1_1 tailf postgresql-2023-03-16_000000.log复制
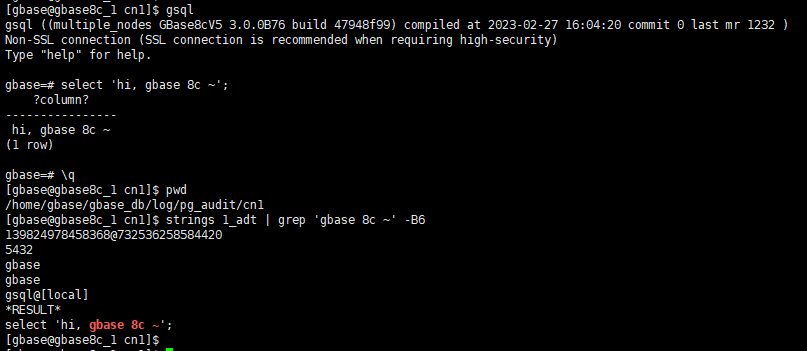
15. 查看审计日志
- CN 节点
日志在 /home/gbase/gbase_db/log/pg_audit/cn1 目录下,日志会按时间字段轮转,需要按需查找。
示例如下,
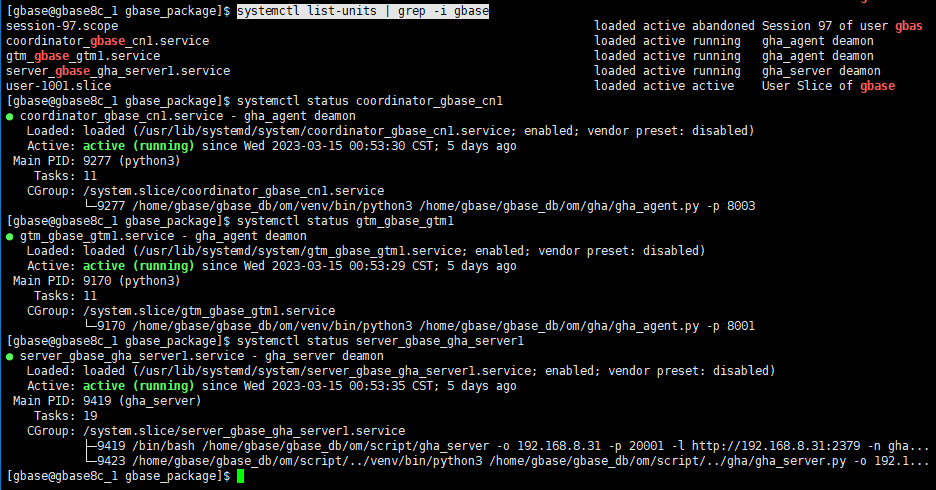
16. 查看 gbase 相关服务
使用 systemctl 查看当前运行的 gbase 服务
systemctl list-units | grep -i gbase复制
-
gtm/gha/cn
-
dn

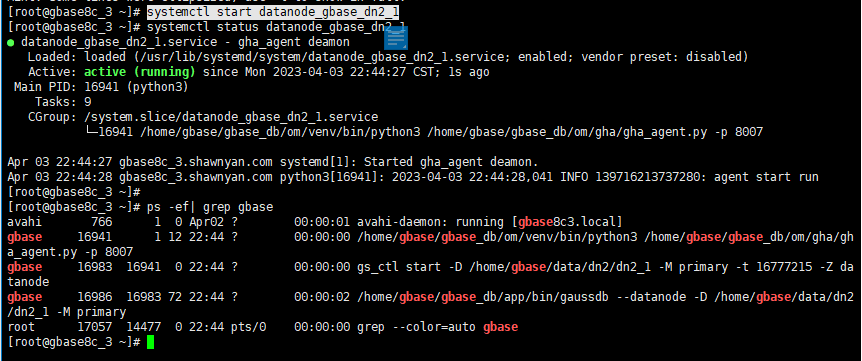
17. 启停数据节点
gha_ctl start datanode -l http://192.168.8.31:2379 GROUP_NAME dn2_1 gha_ctl stop datanode -l http://192.168.8.31:2379 GROUP_NAME dn2_1 systemctl start datanode_gbase_dn2_1 systemctl stop datanode_gbase_dn2_1复制
常见问题
1. 80000209 – ntpd 同步异常
- 现象:
安装时报错:
gbase@gbase8c 1 script$ ./gha ctl install -c gbase -p /home/gbase/gbase package "ret":80000209,'msg":"Timestamp diff too largel gbase@gbase8c 1 script$复制

- 分析:
从各节点同时取时间戳,差距较大,大于 2.5。时间不同步,可能会导致全局时间戳 TSO 失效。
- 解决:
在三个节点分别检查 ntpd 服务的同步情况:
[gbase@gbase8c_1 ~]$ timedatectl Local time: Mon 2023-03-20 21:13:02 CST Universal time: Mon 2023-03-20 13:13:02 UTC RTC time: Mon 2023-03-20 13:13:02 Time zone: Asia/Shanghai (CST, +0800) NTP enabled: no NTP synchronized: no RTC in local TZ: no DST active: n/a [gbase@gbase8c_1 ~]$ systemctl status ntpd ● ntpd.service - Network Time Service Loaded: loaded (/usr/lib/systemd/system/ntpd.service; enabled; vendor preset: disabled) Active: active (running) since Wed 2023-03-15 00:45:31 CST; 5 days ago Main PID: 773 (ntpd) Tasks: 1 CGroup: /system.slice/ntpd.service └─773 /usr/sbin/ntpd -u ntp:ntp -g复制
同时在三个节点执行命令 (date +%s.%N),查看是否存在时间差。
如 ntpd 同步异常,可以将三个节点统一修改同步源:
sudo mv /etc/ntp.conf /etc/ntp.conf.bak0320 sudo vi /etc/ntp.conf driftfile /var/lib/ntp/drift pidfile /var/run/ntpd.pid logfile /var/log/ntp.log restrict default kod nomodify notrap nopeer noquery restrict -6 default kod nomodify notrap nopeer noquery restrict 127.0.0.1 server 127.127.1.0 fudge 127.127.1.0 stratum 10 server ntp.aliyun.com iburst minpoll 4 maxpoll 10 restrict ntp.aliyun.com nomodify notrap nopeer noquery sudo systemctl restart ntpd systemctl status ntpd timedatectl复制
等 5s 再次检查后,发现 ntpd 同步成功:
[gbase@gbase8c_1 ~]$ timedatectl Local time: Mon 2023-03-20 21:34:06 CST Universal time: Mon 2023-03-20 13:34:06 UTC RTC time: Mon 2023-03-20 13:34:06 Time zone: Asia/Shanghai (CST, +0800) NTP enabled: yes NTP synchronized: yes RTC in local TZ: no DST active: n/a [gbase@gbase8c_1 ~]$复制

再次检查时间差,发现小于 1:

再次执行安装命令,即可安装成功!
Ps. 特殊情况下,如果是内网,还没有 ntp 服务器的情况下,有一种取巧的办法可以快速使三个节点时间保持一致,
三个节点同时执行命令:
sudo timedatectl set-ntp no ; sudo timedatectl set-time "2023-03-20 21:18:45" ; sudo timedatectl set-ntp yes ; date +%s.%N复制
2. gsql: command not found…
- 现象:
安装完成后,直接使用 gsql 提示命令未找到。同:快速搭建 GBase 8c 集群环境 – 异常错误2
[gbase@gbase8c_1 script]$ gsql -d postgres -p 5432 bash: gsql: command not found...复制

- 原因:
环境变量未生效。
- 解决:
退出当前用户,再重新进入 gbase 用户即可。或直接引入环境变量 (source ~/.bashrc)。
3. 当前版本不支持 redhat
从配置文件 /home/gbase/gbase_package/package_info.json 可以看出当前版本的 GBase 8c 支持 CentOS、麒麟、统信、欧拉、Debian 操作系统,但尚未适配 redhat。


4. 真的有个包叫 patch
- 现象:
安装时遇到报错:
Host localhost install or upgrade dependency ['patch': None] failed!复制

- 解决:
安装依赖包patch即可解决!
sudo yum install -y patch复制
该程序将 diff 文件应用于原始文件。diff 命令用于比较原始文件和已更改的文件。Diff列出了对文件所做的更改。
其他所需依赖包可参考: 快速搭建 GBase 8c 集群环境 – 确认依赖包已经安装
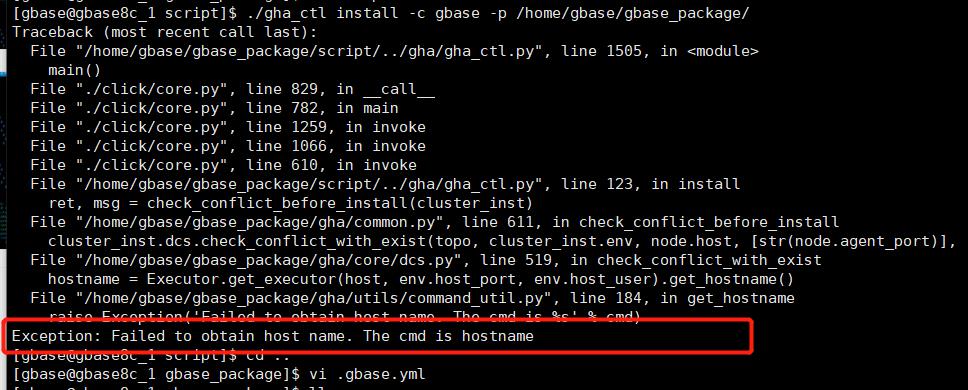
5. “Failed to obtain host name.”
- 现象:
host name 获取失败。
-
分析:
用命令hostname采集主机名时失败,可能是 hostname 设定问题,也可能是 gbase.yaml 中的 IP 配置项错填。 -
解决:
hostnamectl重新检查主机名。- 仔细检查 gbase.yaml 中的各个 IP 是否正确填写。
6. SEMMNI 信号量不足问题
-
现象:
安装过程中可能报错提示 “check install env and os setting On systemwide basis, the maximum number of SEMMNI is not correct. the current SEMMNI value is: 128. Please check it…” -
解决:
执行sudo vi /etc/sysctl.conf配置系统内核参数, 避免信号量不足无法初始化。
kernel.sem = 40960 2048000 40960 20480复制
7. 机器重启后可能会遇到 80000301 错误
错误样式:
$ gha_ctl monitor -l http://192.168.8.31:2379 { "ret":80000301, "msg":"Transport endpoint unreach" }复制
分析原因:
- 机器是否使用固定IP,不要使用自动分配IP,IP地址变化会影响服务正常启动。
- 确认时间是否同步,三台机器是否有时间差。确认ntpd服务运行情况。
- 确认etcd服务运行情况。
[gbase@gbase8c_1 ~]$ systemctl status etcd ● etcd.service - Etcd Server Loaded: loaded (/usr/lib/systemd/system/etcd.service; enabled; vendor preset: disabled) Active: active (running) since Wed 2023-03-15 00:53:29 CST; 2 weeks 0 days ago Main PID: 9095 (etcd) CGroup: /system.slice/etcd.service └─9095 /usr/bin/etcd --name=node_0 --data-dir=/var/lib/etcd/default.etcd --listen-client-urls=http://192.168.8.31:2379 [gbase@gbase8c_1 ~]$复制
9999. 其他可能存在的问题
- 互信未正确配置

解决办法:
检查或重新配置互信:参考 快速搭建 GBase 8c 集群环境 – 3. 配置 gbase 用户 ssh 互信
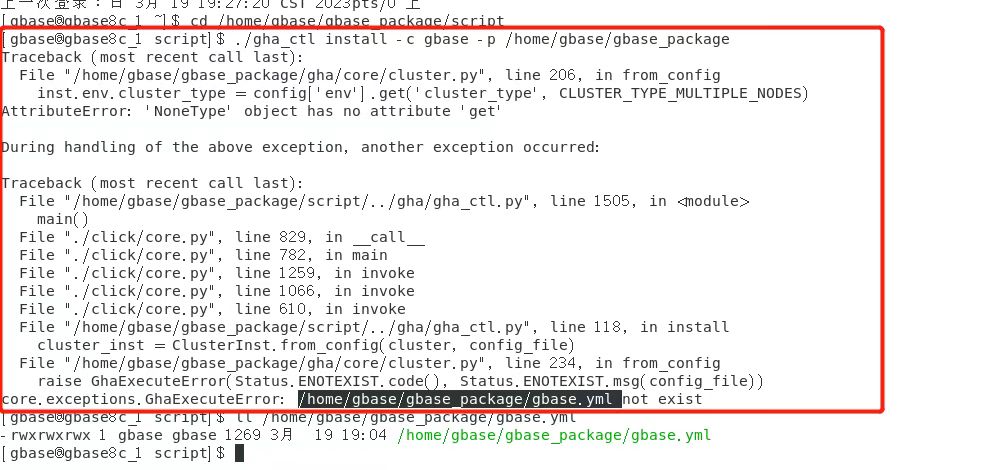
- 安装使用的 gbase.yaml 文件存在格式问题(如,对齐问题,漏、错填配置项)
GhaExecuteError[status.ENOTEXIST.code()], Status.ENOTEXIST.msg(config_file))复制
文章被以下合辑收录
评论

 0
0 点赞
点赞 0 点赞 0 点赞


