


ssh工具:MobaXterm
1、关闭系统防火墙
systemctl stop firewalld.service systemctl disable firewalld.service复制
2、修改hosts文件
vi /etc/hosts复制
3、关闭selinux
vi /etc/selinux/config SELINUX=disabled复制
4、配置本地YUM源
mkdir /yums mount /dev/sr0 /mnt cp /mnt/Packages/* /yums rm -rf /etc/yum.repos.d/* createrepo /yums //创建索引 echo '[local]' >> /etc/yum.repos.d/yums.repo echo 'name=yum local' >> /etc/yum.repos.d/yums.repo echo 'baseurl=file:///yums' >> /etc/yum.repos.d/yums.repo echo 'gpgcheck=0' >> /etc/yum.repos.d/yums.repo echo 'enabled=1' >> /etc/yum.repos.d/yums.repo yum clean all //yum配置生成 yum install -y gcc复制
5、安装ORACLE先决条件的软件包
yum install -y bc yum install -y compat-libcap1* yum install -y compat-libcap* yum install -y binutils yum install -y compat-libstdc++-33 yum install -y elfutils-libelf yum install -y elfutils-libelf-devel yum install -y gcc yum install -y gcc-c++ yum install -y glibc-2.5 yum install -y glibc-common yum install -y glibc-devel yum install -y glibc-headers yum install -y ksh libaio yum install -y libaio-devel yum install -y libgcc yum install -y libstdc++ yum install -y libstdc++-devel yum install -y make yum install -y sysstat yum install -y unixODBC yum install -y unixODBC-devel yum install -y binutils* yum install -y compat-libstdc* yum install -y elfutils-libelf* yum install -y gcc* yum install -y glibc* yum install -y ksh* yum install -y libaio* yum install -y libgcc* yum install -y libstdc* yum install -y make* yum install -y sysstat* yum install -y libXp* yum install -y glibc-kernheaders yum install -y net-tools-*复制
6、修改LINUX的内核文件
vi /etc/sysctl.conf kernel.shmmax = 8589934591 //物理内存*1024*1024*1024-1 kernel.shmmni = 4096 //最小共享内存,一般是固定值 kernel.sem = 250 32000 100 128 net.core.rmem_default = 262144 net.core.rmem_max = 4194304 net.core.wmem_default = 262144 net.core.wmem_max = 1048586 fs.file-max = 6815744 //文件句柄数,一次可以打开文件的个数 kernel.shmall = 2097152 //物理内存*1024*1024*1024/4096,表示内存大小(单位:页=4K) net.ipv4.tcp_max_tw_buckets = 6000 net.ipv4.ip_local_port_range = 9000 65500 net.ipv4.tcp_tw_recycle = 0 net.ipv4.tcp_tw_reuse = 1 #net.core.somaxconn = 262144 net.core.netdev_max_backlog = 262144 net.ipv4.tcp_max_orphans = 262144 net.ipv4.tcp_max_syn_backlog = 262144 net.ipv4.tcp_synack_retries = 2 net.ipv4.tcp_syn_retries = 1 net.ipv4.tcp_fin_timeout = 1 net.ipv4.tcp_keepalive_time = 30 net.ipv4.tcp_keepalive_probes = 6 net.ipv4.tcp_keepalive_intvl = 5 net.ipv4.tcp_timestamps = 0 fs.aio-max-nr = 1048576 net.ipv4.conf.all.rp_filter = 2 net.ipv4.conf.default.rp_filter = 2 sysctl -p复制
7、修改limits.conf文件
vi /etc/security/limits.conf oracle soft nofile 1024 oracle hard nofile 65536 oracle soft nproc 16384 oracle hard nproc 16384 oracle soft stack 10240 oracle hard stack 32768 oracle hard memlock 134217728 oracle soft memlock 134217728复制
8、修改/etc/pam.d/login文件(限制使用进程数)
vi /etc/pam.d/login session required /lib/security/pam_limits.so session required pam_limits.so复制
9、编辑环境变量
vi /etc/profile if [ $USER = "oracle" ]; then if [ $SHELL = "/bin/ksh" ]; then ulimit -p 16384 ulimit -n 65536 else ulimit -u 16384 -n 65536 fi fi source /etc/profile复制
10、创建文件目录和相应的用户
groupadd oinstall groupadd dba groupadd oper useradd -g oinstall -G dba,oper oracle mkdir -p /u01/app/oracle mkdir -p /u01/app/oraInventory chown -R oracle:oinstall /u01 chown -R oracle:oinstall /u01/app/oracle chmod -R 775 /u01/app/oracle mkdir -p /u01/app/oracle/product/12.2.0/dbhome_1 //ORACLE的HOME目录 chown -R oracle:oinstall /u01/app/oracle/product/ passwd oracle //修改oracle用户密码复制
11、配置ORACLE用户的环境变量
su - oracle //切换到oracle用户 vi .bash_profile export EDITOR=vi export TMP=/tmp export TMPDIR=$TMP export ORACLE_SID=orcl export ORACLE_BASE=/u01/app/oracle export ORACLE_HOME=$ORACLE_BASE/product/12.2.0/dbhome_1 export INVENTORY_LOCATION=/u01/app/oraInventory export TNS_ADMIN=$ORACLE_HOME/network/admin export LD_LIBRARY_PATH=$ORACLE_HOME/lib export NLS_LANG="AMERICAN_AMERICA.AL32UTF8" export NLS_DATE_FORMAT="YYYY-MM-DD HH24:MI:SS" export PATH=$ORACLE_HOME/bin:/bin:/usr/bin:/usr/sbin:/usr/local/bin:/usr/X11R6/bin:$PATH:$HOME/bin umask 022 alias sqlplus='rlwrap sqlplus' alias rman='rlwrap rman' source .bash_profile复制
12、上传oracle12c安装文件至/u01目录
13、修改oracle12c安装文件所属用户和权限:
su - root chown -R oracle:oinstall /u01/linuxx64_12201_database.zip复制
14、使用oracle用户解压安装文件
su - oracle cd /u01 unzip linuxx64_12201_database.zip复制
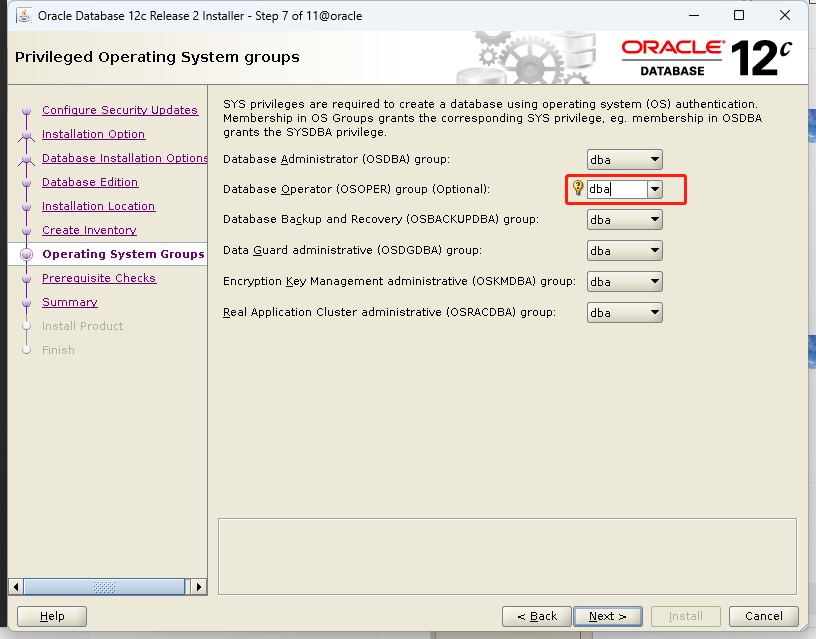
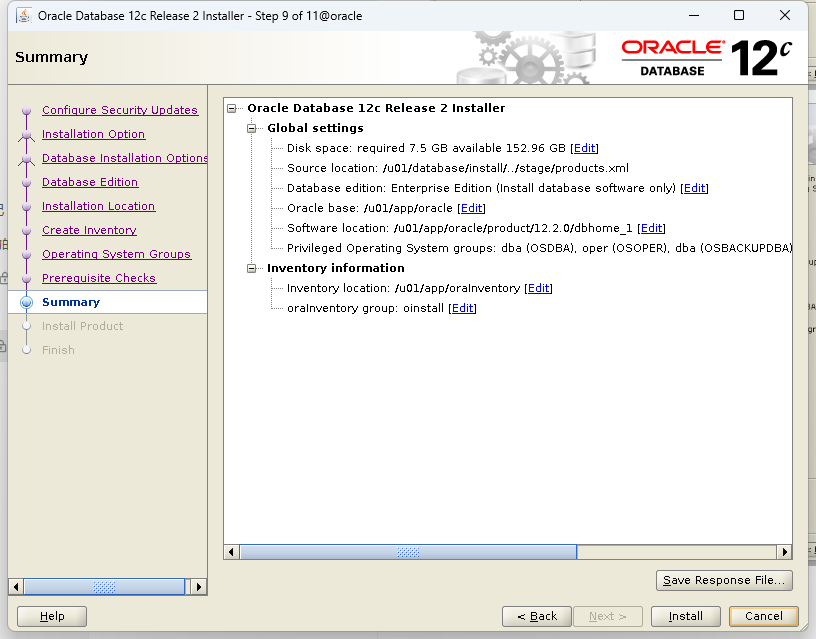
15、使用MobaXterm图形化工具连接到linux服务器:
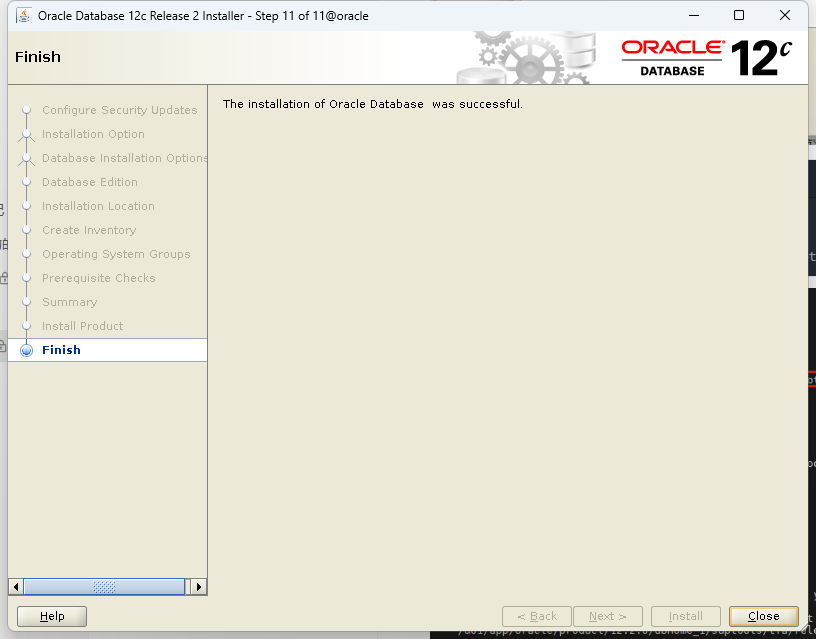
su - oracle export DISPLAY=192.168.150.1:0.0 //注意:192.168.150.1为远程控制的windows主机IP //启动安装程序 cd database/ ./runInstaller //运行后会先后出现三个提示框,全部点yes,然后在windows上进入oracle安装界面复制


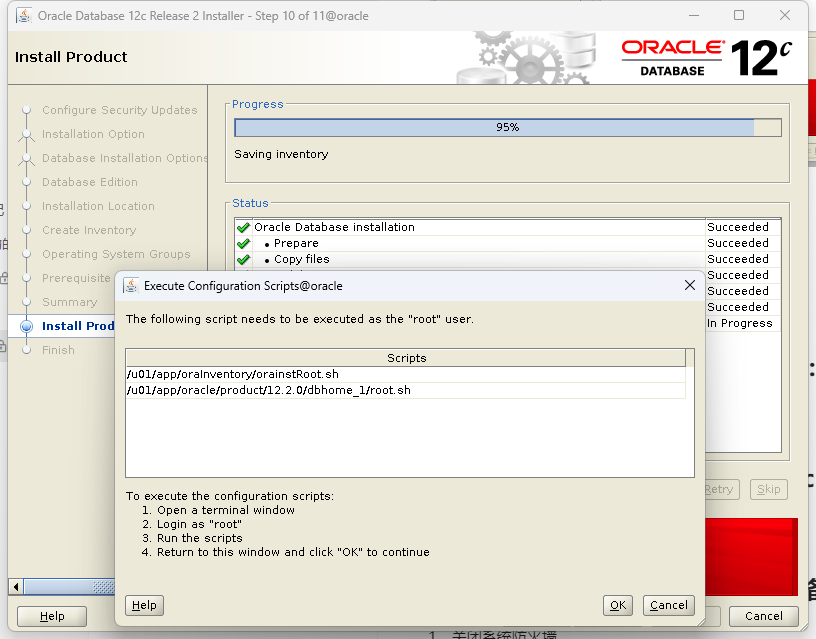
su root /u01/app/oraInventory/orainstRoot.sh /u01/app/oracle/product/12.2.0/dbhome_1/root.sh复制

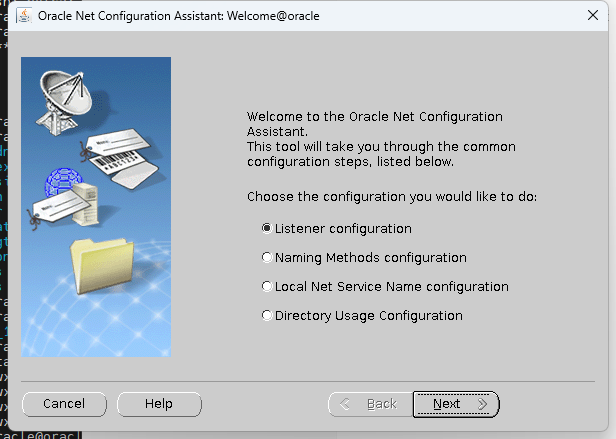
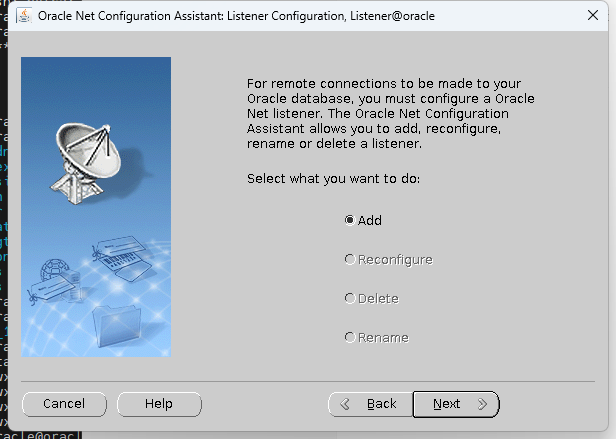
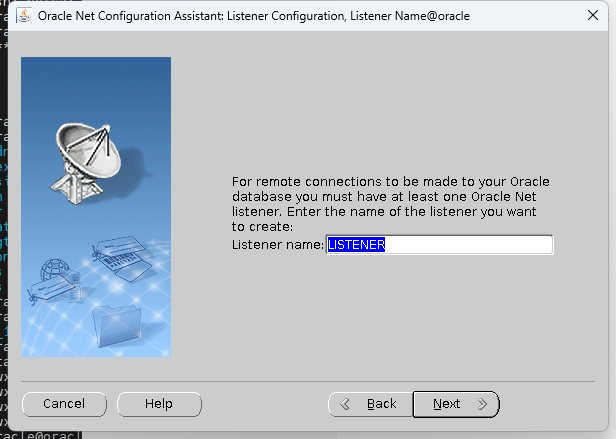
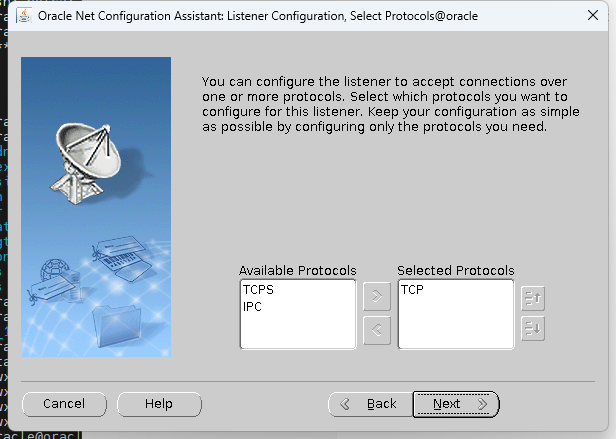
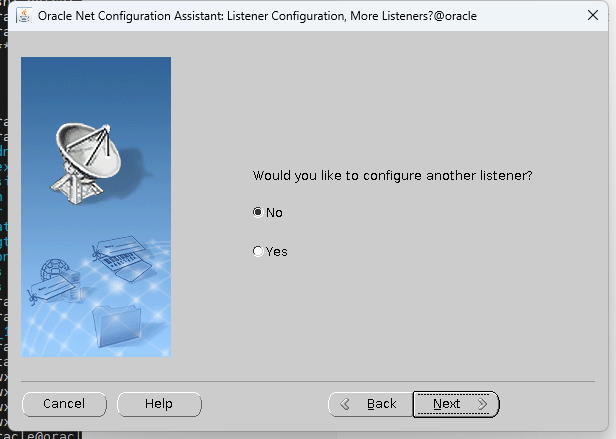
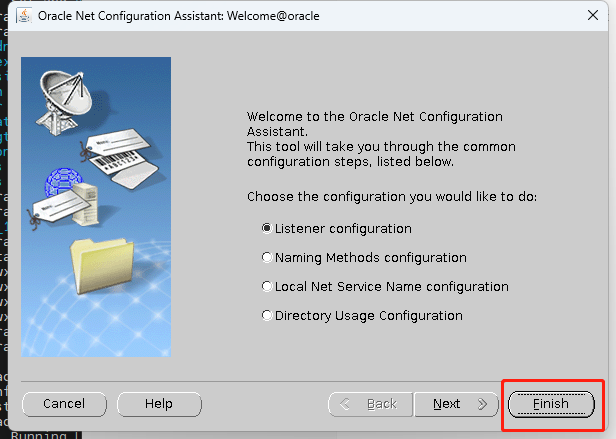
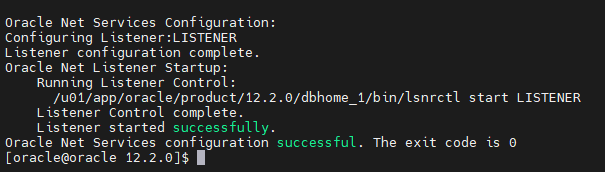
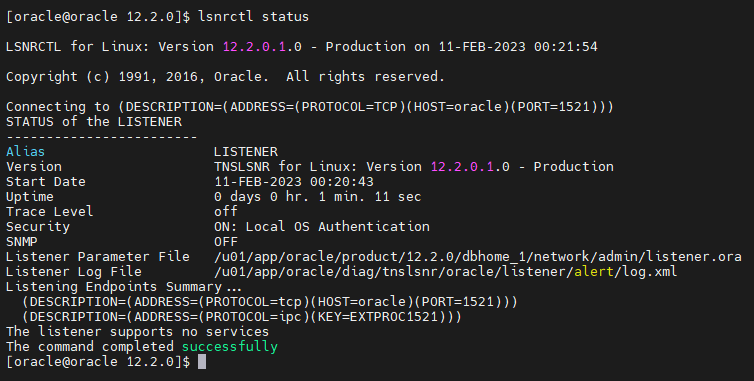
su oracle netca复制


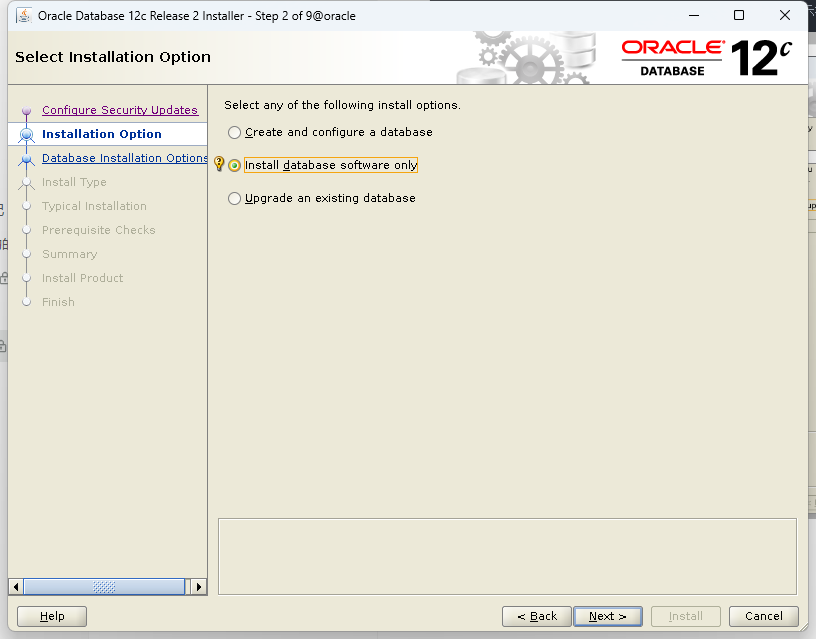
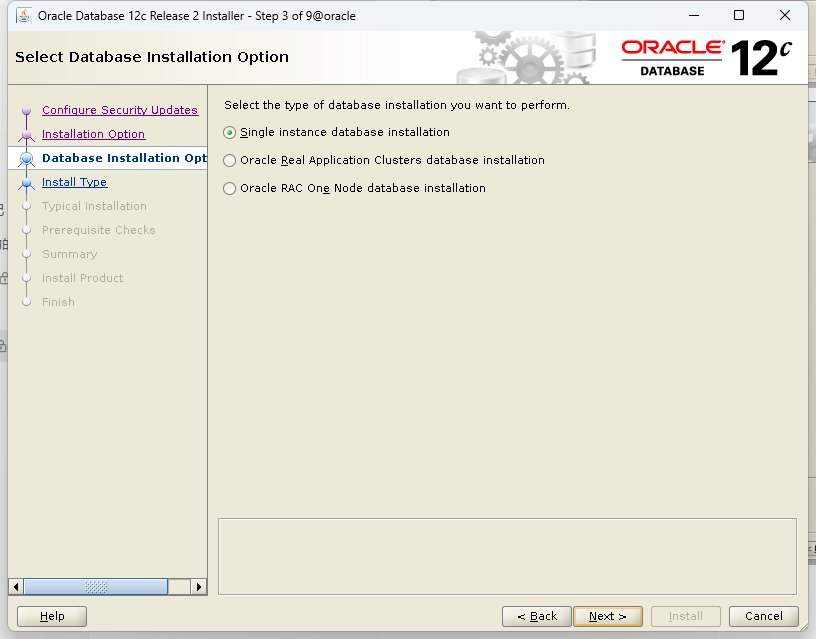
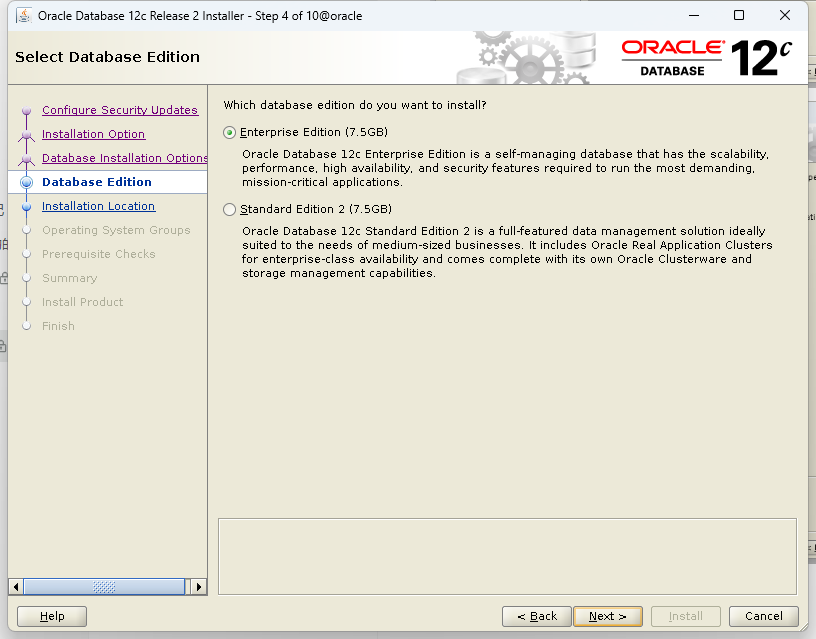
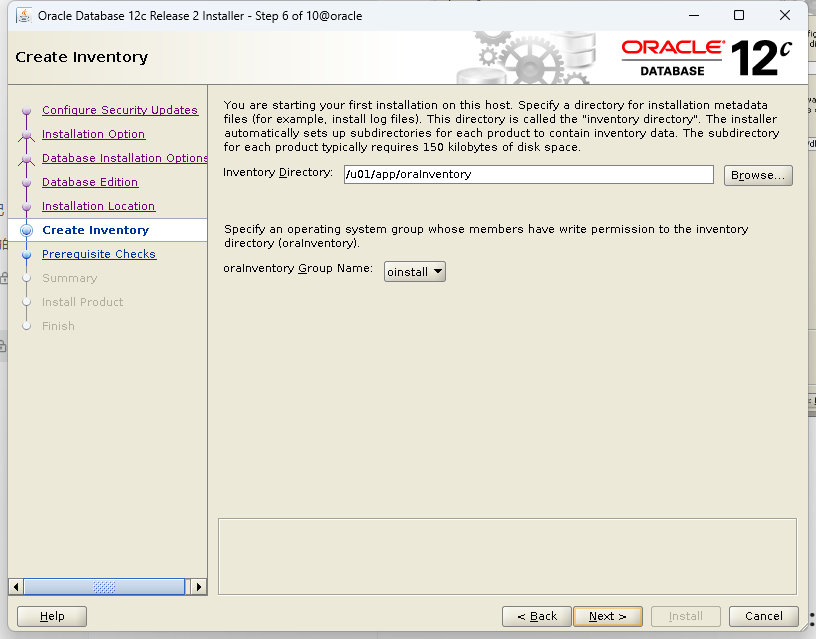
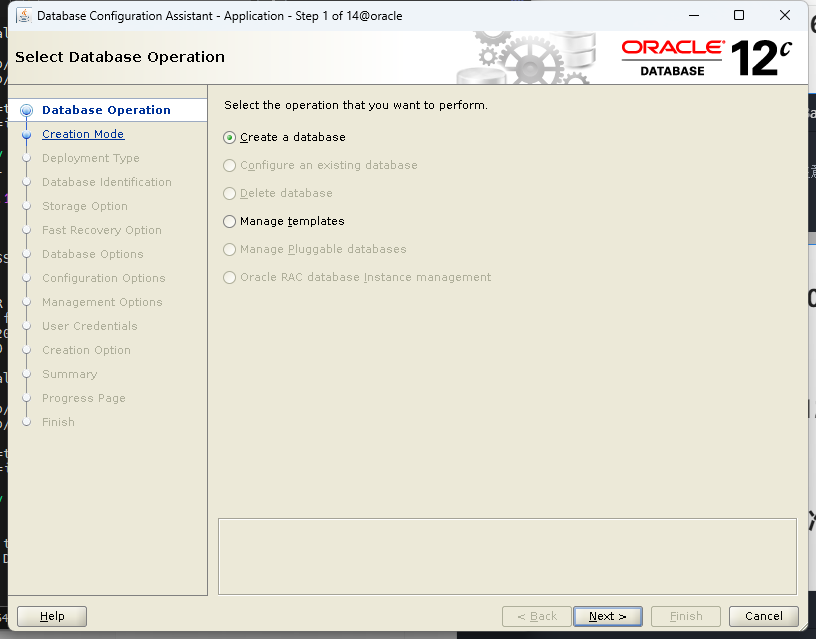
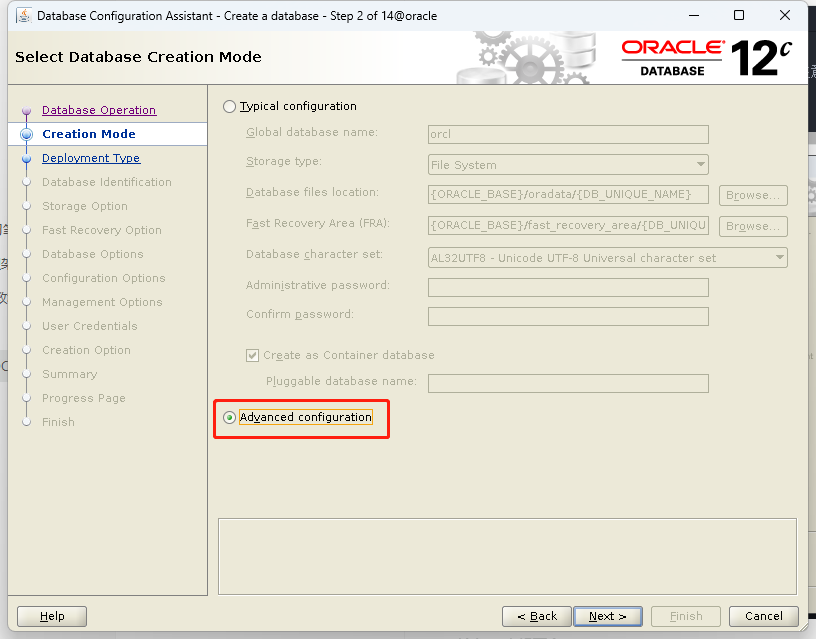
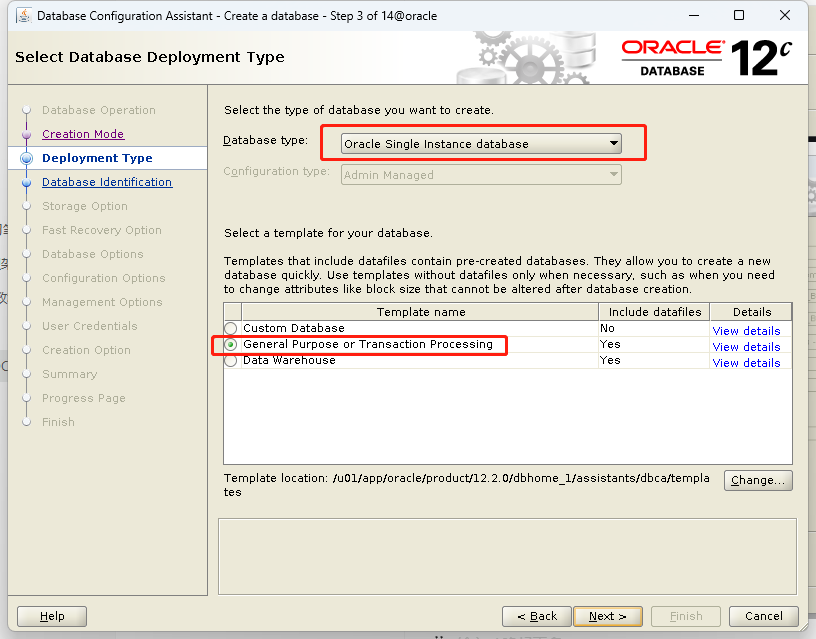
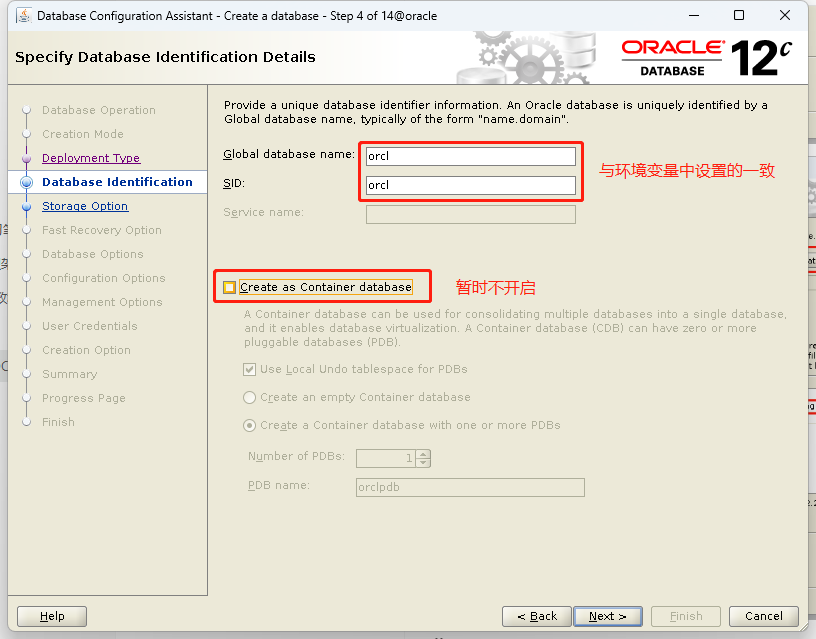
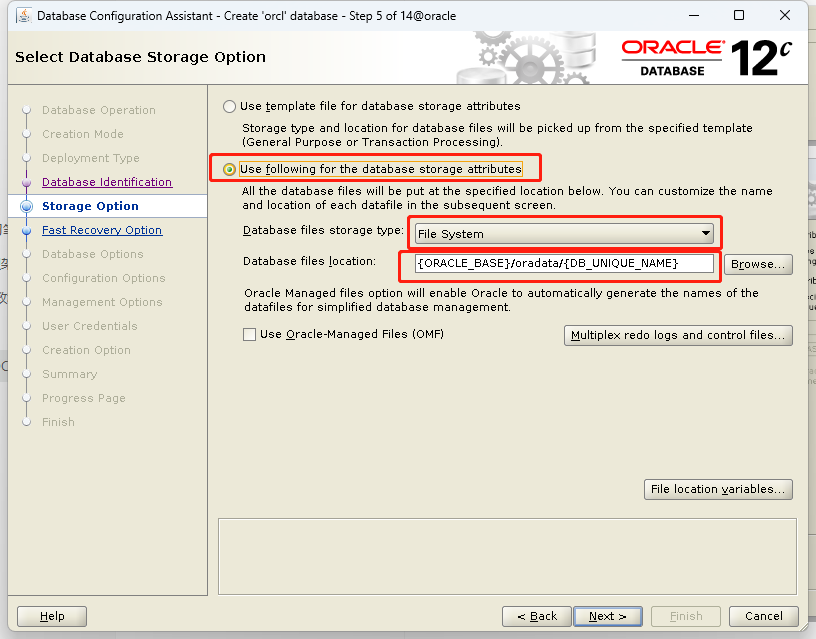
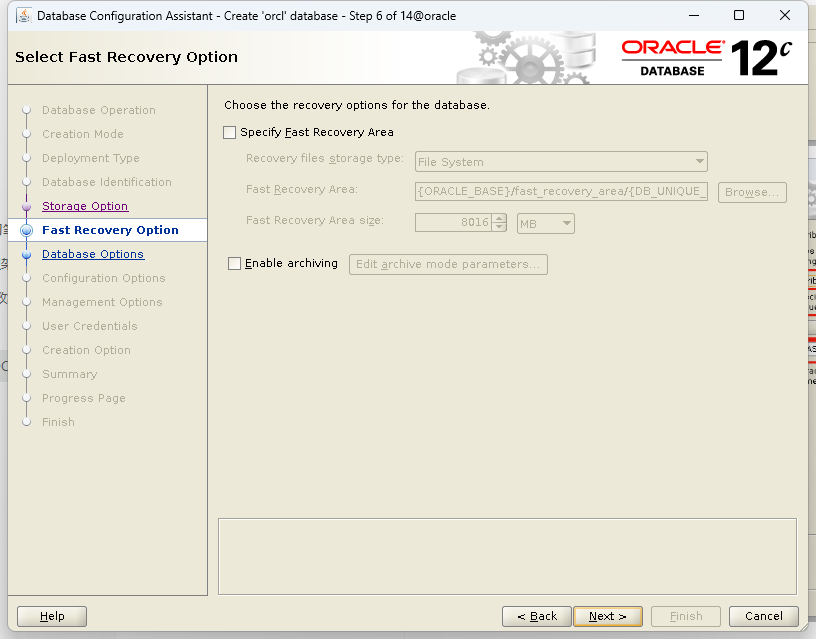
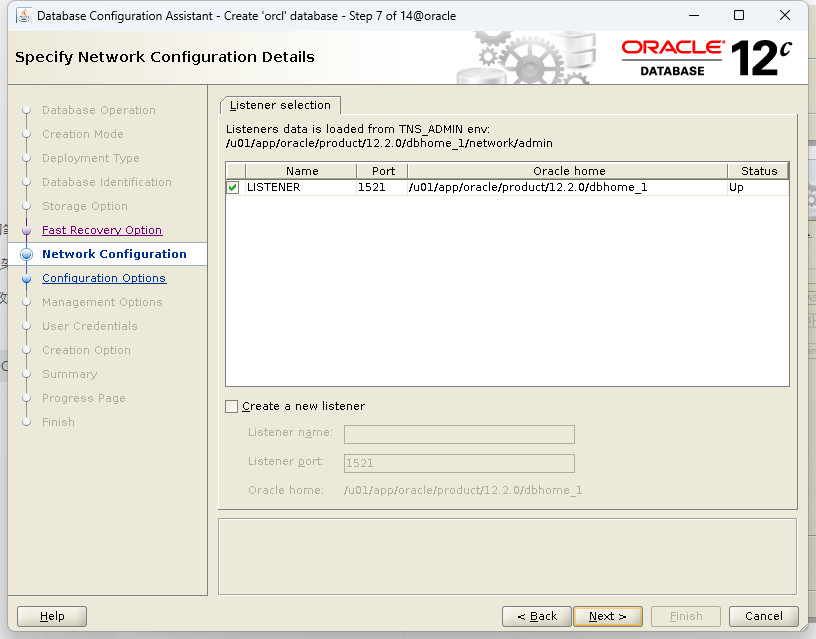
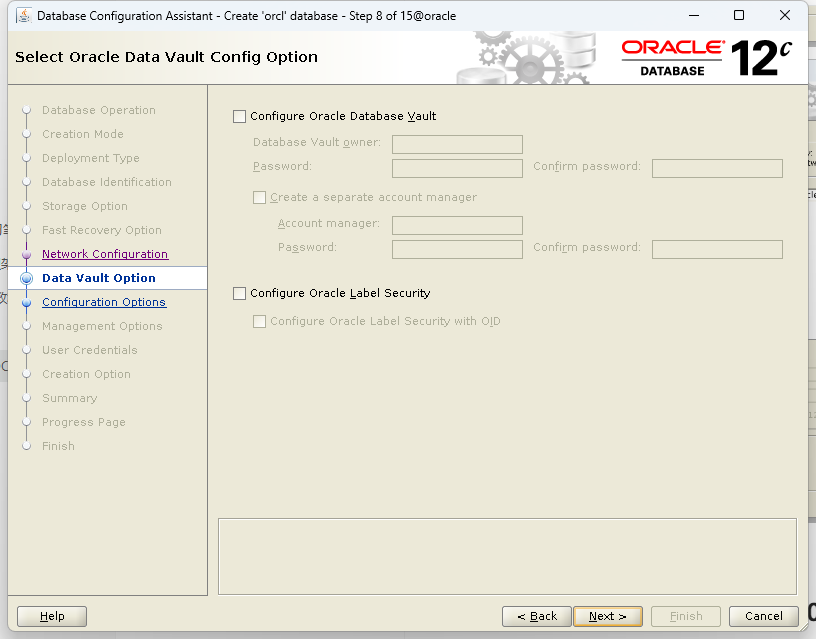
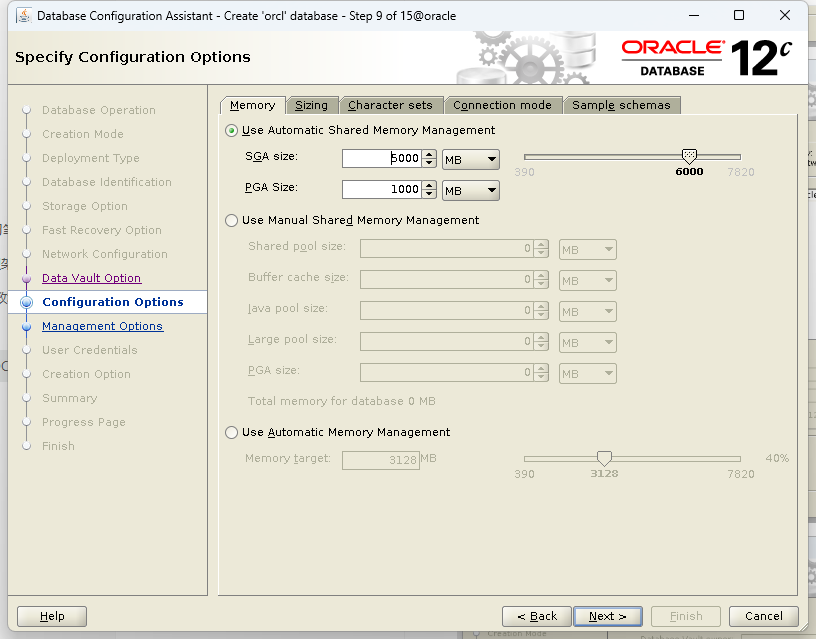
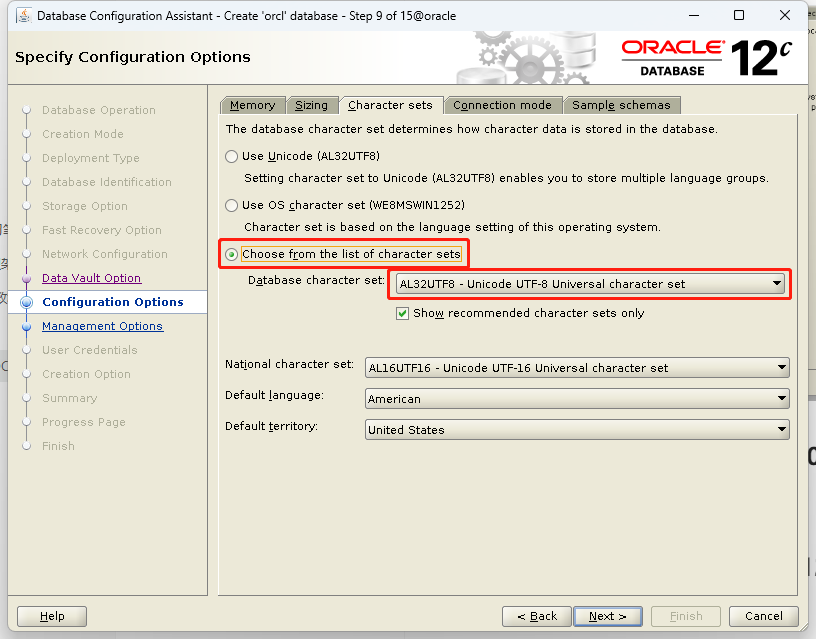
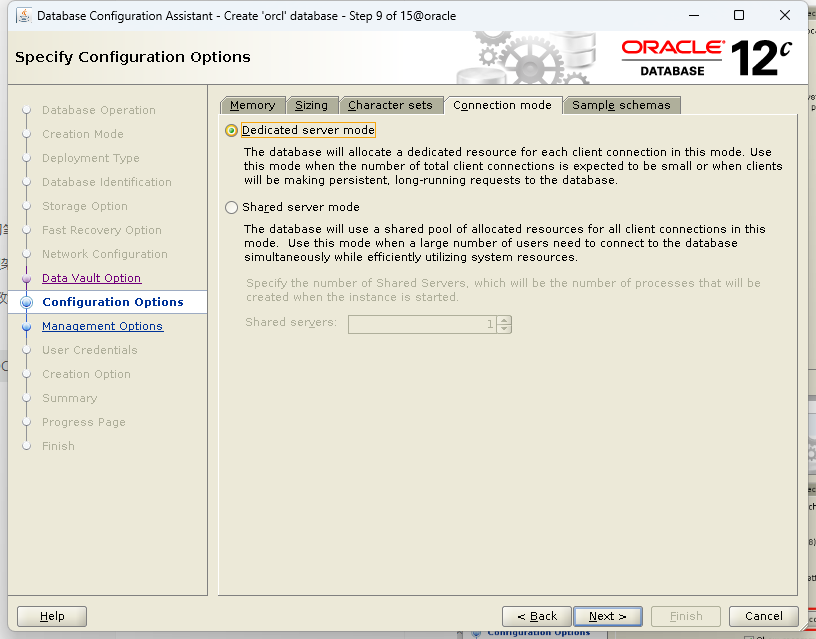
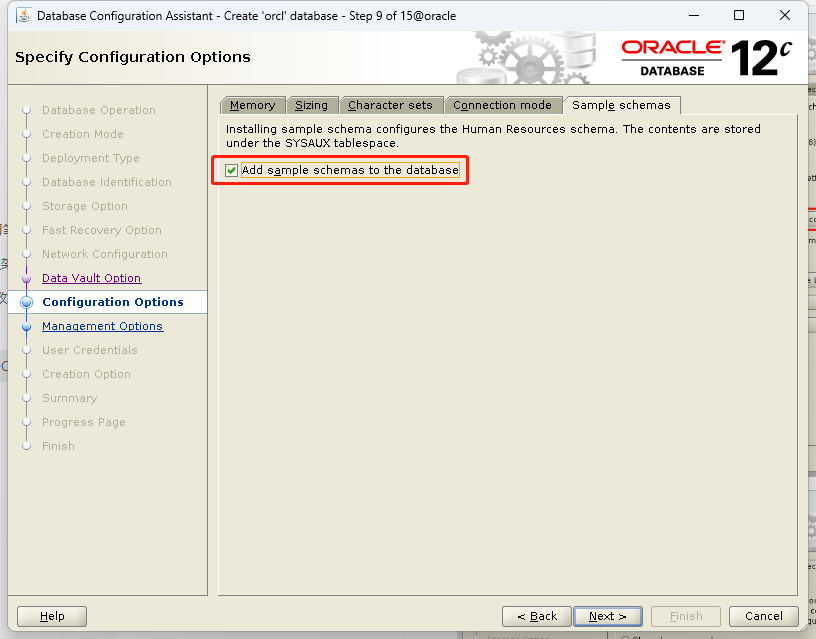
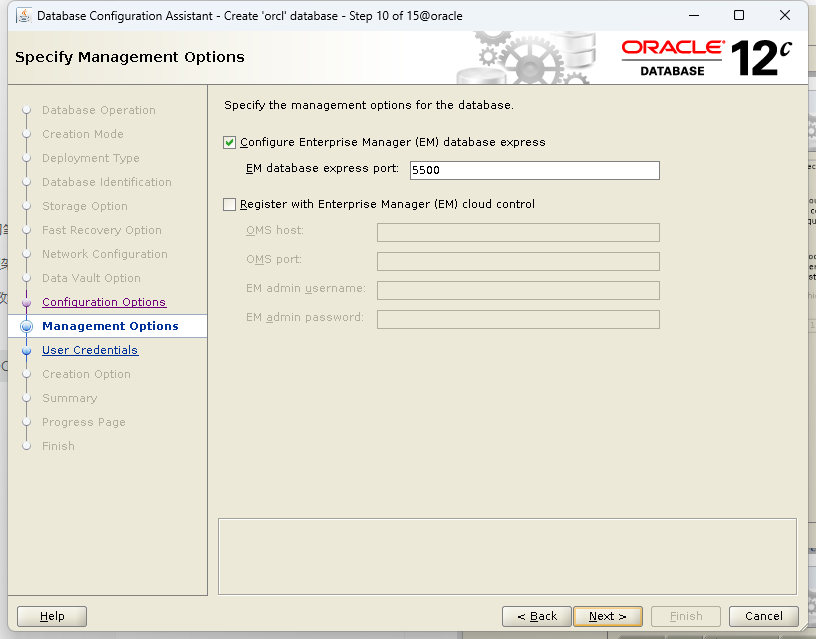
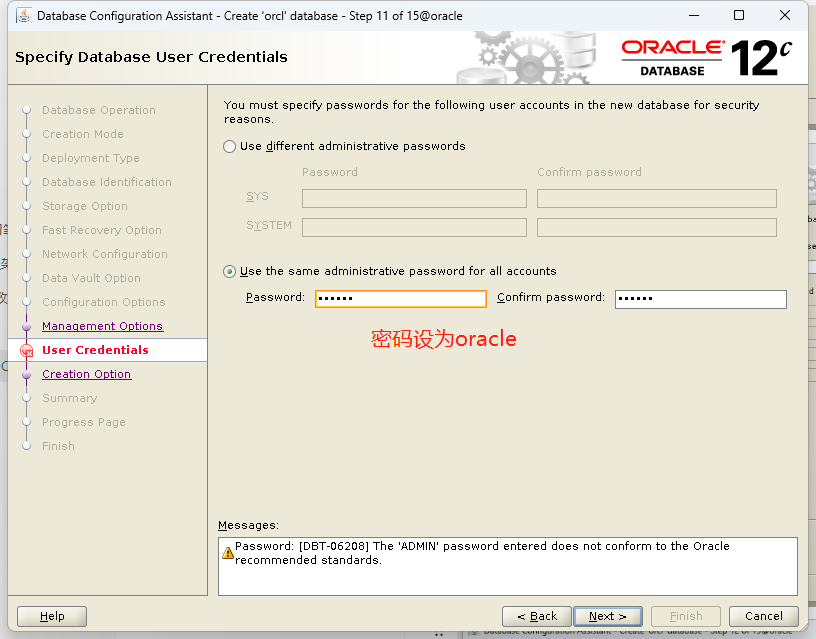
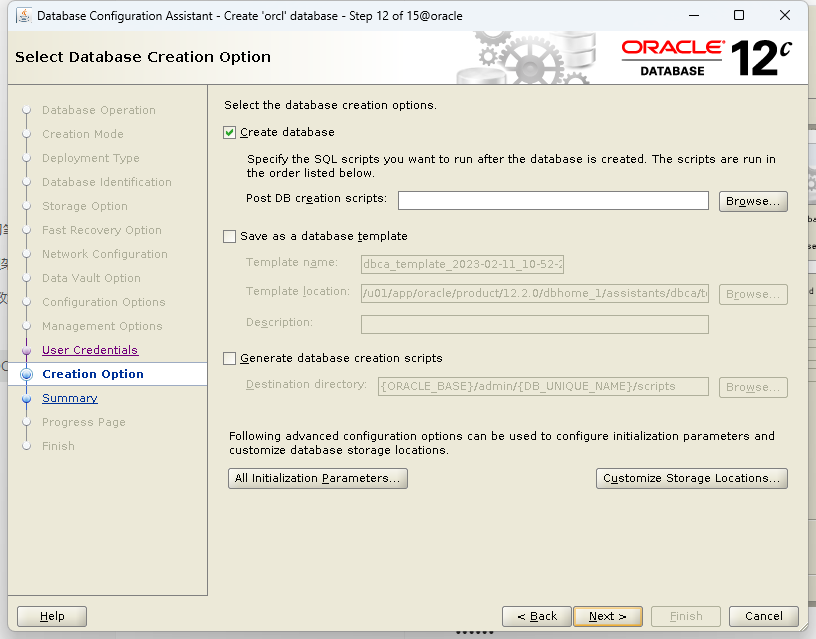
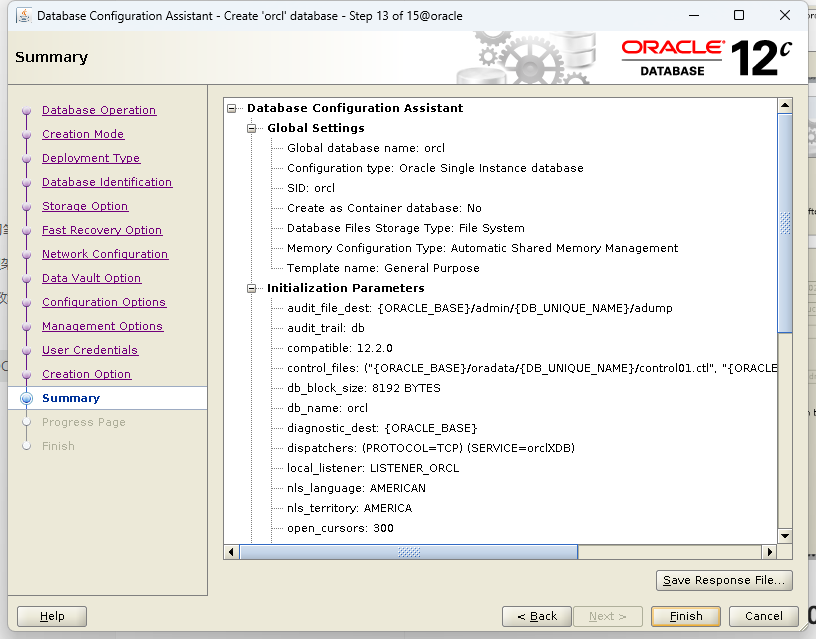
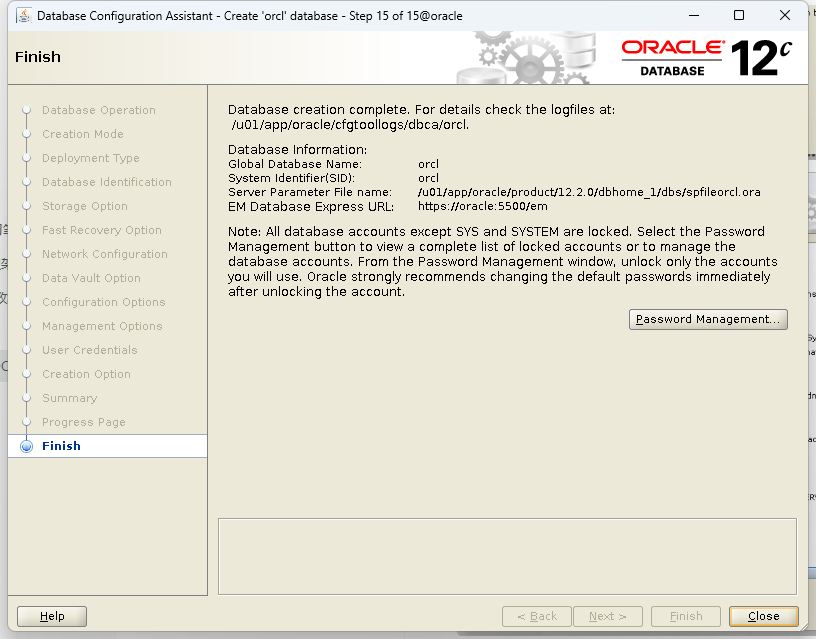
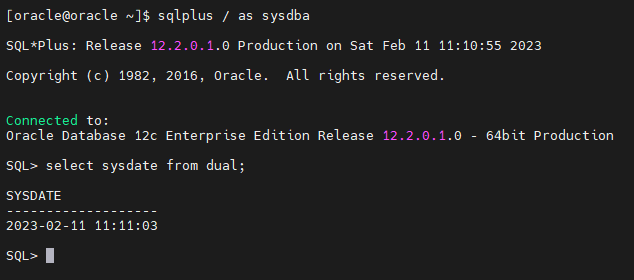
16、创建数据库

最后修改时间:2023-03-31 21:33:09
「喜欢这篇文章,您的关注和赞赏是给作者最好的鼓励」
关注作者
【版权声明】本文为墨天轮用户原创内容,转载时必须标注文章的来源(墨天轮),文章链接,文章作者等基本信息,否则作者和墨天轮有权追究责任。如果您发现墨天轮中有涉嫌抄袭或者侵权的内容,欢迎发送邮件至:contact@modb.pro进行举报,并提供相关证据,一经查实,墨天轮将立刻删除相关内容。
评论
相关阅读
Oracle DataGuard高可用性解决方案详解
孙莹
455次阅读
2025-03-26 23:27:33
Oracle RAC 一键安装翻车?手把手教你如何排错!
Lucifer三思而后行
435次阅读
2025-04-15 17:24:06
墨天轮个人数说知识点合集
JiekeXu
380次阅读
2025-04-01 15:56:03
XTTS跨版本迁移升级方案(11g to 19c RAC for Linux)
zwtian
365次阅读
2025-04-08 09:12:48
Oracle SQL 执行计划分析与优化指南
Digital Observer
350次阅读
2025-04-01 11:08:44
Oracle 19c RAC更换IP实战,运维必看!
szrsu
316次阅读
2025-04-08 23:57:08
3月“墨力原创作者计划”获奖名单公布
墨天轮编辑部
302次阅读
2025-04-15 14:48:05
风口浪尖!诚通证券扩容采购Oracle 793万...
Roger的数据库专栏
299次阅读
2025-03-24 09:42:53
切换Oracle归档路径后,不能正常删除原归档路径上的归档文件
dbaking
293次阅读
2025-03-19 14:41:51
oracle定时任务常用攻略
virvle
292次阅读
2025-03-25 16:05:19


TA的专栏
Linux6 + Oracle11g安装配置
收录4篇内容
目录
