Tutorialspoint PDFBox 教程
来源:易百教程
PDFBox教程™
Apache PDFBox是一个开源的Java库,支持PDF文档的开发和转换。 在本教程中,我们将学习如何使用PDFBox开发可创建,转换和操作PDF文档的Java程序。
面向读者
本教程已经为初学者准备,让他们了解PDFBox库的基础知识和应用。 本教程将帮助读者构建涉及PDF文档创建,操作和删除的应用程序。
前提条件
对于本教程,假定读者具有Java编程语言的知识和编程基础。
问题反馈
我们不能保证您在学习此PDFBox教程的过程中不会遇到任何问题。本教程中的讲解,示例和代码等只是根据作者的理解来概括写出。由于作者水平和能力有限,因此不保正所有编写的文章都准确无误。但是如果有遇到任何错误或问题,请反馈给我们,我们会及时纠正以方便后续读者阅读。
易百教程移动端:请扫描本页面底部(右侧)二维码并关注微信公众号,回复:"教程" 选择相关教程阅读或直接访问:http://m.yiibai.com 。
PDFBox简介 - PDFBox教程™
可移植文档格式(PDF)是一种文件格式,有助于以独立于应用程序软件,硬件和操作系统的方式呈现数据。
每个PDF文件都包含固定布局平面文档的说明,包括显示文本,字体,图形和其他信息。
有几个库可用于通过程序创建和操作PDF文档,例如 -
- Adobe PDF库 - 该库提供C++,.NET和Java等语言的API,使用此库可以编辑,查看打印和从PDF文档中提取文本。
- 格式化对象处理器 - 由XSL格式化对象和输出独立格式化程序驱动的开源打印格式化程序。 主要输出目标是PDF。
- iText - 这个库提供了Java, C# 和其他.NET语言等语言的API,使用这个库可以创建和操作PDF,RTF和HTML文档。
- JasperReports - 这是一个Java报告工具,可在PDF文档中生成报告,包括Microsoft Excel,RTF,ODT,逗号分隔值和XML文件。
PDFBox是什么?
Apache PDFBox是一个开源的Java库,支持PDF文档的开发和转换。 使用这个库,可以开发创建,转换和操作PDF文档的Java程序。
除此之外,PDFBox还包含一个命令行实用程序,用于使用可用的Jar文件对PDF执行各种操作。
PDFBox的特点
下面列出PDFBox的特点 -
- 提取文本 - 使用PDFBox,可以从PDF文件中提取Unicode文本。
- 拆分和合并 - 使用PDFBox,可以将单个PDF文件分割成多个文件,并将它们合并为一个文件。
- 填写表单 - 使用PDFBox,可以将填写表单填入文档中。
- 打印 - 使用PDFBox,可以使用标准Java打印API打印PDF文件。
- 另存为图像 - 使用PDFBox,可以将PDF保存为图像文件,例如:PNG或JPEG。
- 创建PDF - 使用PDFBox,可以通过创建Java程序来创建一个新的PDF文件,并且还可以包含图像和字体。
- 签名 - 使用PDFBox,可以将数字签名添加到PDF文件。
PDFBox的应用
以下是PDFBox的应用 -
- Apache Nutch - Apache Nutch是一款开源的网络搜索软件。它建立在Apache Lucene的基础上,添加了一些特定于web的内容,例如:爬虫,链接图数据库,用于HTML和其他文档格式的解析器等。
- Apache Tika - Apache Tika是一个使用现有解析器库从各种文档检测和提取元数据和结构化文本内容的工具包。
PDFBox的组件
以下是PDFBox的四个主要组件 -
- PDFBox - 这是PDFBox的主要部分。 这包含与内容提取和操作相关的类和接口。
- FontBox - 包含与字体相关的类和接口,使用这些类可以修改PDF文档的文本字体。
- XmpBox - 包含处理XMP元数据的类和接口。
- Preflight - 此组件用于根据PDF/A-1b标准验证PDF文件。
易百教程移动端:请扫描本页面底部(右侧)二维码并关注微信公众号,回复:"教程" 选择相关教程阅读或直接访问:http://m.yiibai.com 。
PDFBox开发环境安装配置 - PDFBox教程™
以下是下载Apache PDFBox的步骤 -
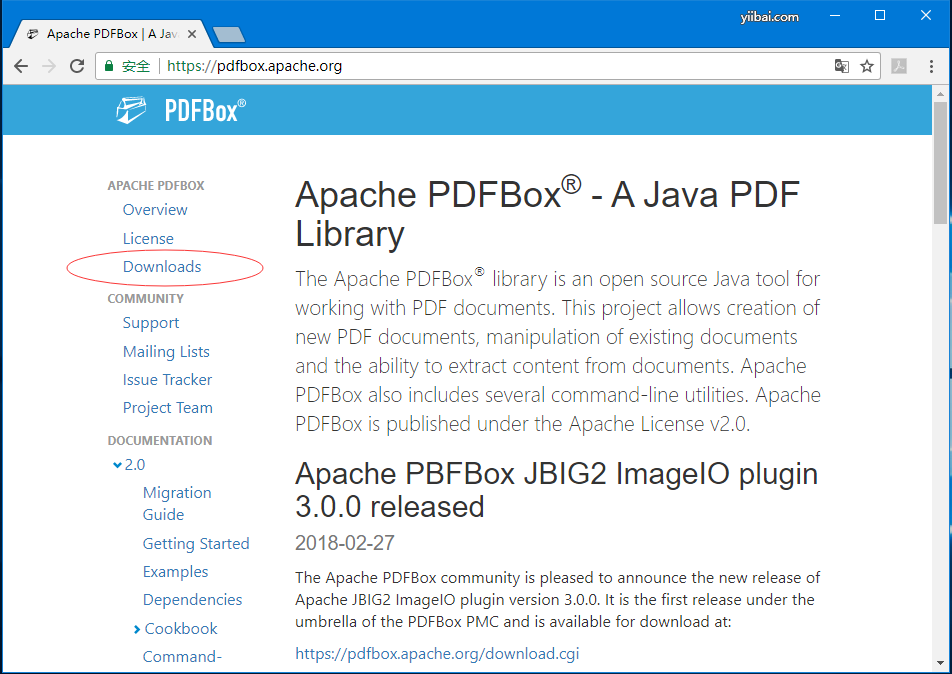
第1步 - 点击以下链接打开Apache PDFBox的主页 - https://pdfbox.apache.org/
第2步 - 上面的链接将引导您进入主页,如下图所示 -
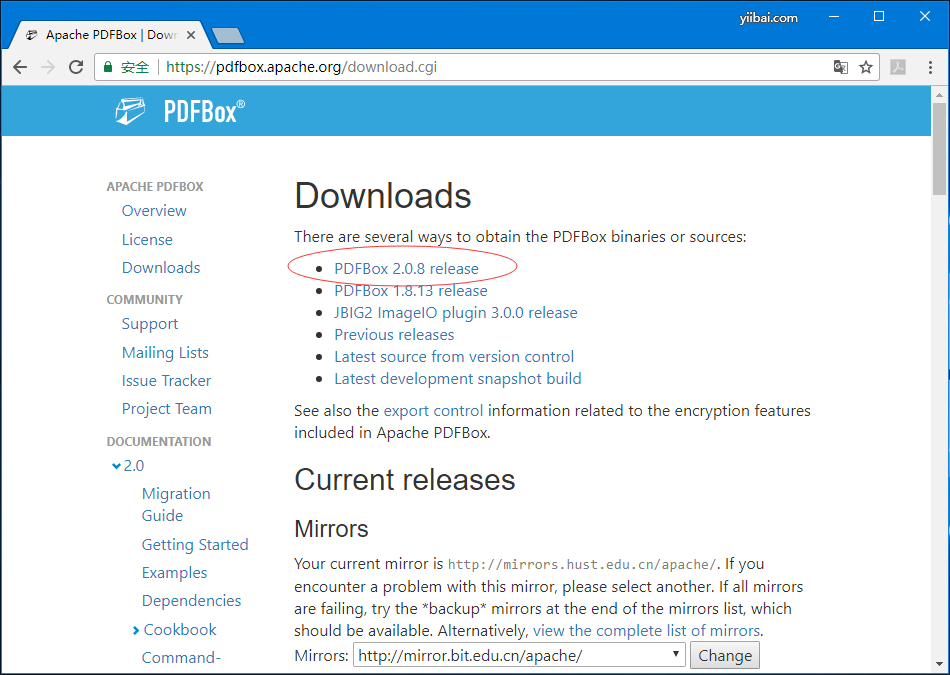
第3步 - 现在,点击上面屏幕截图的下载(Downloads)链接。 点击后,将跳转至PDFBox的下载页面,如以下屏幕截图所示。
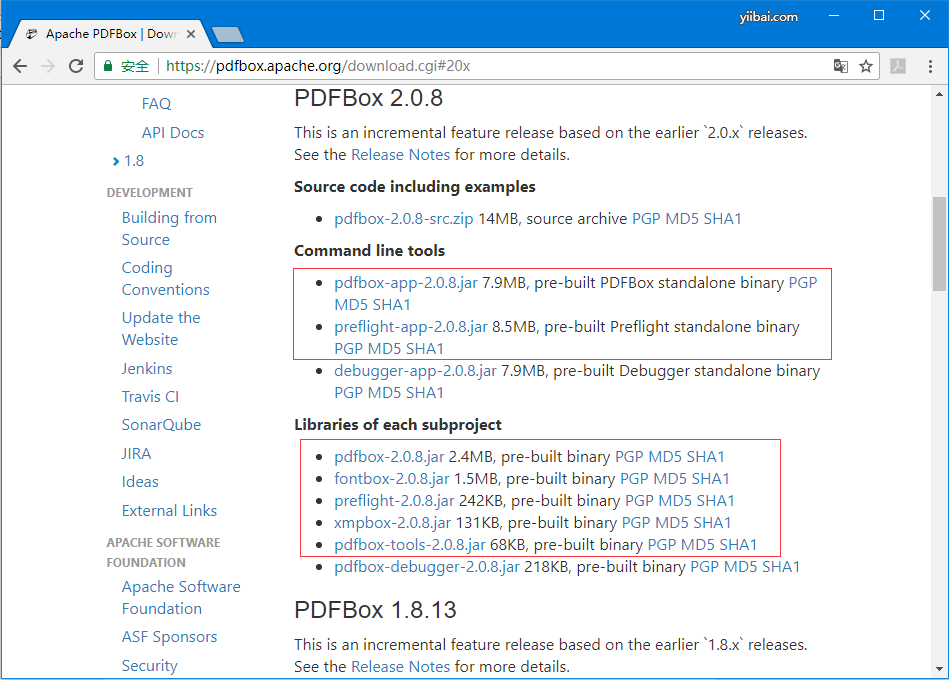
第4步 - 在下载页面中,有几个与PDFBox相关的链接。 点击最新版本的相应链接。 例如,这里选择PDFBox 2.0.8,点击这个链接,跳转到所需的jar文件,如下图所示。
第5步 - 下载jar文件有:pdfbox-2.0.8.jar,fontbox-2.0.8.jar,preflight-2.0.8.jar,xmpbox-2.0.8.jar和pdfbox-tools-2.0.8.jar。
Eclipse安装
下载所需的jar文件后,必须将这些JAR文件嵌入到Eclipse环境中。可以通过将Build路径设置这些JAR文件,或者如果是 Maven 可以使用pom.xml来完成此操作。
设置构建路径
以下是在Eclipse中安装PDFBox的步骤 -
第1步 - 确保您已在系统中安装了Eclipse。 如果没有,请在您的系统中下载并安装Eclipse。
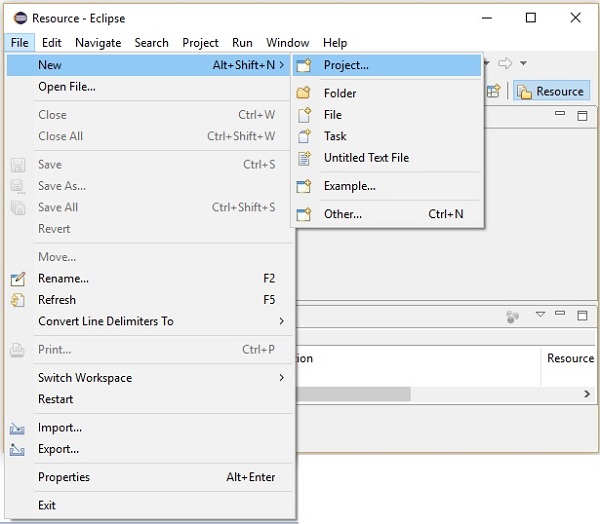
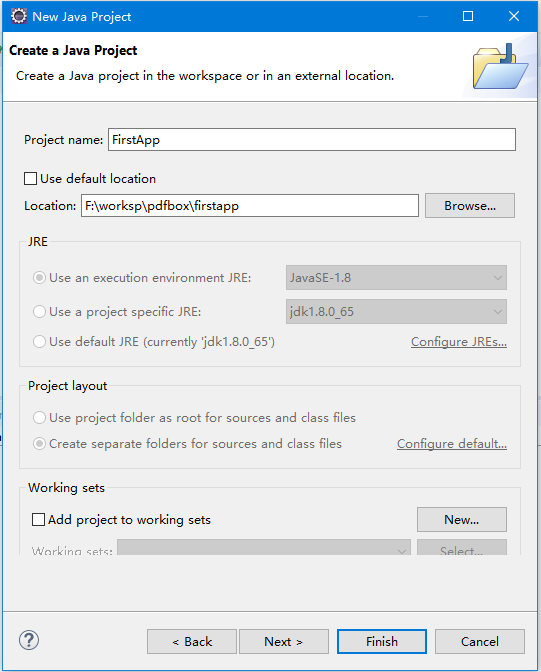
第2步 - 打开Eclipse,点击File,New,然后打开一个新项目: FirstApp,如下图所示。
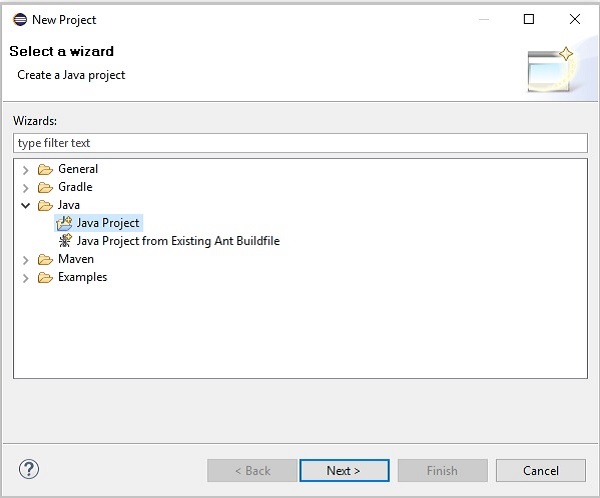
第3步 - 在选择项目时,打开新建项目向导。 在此向导中,选择Java项目,然后单击Next按钮,如下面的屏幕截图所示。
第4步 - 继续前进时,引导至New Java Project向导。 创建一个新项目并单击Next,如下面的截图所示。
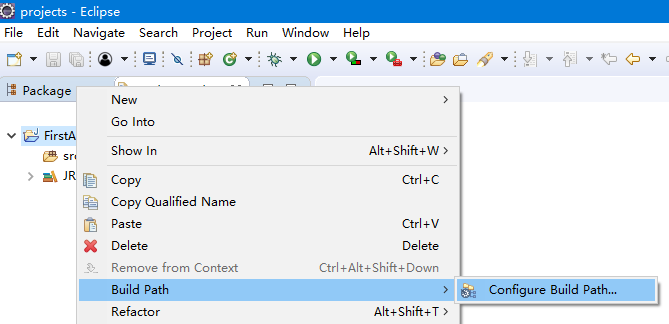
第5步 - 创建一个新项目后,右键单击它; 选择Build Path并点击Configure Build Path …,如下图所示。
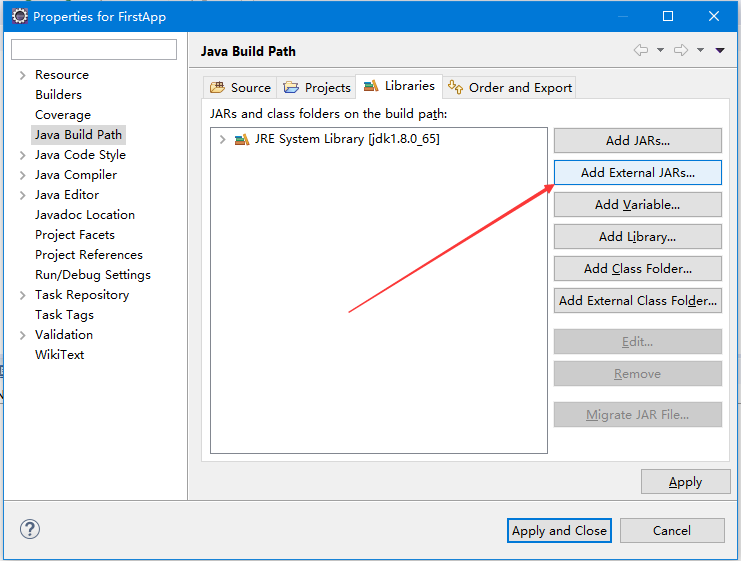
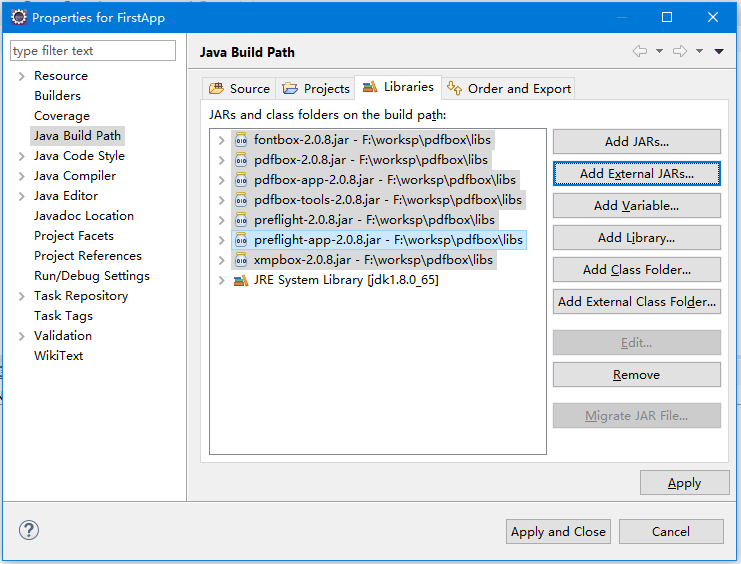
第6步 - 单击Build Path选项时,将指向Java构建路径向导。 选择添加外部JAR,如以下屏幕截图所示。
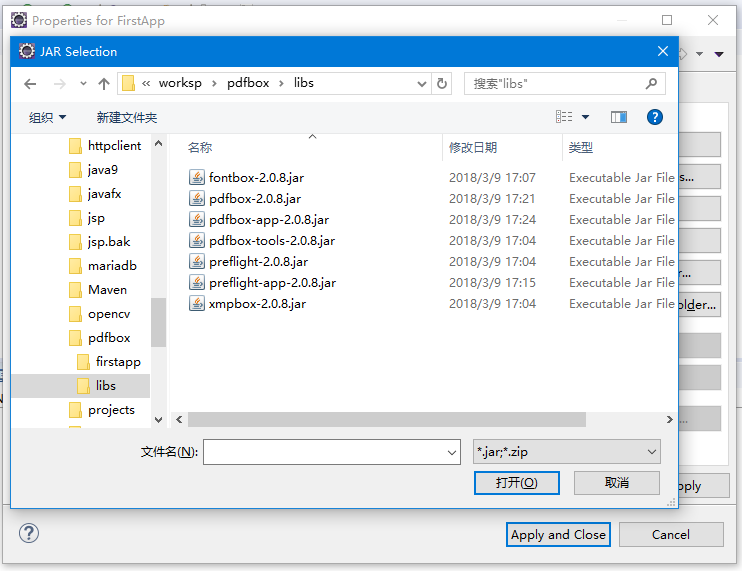
第7步 - 全选jar文件:fontbox-2.0.8.jar,pdfbox-2.0.8.jar,pdfbox-tools-2.0.8.jar,preflight-2.0.8.jar,xmpbox-2.0.8.jar如图所示 在以下屏幕截图中。
第8步 - 单击上面屏幕截图中的打开按钮,这些文件将被添加到您的库中,如以下屏幕截图所示。
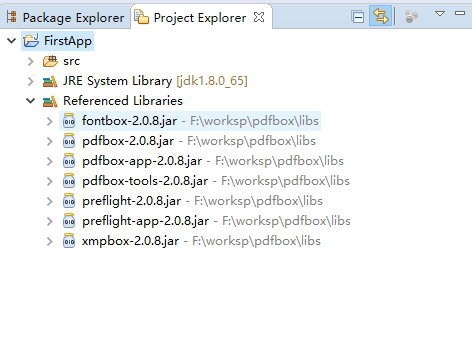
第9步 - 单击确定后,成功将所需的JAR文件添加到当前项目中,并且可以通过展开参考库来验证这些添加的库,如以下屏幕截图所示。
使用pom.xml
将项目转换为Maven项目并将以下内容添加到其pom.xml中。
<project xmlns="http://maven.apache.org/POM/4.0.0"
xmlns:xsi="http://www.w3.org/2001/XMLSchema-instance"
xsi:schemaLocation="http://maven.apache.org/POM/4.0.0
http://maven.apache.org/xsd/maven-4.0.0.xsd">
<modelVersion>4.0.0</modelVersion>
<groupId>firstapp</groupId>
<artifactId>firstapp</artifactId>
<version>0.0.1-SNAPSHOT</version>
<build>
<sourceDirectory>src</sourceDirectory>
<plugins>
<plugin>
<artifactId>maven-compiler-plugin</artifactId>
<version>3.3</version>
<configuration>
<source>1.8</source>
<target>1.8</target>
</configuration>
</plugin>
</plugins>
</build>
<dependencies>
<dependency>
<groupId>org.apache.pdfbox</groupId>
<artifactId>pdfbox</artifactId>
<version>2.0.1</version>
</dependency>
<dependency>
<groupId>org.apache.pdfbox</groupId>
<artifactId>fontbox</artifactId>
<version>2.0.0</version>
</dependency>
<dependency>
<groupId>org.apache.pdfbox</groupId>
<artifactId>jempbox</artifactId>
<version>1.8.11</version>
</dependency>
<dependency>
<groupId>org.apache.pdfbox</groupId>
<artifactId>xmpbox</artifactId>
<version>2.0.0</version>
</dependency>
<dependency>
<groupId>org.apache.pdfbox</groupId>
<artifactId>preflight</artifactId>
<version>2.0.0</version>
</dependency>
<dependency>
<groupId>org.apache.pdfbox</groupId>
<artifactId>pdfbox-tools</artifactId>
<version>2.0.0</version>
</dependency>
</dependencies>
</project>
易百教程移动端:请扫描本页面底部(右侧)二维码并关注微信公众号,回复:"教程" 选择相关教程阅读或直接访问:http://m.yiibai.com 。
PDFBox创建PDF文档 - PDFBox教程™
现在让我们了解如何使用PDFBox库创建PDF文档。
创建一个空的PDF文档
可以通过实例化PDDocument类来创建一个空的PDF文档。使用这个类的Save()方法将文档保存在所需的位置。
以下是创建一个空的PDF文档的步骤。
第1步: 创建空白文档
org.apache.pdfbox.pdmodel包中的PDDocument类是PDF文档的内存中表示形式。 因此,通过实例化这个类,可以创建一个空的PDFDocument,如下面的代码块所示。
PDDocument document = new PDDocument();
第2步: 保存文档
创建文档后,需要将此文档保存在所需的路径中,可以使用PDDocument类的Save()方法执行此操作。 该方法接受一个字符串值,表示要存储文档的路径作为参数。 以下是PDDocument类的save()方法的原型。
document.save("Path");
第3步:关闭文档
完成任务后,最后需要使用PDDocument对象的close()方法关闭。 以下是PDDocument类的close()方法的原型。
document.close();
实例
本示例演示如何创建PDF文档。 在这里,将创建一个Java程序来生成一个名称为my_doc.pdf的PDF文档,并将其保存在F:\worksp\pdfbox目录中。 将下面代码保存在DocumentCreation.java的文件中,代码如下所示 -
import java.io.IOException;
import org.apache.pdfbox.pdmodel.PDDocument;
public class DocumentCreation {
public static void main (String args[]) throws IOException {
//Creating PDF document object
PDDocument document = new PDDocument();
//Saving the document
document.save("F:/worksp/pdfbox/my_doc.pdf");
System.out.println("PDF created");
//Closing the document
document.close();
}
}
编译并执行上面示例程序,得到以下结果 -
PDF created
如果打开目录:F:/worksp/pdfbox/,应该能看到创建的PDF文档,如下所示。
由于这是一个空文档,所以如果打开什么内容也没有。
易百教程移动端:请扫描本页面底部(右侧)二维码并关注微信公众号,回复:"教程" 选择相关教程阅读或直接访问:http://m.yiibai.com 。
PDFBox添加页面 - PDFBox教程™
在前一章中,我们已经学习了如何创建PDF文档。 创建PDF文档后,我们需要添加页面。 现在来了解如何在PDF文档中添加页面。
将页面添加到PDF文档
可以通过实例化PDPage类并使用PDDocument类的addPage()方法将其添加到PDF文档来创建空白页面。
以下是创建一个空文档并向其中添加页面的步骤。
第1步:创建空白文档
通过实例化PDDocument类创建一个空的PDF文档,如下所示。
PDDocument document = new PDDocument();
第2步:创建一个空白页面
PDPage类表示PDF文档中的一个页面,因此可以通过实例化该类来创建一个空页面,如下面的代码块所示。
PDPage my_page = new PDPage();
第3步:将页面添加到文档
使用PDDocument类的addPage()方法将页面添加到PDF文档。 对于此方法,需要传递PDPage对象作为参数。
因此,将在上一步中创建的空白页添加到PDDocument对象,如以下代码块中所示。
document.addPage(my_page);
通过这种方式,可以根据需要添加任意数量的页面作为PDF文档。
第4步:保存文档
添加完所有页面后,使用PDDocument类的save()方法保存PDF文档,如以下代码块所示。
document.save("Path");
第5步:关闭文档
最后使用PDDocument类的close()方法关闭文档,如下所示。
document.close();
示例
本示例演示如何创建PDF文档并向其中添加页面。 在这里我们将创建一个名为my_doc.pdf的PDF文档,并进一步添加10个空白页面,并将其保存在路径F:\worksp\pdfbox中。 将下面代码保存在名称为AddingPages.java的文件中。
package com.yiibai;
import java.io.IOException;
import org.apache.pdfbox.pdmodel.PDDocument;
import org.apache.pdfbox.pdmodel.PDPage;
public class AddingPages {
public static void main(String args[]) throws IOException {
//Creating PDF document object
PDDocument document = new PDDocument();
for (int i=0; i<10; i++) {
//Creating a blank page
PDPage blankPage = new PDPage();
//Adding the blank page to the document
document.addPage( blankPage );
}
//Saving the document
document.save("F:\\worksp\\pdfbox\\my_doc.pdf");
System.out.println("PDF created");
//Closing the document
document.close();
}
}
执行后,上述程序会创建一个带有空白页面的PDF文档,其中显示以下消息 -
PDF created
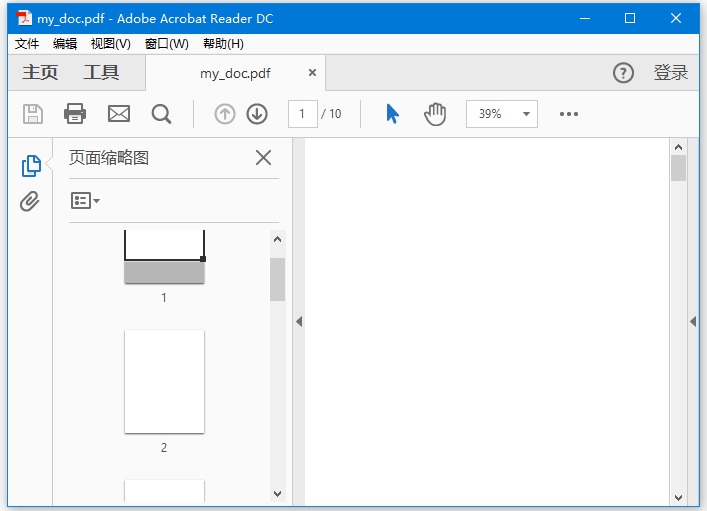
如果验证指定的路径,可以找到创建的PDF文档,如以下屏幕截图所示 -
易百教程移动端:请扫描本页面底部(右侧)二维码并关注微信公众号,回复:"教程" 选择相关教程阅读或直接访问:http://m.yiibai.com 。
PDFBox加载文件 - PDFBox教程™
在前面的例子中,已经学习了如何创建一个新文档并向其中添加页面。 本章将教您如何加载系统中已经存在的PDF文档,并对其进行一些操作。
加载现有的PDF文档
PDDocument类的load()方法用于加载现有的PDF文档。 按照以下步骤加载现有的PDF文档。
第1步:加载现有的PDF文档
使用PDDocument类的静态方法load()加载现有的PDF文档。 此方法接受一个文件对象作为参数,因为这是一个静态方法,可以直接使用类名称调用它,如下所示。
File file = new File("path of the document")
PDDocument.load(file);
第2步:执行所需的操作
执行所需的操作,例如添加添加文本的页面,将图像添加到加载的文档。
第3步:保存文档
添加完所有页面后,使用PDDocument类的save()方法保存PDF文档,如以下代码块所示。
document.save("Path");
第4步:关闭文档
最后使用PDDocument类的close()方法关闭文档,如下所示。
document.close();
示例
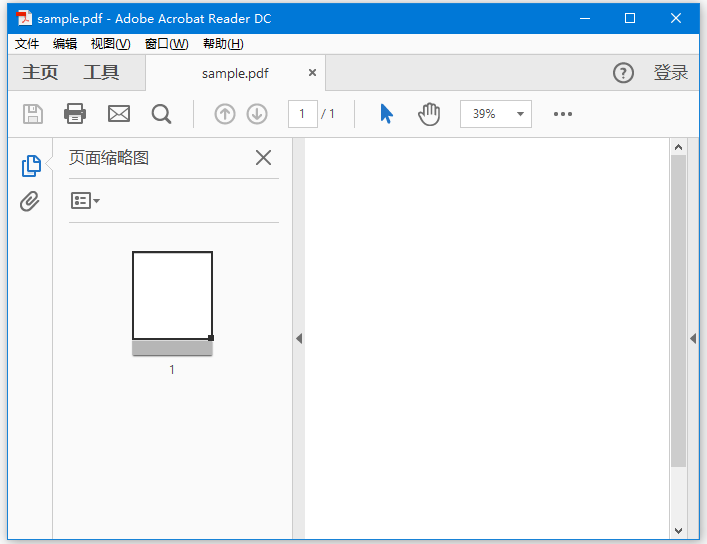
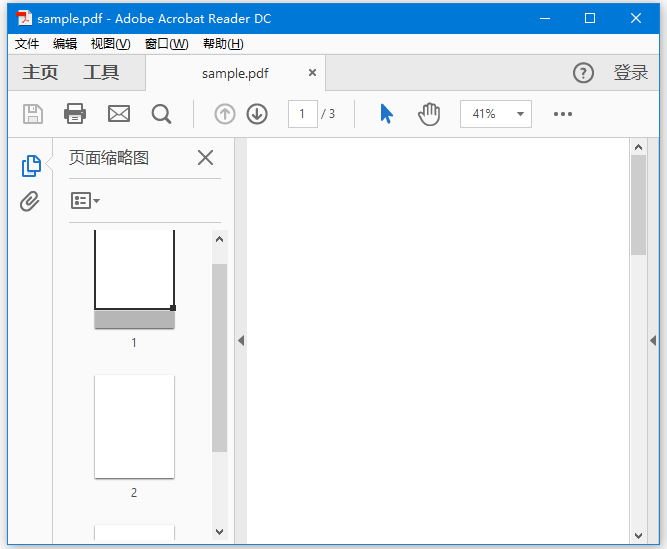
假设有一个包含单个页面的PDF文档:sample.pdf,路径为F:\worksp\pdfbox,如以下屏幕截图所示。
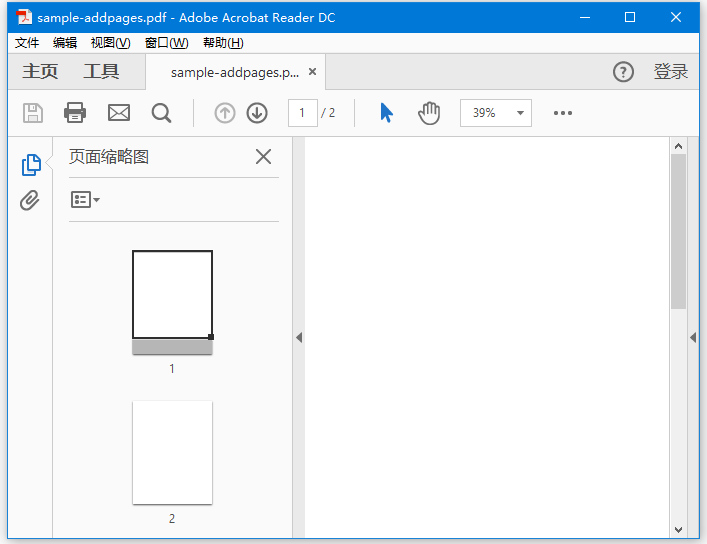
本示例演示如何加载现有的PDF文档。 在这里,将加载上面显示的PDF文档sample.pdf,为它添加一个页面,并将其保存在F:/worksp/pdfbox/sample-addpages.pdf文件中。
第1步 - 将此代码保存在名为LoadingExistingDocument.java的文件中。
package com.yiibai;
import java.io.File;
import java.io.IOException;
import org.apache.pdfbox.pdmodel.PDDocument;
import org.apache.pdfbox.pdmodel.PDPage;
public class LoadingExistingDocument {
public static void main(String args[]) throws IOException {
// Loading an existing document
File file = new File("F:/worksp/pdfbox/sample.pdf");
PDDocument document = PDDocument.load(file);
System.out.println("PDF loaded");
// Adding a blank page to the document
document.addPage(new PDPage());
// Saving the document
document.save("F:/worksp/pdfbox/sample-addpages.pdf");
// Closing the document
document.close();
}
}
执行后,上述程序将加载指定的PDF文档,并向其添加一个空白页面,以显示以下消息。
PDF loaded
如果验证指定的路径,可以找到添加到指定PDF文档的附加页面,如下所示。
易百教程移动端:请扫描本页面底部(右侧)二维码并关注微信公众号,回复:"教程" 选择相关教程阅读或直接访问:http://m.yiibai.com 。
PDFBox删除页面 - PDFBox教程™
现在让我们学习如何从PDF文档中移除页面。
从现有文档中删除页面
使用PDDocument类的removePage()方法从现有的PDF文档中移除页面。
第1步:加载现有的PDF文档
使用PDDocument类的静态方法load()加载现有的PDF文档。 此方法接受一个文件对象作为参数,因为这是一个静态方法,可以使用类名称调用它,如下所示。
File file = new File("path-of-the-document")
PDDocument.load(file);
第2步:列出页数
使用getNumberOfPages()方法列出PDF文档中存在的页面数量,如下所示。
int noOfPages= document.getNumberOfPages();
System.out.print(noOfPages);
第3步:删除页面
使用PDDocument类的removePage()方法从PDF文档中移除页面。 对于此方法,需要传递要删除的页面的索引。
在为PDF文档中的页面指定索引时,请记住,这些页面的索引从零开始,即如果要删除第1页,则索引值为0。
document.removePage(2); // 删除第三页
第4步:保存文档
删除页面后,使用PDDocument类的save()方法保存PDF文档,如以下代码块中所示。
document.save("Path");
第5步:关闭文档
最后,使用PDDocument类的close()方法关闭文档,如下所示。
document.close();
示例
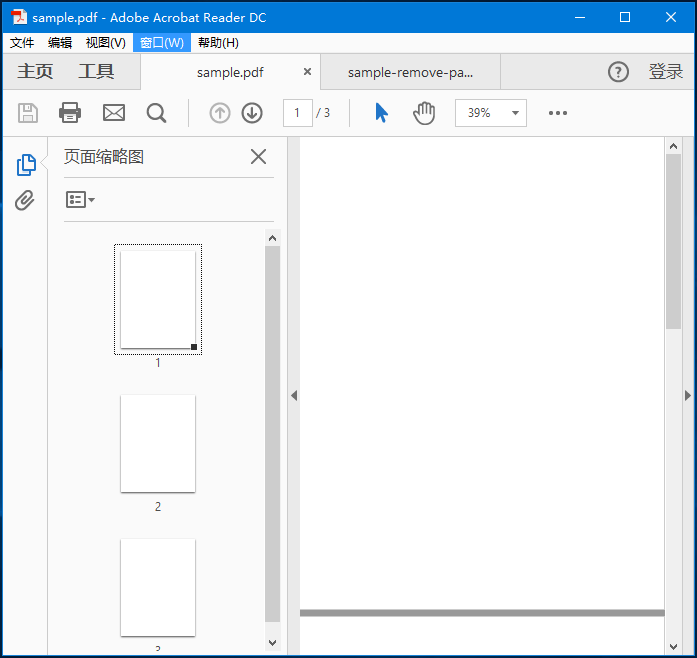
假设有一个名称为sample.pdf的PDF文档,它包含三个空页面,如下所示。
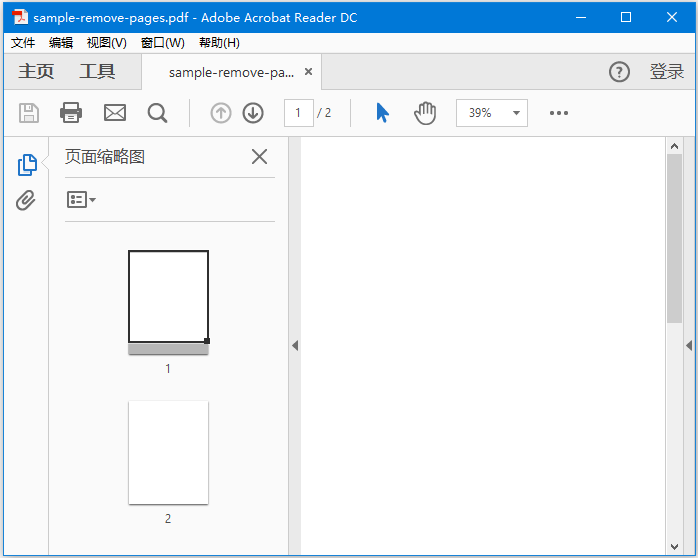
这个例子演示了如何从现有的PDF文档中删除页面。 在这里,将加载上面名称为sample.pdf的PDF文档,从中删除一个页面,并将其保存在:F:\worksp\pdfbox\sample-remove-pages.pdf文件中。 将此代码保存在名称为RemovingPages.java的文件中。
package com.yiibai;
import java.io.File;
import java.io.IOException;
import org.apache.pdfbox.pdmodel.PDDocument;
public class RemovingPages {
public static void main(String args[]) throws IOException {
//Loading an existing document
File file = new File("F:/worksp/pdfbox/sample.pdf");
PDDocument document = PDDocument.load(file);
//Listing the number of existing pages
int noOfPages= document.getNumberOfPages();
System.out.println(noOfPages);
//Removing the pages
document.removePage(2);
System.out.println("page removed");
//Saving the document
document.save("F:/worksp/pdfbox/sample-remove-pages.pdf");
//Closing the document
document.close();
}
}
执行上面示例代码后,将会创建一个PDF文档,其中包含显示以下消息的空白页面。
3
page removed
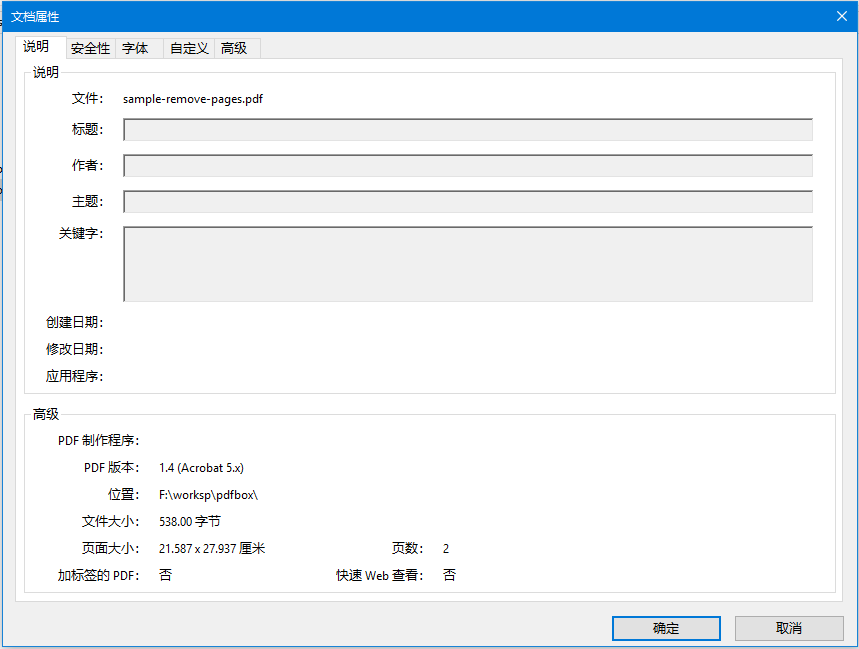
如果验证指定的路径,则可以发现所需页面已被删除,并且文档中只剩下两页,如下所示。
易百教程移动端:请扫描本页面底部(右侧)二维码并关注微信公众号,回复:"教程" 选择相关教程阅读或直接访问:http://m.yiibai.com 。
PDFBox文档属性 - PDFBox教程™
和其他文件一样,PDF文档也具有文档属性。 这些属性是键值对。 每个属性都提供有关文档的特定信息。
以下是PDF文档的属性 -
编号 | 属性 | 描述 |
1 | File | 该属性保存文件的名称。 |
2 | Title | 使用此属性,可以设置文档的标题。 |
3 | Author | 使用此属性,可以设置文档的作者姓名。 |
4 | Subject | 使用此属性,可以指定PDF文档的主题。 |
5 | Keywords | 使用此属性,列出可以搜索文档的关键字。 |
6 | Created | 使用此属性,可以设置为文档修改的日期 |
7 | Application | 使用此属性,可以设置文档的应用程序。 |
以下是PDF文档的文档属性表的截图。
设置文档属性
PDFBox提供了一个名称为PDDocumentInformation的类。 这个类有一组setter和getter方法。
该类的setter方法用于设置文档的各种属性的值,getter方法用于检索这些值的。
以下是PDDocumentInformation类的setter方法。
编号 | 方法 | 描述 |
1 | setAuthor(String author) | 此方法用于设置名为Author的PDF文档的属性值。 |
2 | setTitle(String title) | 此方法用于设置名为Title的PDF文档的属性值。 |
3 | setCreator(String creator) | 此方法用于设置名为Creator的PDF文档的属性值。 |
4 | setSubject(String subject) | 此方法用于设置名为Subject的PDF文档的属性值。 |
5 | setCreationDate(Calendar date) | 此方法用于设置名为CreationDate的PDF文档的属性值。 |
6 | setModificationDate(Calendar date) | 此方法用于设置名为ModificationDate的PDF文档的属性值。 |
7 | setKeywords(String keywords list) | 此方法用于设置名为Keywords的PDF文档的属性值。 |
示例
PDFBox提供了一个名称为PDDocumentInformation的类,该类提供了各种方法。 这些方法可以为文档设置各种属性并检索它们。
本示例演示如何将诸如作者,标题,日期和主题等属性添加到PDF文档。 在这里,我们将创建一个名称为doc_attributes.pdf的PDF文档,为此pdf文档添加各种属性,并将其保存在路径为:F:\worksp\pdfbox目录中。 将下面代码保存在名称为AddingAttributes.java的文件中。
package com.yiibai;
import java.io.IOException;
import java.util.Calendar;
import java.util.GregorianCalendar;
import org.apache.pdfbox.pdmodel.PDDocument;
import org.apache.pdfbox.pdmodel.PDDocumentInformation;
import org.apache.pdfbox.pdmodel.PDPage;
public class AddingDocumentAttributes {
public static void main(String args[]) throws IOException {
//Creating PDF document object
PDDocument document = new PDDocument();
//Creating a blank page
PDPage blankPage = new PDPage();
//Adding the blank page to the document
document.addPage( blankPage );
//Creating the PDDocumentInformation object
PDDocumentInformation pdd = document.getDocumentInformation();
//Setting the author of the document
pdd.setAuthor("Yiibai.com");
// Setting the title of the document
pdd.setTitle("一个简单的文档标题");
//Setting the creator of the document
pdd.setCreator("PDF Examples");
//Setting the subject of the document
pdd.setSubject("文档标题");
//Setting the created date of the document
Calendar date = new GregorianCalendar();
date.set(2017, 11, 5);
pdd.setCreationDate(date);
//Setting the modified date of the document
date.set(2018, 10, 5);
pdd.setModificationDate(date);
//Setting keywords for the document
pdd.setKeywords("pdfbox, first example, my pdf");
//Saving the document
document.save("F:/worksp/pdfbox/doc_attributes.pdf");
System.out.println("Properties added successfully ");
//Closing the document
document.close();
}
}
执行时,上述程序将所有指定的属性添加到显示以下消息的文档中。
Properties added successfully
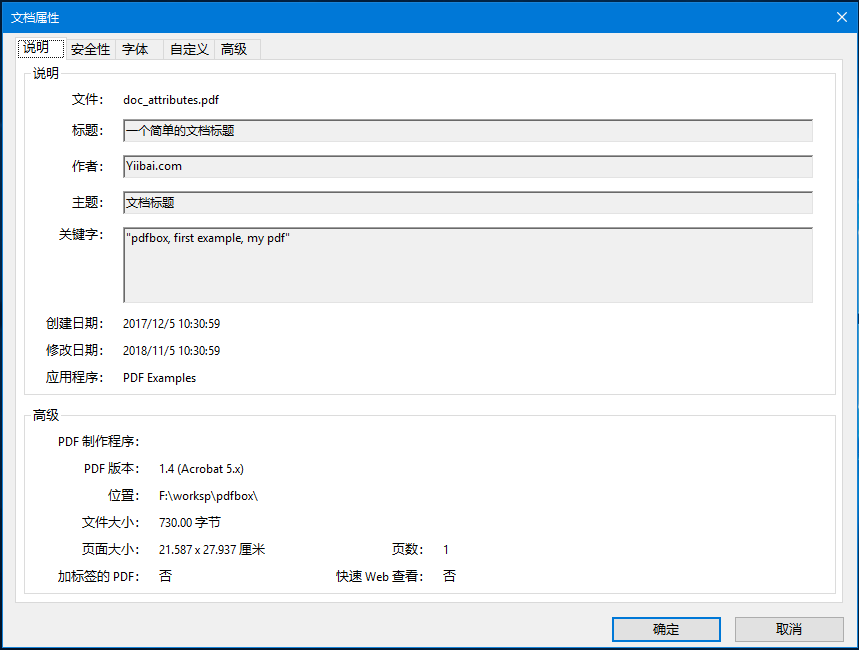
现在,访问给定的路径找到创建的PDF。 右键单击文档并选择文档属性选项。打开文档属性窗口,在这里可以观察到文档的所有属性都被设置为指定的值。如下所示。
检索文档属性
使用PDDocumentInformation类提供的getter方法来检索文档的属性。
以下是PDDocumentInformation类的getter方法。
编号 | 方法 | 描述 |
1 | getAuthor() | 此方法用于检索名为Author的PDF文档的属性值。 |
2 | getTitle() | 此方法用于检索名为Title的PDF文档的属性值。 |
3 | getCreator() | 此方法用于检索名为Creator的PDF文档的属性值。 |
4 | getSubject() | 此方法用于检索名为Subject的PDF文档的属性的值。 |
5 | getCreationDate() | 此方法用于检索名为CreationDate的PDF文档的属性值。 |
6 | getModificationDate() | 此方法用于检索名为ModificationDate的PDF文档的属性的值。 |
7 | getKeywords() | 此方法用于检索名为Keywords的PDF文档的属性值。 |
示例
本示例演示如何检索现有PDF文档的属性。 在这里,将创建一个Java程序并加载保存在路径F:\worksp\pdfbox中的名称为doc_attributes.pdf的PDF文档,并检索其属性。 将此代码保存在名称为RetrivingDocumentAttributes.java的文件中。
package com.yiibai;
import java.io.File;
import java.io.IOException;
import org.apache.pdfbox.pdmodel.PDDocument;
import org.apache.pdfbox.pdmodel.PDDocumentInformation;
public class RetrivingDocumentAttributes {
public static void main(String args[]) throws IOException {
//Loading an existing document
File file = new File("F:/worksp/pdfbox/doc_attributes.pdf");
PDDocument document = PDDocument.load(file);
//Getting the PDDocumentInformation object
PDDocumentInformation pdd = document.getDocumentInformation();
//Retrieving the info of a PDF document
System.out.println("Author of the document is :"+ pdd.getAuthor());
System.out.println("Title of the document is :"+ pdd.getTitle());
System.out.println("Subject of the document is :"+ pdd.getSubject());
System.out.println("Creator of the document is :"+ pdd.getCreator());
System.out.println("Creation date of the document is :"+ pdd.getCreationDate());
System.out.println("Modification date of the document is :"+
pdd.getModificationDate());
System.out.println("Keywords of the document are :"+ pdd.getKeywords());
//Closing the document
document.close();
}
}
执行后,上述程序将检索文档的所有属性并显示它们,如下所示。
Author of the document is :Yiibai.com
Title of the document is :一个简单的文档标题
Subject of the document is :文档标题
Creator of the document is :PDF Examples
Creation date of the document is :java.util.GregorianCalendar[time=1512441059000,areFieldsSet=true,areAllFieldsSet=true,lenient=false,zone=java.util.SimpleTimeZone[id=GMT+08:00,offset=28800000,dstSavings=3600000,useDaylight=false,startYear=0,startMode=0,startMonth=0,startDay=0,startDayOfWeek=0,startTime=0,startTimeMode=0,endMode=0,endMonth=0,endDay=0,endDayOfWeek=0,endTime=0,endTimeMode=0],firstDayOfWeek=1,minimalDaysInFirstWeek=1,ERA=1,YEAR=2017,MONTH=11,WEEK_OF_YEAR=49,WEEK_OF_MONTH=2,DAY_OF_MONTH=5,DAY_OF_YEAR=339,DAY_OF_WEEK=3,DAY_OF_WEEK_IN_MONTH=1,AM_PM=0,HOUR=10,HOUR_OF_DAY=10,MINUTE=30,SECOND=59,MILLISECOND=0,ZONE_OFFSET=28800000,DST_OFFSET=0]
Modification date of the document is :java.util.GregorianCalendar[time=1541385059000,areFieldsSet=true,areAllFieldsSet=true,lenient=false,zone=java.util.SimpleTimeZone[id=GMT+08:00,offset=28800000,dstSavings=3600000,useDaylight=false,startYear=0,startMode=0,startMonth=0,startDay=0,startDayOfWeek=0,startTime=0,startTimeMode=0,endMode=0,endMonth=0,endDay=0,endDayOfWeek=0,endTime=0,endTimeMode=0],firstDayOfWeek=1,minimalDaysInFirstWeek=1,ERA=1,YEAR=2018,MONTH=10,WEEK_OF_YEAR=45,WEEK_OF_MONTH=2,DAY_OF_MONTH=5,DAY_OF_YEAR=309,DAY_OF_WEEK=2,DAY_OF_WEEK_IN_MONTH=1,AM_PM=0,HOUR=10,HOUR_OF_DAY=10,MINUTE=30,SECOND=59,MILLISECOND=0,ZONE_OFFSET=28800000,DST_OFFSET=0]
Keywords of the document are :pdfbox, first example, my pdf
易百教程移动端:请扫描本页面底部(右侧)二维码并关注微信公众号,回复:"教程" 选择相关教程阅读或直接访问:http://m.yiibai.com 。
PDFBox添加文档 - PDFBox教程™
在前一章中,我们讨论了如何将页面添加到PDF文档。 在本章中,我们将讨论如何将文本添加到现有的PDF文档。
将文本添加到现有的PDF文档
可以使用PDFBox库将内容添加到文档,它提供一个名称为PDPageContentStream的类,其中包含在PDFDocument的页面中插入文本,图像和其他类型内容所需的方法。
以下是创建空白文档并将内容添加到其中的页面的步骤。
第1步:加载现有文档
使用PDDocument类的load()方法加载现有文档。 因此,请实例化此类并加载所需的文档,如下所示。
File file = new File("Path_of_the_document");
PDDocument doc = document.load(file);
第2步:获取所需的页面
使用getPage()方法获取文档中的所需页面。 通过将索引传递给此方法来检索所需页面的对象,如下所示。
PDPage page = doc.getPage(1);
第3步:准备内容流
使用PDPageContentStream类的对象插入各种数据元素。 因此,需要将文档对象和页面对象传递给此类的构造函数,通过传递在前面的步骤中创建的这两个对象来实例化此类,如下所示。
PDPageContentStream contentStream = new PDPageContentStream(doc, page);
第4步:开始文本
在PDF文档中插入文本时,可以使用PDPageContentStream类的beginText()和endText()方法指定文本的开始点和结束点,如下所示。
contentStream.beginText();
// 其它代码 .....
code to add text content
// 其它代码 .....
contentStream.endText();
因此,使用beginText()方法开始文本,如下所示。
contentStream.beginText();
第5步:设置文本的位置
使用newLineAtOffset()方法,可以在页面中设置内容流的位置。
//Setting the position for the line
contentStream.newLineAtOffset(25, 700);
第6步:设置字体
可以使用PDPageContentStream类的setFont()方法将文本的字体设置为所需的样式,如下所示。 要使用此方法,需要传递字体的类型和大小。
contentStream.setFont( font_type, font_size );
第7步:插入文本
使用PDPageContentStream类的ShowText()方法将文本插入到页面中,如下所示。 该方法以字符串的形式接受所需的文本。
contentStream.showText(text);
第8步:结束文本
插入文本后,需要使用PDPageContentStream类的endText()方法结束文本,如下所示。
contentStream.endText();
第9步:关闭PDPageContentStream
使用PDPageContentStream类的close()方法关闭对象,如下所示。
contentstream.close();
第10步:保存文档
添加所需内容后,使用PDDocument类的save()方法保存PDF文档,如以下代码块中所示。
doc.save("Path");
步骤11:关闭文件
最后,使用PDDocument类的close()方法关闭文档,如下所示。
doc.close();
示例
本示例演示如何将内容添加到文档中的页面。 在这里将创建一个Java程序来加载保存在F:\worksp\pdfbox目录中的my_doc.pdf的PDF文档,并为其添加一些文本。 将此代码保存在AddingContent.java 的文件中。
package com.yiibai;
import java.io.File;
import java.io.IOException;
import org.apache.pdfbox.pdmodel.PDDocument;
import org.apache.pdfbox.pdmodel.PDPage;
import org.apache.pdfbox.pdmodel.PDPageContentStream;
import org.apache.pdfbox.pdmodel.font.PDType1Font;
public class AddingContent {
public static void main (String args[]) throws IOException {
//Loading an existing document
File file = new File("F:\\worksp\\pdfbox\\my_doc.pdf");
PDDocument document = PDDocument.load(file);
//Retrieving the pages of the document
PDPage page = document.getPage(0);
PDPageContentStream contentStream = new PDPageContentStream(document, page);
//Begin the Content stream
contentStream.beginText();
// contentStream.set
//Setting the font to the Content stream
contentStream.setFont(PDType1Font.HELVETICA_BOLD, 14);
//Setting the position for the line
contentStream.newLineAtOffset(25, 500);
String text = "This is the sample document and we are adding content to it. - By yiibai.com";
//Adding text in the form of string
contentStream.showText(text);
//Ending the content stream
contentStream.endText();
System.out.println("Content added");
//Closing the content stream
contentStream.close();
//Saving the document
document.save(new File("F:\\worksp\\pdfbox\\new-doc-text.pdf"));
//Closing the document
document.close();
}
}
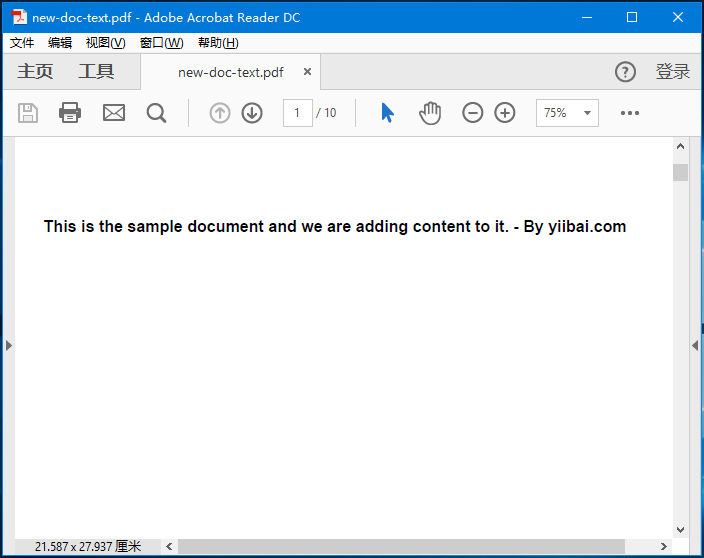
执行上面示例代码后,在指定路径中找到并打开PDF文档:new-doc-text.pdf,则可以观察到给定内容已添加到文档中,如下所示。
易百教程移动端:请扫描本页面底部(右侧)二维码并关注微信公众号,回复:"教程" 选择相关教程阅读或直接访问:http://m.yiibai.com 。
PDFBox添加多行文档 - PDFBox教程™
在前一章中提供的示例中,学习了如何在PDF中向页面添加文本,但通过此程序,只能添加适合单行的文本。 如果您尝试添加更多内容,则不会显示超出行间距的所有文字。
例如,如果传递以下字符串在上一章中执行上述程序,则只会显示其中的一部分。
String text = "This is an example of adding text to a page in the pdf document. we can
add as many lines as we want like this using the showText() method of the
ContentStream class";
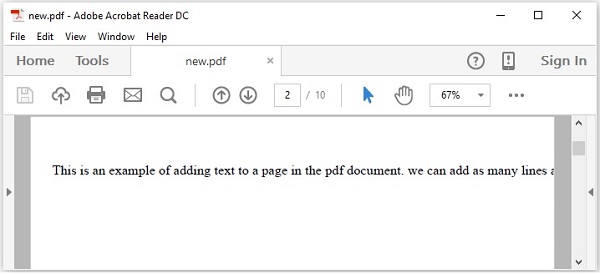
用上面提到的字符串替换上一章中例子的字符串文本并执行它。 执行后,将得到类似以下输出。
如果仔细观察输出,可以看到只显示了一部分字符串。
要将多行添加到PDF,需要使用setLeading()方法设置前导,并在每行完成后使用newline()方法切换到新行。
以下是创建空白文档并将多行文本内容添加到页面的步骤。
第1步:加载现有文档
使用PDDocument类的load()方法加载现有文档。 因此,请实例化此类并加载所需的文档,如下所示。
File file = new File("Path of the document");
PDDocument doc = PDDocument.load(file);
第2步:获取所需的页面
使用getPage()方法获取文档中的所需页面。 通过将索引传递给此方法来检索所需页面的对象,如下所示。
PDPage page = doc.getPage(1);
第3步:准备内容流
使用PDPageContentStream类的对象来插入各种数据元素。 因此,需要将文档对象和页面对象传递给此类的构造函数,通过传递在前面的步骤中创建的这两个对象来实例化此类,如下所示。
PDPageContentStream contentStream = new PDPageContentStream(doc, page);
第4步:开始文本
在PDF文档中插入文本时,可以使用PDPageContentStream类的beginText()和endText()方法指定文本的开始点和结束点,如下所示。
contentStream.beginText();
......
code to add text content
......
contentStream.endText();
因此,使用beginText()方法开始文本,如下所示。
contentStream.beginText();
第5步:设置文本的位置
使用newLineAtOffset()方法,可以在页面中设置内容流的位置。
//Setting the position for the line
contentStream.newLineAtOffset(25, 700);
第6步:设置字体
使用PDPageContentStream类的setFont()方法将文本的字体设置为所需的样式,如下所示,需要传递该字体的类型和大小。
contentStream.setFont( font_type, font_size );
第7步:设置文本引导
可以使用setLeading()方法设置文本引导,如下所示。
contentStream.setLeading(14.5f);
第8步:使用newline()插入多个字符串
使用PDPageContentStream类的ShowText()方法插入多个字符串,方法是使用newline()方法将每个字符串分开,如下所示。
contentStream. ShowText(text1);
contentStream.newLine();
contentStream. ShowText(text2);
第9步:结束文本
插入文本后,需要使用PDPageContentStream类的endText()方法结束文本,如下所示。
contentStream.endText();
第10步:关闭PDPageContentStream
使用close()方法关闭PDPageContentStream对象,如下所示。
contentstream.close();
第11步:保存文档
添加所需内容后,使用PDDocument类的save()方法保存PDF文档,如以下代码块中所示。
doc.save("Path");
第12步:关闭文件
最后,使用PDDocument类的close()方法关闭文档,如下所示。
doc.close();
示例
本示例演示如何使用PDFBox在PDF中添加多行。 此程序保存在名称为AddMultipleLines.java的文件中。
package com.yiibai;
import java.io.File;
import java.io.IOException;
import org.apache.pdfbox.pdmodel.PDDocument;
import org.apache.pdfbox.pdmodel.PDPage;
import org.apache.pdfbox.pdmodel.PDPageContentStream;
import org.apache.pdfbox.pdmodel.font.PDFont;
import org.apache.pdfbox.pdmodel.font.PDType0Font;
import org.apache.pdfbox.pdmodel.font.PDType1Font;
public class AddMultipleLines {
public static void main(String args[]) throws IOException {
//Loading an existing document
File file = new File("F:/worksp/pdfbox/my_doc.pdf");
PDDocument doc = PDDocument.load(file);
//Creating a PDF Document
PDPage page = doc.getPage(1);
PDFont font = PDType0Font.load(doc, new File("c:/windows/fonts/times.ttf"));
PDPageContentStream contentStream = new PDPageContentStream(doc, page);
//Begin the Content stream
contentStream.beginText();
//Setting the font to the Content stream
contentStream.setFont( PDType1Font.TIMES_ROMAN, 16 );
System.out.println(" getName => "+font.getName());
// contentStream.setFont( font, 16 );
//Setting the leading
contentStream.setLeading(14.5f);
//Setting the position for the line
contentStream.newLineAtOffset(25, 725);
String text1 = "This is an example of adding text to a page in the pdf document. we can add as many lines";
String text2 = "as we want like this using the ShowText() method of the ContentStream class";
//Adding text in the form of string
contentStream.showText(text1);
contentStream.newLine();
contentStream.newLine();
contentStream.showText(text2);
contentStream.newLine();
//Ending the content stream
contentStream.endText();
System.out.println("Content added");
//Closing the content stream
contentStream.close();
//Saving the document
doc.save(new File("F:/worksp/pdfbox/new-mul-doc.pdf"));
//Closing the document
doc.close();
}
}
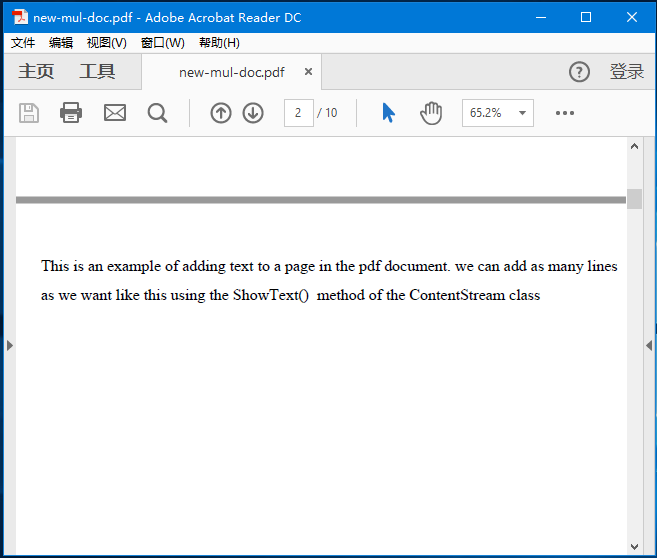
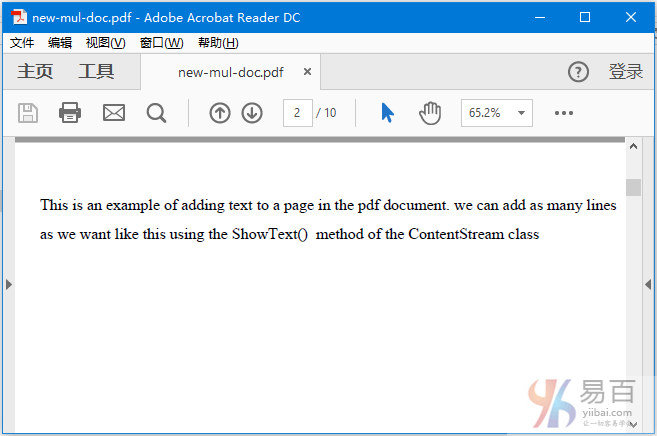
执行上面示例代码后,在指定路径中打开PDF文档:new-mul-doc.pdf,则可以观察到给定内容以多行添加到文档中,如下所示。
易百教程移动端:请扫描本页面底部(右侧)二维码并关注微信公众号,回复:"教程" 选择相关教程阅读或直接访问:http://m.yiibai.com 。
PDFBox读取文档 - PDFBox教程™
在前一章中,我们已经学习了如何将文本添加到现有的PDF文档。 在本章中,我们将学习如何从现有PDF文档中读取文本。
从现有的PDF文档中提取文本
提取文本是PDFBox的主要功能之一。 可以使用PDFTextStripper类的getText()方法提取文本。 这个类从给定的PDF文档中提取所有文本。
以下是从现有PDF文档中提取文本的步骤。
第1步:加载现有的PDF文档
使用PDDocument类的静态方法load()加载现有的PDF文档。 此方法接受一个文件对象作为参数,因为这是一个静态方法,可以使用类名称调用它,如下所示。
File file = new File("path_of_the_document");
PDDocument document = PDDocument.load(file);
第2步:实例化PDFTextStripper类
PDFTextStripper类提供了从PDF文档中检索文本的方法,因此,请按如下所示实例化此类。
PDFTextStripper pdfStripper = new PDFTextStripper();
第3步:检索文本
使用PDFTextStripper类的getText()方法从PDF文档读取/检索页面的内容。 对于此方法,需要将文档对象作为参数传递。 此方法检索给定文档中的文本并以String对象的形式返回。
String text = pdfStripper.getText(document);
第4步:关闭文档
最后,使用PDDocument类的close()方法关闭文档,如下所示。
document.close();
示例
假设有一个PDF文档(new-mul-doc.pdf),其中包含一些文本,如下所示。
此示例演示如何从上述PDF文档中读取文本。 在这里,将创建一个Java程序并加载一个PDF文档:new-mul-doc.pdf,该文档保存在目录:F:\worksp\pdfbox 中。 将此代码保存在名称为ReadingText.java的文件中。
package com.yiibai;
import java.io.File;
import java.io.IOException;
import org.apache.pdfbox.pdmodel.PDDocument;
import org.apache.pdfbox.text.PDFTextStripper;
public class ReadingText {
public static void main(String args[]) throws IOException {
//Loading an existing document
File file = new File("F:\\worksp\\pdfbox\\new-mul-doc.pdf");
PDDocument document = PDDocument.load(file);
//Instantiate PDFTextStripper class
PDFTextStripper pdfStripper = new PDFTextStripper();
//Retrieving text from PDF document
String text = pdfStripper.getText(document);
System.out.println(text);
//Closing the document
document.close();
}
}
执行上面示例代码,得到以下结果 -
This is an example of adding text to a page in the pdf document. we can add as many lines
as we want like this using the ShowText() method of the ContentStream class
易百教程移动端:请扫描本页面底部(右侧)二维码并关注微信公众号,回复:"教程" 选择相关教程阅读或直接访问:http://m.yiibai.com 。
PDFBox插入图像 - PDFBox教程™
在前一章中,我们已经学习如何从现有的PDF文档中提取文本。 在本章中,将讨论如何将图像插入PDF文档。
将图像插入PDF文档
分别使用PDImageXObject类的createFromFile()以及PDPageContentStream类的drawImage()方法将图像插入到PDF文档中。
以下是从现有PDF文档中提取文本的步骤。
第1步:加载现有的PDF文档
使用PDDocument类的静态方法load()加载现有的PDF文档。 此方法接受一个文件对象作为参数,因为这是一个静态方法,可以使用类名称调用它,如下所示。
File file = new File("path of the document")
PDDocument doc = PDDocument.load(file);
第2步:检索页面
在PDF文档中选择一个页面,并使用getPage()方法检索其PDPage对象,如下所示。
PDPage page = doc.getPage(0);
第3步:创建PDImageXObject对象
PDFBox库中的类PDImageXObject表示图像。 它提供了执行与图像相关的操作所需的所有方法,例如插入图像,设置图像高度,设置图像宽度等。
可以使用createFromFile()方法创建这个类的一个对象。 对于这种方法,需要传递想要以字符串形式添加的图像路径以及需要添加图像的文档对象。
PDImageXObject pdImage = PDImageXObject.createFromFile("C:/logo.png", doc);
第4步:准备内容流
可以使用名称为PDPageContentStream的类的对象来插入各种数据元素。 因此,需要将文档对象和页面对象传递给此类的构造函数,通过传递在前面的步骤中创建的这两个对象来实例化此类,如下所示。
PDPageContentStream contentStream = new PDPageContentStream(doc, page);
第5步:在PDF文档中绘制图像
使用drawImage()方法在PDF文档中插入图像。 对于这种方法,需要添加上述步骤中创建的图像对象和图像所需的尺寸(宽度和高度),如下所示。
contentstream.drawImage(pdImage, 70, 250);
第6步:关闭PDPageContentStream
使用close()方法关闭PDPageContentStream对象,如下所示。
contentstream.close();
第7步:保存文档
添加所需内容后,使用PDDocument类的save()方法保存PDF文档,如以下代码块中所示。
doc.save("Path");
第8步:关闭文件
最后,使用PDDocument类的close()方法关闭文档,如下所示。
doc.close();
示例
假设有一个名称为sample.pdf的PDF文档,存放的目录是:F:\worksp\pdfbox ,其空页如下所示。
本示例演示如何将图像添加到上述PDF文档的空白页面。 在这里,将加载PDF文档 - sample.pdf, 并添加图像。 将此代码保存在名称为InsertingImage.java的文件中。
package com.yiibai;
import java.io.File;
import org.apache.pdfbox.pdmodel.PDDocument;
import org.apache.pdfbox.pdmodel.PDPage;
import org.apache.pdfbox.pdmodel.PDPageContentStream;
import org.apache.pdfbox.pdmodel.graphics.image.PDImageXObject;
public class InsertingImage {
public static void main(String args[]) throws Exception {
//Loading an existing document
File file = new File("F:/worksp/pdfbox/sample.pdf");
PDDocument doc = PDDocument.load(file);
//Retrieving the page
PDPage page = doc.getPage(0);
//Creating PDImageXObject object
PDImageXObject pdImage = PDImageXObject.createFromFile("F:/worksp/pdfbox/logo.png",doc);
//creating the PDPageContentStream object
PDPageContentStream contents = new PDPageContentStream(doc, page);
//Drawing the image in the PDF document
contents.drawImage(pdImage, 70, 250);
System.out.println("Image inserted");
//Closing the PDPageContentStream object
contents.close();
//Saving the document
doc.save("F:/worksp/pdfbox/sample-image.pdf");
//Closing the document
doc.close();
}
}
执行上面示例代码,得到以下结果 -
Image inserted
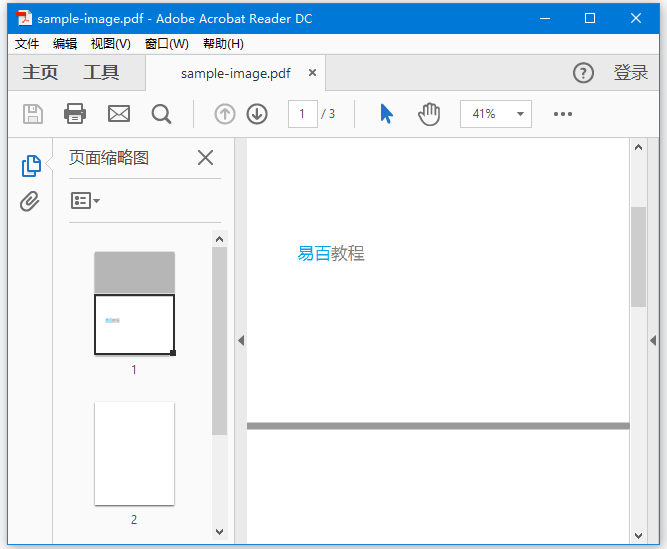
如果打开文档:sample-image.pdf,可以观察到插入了一张图像,如下所示。
易百教程移动端:请扫描本页面底部(右侧)二维码并关注微信公众号,回复:"教程" 选择相关教程阅读或直接访问:http://m.yiibai.com 。
PDFBox加密PDF文档 - PDFBox教程™
在前一章中,我们已经看到了如何在PDF文档中插入图像。 在本章中,我们将学习如何加密PDF文档。
加密PDF文档
使用StandardProtectionPolicy和AccessPermission类提供的方法加密PDF文档。
AccessPermission类用于通过为其分配访问权限来保护PDF文档。 使用此教程,您可以限制用户执行以下操作。
- 打印文档
- 修改文档的内容
- 复制或提取文档的内容
- 添加或修改注释
- 填写交互式表单域
- 提取文字和图形以便视障人士使用
- 汇编文件
- 打印质量下降
StandardProtectionPolicy类用于向文档添加基于密码的保护。
以下是对现有PDF文档进行加密的步骤。
第1步:加载现有的PDF文档
使用PDDocument类的静态方法load()加载现有的PDF文档。 此方法接受一个文件对象作为参数,因为这是一个静态方法,可以使用类名称调用它,如下所示。
File file = new File("path of the document")
PDDocument document = PDDocument.load(file);
第2步:创建访问权限对象
实例化AccessPermission类,如下所示。
AccessPermission accessPermission = new AccessPermission();
第3步:创建StandardProtectionPolicy对象
通过传递所有者密码,用户密码和AccessPermission对象来实例化StandardProtectionPolicy类,如下所示。
StandardProtectionPolicy spp = new StandardProtectionPolicy("1234","1234",accessPermission);
第4步:设置加密密钥的长度
使用setEncryptionKeyLength()方法设置加密密钥长度,如下所示。
spp.setEncryptionKeyLength(128);
第5步:设置权限
使用StandardProtectionPolicy类的setPermissions()方法设置权限。 该方法接受一个AccessPermission对象作为参数。
spp.setPermissions(accessPermission);
第6步:保护文档
可以使用PDDocument类的protect()方法保护文档,如下所示。 将StandardProtectionPolicy对象作为参数传递给此方法。
document.protect(spp);
第7步:保存文档
在添加所需内容后,使用PDDocument类的save()方法保存PDF文档,如以下代码块所示。
document.save("Path");
第8步:关闭文件
最后,使用PDDocument类的close()方法关闭文档,如下所示。
document.close();
示例
假设有一个PDF文档:sample.pdf,所在目录为:F:\worksp\pdfbox,其空页如下所示。
这个例子演示了如何加密上面提到的PDF文档。 在这里,将加载名称为sample.pdf 的PDF文档并对其进行加密。 将此代码保存在EncriptingPDF.java文件中。
package com.yiibai;
import java.io.File;
import org.apache.pdfbox.pdmodel.PDDocument;
import org.apache.pdfbox.pdmodel.encryption.AccessPermission;
import org.apache.pdfbox.pdmodel.encryption.StandardProtectionPolicy;
public class EncriptingPDF {
public static void main(String args[]) throws Exception {
//Loading an existing document
File file = new File("F:/worksp/pdfbox/sample.pdf");
PDDocument document = PDDocument.load(file);
//Creating access permission object
AccessPermission ap = new AccessPermission();
//Creating StandardProtectionPolicy object
StandardProtectionPolicy spp = new StandardProtectionPolicy("123456", "123456", ap);
//Setting the length of the encryption key
spp.setEncryptionKeyLength(128);
//Setting the access permissions
spp.setPermissions(ap);
//Protecting the document
document.protect(spp);
System.out.println("Document encrypted");
//Saving the document
document.save("F:/worksp/pdfbox/sample-encript.pdf");
//Closing the document
document.close();
}
}
执行时,上述程序会加密显示以下消息的给定PDF文档。
Document encrypted
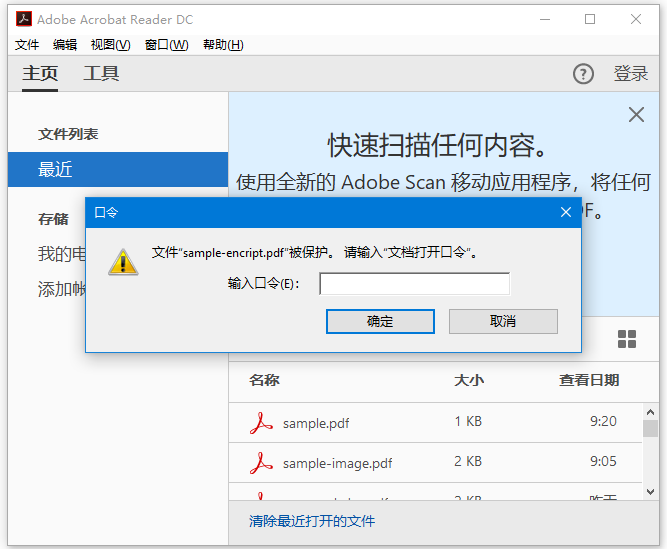
如果尝试打开文档sample-encript.pdf,则它会提示输入密码以打开文档,因为它是加密的,如下所示。
在输入密码后,文档应该可以正确打开。
易百教程移动端:请扫描本页面底部(右侧)二维码并关注微信公众号,回复:"教程" 选择相关教程阅读或直接访问:http://m.yiibai.com 。
PDFBox PDF文档中的JavaScript - PDFBox教程™
在前一章中,我们学习了如何将图像插入到PDF文档中。 在本章中,将学习如何将JavaScript添加到PDF文档。
将JavaScript添加到PDF文档
可以使用PDActionJavaScript类将JavaScript操作添加到PDF文档。 它代表了JavaScript操作。
以下是将JavaScript操作添加到现有PDF文档的步骤。
第1步:加载现有的PDF文档
使用PDDocument类的load()静态方法加载现有的PDF文档。 此方法接受一个文件对象作为参数,因为这是一个静态方法,可以使用类名称调用它,如下所示。
File file = new File("path of the document")
PDDocument document = PDDocument.load(file);
第2步:创建PDActionJavaScript对象
实例化PDActionJavaScript对象,如下所示。 在这个类的构造函数中,以String的形式传递所需的JavaScript,如下所示。
String javaScript = "app.alert( {cMsg: 'this is an example', nIcon: 3,"
+ " nType: 0,cTitle: 'PDFBox Javascript example' } );";
PDActionJavaScript PDAjavascript = new PDActionJavaScript(javaScript);
第3步:在文档中嵌入Javascript
如下所示将必需的字符串嵌入到PDF文档中。
document.getDocumentCatalog().setOpenAction(PDAjavascript);
第4步:保存文档
在添加所需内容后,使用PDDocument类的save()方法保存PDF文档,如以下代码块所示。
document.save("Path");
第5步:关闭文档
最后,使用PDDocument类的close()方法关闭文档,如下所示。
document.close();
示例
假设有一个名称为sample.pdf的PDF文档,存储在目录:F:\worksp\pdfbox,其空页如下所示。
这个例子演示了如何在上面提到的PDF文档中嵌入JavaScript。 在这里,将加载sample.pdf PDF文档并在其中嵌入JavaScript。 将此代码保存在名称为AddJavaScript.java的文件中。
package com.yiibai;
import java.io.File;
import org.apache.pdfbox.pdmodel.PDDocument;
import org.apache.pdfbox.pdmodel.interactive.action.PDActionJavaScript;
public class AddJavaScript {
public static void main(String args[]) throws Exception {
//Loading an existing file
File file = new File("F:/worksp/pdfbox/sample.pdf");
PDDocument document = PDDocument.load(file);
String javaScript = "app.alert( {cMsg: 'this is an example', nIcon: 3,"
+ " nType: 0, cTitle: 'PDFBox Javascript example’} );";
//Creating PDActionJavaScript object
PDActionJavaScript PDAjavascript = new PDActionJavaScript(javaScript);
//Embedding java script
document.getDocumentCatalog().setOpenAction(PDAjavascript);
//Saving the document
document.save( new File("F:/worksp/pdfbox/smaple-js.pdf") );
System.out.println("Data added to the given PDF");
//Closing the document
document.close();
}
}
执行上面示例代码,得到以下结果 -
Data added to the given PDF
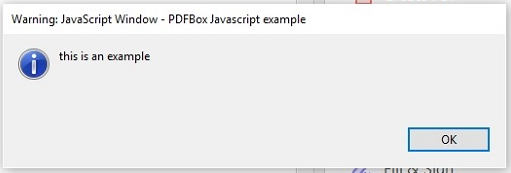
打开生成的PDF文件:smaple-js.pdf,应该会看到有以下提示信息 -
易百教程移动端:请扫描本页面底部(右侧)二维码并关注微信公众号,回复:"教程" 选择相关教程阅读或直接访问:http://m.yiibai.com 。
PDFBox分割PDF文档 - PDFBox教程™
在前一章中,我们已经看到了如何将JavaScript添加到PDF文档。 现在来学习如何将给定的PDF文档分成多个文档。
分割PDF文档中的页面
可以使用Splitter类将给定的PDF文档分割为多个PDF文档。 该类用于将给定的PDF文档分成几个其他文档。
以下是拆分现有PDF文档的步骤
第1步:加载现有的PDF文档
使用PDDocument类的静态方法load()加载现有的PDF文档。 此方法接受一个文件对象作为参数,因为这是一个静态方法,可以使用类名称调用它,如下所示。
File file = new File("path of the document")
PDDocument document = PDDocument.load(file);
第2步:实例化Splitter类
这个Splitter类包含了分割给定的PDF文档的方法,因此实例化这个类,如下所示。
Splitter splitter = new Splitter();
第3步:分割PDF文档
使用Splitter类的Split()方法来分割给定的文档。 该方法接受PDDocument类的一个对象作为参数。
List<PDDocument> Pages = splitter.split(document);
split()方法将给定文档的每个页面分割为单独的文档,并以列表的形式返回所有这些文档。
第4步:创建一个迭代器对象
要遍历文档列表,需要获取上述步骤中获取的列表的迭代器对象,使用listIterator()方法获取列表的迭代器对象,如下所示。
Iterator<PDDocument> iterator = Pages.listIterator();
第5步:关闭文档
最后,使用PDDocument类的close()方法关闭文档,如下所示。
document.close();
示例
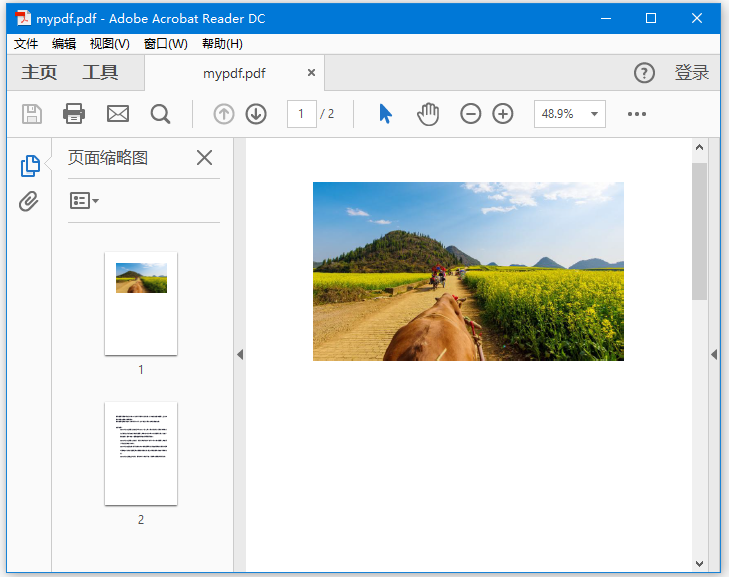
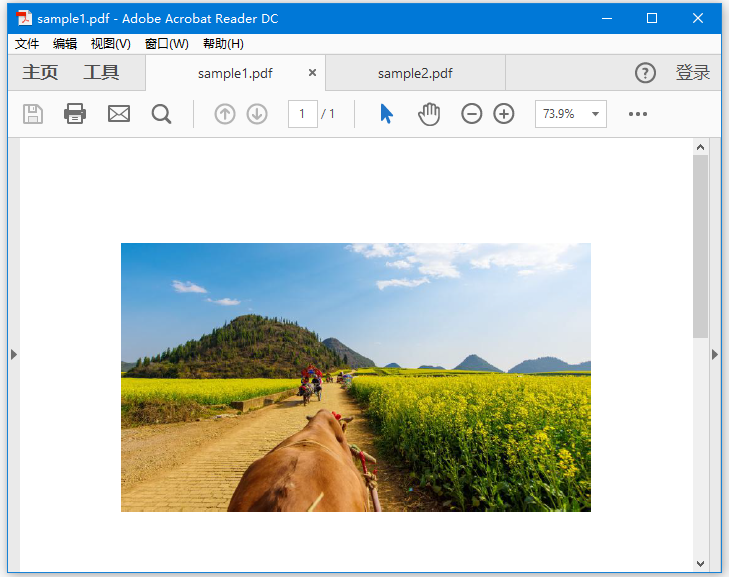
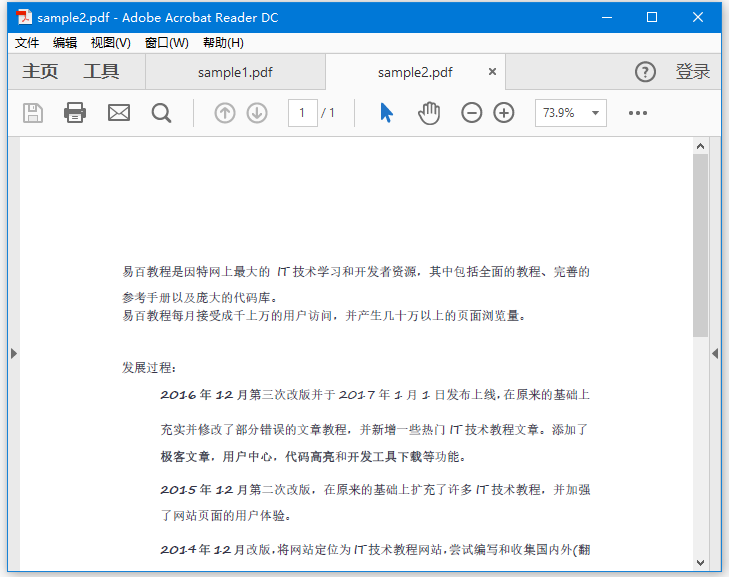
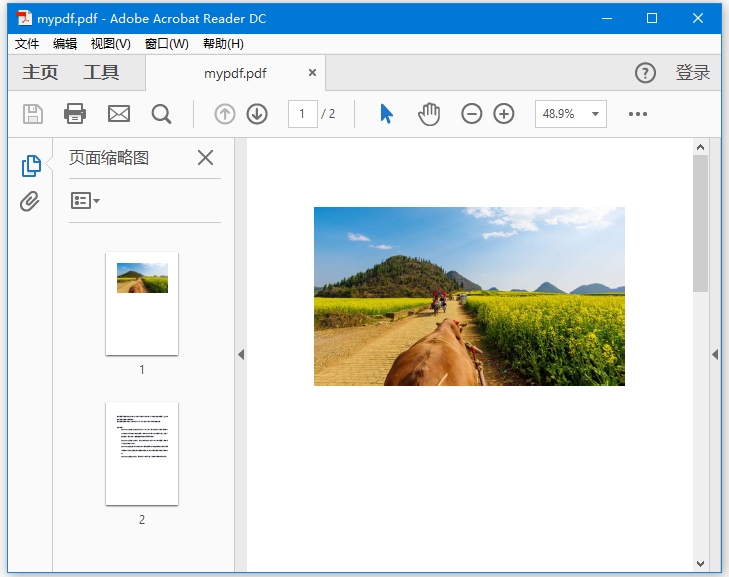
假设在目录:F:\worksp\pdfbox 中有一个名称为mypdf.pdf的PDF文档,并且该文档包含两个页面 - 一个页面包含图像,另一个页面包含文本,如下所示。
这个例子演示了如何分割上面提到的PDF文档。 在这里,将把名称为mypdf.pdf的PDF文档分成两个不同的文档:sample1.pdf和sample2.pdf。 将此代码保存在名为SplitPages.java的文件中。
package com.yiibai;
import org.apache.pdfbox.multipdf.Splitter;
import org.apache.pdfbox.pdmodel.PDDocument;
import java.io.File;
import java.io.IOException;
import java.util.List;
import java.util.Iterator;
public class SplitPages {
public static void main(String[] args) throws IOException {
//Loading an existing PDF document
File file = new File("F:/worksp/pdfbox/mypdf.pdf");
PDDocument document = PDDocument.load(file);
//Instantiating Splitter class
Splitter splitter = new Splitter();
//splitting the pages of a PDF document
List<PDDocument> Pages = splitter.split(document);
//Creating an iterator
Iterator<PDDocument> iterator = Pages.listIterator();
//Saving each page as an individual document
int i = 1;
while(iterator.hasNext()) {
PDDocument pd = iterator.next();
pd.save("F:/worksp/pdfbox/sample"+ i +".pdf");
i = i + 1;
}
System.out.println("Multiple PDF’s created");
document.close();
}
}
执行上面示例代码,得到以下结果 -
Multiple PDF’s created
生成的两个文件,打开效果如下 -
第二个PDF文件:
易百教程移动端:请扫描本页面底部(右侧)二维码并关注微信公众号,回复:"教程" 选择相关教程阅读或直接访问:http://m.yiibai.com 。
PDFBox合并多个PDF文档 - PDFBox教程™
在前一章中,我们已经看到如何将给定的PDF文档分成多个文档。 现在让我们学习如何将多个PDF文档合并为一个文档。
合并多个PDF文档
使用PDFMergerUtility类的类将多个PDF文档合并到单个PDF文档中,该类提供了将两个或多个PDF文档合并到单个PDF文档中的方法。
以下是合并多个PDF文档的步骤。
第1步:加载现有的PDF文档
使用PDDocument类的静态方法load()加载现有的PDF文档。 此方法接受一个文件对象作为参数,因为这是一个静态方法,可以使用类名称调用它,如下所示。
File file = new File("path of the document")
PDDocument document = PDDocument.load(file);
第2步:实例化PDFMergerUtility类
如下所示实例化合并实用程序类。
PDFMergerUtility PDFmerger = new PDFMergerUtility();
第3步:设置目标文件
使用setDestinationFileName()方法设置目标文件,如下所示。
PDFmerger.setDestinationFileName("D:/PdfBoxExamples/docs/merged.pdf");
第4步:设置源文件
使用addSource()方法设置源文件,如下所示。
PDFmerger.addSource(file1);
第5步:合并文档
使用PDFmerger类的mergeDocuments()方法合并文档,如下所示。
PDFmerger.mergeDocuments();
第6步:关闭文档
最后使用PDDocument类的close()方法关闭文档,如下所示。
document.close();
示例
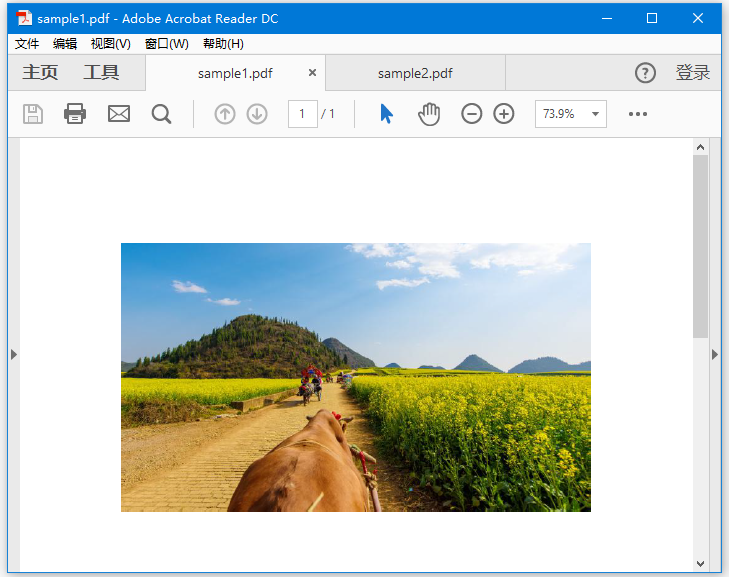
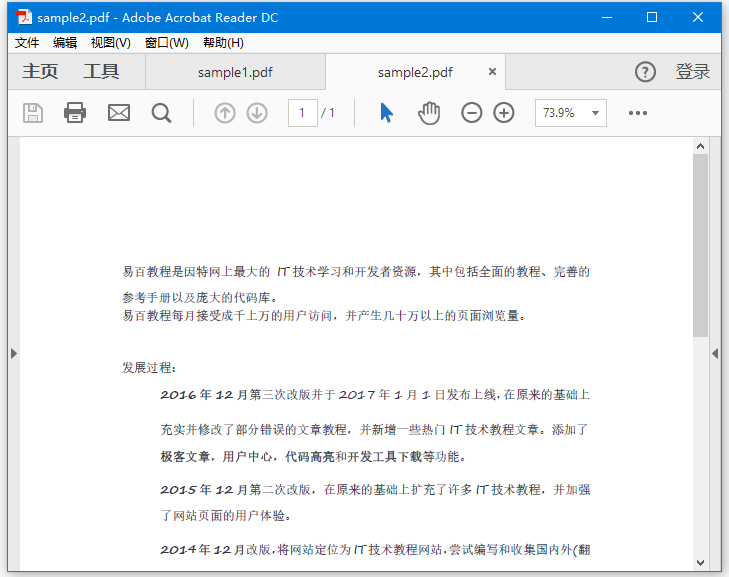
假设,在目录:F:\worksp\pdfbox中有两个PDF文档 - sample1.pdf和sample2.pdf,如下所示。
第一个PDF文件(sample1.pdf):
第二个PDF文件(sample2.pdf):
本示例演示如何合并上述PDF文档。 在这里,我们将把sample1.pdf和sample2.pdf这两个PDF文档合并到一个PDF文档 - merged.pdf中。 将此代码保存在名称为MergePDFs.java的文件中。
package com.yiibai;
import org.apache.pdfbox.multipdf.PDFMergerUtility;
import org.apache.pdfbox.pdmodel.PDDocument;
import java.io.File;
import java.io.IOException;
public class MergePDFs {
public static void main(String[] args) throws IOException {
//Loading an existing PDF document
File file1 = new File("F:/worksp/pdfbox/sample1.pdf");
PDDocument doc1 = PDDocument.load(file1);
File file2 = new File("F:/worksp/pdfbox/sample2.pdf");
PDDocument doc2 = PDDocument.load(file2);
//Instantiating PDFMergerUtility class
PDFMergerUtility PDFmerger = new PDFMergerUtility();
//Setting the destination file
PDFmerger.setDestinationFileName("F:/worksp/pdfbox/merged.pdf");
//adding the source files
PDFmerger.addSource(file1);
PDFmerger.addSource(file2);
//Merging the two documents
PDFmerger.mergeDocuments();
System.out.println("Documents merged");
//Closing the documents
doc1.close();
doc2.close();
}
}
执行时,上述程序会显示以下消息 -
Documents merged
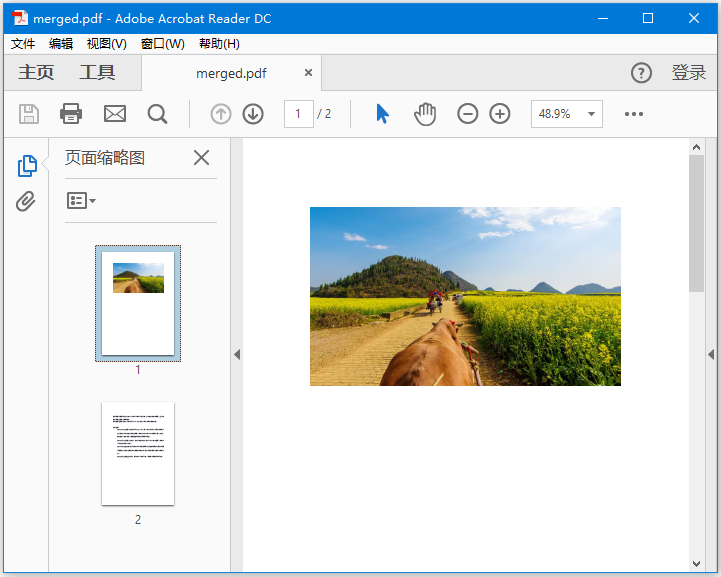
打开新合成的文档(merged.pdf),如下所示 -
易百教程移动端:请扫描本页面底部(右侧)二维码并关注微信公众号,回复:"教程" 选择相关教程阅读或直接访问:http://m.yiibai.com 。
PDFBox提取图像 - PDFBox教程™
在前一章中,我们已经看到了如何合并多个PDF文档。 在本章中,我们将了解如何从PDF文档的页面提取图像。
从PDF文档生成图像
PDFBox库提供了一个名称为PDFRenderer的类,它将PDF文档呈现为AWT BufferedImage。
以下是从PDF文档生成图像的步骤。
第1步:加载现有的PDF文档
使用PDDocument类的静态方法load()加载现有的PDF文档。 此方法接受一个文件对象作为参数,因为这是一个静态方法,可以使用类名称调用它,如下所示。
File file = new File("path of the document")
PDDocument document = PDDocument.load(file);
第2步:实例化PDFRenderer类
PDFRenderer类将PDF文档呈现到AWT BufferedImage中。 因此,需要实例化这个类,如下所示。 这个类的构造函数接受一个文档对象; 传递上一步创建的文档对象,如下所示。
PDFRenderer renderer = new PDFRenderer(document);
第3步:从PDF文档渲染图像
可以使用Renderer类的renderImage()方法在特定页面中呈现图像,以将此方法用于传递要渲染图像的页面的索引。
BufferedImage image = renderer.renderImage(0);
第4步:将图像写入文件
可以使用write()方法将上一步中呈现的图像写入文件。 对于这种方法,需要传递三个参数 -
- 渲染的图像对象。
- 代表图像类型的字符串(jpg或png)。
- 需要保存提取的图像的文件对象。
ImageIO.write(image, "JPEG", new File("D:/PdfBoxExamples/myimage.jpg"));
第5步:关闭文档
最后,使用PDDocument类的close()方法关闭文档,如下所示。
document.close();
示例
假设,在目录:F:\worksp\pdfbox中有一个PDF文档 - mypdf.pdf,并且在其第一页中包含一个图像,如下所示。
本示例演示如何将上述PDF文档转换为图像文件。 在这里,将检索PDF文档第一页中的图像并将其保存为myimage.jpg。 将此代码保存为PdfToImage.java -
package com.yiibai;
import java.awt.image.BufferedImage;
import java.io.File;
import javax.imageio.ImageIO;
import org.apache.pdfbox.pdmodel.PDDocument;
import org.apache.pdfbox.rendering.PDFRenderer;
public class PdfToImage {
public static void main(String args[]) throws Exception {
//Loading an existing PDF document
File file = new File("F:/worksp/pdfbox/mypdf.pdf");
PDDocument document = PDDocument.load(file);
//Instantiating the PDFRenderer class
PDFRenderer renderer = new PDFRenderer(document);
//Rendering an image from the PDF document
BufferedImage image = renderer.renderImage(0);
//Writing the image to a file
ImageIO.write(image, "JPEG", new File("F:/worksp/pdfbox/myimage.jpg"));
System.out.println("Image created");
//Closing the document
document.close();
}
}
执行时,上述程序将检索给定PDF文档中的图像,并显示以下消息。
Image created
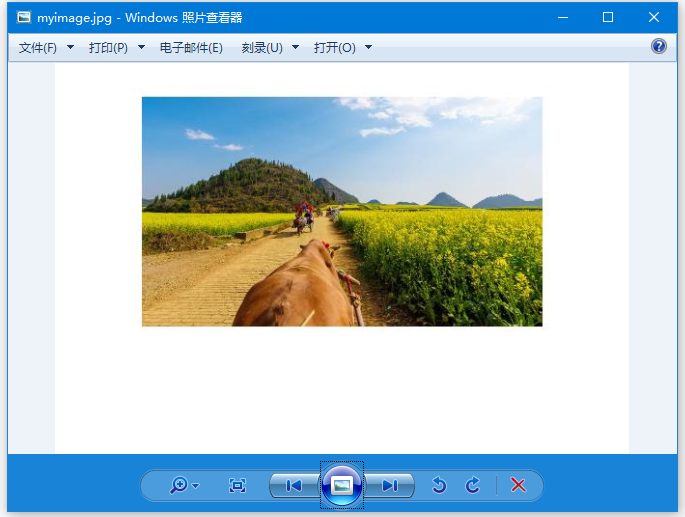
如果打开F:/worksp/pdfbox/,可以观察到图像文件:myimage.jpg,打开后如下所示。
易百教程移动端:请扫描本页面底部(右侧)二维码并关注微信公众号,回复:"教程" 选择相关教程阅读或直接访问:http://m.yiibai.com 。
PDFBox添加矩形 - PDFBox教程™
本章将演示如何在PDF文档的页面中创建颜色框。
在PDF文档中创建框
使用PDPageContentStream类的addRect()方法在PDF页面中添加矩形框。
以下是在PDF文档的页面中创建矩形形状的步骤。
File file = new File("path of the document")
PDDocument document = PDDocument.load(file);
第2步:获取页面对象
需要使用PDDocument类的getPage()方法检索要添加矩形的所需页面的PDPage对象。 对于此方法,传递要添加矩形的页面的索引。
PDPage page = document.getPage(0);
第3步:准备内容流
使用PDPageContentStream类的对象来插入各种数据元素。 因此,需要将文档对象和页面对象传递给此类的构造函数,通过传递在前面的步骤中创建的这两个对象来实例化此类,如下所示。
PDPageContentStream contentStream = new PDPageContentStream(document, page);
第4步:设置不划线颜色
使用PDPageContentStream类的setNonStrokingColor()方法将非划线颜色设置为矩形。 对于这个方法,需要将所需的颜色作为参数传递,如下所示。
contentStream.setNonStrokingColor(Color.DARK_GRAY);
第5步:绘制矩形
使用addRect()方法绘制具有所需尺寸的矩形。 对于此方法,需要传递要添加的矩形的尺寸,如下所示。
contentStream.addRect(200, 650, 100, 100);
第6步:填充矩形
PDPageContentStream类的fill()方法使用所需的颜色填充指定尺寸之间的路径,如下所示。
contentStream.fill();
第7步:关闭文档
最后使用PDDocument类的close()方法关闭文档,如下所示。
document.close();
示例
假设在目录:F:\worksp\pdfbox 中有一个名称为:blank-doc.pdf 的PDF文档,它包含一个空白页面,如下所示。
这个例子演示了如何在PDF文档中创建/插入矩形。 在这里,将在空白PDF中创建一个框。 将此代码保存为AddRectangles.java。
package com.yiibai;
import java.awt.Color;
import java.io.File;
import org.apache.pdfbox.pdmodel.PDDocument;
import org.apache.pdfbox.pdmodel.PDPage;
import org.apache.pdfbox.pdmodel.PDPageContentStream;
public class ShowColorBoxes {
public static void main(String args[]) throws Exception {
//Loading an existing document
File file = new File("F:/worksp/pdfbox/bank_doc.pdf");
PDDocument document = PDDocument.load(file);
//Retrieving a page of the PDF Document
PDPage page = document.getPage(0);
//Instantiating the PDPageContentStream class
PDPageContentStream contentStream = new PDPageContentStream(document, page);
//Setting the non stroking color
contentStream.setNonStrokingColor(Color.DARK_GRAY);
//Drawing a rectangle
contentStream.addRect(200, 650, 100, 100);
//Drawing a rectangle
contentStream.fill();
System.out.println("rectangle added");
//Closing the ContentStream object
contentStream.close();
//Saving the document
File file1 = new File("F:/worksp/pdfbox/colorbox.pdf");
document.save(file1);
//Closing the document
document.close();
}
}
执行上面示例代码,得到以下结果 -
Rectangle created
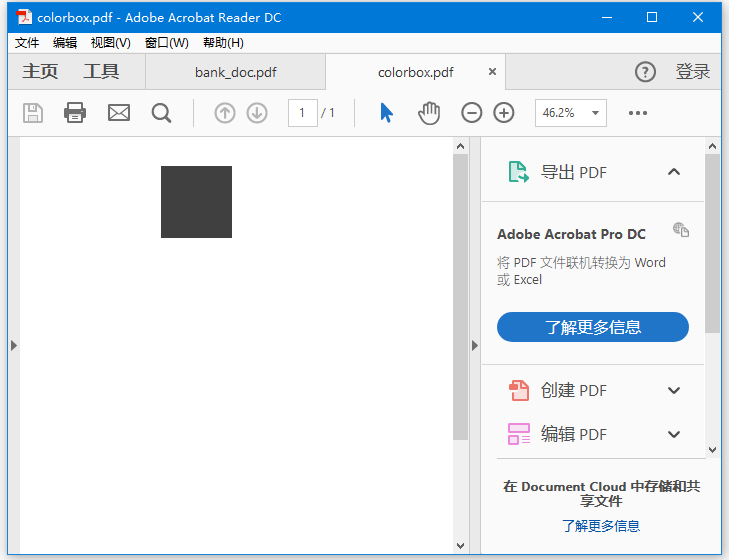
打开生成的文件:colorbox.pdf ,显示如下 -
易百教程移动端:请扫描本页面底部(右侧)二维码并关注微信公众号,回复:"教程" 选择相关教程阅读或直接访问:http://m.yiibai.com 。


