原文链接:https://www.cnblogs.com/sheng-jie/p/8249660.html#autoid-4-3-0
.NET Core容器化@Docker
.NET Core容器化之多容器应用部署@Docker-Compose
.NET Core+MySql+Nginx 容器化部署
GitHub-Demo:Docker.NetCore.MySql
1. 引言
上两节我们通过简单的demo学习了docker的基本操作。这一节我们来一个进阶学习,完成ASP.NET Core + MySql + Nginx的容器化部署。
本文是基于CentOS 7.4环境进行演示,示例项目可以访问Docker.NetCore.MySql进行下载。
2. Hello MySQL
同样我们还是以循序渐进的方式来展开。首先来基于Docker来试玩一下MySQL。
2.1. 创建MySql实例
//拉取mysql镜像
 docker pull mysql$ docker images$REPOSITORY                           TAG                 IMAGE ID            CREATED             SIZEdocker.io/mysql                      latest              7d83a47ab2d2        13 days ago         408.2 MB//创建一个mysql实例$ docker run --name hello.mysql -e MYSQL_ROOT_PASSWORD=123456 -d mysql$ docker ps
CONTAINER ID        IMAGE      COMMAND                  CREATED             STATUS              PORTS          NAMESe21bbd84e0b5        mysql      "docker-entrypoint.sh"   3 minutes ago       Up 3 minutes        3306/tcp        hello.mysql
下面我们直接在容器中连接到我们刚刚创建的mysql数据库:
$ docker exec -it hello.mysql \
> mysql -uroot -p123456
mysql: [Warning] Using a password on the command line interface can be insecure.
Welcome to the MySQL monitor.  Commands end with ; or \g.
Your MySQL connection id is 8Server version: 5.7.20 MySQL Community Server (GPL)
Copyright (c) 2000, 2017, Oracle and/or its affiliates. All rights reserved.
Oracle is a registered trademark of Oracle Corporation and/or its
affiliates. Other names may be trademarks of their respective
owners.
Type 'help;' or '\h' for help. Type '\c' to clear the current input statement.mysql> show databases;
+--------------------+
| Database           |
+--------------------+
| information_schema |
| mysql              |
| performance_schema |
| sys                |
+--------------------+4 rows in set (0.00 sec)
2.2. 挂载数据卷
上面创建的mysql实例其数据都在容器内部存储,这样就暴露了一个问题,如果容器销毁,那么对应的数据库数据就会丢失。那如何持久化存储容器内数据呢?我们可以通过挂载数据卷的方式来解决这一问题。
//创建数据卷
$ docker volume create --name hello.dbhello.db
//查看数据卷信息
$ docker volume inspect hello.db
[
    {        "Name": "hello.db",        "Driver": "local",        "Mountpoint": "/var/lib/docker/volumes/hello.db/_data",        "Labels": {},        "Scope": "local"
    }
]
// 挂载数据卷启动MySql实例
$ docker run --name hello.mysql \> -v hello.db:/var/lib/mysql \
> -e MYSQL_ROOT_PASSWORD=123456 -d mysql
上面是使用使用了docker volume create
命令创建了一个数据卷,当然我们也可以自行挂载某个目录作为数据卷。
3. 准备.NET Core+EFCore+MySql项目
为了演示方便,我准备了一个ASP.NET Core+EFCore+MySql的示例项目。其结构如下所示: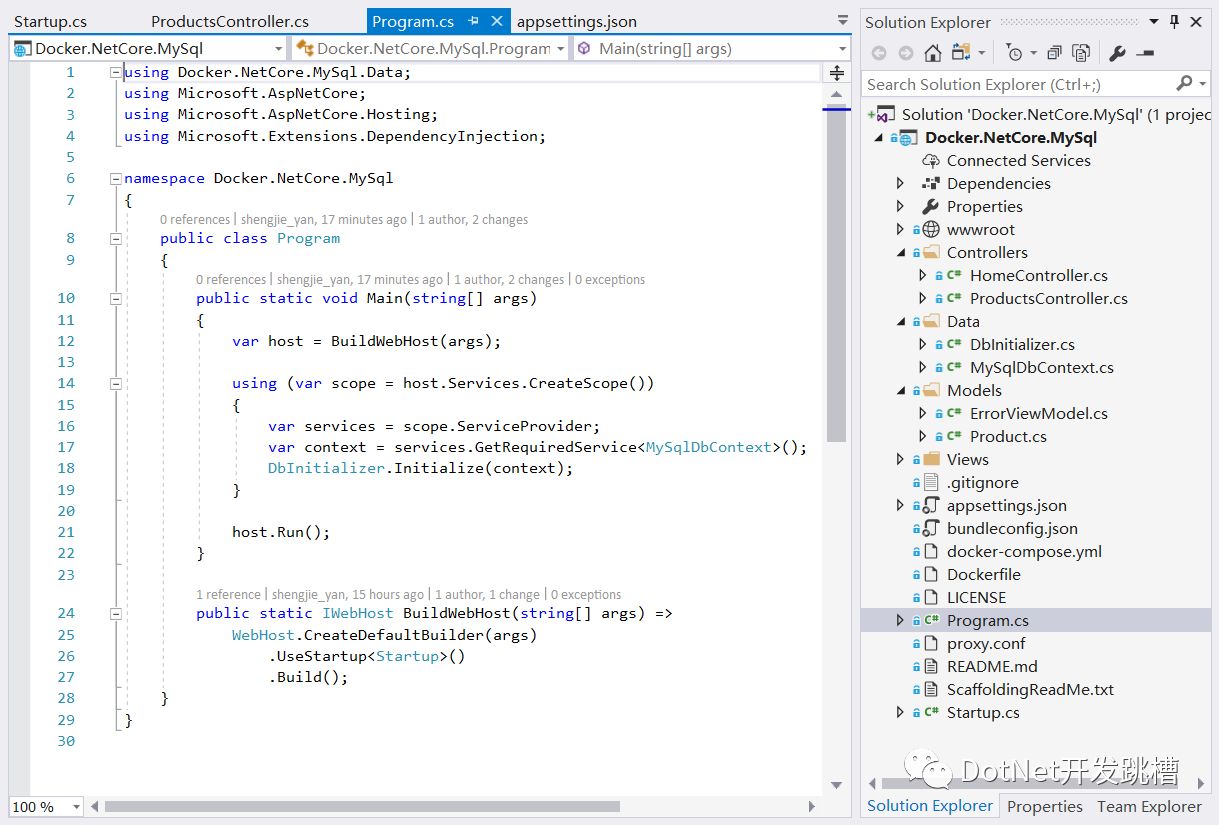
是基于.NET Core Mvc模板项目,其中定义了一个Product
实体,并通过ProductsController
暴露WebApi接口。核心代码如下:
Product实体类:
public class Product{    public int ProductId { get; set; }    public string Name { get; set; }    public decimal Price { get; set; }    public int StockQty { get; set; }
}
DbContext类:
public class MySqlDbContext : DbContext{    public MySqlDbContext (DbContextOptions<MySqlDbContext> options)
        : base(options)    {
    }    public DbSet<Product> Products { get; set; }
}
数据库初始化类:
public class DbInitializer{    public static void Initialize(MySqlDbContext context)    {
        context.Database.EnsureCreated();        if (context.Products.Any())
        {            return;
        }        var products = new Product[]
        {            new Product{Name="iphone 6",Price=5000,StockQty=10 },            new Product{Name="iphone 7",Price=6000,StockQty=10 },            new Product{Name="iphone 7 plus",Price=7000,StockQty=10 },            new Product{Name="iphone x",Price=8000,StockQty=10 }
        };
        context.Products.AddRange(products);
        context.SaveChanges();
    }
}
该数据库初始化类会在项目启动时运行。详细代码可参考Docker.NetCore.MySql。
4. 基于示例项目进行实操演练
4.1 安装Git并Clone示例项目
$ yum install git
$ git --version
git version 1.8.3.1$ cd ~/demo
$ git clone https://github.com/yanshengjie/Docker.NetCore.MySql.gitCloning into 'Docker.NetCore.MySql'...remote: Counting objects: 155, done.remote: Compressing objects: 100% (125/125), done.remote: Total 155 (delta 42), reused 123 (delta 25), pack-reused 0Receiving objects: 100% (155/155), 534.30 KiB | 333.00 KiB/s, done.
Resolving deltas: 100% (42/42), done.
4.2. 构建镜像
细心的你会发现,项目中已经定义了Dockerfile,所以我们可以直接使用docker build
构建镜像。
# cd Docker.NetCore.MySql[root@iZ288a3qazlZ Docker.NetCore.MySql]# lsappsettings.Development.json  docker-compose.yml           Program.cs             Viewsappsettings.json              Dockerfile                   proxy.conf             wwwrootbundleconfig.json             Docker.NetCore.MySql.csproj  README.mdControllers                   LICENSE                      ScaffoldingReadMe.txtData                          Models                       Startup.cs
//构建镜像# docker build -t docker.netcore.mysql .Sending build context to Docker daemon 3.045 MBStep 1 : FROM microsoft/dotnet:latest ---> 7d4dc5c258ebStep 2 : WORKDIR app ---> Using cache
 ---> 98d48a4e278cStep 3 : COPY . app ---> 6b1bf8bb5261Removing intermediate container b86460477977Step 4 : RUN dotnet restore ---> Running in 4e0a46f762bb
  Restoring packages for app/Docker.NetCore.MySql.csproj...  Installing Microsoft.CodeAnalysis.Razor 2.0.0.
  .....  Restore completed in 216.83 ms for app/Docker.NetCore.MySql.csproj. ---> 4df70c77916eRemoving intermediate container 4e0a46f762bbStep 5 : EXPOSE 5000
 ---> Running in 11b421b3bd3e
 ---> 3506253060feRemoving intermediate container 11b421b3bd3eStep 6 : ENV ASPNETCORE_URLS http://*:5000
 ---> Running in 201aabbab72c
 ---> 7f29963a8d96Removing intermediate container 201aabbab72cStep 7 : ENTRYPOINT dotnet run ---> Running in c79f73cba162
 ---> 9d1fb6ee46cbRemoving intermediate container c79f73cba162Successfully built 9d1fb6ee46cb
[root@iZ288a3qazlZ Docker.NetCore.MySql]# docker images docker.netcore.mysqlREPOSITORY             TAG                 IMAGE ID            CREATED             SIZEdocker.netcore.mysql   latest              9d1fb6ee46cb        13 seconds ago      1.756 GB
4.3. 启动镜像并连接到指定数据库
docker提供了--link
参数用于在容器之间建立连接。下面我们实例化创建的镜像docker.netcore.mysql
并命名容器名为hello.netcore.mysql
,并使用--link参数与我们文章开头建立的hello.mysql
容器建立连接。
# docker run --name hello.netcore.mysql --link hello.mysql:db -d -p 5000:5000 docker.netcore.mysql
这里需要特别注意一下
--link=hello.mysql:db
,这个参数就是告诉Docker容器需要使用hello.mysql
容器,并将其别名命名为db,这样在hello.netcore.mysql
这个容器中就可以使用db来作为提供mysql数据库服务的服务器。这也就是为什么我们.NET Core项目中连接字符串设置为server=db;
的原因。"ConnectionStrings": { "MySql": "server=db;database=MySqlDbContext;uid=root;pwd=123456;" }
//查看运行中容器列表# docker ps CONTAINER ID IMAGE COMMAND CREATED STATUS PORTS NAMES5cbfd27ebe2a docker.netcore.mysql "dotnet run" 2 minutes ago Up 2 minutes 0.0.0.0:5000->5000/tcp hello.netcore.mysql4dfa4159b669 mysql "docker-entrypoint.sh" About an hour ago Up About an hour 3306/tcp hello.mysql//访问api/products[root@iZ288a3qazlZ Docker.NetCore.MySql]# curl http://localhost:5000/api/products[{"productId":1,"name":"iphone 6","price":5000.0000000000000000000000000,"stockQty":10},{"productId":2,"name":"iphone 7","price":6000.0000000000000000000000000,"stockQty":10},{"productId":3,"name":"iphone 7 plus","price":7000.0000000000000000000000000,"stockQty":10},{"productId":4,"name":"iphone x","price":8000.000000000000000000000000,"stockQty":10}]
从上图可知,我们完成了.NET Core与MySql的连接。
5. ASP.NET Core + MySql + Nginx
结合上一篇文章.NET Core容器化之多容器应用部署@Docker-Compose,我们来使用docker-compose完成asp.net core + mysql + nginx的多容器部署。
5.1. 定义 docker-compose.yml
version: '2'services:  db:    container_name: hello.db    environment:      MYSQL_ROOT_PASSWORD: 123456  volumes:
    - ./mysql:/var/lib/mysql
  web:    container_name: hello.web    build: .    depends_on:
      - db    links:
      - db

  reverse-proxy:    container_name: hello.proxy    image: nginx    depends_on:
      - web    ports:
      - "9090:8080"    volumes:
      - ./proxy.conf:/etc/nginx/conf.d/default.conf
其中定义了三个服务:
db:使用mysql镜像,并挂载当前项目下的mysql文件夹来持久化存储。
web:基于当前项目构建的容器服务,依赖于db服务。
reverse-proxy:使用nginx定义反向代理服务,其中挂载了当前项目下的proxy.conf文件作为反向代理配置文件。其中proxy.conf的配置如下(注意proxy_pass指定的url为http://web:5000):
server {listen 8080;location  {    proxy_pass http://web:5000;
}
}
5.2. 启动Compose
在启动Compose之前,建议清空上面创建的容器。也可以使用docker rm $(docker ps -qa)
清除所有容器。
//启动compose
[root@iZ288a3qazlZ Docker.NetCore.MySql]# docker-compose up -dCreating network "dockernetcoremysql_default" with the default driverBuilding webStep 1 : FROM microsoft/dotnet:latest ---> 7d4dc5c258ebStep 2 : WORKDIR app ---> Using cache
 ---> 98d48a4e278cStep 3 : COPY . app ---> d41b32323c0fRemoving intermediate container 1259f5fb82bcStep 4 : RUN dotnet restore ---> Running in d482e355de77
  Restoring packages for /app/Docker.NetCore.MySql.csproj...  Installing Microsoft.CodeAnalysis.Razor 2.0.0.
  .....  Restore completed in 216.83 ms for /app/Docker.NetCore.MySql.csproj. ---> a0658008f161Removing intermediate container d482e355de77Step 5 : EXPOSE 5000
 ---> Running in dc6eeb29fd5e
 ---> a419314ece08Removing intermediate container dc6eeb29fd5eStep 6 : ENV ASPNETCORE_URLS http://*:5000
 ---> Running in c1d1474b14a0
 ---> 9cc13c549042Removing intermediate container c1d1474b14a0Step 7 : ENTRYPOINT dotnet run ---> Running in efdf0e857a84
 ---> 830ac11428cfRemoving intermediate container efdf0e857a84Successfully built 830ac11428cfCreating hello.db ... doneCreating hello.web ... doneCreating hello.proxy ... doneCreating hello.web ...Creating hello.proxy ...
[root@iZ288a3qazlZ Docker.NetCore.MySql]# docker psCONTAINER ID        IMAGE                    COMMAND                  CREATED             STATUS              PORTS                            NAMES6253bf85682e        nginx                    "nginx -g 'daemon off"   33 seconds ago      Up 28 seconds       80/tcp, 0.0.0.0:9090->8080/tcp   hello.proxyea553a9e22f2        dockernetcoremysql_web   "dotnet run"             37 seconds ago      Up 32 seconds       5000/tcp                         hello.weba1f5aa981bfb        mysql                    "docker-entrypoint.sh"   38 seconds ago      Up 36 seconds       3306/tcp                         hello.db
[root@iZ288a3qazlZ Docker.NetCore.MySql]# docker-compose ps   Name                 Command             State               Ports----------------------------------------------------------------------------------hello.db      docker-entrypoint.sh mysqld   Up      3306/tcphello.proxy   nginx -g daemon off;          Up      80/tcp, 0.0.0.0:9090->8080/tcphello.web     dotnet run                    Up      5000/tcp
[root@iZ288a3qazlZ Docker.NetCore.MySql]# curl http://localhost:9090/api/products
[{"productId":1,"name":"iphone 6","price":5000.0000000000000000000000000,"stockQty":10},{"productId":2,"name":"iphone 7","price":6000.0000000000000000000000000,"stockQty":10},{"productId":3,"name":"iphone 7 plus","price":7000.0000000000000000000000000,"stockQty":10},{"productId":4,"name":"iphone x","price":8000.000000000000000000000000,"stockQty":10}]
上面的运行结果显示,我们已经成功完成了ASP.NET Core+MySql+Nginx的多容器应用部署。通过浏览器访问http:<ipaddress>:9090/api/products
即可访问我们暴露的api。
5.3. 数据库验证
我们来验证一下数据库是否成功创建:
[root@iZ288a3qazlZ Docker.NetCore.MySql]# ls mysqlauto.cnf         client-key.pem         ib_logfile0  performance_schema  server-key.pem
ca-key.pem       MySqlDbContext  ib_logfile1  private_key.pem     sys
ca.pem           ib_buffer_pool         ibtmp1       public_key.pem
client-cert.pem  ibdata1                mysql        server-cert.pem
[root@iZ288a3qazlZ Docker.NetCore.MySql]# docker exec -it hello.db mysql -uroot -p123456mysql: [Warning] Using a password on the command line interface can be insecure.
Welcome to the MySQL monitor.  Commands end with ; or \g.
Your MySQL connection id is 8Server version: 5.7.20 MySQL Community Server (GPL)
Copyright (c) 2000, 2017, Oracle and/or its affiliates. All rights reserved.
Oracle is a registered trademark of Oracle Corporation and/or its
affiliates. Other names may be trademarks of their respective
owners.
Type 'help;' or '\h' for help. Type '\c' to clear the current input statement.mysql> show databases;
+-----------------------+
| Database              |
+-----------------------+
| information_schema    |
| MySqlDbContext  |
| mysql                 |
| performance_schema    |
| sys                   |
+-----------------------+5 rows in set (0.00 sec)
mysql> use MySqlDbContext;
Reading table information for completion of table and column names
You can turn off this feature to get a quicker startup with -A
Database changed
mysql> show tables;
+---------------------------------+
| Tables_in_MySqlDbContext |
+---------------------------------+
| Products                        |
+---------------------------------+1 row in set (0.00 sec)
mysql> select * from Products;
+-----------+---------------+-------------------------------------+----------+
| ProductId | Name          | Price                               | StockQty |
+-----------+---------------+-------------------------------------+----------+
|         1 | iphone 6      | 5000.000000000000000000000000000000 |       10 |
|         2 | iphone 7      | 6000.000000000000000000000000000000 |       10 |
|         3 | iphone 7 plus | 7000.000000000000000000000000000000 |       10 |
|         4 | iphone x      | 8000.000000000000000000000000000000 |       10 |
+-----------+---------------+-------------------------------------+----------+4 rows in set (0.00 sec)
从上面的运行结果可知,我们成功将项目文件夹下的mysql文件夹挂载到容器内部进行数据持久化。
6. 最后
本文通过先介绍如何基于Docker实例化MySQL容器,再介绍如何通过挂载数据卷来持久化MySQL数据,以及如何使用--Link参数进行容器之间的连接,完成了.NET Core连接MySQL数据库。
最后,使用Docker-Compose综合ASP.NET Core+MySQL+Nginx完成了容器化部署。
下一节我们来介绍下如何使用Docker-Swarm进行集群部署。
7. 参考资料
mysql -Docker Documentation
Hello Docker
.NET Core容器化@Docker
.NET Core容器化之多容器应用部署@Docker-Compose
作者:『圣杰』
出处:http://www.cnblogs.com/sheng-jie/
本文版权归作者和博客园共有,欢迎转载,但未经作者同意必须保留此段声明,且在文章页面明显位置给出原文链接,否则保留追究法律责任的权利。
版权申明:本文来源于网友收集或网友提供,如果有侵权,请转告版主或者留言,本公众号立即删除。