突然接到任务oracle11gASM单机迁移,想通过冷备进行迁移,要搭建11gASM单机来测试。故作此笔记记录,在VMware虚拟机上模拟生产环境安装11g ASM单实例。
1.OS和Oracle版本介绍
由于作为测试用,用的OEL5.4和Oracle11.2.0.3。
2.系统硬件和软件环境检查
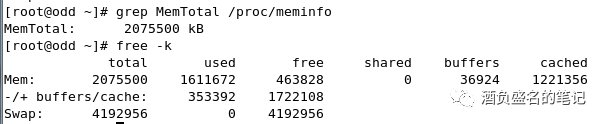
2.1硬件检查
物理内存至少1.5G,swap一般需要和物理内存相当,大于16G则设置16G,不满足需要扩容,Tmp至少8G,不满足需扩容
2.2软件检查
#检查防火墙是否关闭
service iptables status
#关闭防火墙
chkconfig iptables off
service iptables stop
#确认防火墙已关闭
service iptables status
# 检查selinux是否禁用
# 禁用selinux,配置/etc/sysconfig/selinux,修改SELINUX项为disabled
SELINUX=disabled
# 检查确认,需要重启操作系统生效
grep 'SELINUX=' etc/sysconfig/selinux
[root@odd ~]# service iptables status
Firewall is stopped.
[root@odd ~]# grep 'SELINUX=' /etc/sysconfig/selinux
# SELINUX= can take one of these three values:
SELINUX=disabled
3.安装Oracle软件所需rpm包,因OEL版本在安装OS的时候已经预安装Oracle需要的内置rpm包,故在此无需安装太多rpm包
rpm -Uvh libaio-devel-0.3.106-3.2.i386.rpm
rpm -Uvh libstdc++44-devel-4.4.0-6.el5.i386.rpm
rpm -Uvh sysstat-7.0.2-3.el5.i386.rpm
rpm -Uvh unixODBC-2.2.11-7.1.i386.rpm
rpm -Uvh unixODBC-devel-2.2.11-7.1.i386.rpm
4.建立用户组及用户
-- After oracle preinstallation, the group oinstall,dba and user oracle will be created.
/usr/sbin/groupadd -g 502 oper
/usr/sbin/groupadd -g 503 asmadmin
/usr/sbin/groupadd -g 504 asmoper
/usr/sbin/groupadd -g 505 asmdba
/usr/sbin/usermod -a -G oper,asmadmin,asmoper,asmdba oracle
-- Password of the user oracle
passwd oracle
5.检查文件 /etc/security/limits.conf 的参数设置 (as root)
vi /etc/security/limits.conf
-- Add the following lines at the end of file (These settings will be set by preinstallation)
oracle soft nproc 2047
oracle hard nproc 16384
oracle soft nofile 1024
oracle hard nofile 65536
oracle soft stack 10240
6. 检查文件 /etc/sysctl.conf 的参数设置 (as root)
vi /etc/sysctl.conf
-- 按以下 Oracle 文档要求的值修正以下各参数:
fs.aio-max-nr = 1048576
fs.file-max = 6815744
kernel.shmall = 2097152
kernel.shmmax = 4294967295
kernel.shmmni = 4096
kernel.sem = 250 32000 100 128
net.ipv4.ip_local_port_range = 9000 65500
net.core.rmem_default = 262144
net.core.rmem_max = 4194304
net.core.wmem_default = 262144
net.core.wmem_max = 1048576
-- 加载修改后的设定
/sbin/sysctl -p
7.建立相关的 DB 文件夹, 设定用户使用权限
mkdir -p /u01/app/oracle/oradata
mkdir -p /u01/app/oracle/fast_recovery_area
mkdir -p /u01/app/oraInventory
chown -R oracle:oinstall /u01/app
chmod -R 775 /u01/app
mkdir -p /u01/app/11.2.0/grid
chown -R oracle:oinstall /u01/app/11.2.0/grid
chmod -R 755 /u01/app/11.2.0/grid
8.配置ntpd的参数,我们主要强调的是要配置成"微调的模式" 也就是在options中要加入-x的选项
-- Edit the file /etc/sysconfig/ntpd (as root) and change the line:
OPTIONS="-u ntp:ntp -p /var/run/ntpd.pid"
=> OPTIONS="-x -u ntp:ntp -p /var/run/ntpd.pid"
-- Save and restart the NTP daemon
/sbin/service ntpd restart
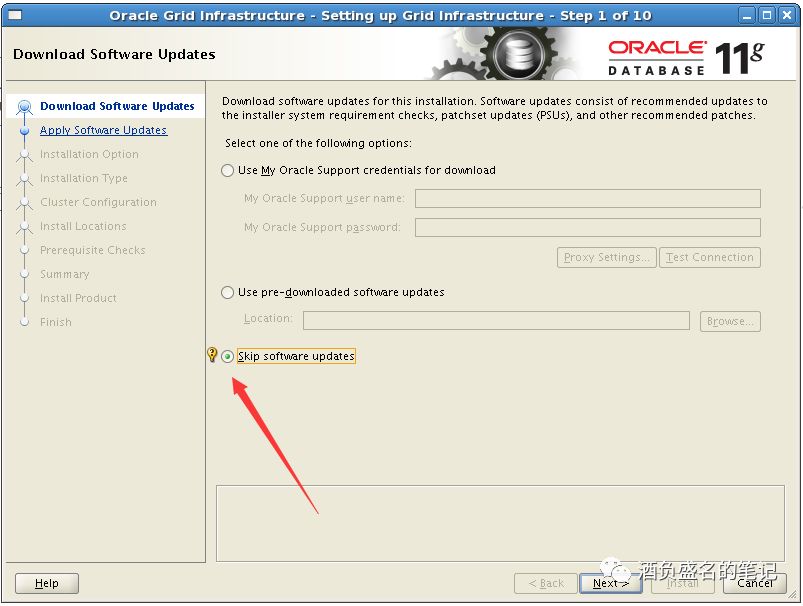
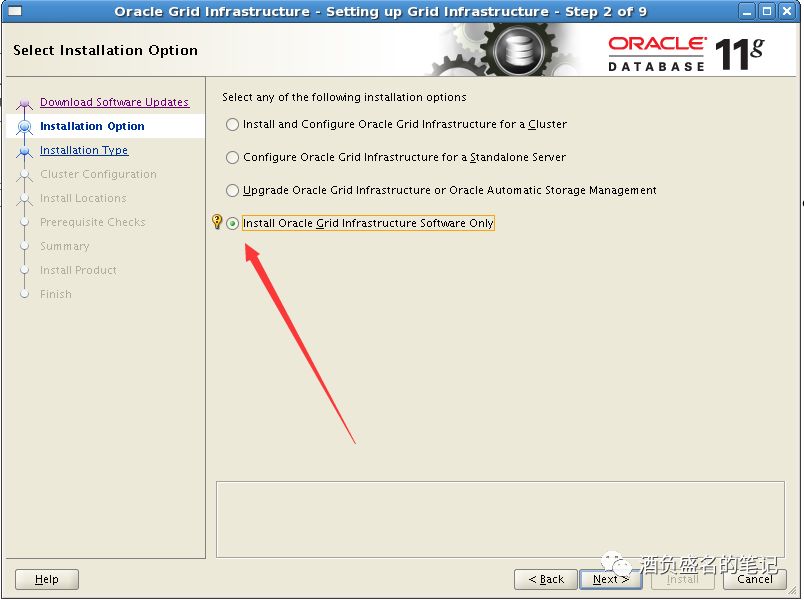
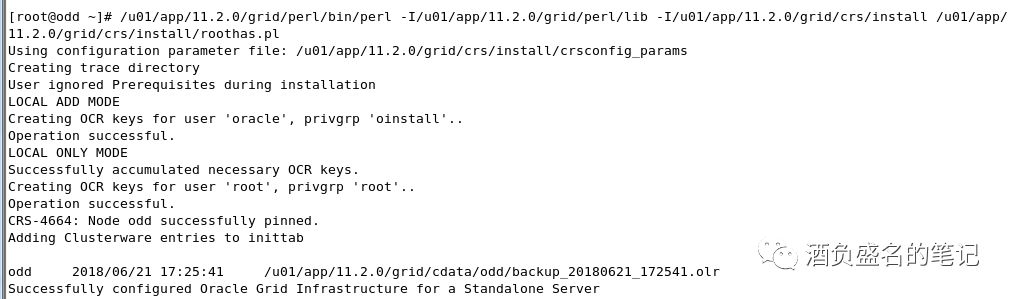
9.解压安装包并安装GI
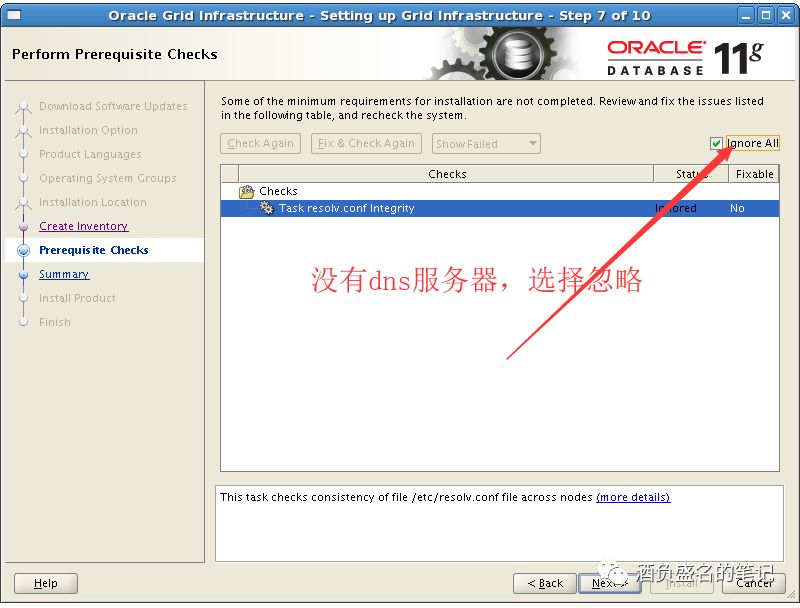
根据提示执行脚本

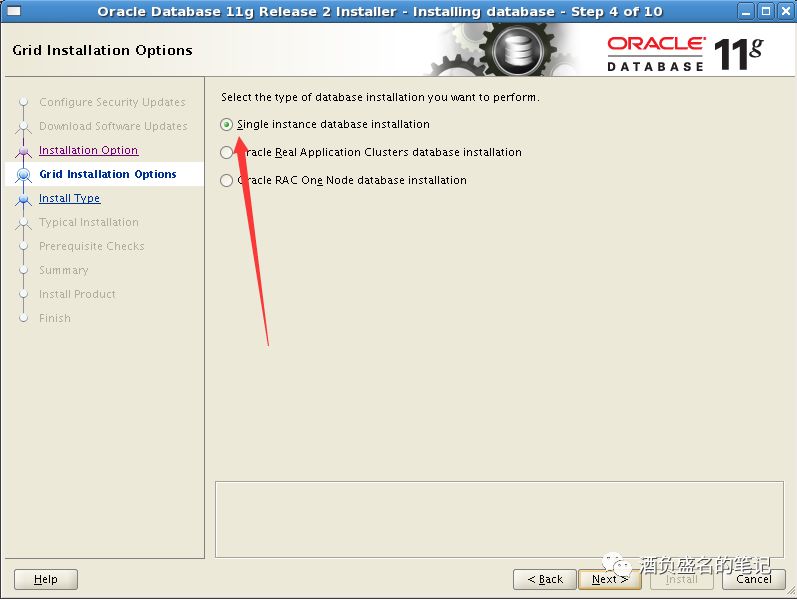
10.安装数据库软件
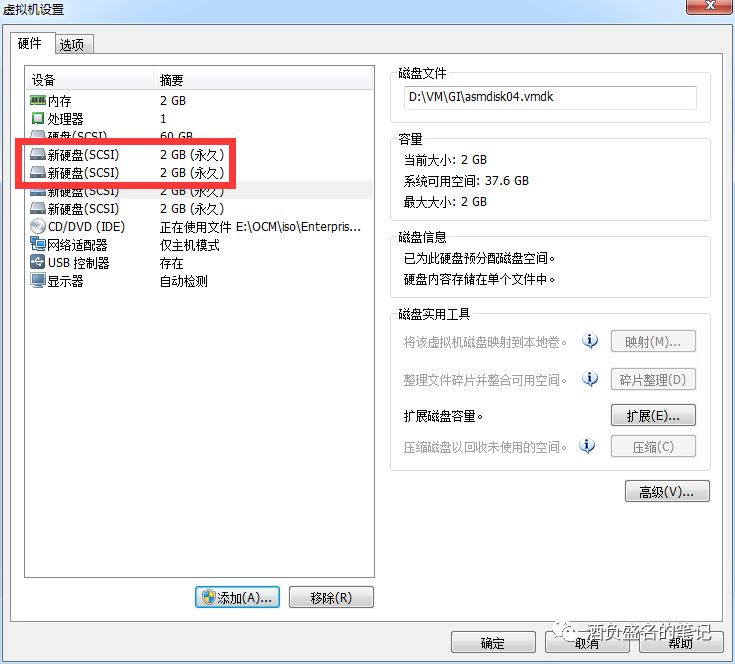
11.关闭虚拟机,添加两块硬盘,一个作为数据盘,一个为闪回恢复盘
12.对新加磁盘做初始化(root)
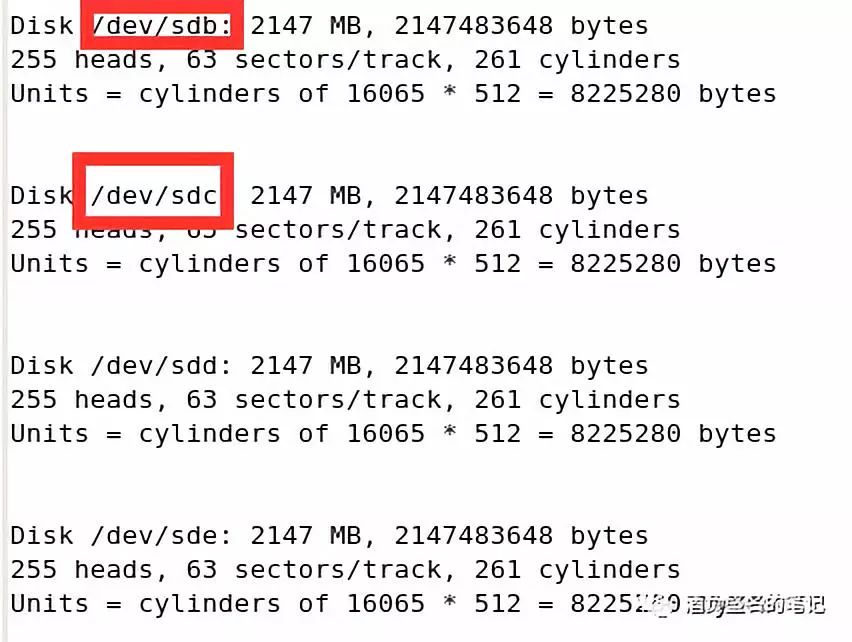
-- Format the disks as root.
/sbin/fdisk /dev/sdb
Type "n" - >
-> Type "p" - >
-> Type "1″ - >
-> Click <enter> 2 times - >
-> Type "w"
13.配置 ASM LIB
安装前置包
rpm -Uvh oracleasm-support-2.1.3-1.el5.i386.rpm
rpm -Uvh oracleasm-2.6.18-164.el5-2.0.5-1.el5.i686.rpm
-- Download and install the oracle ASMLIB package
cd /stage
rpm -Uvh oracleasmlib-2.0.4-1.el5.i386.rpm
配置 ASM lib
-- Configuring ASMLib: run as root
service oracleasm configure
Default user to own the driver interface ="oracle"
Default group to own the driver interface ="asmadmin"
Start Oracle ASM library driver on boot (y/n) ="y"
Scan for Oracle ASM disks on boot (y/n) ="y"
14.配置ASM disks
-- Marking ASM Candidate Disk Partitions
-- Create the asmdisk as root
[root@odd ~]# /sbin/service oracleasm createdisk DATA01 /dev/sdb1
Marking disk "DATA01" as an ASM disk: [ OK ]
[root@odd ~]# /sbin/service oracleasm createdisk FRA01 /dev/sdc1
Marking disk "FRA01" as an ASM disk: [ OK ]
[root@odd ~]# /sbin/service oracleasm createdisk DATA02 /dev/sdd1
Marking disk "DATA02" as an ASM disk: [ OK ]
[root@odd ~]# /sbin/service oracleasm createdisk FRA02 /dev/sde1
Marking disk "FRA02" as an ASM disk: [ OK ]
[root@odd ~]# /sbin/service oracleasm listdisks
DATA01
DATA02
FRA01
FRA02
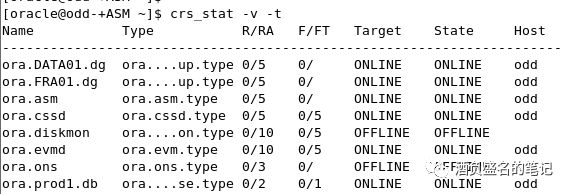
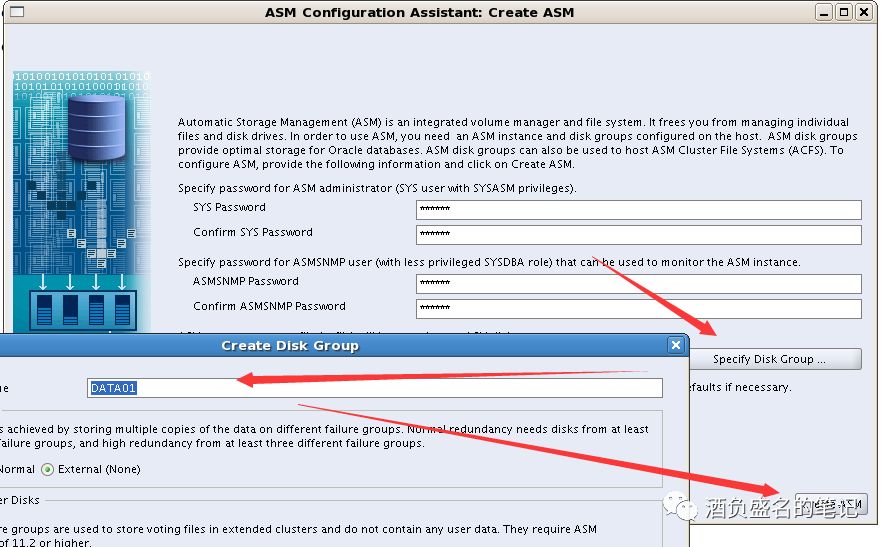
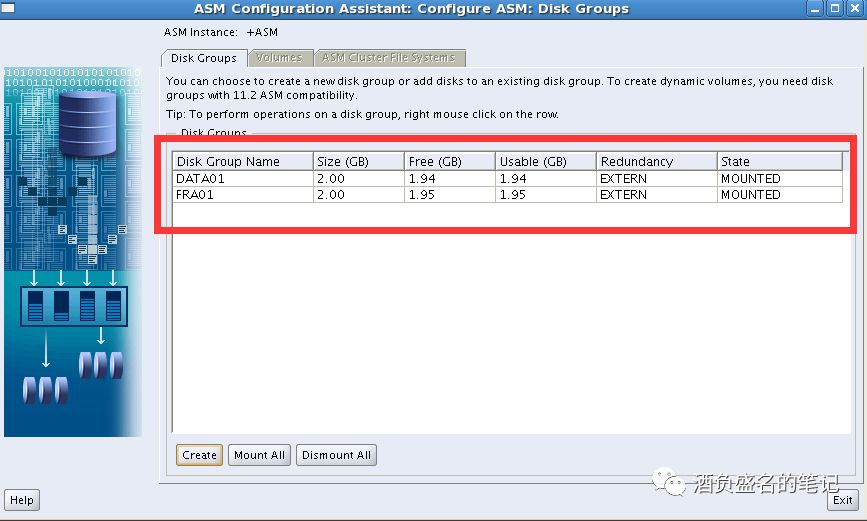
15.通过ASMCA工具配置磁盘组
16DBCA建库,安装完毕