- 介绍
MySQL是一个强大且广泛使用的开源数据库管理系统。其管理的更高级功能之一包括启用和禁用远程连接。此功能允许用户从远程位置访问和管理数据库。无论您是需要向远程开发人员授予访问权限,还是通过限制远程访问来确保数据库的安全性,管理此功能都是数据库管理员的一项关键技能。
在本教程中,我们将探讨如何启用和禁用与 MySQL 8 服务器的远程连接。我们将从基本概念开始,然后演示几种操作技术,以便您可以有效地管理这些设置。 - 先决条件
MySQL Server 8 已安装并运行
对 MySQL 服务器的管理访问权限
SQL和数据库概念的基本知识
访问命令行界面 (CLI) - 了解 MySQL 用户帐户
在调整远程连接设置之前,您需要了解 MySQL 用户帐户及其工作原理。在MySQL中,每个用户帐户不仅由其用户名定义,还由它可以连接的主机定义。“主机”部分是控制远程访问的关键。它可以是 IP 地址、域名或通配符“%”或“_”。 - 登录MySQL
Enter password: Welcome to the MySQL monitor. Commands end with ; or \\g. Your MySQL connection id is 10 Server version: 8.0.37-0ubuntu0.20.04.3 (Ubuntu) Copyright © 2000, 2024, Oracle and/or its affiliates. Oracle is a registered trademark of Oracle Corporation and/or its affiliates. Other names may be trademarks of their respective owners. Type ‘help;’ or ‘\\h’ for help. Type ‘\\c’ to clear the current input statement. mysql>复制
- 创建用户
Query OK, 0 rows affected (0.13 sec)复制
创建一个名为test的用户,密码为123456
- 用户授权
Query OK, 0 rows affected (0.01 sec)复制
- 重新加载授权表
Query OK, 0 rows affected (0.00 sec)复制
- 找到MySQL配置文件
/etc/mysql/mysql.conf.d/mysqld.cnf复制
注:由于环境和安装方式的不同,MySQL的配置文件路径也会不同,请根据自己的实际环境来修改路径。
- 编辑MySQl配置文件
搜索bind-address选项,把默认127.0.0.1地址修改为:0.0.0.0 设置为 0.0.0.0 将允许 MySQL 接受来自任何 IP 地址的连接。请确保您的防火墙配置为仅将访问权限限制为受信任的用户。bind-address \# The MySQL database server configuration file. \# One can use all long options that the program supports. \# Run program with --help to get a list of available options and with \# --print-defaults to see which it would actually understand and use. \# For explanations see \# http://dev.mysql.com/doc/mysql/en/server-system-variables.html \# Here is entries for some specific programs \# The following values assume you have at least 32M ram \[mysqld\] \# \* Basic Settings user = mysql \# pid-file = /var/run/mysqld/mysqld.pid \# socket = /var/run/mysqld/mysqld.sock \# port = 3306 \# datadir = /var/lib/mysql \# If MySQL is running as a replication slave, this should be \# changed. Ref https://dev.mysql.com/doc/refman/8.0/en/server-system-variables.html#sysvar\_tmpdir \# tmpdir = /tmp \# Instead of skip-networking the default is now to listen only on \# localhost which is more compatible and is not less secure. bind-address = 0.0.0.0 mysqlx-bind-address = 127.0.0.1 \# \* Fine Tuning key\_buffer\_size = 16M \# max\_allowed\_packet = 64M \# thread\_stack = 256K \# thread\_cache\_size = -1 \# This replaces the startup script and checks MyISAM tables if needed \# the first time they are touched myisam-recover-options = BACKUP \# max\_connections = 151 \# table\_open\_cache = 4000 \# \* Logging and Replication \# Both location gets rotated by the cronjob. \# Log all queries \# Be aware that this log type is a performance killer. \# general\_log\_file = /var/log/mysql/query.log \# general\_log = 1 \# Error log - should be very few entries. log\_error = /var/log/mysql/error.log \# Here you can see queries with especially long duration \# slow\_query\_log = 1 \# slow\_query\_log\_file = /var/log/mysql/mysql-slow.log \# long\_query\_time = 2 \# log-queries-not-using-indexes \# The following can be used as easy to replay backup logs or for replication. \# note: if you are setting up a replication slave, see README.Debian about \# other settings you may need to change. \# server-id = 1 \# log\_bin = /var/log/mysql/mysql-bin.log \# binlog\_expire\_logs\_seconds = 2592000 max\_binlog\_size = 100M \# binlog\_do\_db = include\_database\_name \# binlog\_ignore\_db = include\_database\_name复制
- 重启MySQL服务器
11.查看MySQl服务状态
● mysql.service - MySQL Community Server Loaded: loaded (/lib/systemd/system/mysql.service; enabled; vendor prese> Active: active (running) since Wed 2024-06-12 06:13:13 UTC; 12min ago Main PID: 419128 (mysqld) Status: “Server is operational” Tasks: 37 (limit: 19102) Memory: 369.0M CGroup: /system.slice/mysql.service └─419128 /usr/sbin/mysqld Jun 12 06:13:10 ubuntu systemd\[1\]: Starting MySQL Community Server… Jun 12 06:13:13 ubuntu systemd\[1\]: Started MySQL Community Server.复制
- 远程登录
13. 高级设置
在更高级的方案中,您可能希望限制对特定网络接口的访问,或将MySQL配置为侦听非标准端口。
特定网络接口
bind-address = 192.168.10.100复制
这会将 MySQL 配置为侦听特定网络接口上的连接。这在具有多个网络接口的服务器环境中非常有用。
非标准端口
[mysqld] port = 3307复制
远程客户端现在需要在连接时指定非标准端口。这可以通过掩盖 MySQL 的预期通信端口来增加一层安全性。
使用防火墙控制访问
控制对MySQL的远程访问的另一个重要方面是通过防火墙。配置良好的防火墙可以启用必要的远程访问,同时提供安全性,防止未经授权的尝试。
在 Ubuntu 上使用 UFW
sudo ufw allow from remote_IP_address to any port 3306
sudo ufw status verbose
使用应授予访问权限的客户端的实际 IP 地址调整占位符。remote_IP_address
使用 iptables
sudo iptables -A INPUT -p tcp -s remote_IP_address --dport 3306 -j ACCEPT
sudo service iptables save
与 UFW 一样,如果您使用的是非标准端口,请记住替换为实际 IP,并确保正确的端口。remote_IP_address
测试远程连接
配置服务器和防火墙后,测试远程连接。您可以从远程计算机使用 MySQL 命令行客户端:
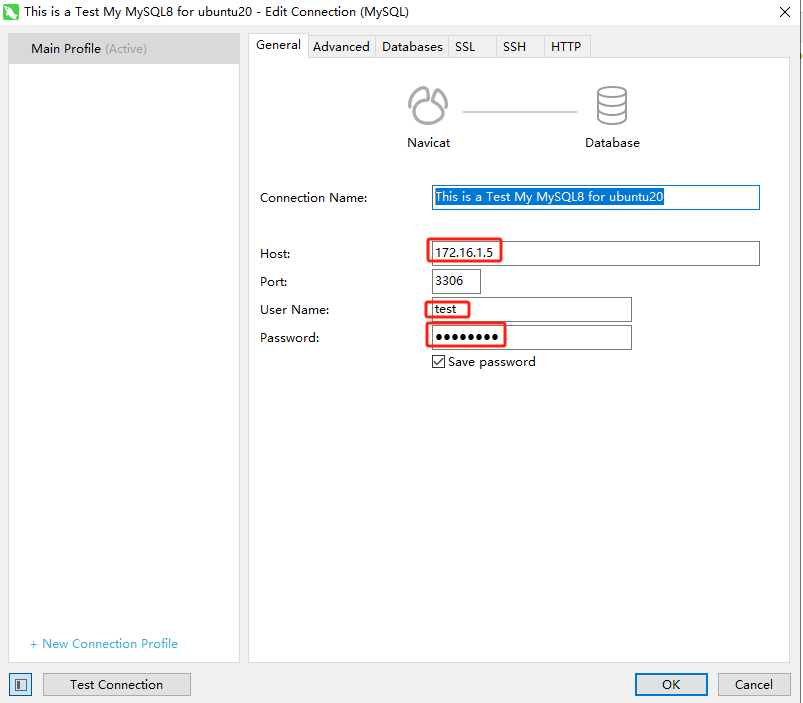
mysql -h server_ip -u username -p
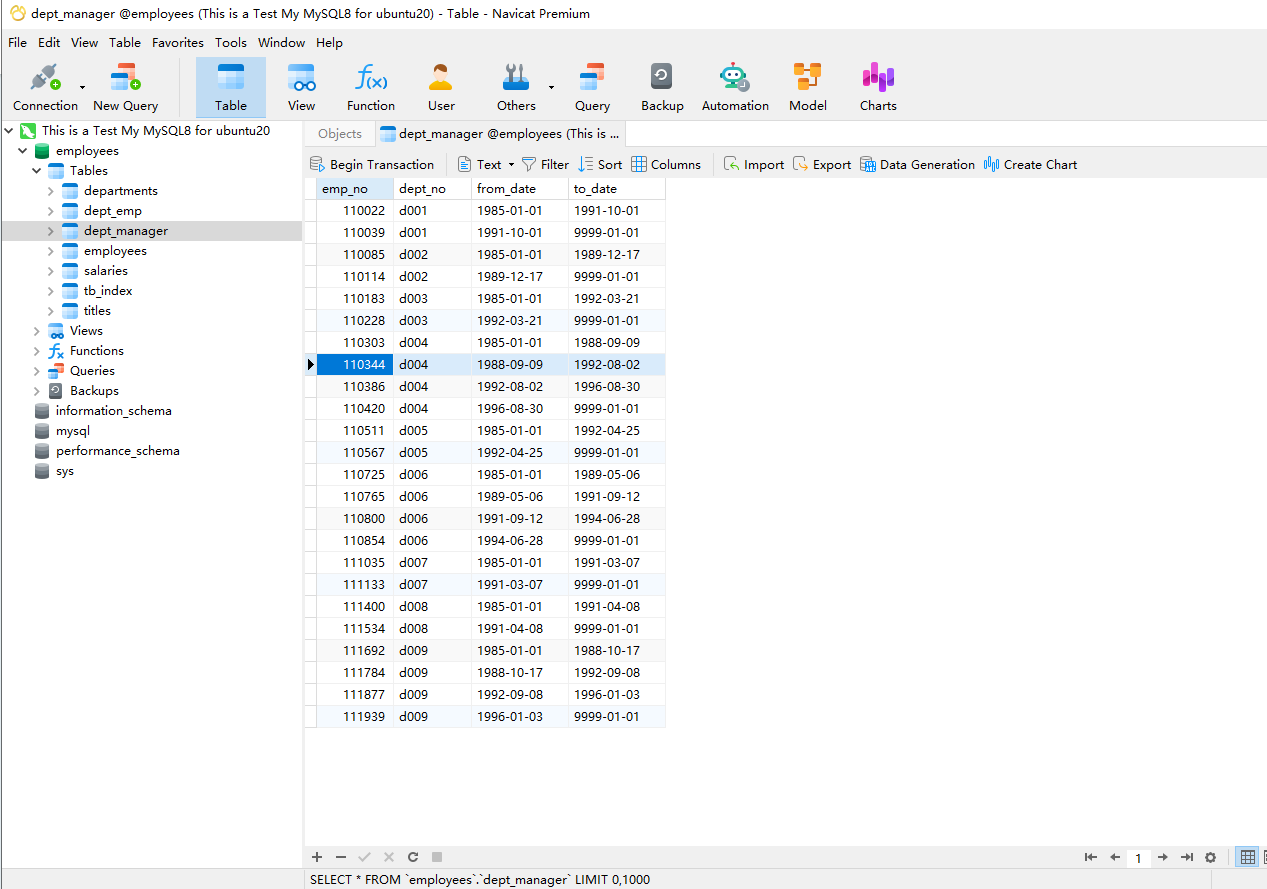
如果您已正确设置所有内容,则应该能够使用指定的用户帐户连接到MySQL服务器。
- 参数说明
bind-address 选项,指定 MySQL 服务监听的网络接口地址。
默认 bind-address 值是 127.0.0.1,表示着 MySQL只接受来自本机的连接请求。如果我们需要远程连接到 MySQL数据库,需要将 bind-address 修改为 0.0.0.0 或者是服务器的IP 地址。
local host和%
MySQL账户=用户名@主机
localhost表示本地主机 , 百分号 % 表示任意主机
15. 结论
在MySQL中管理远程连接对于功能和安全性都至关重要。按照上述的步骤都将有助于确保您对 MySQL 实例具有所需的访问控制。


